868 KiB
Vastai-Api - Llms-Txt
Pages: 283
Workergroup Parameters
URL: llms-txt#workergroup-parameters
Contents:
- gpu_ram
- launch_args
- search_params
- template_hash
- template_id
- test_workers
The following parameters can be specified specifically for a Workergroup and override Endpoint parameters. The Endpoint parameters will continue to apply for other Workergroups contained in it, unless specifically set.
- min_load
- target_util
- cold_mult
The parameters below are specific to only Workergroups, not Endpoints.
The amount of GPU memory (VRAM) in gigabytes that your model or workload requires to run. This parameter tells the serverless engine how much GPU memory your model needs.
If not specified during workergroup creation, the default value is 24.
A command-line style string containing additional parameters for instance creation that will be parsed and applied when the serverless engine creates new workers. This allows you to customize instance configuration beyond what's specified in templates.
There is no default value for launch_args.
A query string, list, or dictionary that specifies the hardware and performance criteria for filtering GPU offers in the vast.ai marketplace. It uses a simple query syntax to define requirements for the machines that your Workergroup will consider when searching for workers to create.
There is no default value for search_params. To see all available search filters, see the CLI docs here.
A unique hexadecimal identifier that references a pre-configured template containing all the configuration needed to create instances. Templates are comprehensive specifications that include the Docker image, environment variables, onstart scripts, resource requirements, and other deployment settings.
There is no default value for template_hash.
A numeric (integer) identifier that uniquely references a template in the Vast.ai database. This is an alternative way to reference the same template that template_hash points to, but using the template's database primary key instead of its hash string.
There is no default value for template_id.
The number of different physical machines that a Workergroup should test during its initial "exploration" phase to gather performance data before transitioning to normal demand-based scaling. The Worker Group remains in "exploring" mode until it has successfully tested at least floor(test_workers / 2) machines.
If not specified during workergroup creation, the default value is 3.
delete endpoint
URL: llms-txt#delete-endpoint
Source: https://docs.vast.ai/api-reference/serverless/delete-endpoint
api-reference/openapi.json delete /api/v0/endptjobs/{id}/ Deletes an endpoint group by ID. Associated workergroups will also be deleted.
CLI Usage: vastai delete endpoint <id>
QuickStart
URL: llms-txt#quickstart
Contents:
-
- Sign Up & Add Credit
- 2. Prepare to Connect
- 3. Pick a Template & Find a Machine
- 4. Manage or End Your Instance
- Common Questions
- What is a minimum deposit amount?
- What happens when my balance runs out? Can I avoid interruptions?
- How can I customize a template?
Source: https://docs.vast.ai/documentation/get-started/quickstart
<script type="application/ld+json" dangerouslySetInnerHTML={{ __html: JSON.stringify({ "@context": "https://schema.org", "@type": "HowTo", "name": "How to Get Started with Vast.ai", "description": "A step-by-step guide to setting up your Vast.ai account and running your first GPU instance.", "step": [ { "@type": "HowToStep", "name": "Sign Up & Add Credit", "text": "Create an account on vast.ai, verify your email address, and add credit through Billing using credit card, Coinbase, or Crypto.com. Your balance will appear at the top right of the dashboard." }, { "@type": "HowToStep", "name": "Prepare to Connect", "text": "For SSH access: generate an SSH key pair and upload your public key in the Keys page. For Jupyter access: download and install the provided TSL certificate for secure browser access." }, { "@type": "HowToStep", "name": "Pick a Template & Find a Machine", "text": "Browse Templates for pre-built setups like PyTorch, TensorFlow, or ComfyUI. Go to Search and filter by GPU type, count, RAM, CPU, network speed, and price. Remember that disk space is permanent and cannot be changed later. Click Rent when you find a match and wait for the instance to start." }, { "@type": "HowToStep", "name": "Manage or End Your Instance", "text": "Use Stop to pause GPU billing (storage still accrues charges). Use Delete when finished to stop all charges." } ] }) }} /> <script type="application/ld+json" dangerouslySetInnerHTML={{ __html: JSON.stringify({ "@context": "https://schema.org", "@type": "FAQPage", "mainEntity": [ { "@type": "Question", "name": "What is a minimum deposit amount?", "acceptedAnswer": { "@type": "Answer", "text": "The minimum deposit amount on Vast.ai is $5." } }, { "@type": "Question", "name": "What happens when my balance runs out? Can I avoid interruptions?", "acceptedAnswer": { "@type": "Answer", "text": "When your balance reaches zero, your running instances will automatically stop. To avoid this, you can enable auto-billing on the Billing page. Set an auto-charge threshold higher than your average daily spend, so your card is automatically charged when your balance falls below that amount. We also recommend setting a low-balance email alert at a slightly lower threshold to notify you if the auto-charge fails for any reason." } }, { "@type": "Question", "name": "How can I customize a template?", "acceptedAnswer": { "@type": "Answer", "text": "You can create a new template from scratch, or you can edit an existing template. You can find a guide in the templates documentation." } } ] }) }} /> This Quickstart will guide you through setting up your Vast.ai account and running your first instance in just a few steps. ### 1. Sign Up & Add Credit * Create an account on [vast.ai.](https://cloud.vast.ai/) * Verify your email address. * Go to [**Billing**](https://cloud.vast.ai/billing/) → **Add Credit** and top up using credit card, Coinbase, or Crypto.com.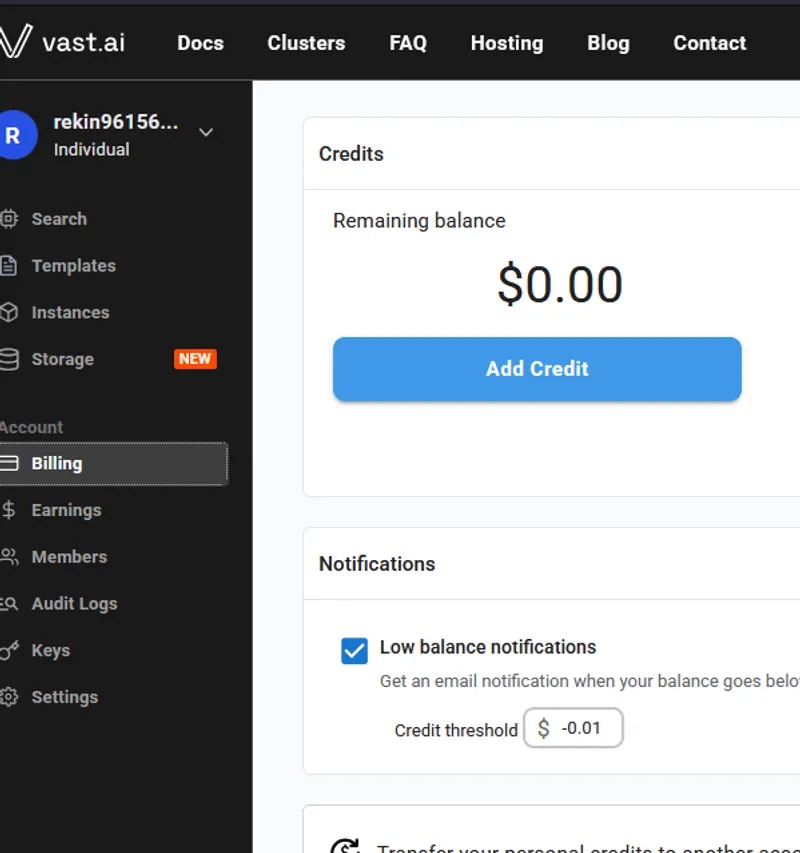 * Your balance appears at the top right of the dashboard.
 Before you can **rent a machine **or **create a team**, you must verify your email address. After signing up, check your inbox (and spam folder) for the verification email and click the link inside. You can resend the verification email anytime from **Settings → Resend Verification Email.**
### 2**. Prepare to Connect**
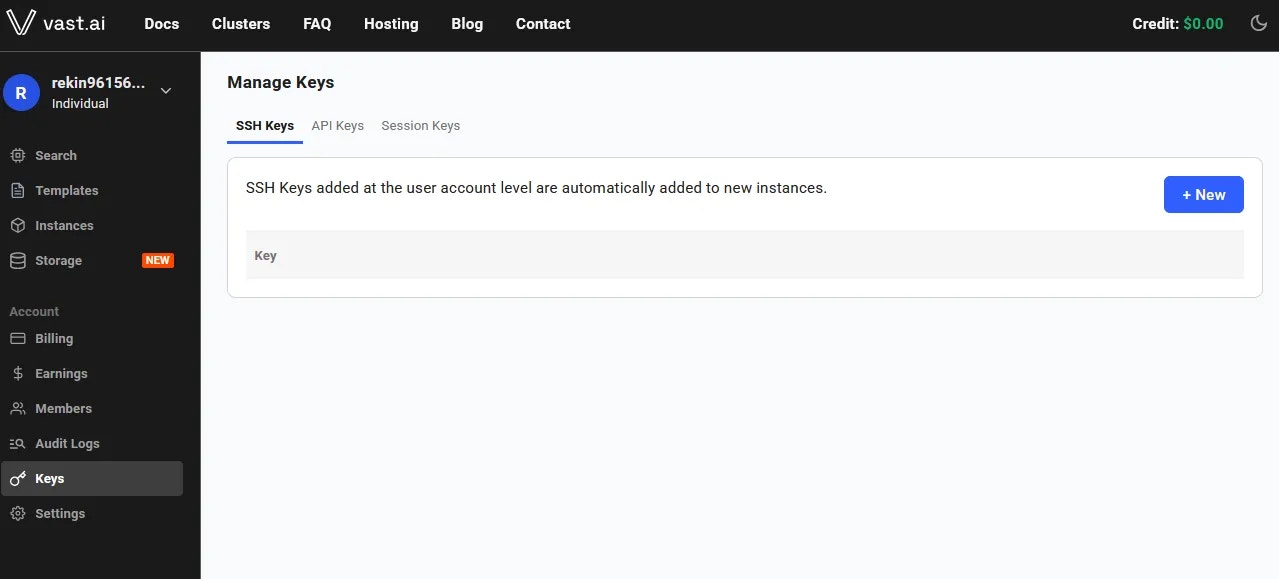
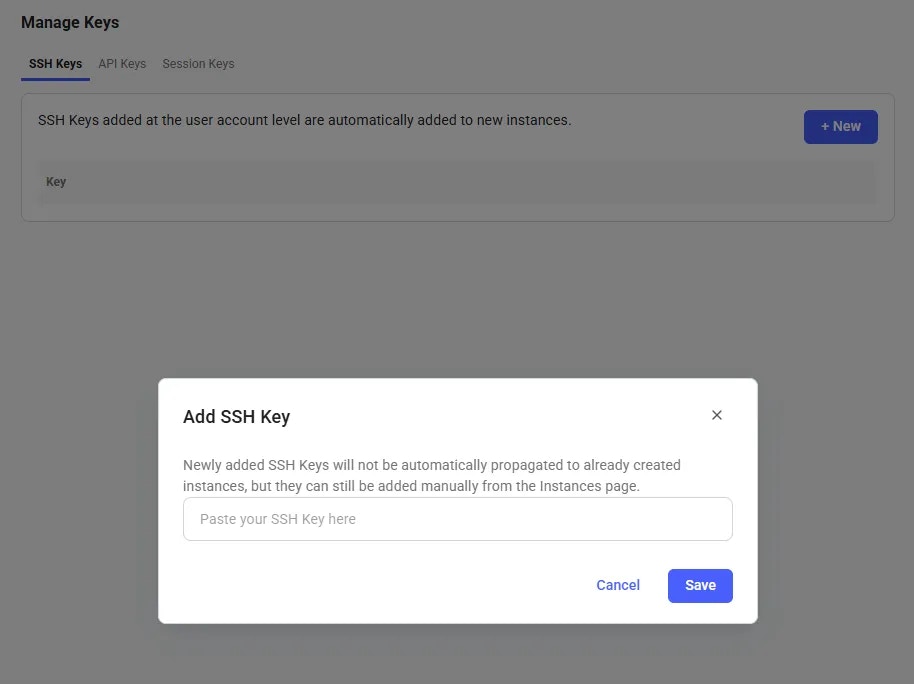
* **For SSH access**: generate an [SSH key pair](/documentation/instances/sshscp) and upload your **public key** in [Keys page](https://cloud.vast.ai/manage-keys/).
Before you can **rent a machine **or **create a team**, you must verify your email address. After signing up, check your inbox (and spam folder) for the verification email and click the link inside. You can resend the verification email anytime from **Settings → Resend Verification Email.**
### 2**. Prepare to Connect**
* **For SSH access**: generate an [SSH key pair](/documentation/instances/sshscp) and upload your **public key** in [Keys page](https://cloud.vast.ai/manage-keys/).
 * **For Jupyter access**: download and install the provided [TSL certificate](/documentation/instances/jupyter#1SmCz) (needed for secure browser access).
If you don’t install the provided browser certificate:
* **Windows / Linux** – You’ll see a **“Your connection is not private”** privacy warning. You can still connect by clicking **Advanced** → **Proceed**, but the warning will appear every time.
* **macOS** – Browsers will block Jupyter until you install and trust the provided certificate in **Keychain Access**. Without it, you won’t be able to connect.
Installing the certificate once removes the warning permanently.
### 3**. Pick a **[**Template**](/documentation/instances/templates)** & Find a Machine**
* Browse [**Templates**](https://cloud.vast.ai/templates/) for pre-built setups (e.g., [PyTorch](/pytorch), TensorFlow, ComfyUI).
* Go to [**Search**](https://cloud.vast.ai/create/) and filter by GPU type, count, RAM, CPU, network speed, and price.
* **Disk Space is Permanent. **The disk size you choose when creating an instance cannot be changed later. If you run out of space, you’ll need to create a new instance with a larger disk. Tip: Allocate a bit more than you think you need to avoid interruptions.
* Click **Rent** when you find a match.
* Wait for the instance to start—cached images launch quickly, fresh pulls may take 10–60 minutes.
* Click **Open** button to access your instance.
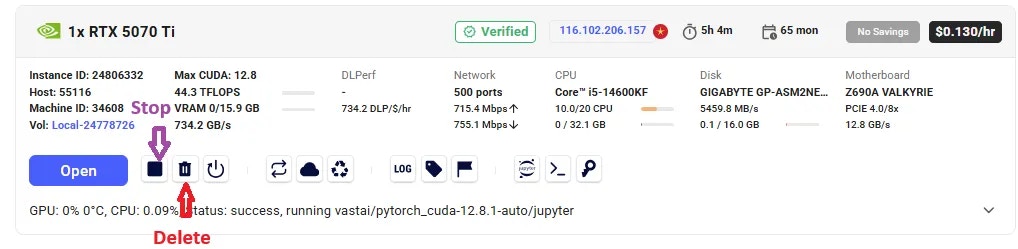
### **4. **[**Manage or End Your Instance**](/documentation/instances/managing-instances)
* Use **Stop** to pause GPU billing (storage still accrues charges).
* Use **Delete** when finished to stop *all* charges.
* **For Jupyter access**: download and install the provided [TSL certificate](/documentation/instances/jupyter#1SmCz) (needed for secure browser access).
If you don’t install the provided browser certificate:
* **Windows / Linux** – You’ll see a **“Your connection is not private”** privacy warning. You can still connect by clicking **Advanced** → **Proceed**, but the warning will appear every time.
* **macOS** – Browsers will block Jupyter until you install and trust the provided certificate in **Keychain Access**. Without it, you won’t be able to connect.
Installing the certificate once removes the warning permanently.
### 3**. Pick a **[**Template**](/documentation/instances/templates)** & Find a Machine**
* Browse [**Templates**](https://cloud.vast.ai/templates/) for pre-built setups (e.g., [PyTorch](/pytorch), TensorFlow, ComfyUI).
* Go to [**Search**](https://cloud.vast.ai/create/) and filter by GPU type, count, RAM, CPU, network speed, and price.
* **Disk Space is Permanent. **The disk size you choose when creating an instance cannot be changed later. If you run out of space, you’ll need to create a new instance with a larger disk. Tip: Allocate a bit more than you think you need to avoid interruptions.
* Click **Rent** when you find a match.
* Wait for the instance to start—cached images launch quickly, fresh pulls may take 10–60 minutes.
* Click **Open** button to access your instance.
### **4. **[**Manage or End Your Instance**](/documentation/instances/managing-instances)
* Use **Stop** to pause GPU billing (storage still accrues charges).
* Use **Delete** when finished to stop *all* charges.
 ### What is a minimum deposit amount?
The minimum deposit amount on Vast.ai is \$5.
### What happens when my balance runs out? Can I avoid interruptions?
When your balance reaches zero, your running instances will automatically stop. To avoid this, you can enable **auto-billing **on the Billing page. Set an auto-charge threshold higher than your average daily spend, so your card is automatically charged when your balance falls below that amount. We also recommend setting a **low-balance email alert **at a slightly lower threshold to notify you if the auto-charge fails for any reason.
### How can I customize a template?
You can create a new template from scratch, or you can edit an existing template. You can find a guide [here](/documentation/instances/templates#LrOME).
---
## Huggingface TGI with LLama3
**URL:** llms-txt#huggingface-tgi-with-llama3
**Contents:**
- 1) Choose The Huggingface LLama3 TGI API Template From the Recommended Section
- 2) Modifying the Template
- 3) Rent a GPU
- 4) Monitor Your Instance
- 5) Congratulations!
Source: https://docs.vast.ai/huggingface-tgi-with-llama3
This is a guide on how to setup and expose an API for Llama3 Text Generation.
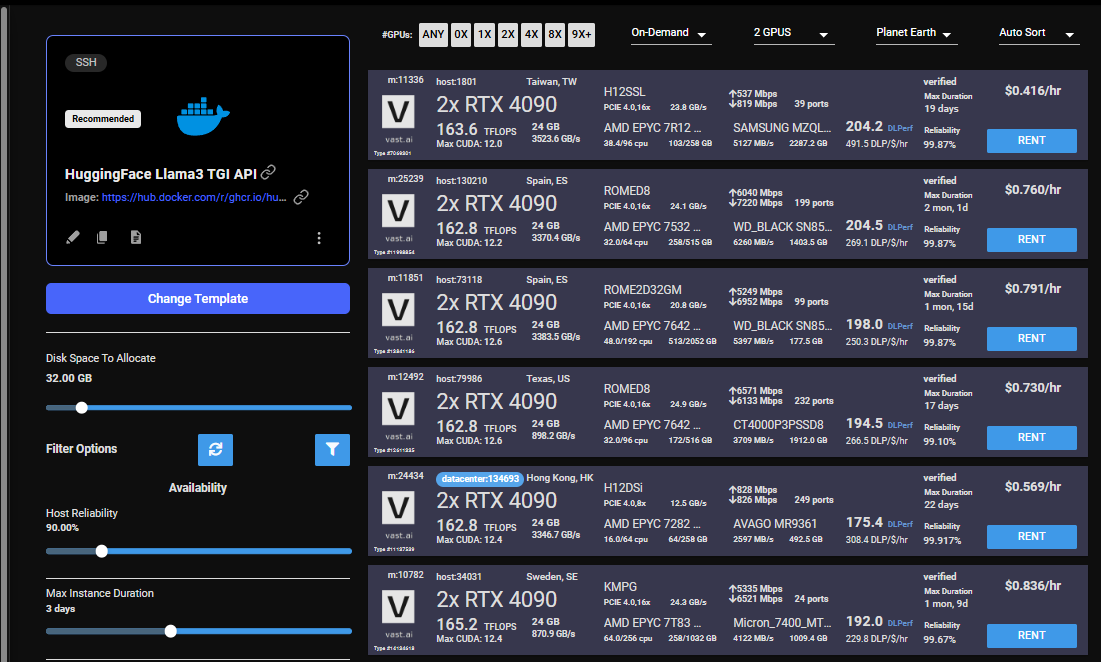
## 1) Choose The Huggingface LLama3 TGI API Template From the Recommended Section
Login to your Vast account on the [console](https://cloud.vast.ai)
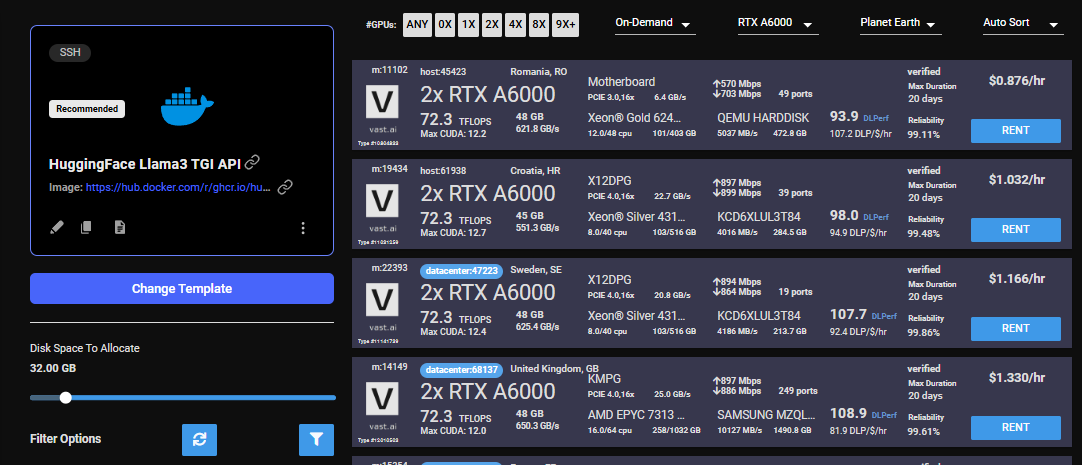
Select the [HuggingFace Llama3 TGI API](https://cloud.vast.ai/?template_id=906891f677fb36f21662a92e6092b5fc) template by clicking the link provider
For this template we will be using the meta-llama/Meta-Llama-3-8B-Instruct model, and the TGI 2.0.4 from Huggingface
Templates encapsulate all the information required to run an application with the autoscaler, including machine parameters, docker image, and environment variables.
For this template, the only requirement is that you have your own Huggingface access token. You will also need to apply to have access to Llama3 on huggingface in order to access this gated repository.
The template comes with some filters that are minimum requirements for TGI to run effectively. This includes but is not limited to a disk space requirement of 100GB, and a gpu ram requirement of at least 16GB.
After selecting the template your screen should look like this:
### What is a minimum deposit amount?
The minimum deposit amount on Vast.ai is \$5.
### What happens when my balance runs out? Can I avoid interruptions?
When your balance reaches zero, your running instances will automatically stop. To avoid this, you can enable **auto-billing **on the Billing page. Set an auto-charge threshold higher than your average daily spend, so your card is automatically charged when your balance falls below that amount. We also recommend setting a **low-balance email alert **at a slightly lower threshold to notify you if the auto-charge fails for any reason.
### How can I customize a template?
You can create a new template from scratch, or you can edit an existing template. You can find a guide [here](/documentation/instances/templates#LrOME).
---
## Huggingface TGI with LLama3
**URL:** llms-txt#huggingface-tgi-with-llama3
**Contents:**
- 1) Choose The Huggingface LLama3 TGI API Template From the Recommended Section
- 2) Modifying the Template
- 3) Rent a GPU
- 4) Monitor Your Instance
- 5) Congratulations!
Source: https://docs.vast.ai/huggingface-tgi-with-llama3
This is a guide on how to setup and expose an API for Llama3 Text Generation.
## 1) Choose The Huggingface LLama3 TGI API Template From the Recommended Section
Login to your Vast account on the [console](https://cloud.vast.ai)
Select the [HuggingFace Llama3 TGI API](https://cloud.vast.ai/?template_id=906891f677fb36f21662a92e6092b5fc) template by clicking the link provider
For this template we will be using the meta-llama/Meta-Llama-3-8B-Instruct model, and the TGI 2.0.4 from Huggingface
Templates encapsulate all the information required to run an application with the autoscaler, including machine parameters, docker image, and environment variables.
For this template, the only requirement is that you have your own Huggingface access token. You will also need to apply to have access to Llama3 on huggingface in order to access this gated repository.
The template comes with some filters that are minimum requirements for TGI to run effectively. This includes but is not limited to a disk space requirement of 100GB, and a gpu ram requirement of at least 16GB.
After selecting the template your screen should look like this:
 ## 2) Modifying the Template
Once you have selected the template, you will need to then add in your huggingface token and click the 'Select & Save' button.
You can add your huggingface token with the rest of the docker run options.

This is the only modification you will need to make on this template.
You can then press 'Select & Save' to get ready to launch your instance.
Once you have selected the template, you can then choose to rent a GPU of your choice from either the search page or the CLI/API.
For someone just getting started I recommend either an Nvidia RTX 4090, or an A5000.
## 4) Monitor Your Instance
Once you rent a GPU your instance will being spinning up on the Instances page.
You know the API will be ready when your instance looks like this:

Once your instance is ready you will need to find where your API is exposed. Go to the IP & Config by pressing the blue button on the top of the instance card. You can see the networking configuration here.
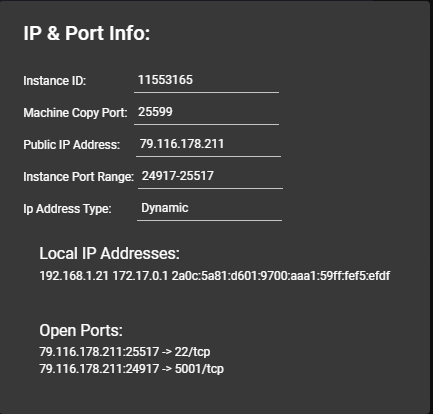
After opening the IP & Port Config you should see a forwarded port from 5001, this is where your API resides. To hit TGI you can use the '/generate' endpoint on that port.
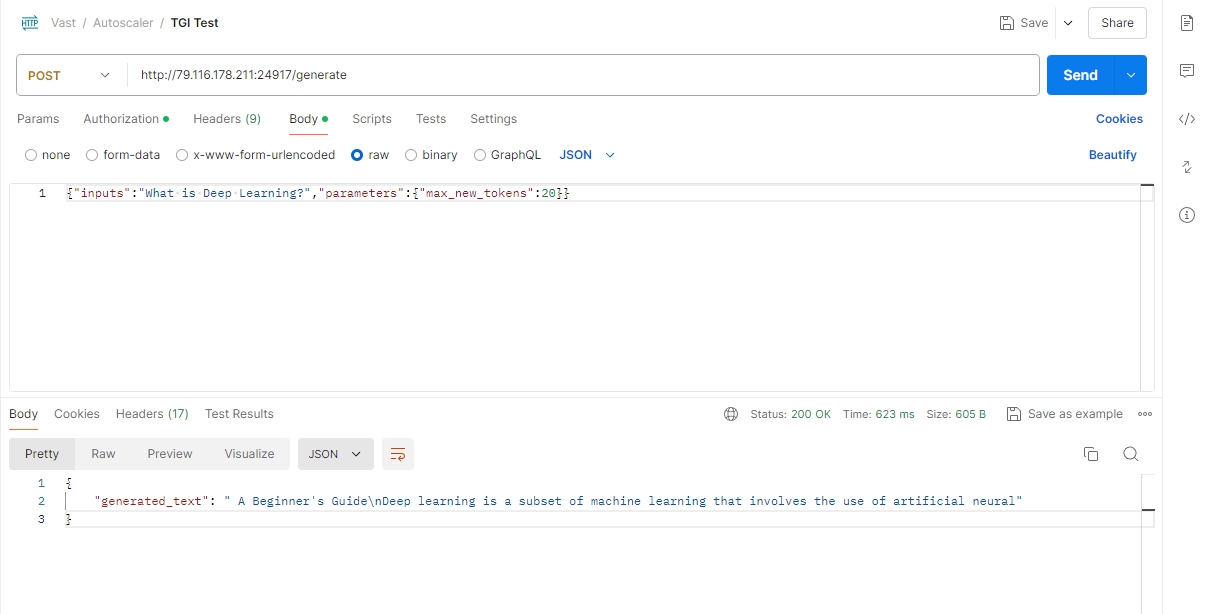
## 5) Congratulations!
You now have a running instance with an API that is using TGI loaded up with Llama3 8B!
---
## SSH Connection
**URL:** llms-txt#ssh-connection
**Contents:**
- About SSH
- Quick start: Generate and add your SSH key to your Vast account
- Connecting to your Instance
- Direct vs Proxy Connections
- Tmux
- SSH Local Port Forwarding
- SSH Alternative - Jupyter Terminal
- Troubleshooting
- Permission Denied (publickey)
- SSH Key Changes
Source: https://docs.vast.ai/documentation/instances/connect/ssh
Learn how to securely connect to Vast.ai instances using SSH. Generate keys, establish connections, use port forwarding, and integrate with VS Code.
**SSH (Secure Shell)** is a protocol for safely connecting to remote servers. It encrypts your connection so you can:
* Log in securely
* Run commands remotely
* Transfer files without exposing your data
Vast.ai instances are configured to accept keys only - Password authentication is disabled for improved security.
## Quick start: Generate and add your SSH key to your Vast account
**1. Generate a SSH key pair in your terminal**
1. Creates two files (by default in \~/.ssh/):
* id\_ed25519 → your **private key** (keep safe, never share).
* id\_ed25519.pub → your **public key** (safe to share, add to servers).
2. -C "[your\_email@example.com](mailto:your_email@example.com)" is optional. Whatever you put there is stored as a comment in the public key file (e.g., id\_ed25519.pub). It's just for identification (helpful if you use multiple keys), not for security.
When you run ssh-keygen -t ed25519 in **Windows PowerShell**, the keys are created in your Windows user profile folder:
`C:\Users\\.ssh\`
**2. Copy your public key.**
**3. Add it in your** [**vast account**](https://cloud.vast.ai/manage-keys/)
## 2) Modifying the Template
Once you have selected the template, you will need to then add in your huggingface token and click the 'Select & Save' button.
You can add your huggingface token with the rest of the docker run options.

This is the only modification you will need to make on this template.
You can then press 'Select & Save' to get ready to launch your instance.
Once you have selected the template, you can then choose to rent a GPU of your choice from either the search page or the CLI/API.
For someone just getting started I recommend either an Nvidia RTX 4090, or an A5000.

## 4) Monitor Your Instance
Once you rent a GPU your instance will being spinning up on the Instances page.
You know the API will be ready when your instance looks like this:

Once your instance is ready you will need to find where your API is exposed. Go to the IP & Config by pressing the blue button on the top of the instance card. You can see the networking configuration here.

After opening the IP & Port Config you should see a forwarded port from 5001, this is where your API resides. To hit TGI you can use the '/generate' endpoint on that port.

## 5) Congratulations!
You now have a running instance with an API that is using TGI loaded up with Llama3 8B!
---
## SSH Connection
**URL:** llms-txt#ssh-connection
**Contents:**
- About SSH
- Quick start: Generate and add your SSH key to your Vast account
- Connecting to your Instance
- Direct vs Proxy Connections
- Tmux
- SSH Local Port Forwarding
- SSH Alternative - Jupyter Terminal
- Troubleshooting
- Permission Denied (publickey)
- SSH Key Changes
Source: https://docs.vast.ai/documentation/instances/connect/ssh
Learn how to securely connect to Vast.ai instances using SSH. Generate keys, establish connections, use port forwarding, and integrate with VS Code.
**SSH (Secure Shell)** is a protocol for safely connecting to remote servers. It encrypts your connection so you can:
* Log in securely
* Run commands remotely
* Transfer files without exposing your data
Vast.ai instances are configured to accept keys only - Password authentication is disabled for improved security.
## Quick start: Generate and add your SSH key to your Vast account
**1. Generate a SSH key pair in your terminal**
1. Creates two files (by default in \~/.ssh/):
* id\_ed25519 → your **private key** (keep safe, never share).
* id\_ed25519.pub → your **public key** (safe to share, add to servers).
2. -C "[your\_email@example.com](mailto:your_email@example.com)" is optional. Whatever you put there is stored as a comment in the public key file (e.g., id\_ed25519.pub). It's just for identification (helpful if you use multiple keys), not for security.
When you run ssh-keygen -t ed25519 in **Windows PowerShell**, the keys are created in your Windows user profile folder:
`C:\Users\\.ssh\`
**2. Copy your public key.**
**3. Add it in your** [**vast account**](https://cloud.vast.ai/manage-keys/)
 **Add & Generate SSH Key (using** [**Vast CLI**](/cli/get-started)**)**
1. **Install Vast CLI:**
2. **Generate an API key in your vast account:**
1. Open [CLI page](https://cloud.vast.ai/cli/)
2. Create an API key
**Add & Generate SSH Key (using** [**Vast CLI**](/cli/get-started)**)**
1. **Install Vast CLI:**
2. **Generate an API key in your vast account:**
1. Open [CLI page](https://cloud.vast.ai/cli/)
2. Create an API key
 3. **Generate a new SSH key pair** (you will need your vast API key):
* Saves keys as \~/.ssh/id\_ed25519 (private) and \~/.ssh/id\_ed25519.pub (public).
* Backs up existing keys as .backup\_\[timestamp].
* Keys are stored in your Vast account and used for new instances.
* Adding a key to your account keys only applies to **new instances**.
* Existing instances will **not** get the new key automatically. To add a key, use the **instance-specific SSH interface**.
* For **VM instances**, changing keys requires recreating the VM.
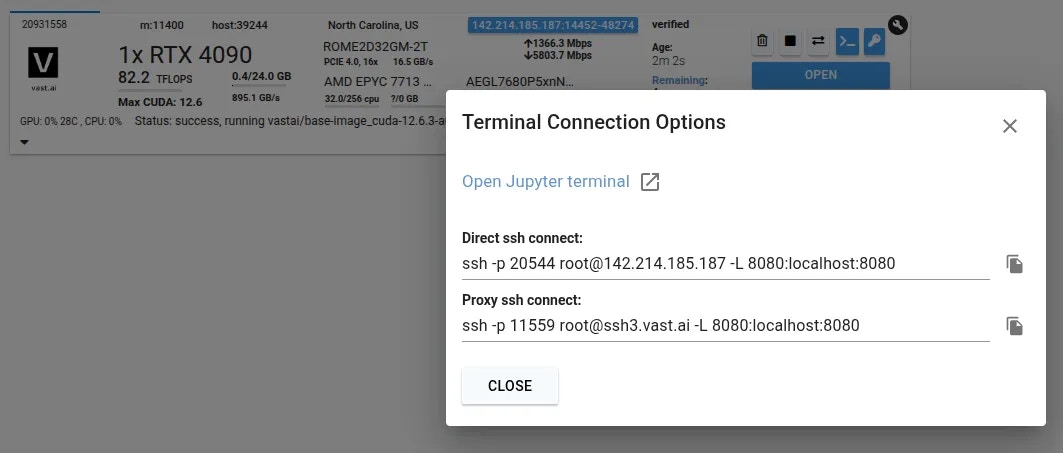
## Connecting to your Instance
Start a new instance and click the SSH icon to see your connection information.
3. **Generate a new SSH key pair** (you will need your vast API key):
* Saves keys as \~/.ssh/id\_ed25519 (private) and \~/.ssh/id\_ed25519.pub (public).
* Backs up existing keys as .backup\_\[timestamp].
* Keys are stored in your Vast account and used for new instances.
* Adding a key to your account keys only applies to **new instances**.
* Existing instances will **not** get the new key automatically. To add a key, use the **instance-specific SSH interface**.
* For **VM instances**, changing keys requires recreating the VM.
## Connecting to your Instance
Start a new instance and click the SSH icon to see your connection information.
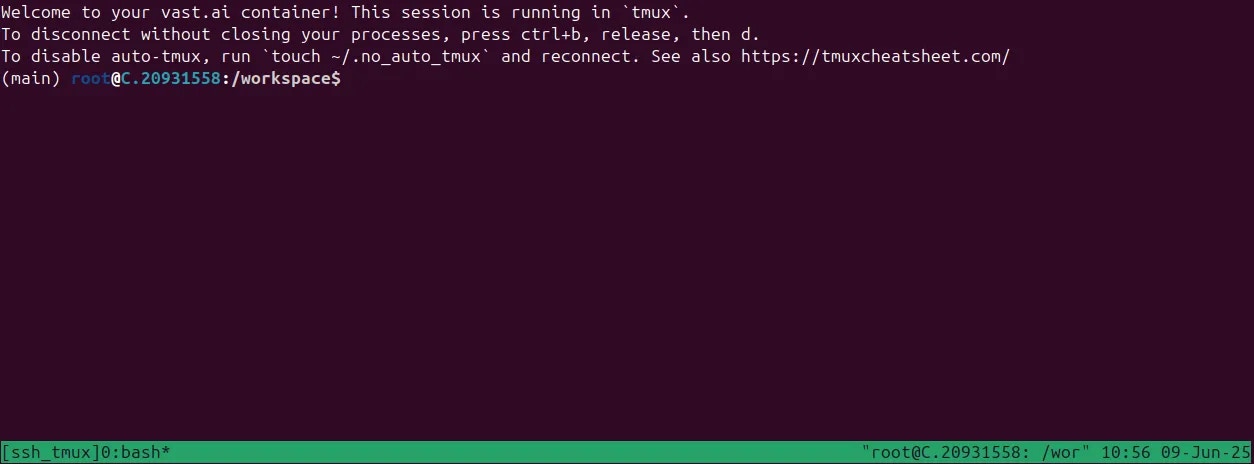
 Now you can enter the connection command string into your terminal
You should now see a screen similar to this. You will, by default, be placed into a tmux session.
Now you can enter the connection command string into your terminal
You should now see a screen similar to this. You will, by default, be placed into a tmux session.
 ### Direct vs Proxy Connections
Vast offers both proxy (default) and direct connection methods for SSH:
* **Proxy SSH**: Works on all machines, slower for data transfer, uses Vast proxy server
* **Direct SSH**: Requires machines with open ports, faster and more reliable, preferred method
We connect you to a tmux session by default for reliability and to prevent unintentional termination of foreground processes. You can create a new bash terminal window with `ctrl+b` + `c`. Cycle through your windows with `ctrl+b` + `n`
There is an excellent guide for getting to grips with tmux at [https://tmuxcheatsheet.com](https://tmuxcheatsheet.com/)
If, however, you would prefer to disable TMUX, you can apply the following either in a terminal or from your template's on-start section.
## SSH Local Port Forwarding
An often overlooked feature of SSH is its ability to forward local ports to another machine. When you access a server remotely over SSH, you can make ports from the remote machine available as if they were listening on your own device. This is a secure alternative to opening ports on the public interface as all data is transported over the SSH connection.
This SSH command connects to the remote instance and sets up **local port forwarding** (SSH tunneling):
**Connection details:**
* Connects to IP 180.123.123.123 as user root
* Uses port 1234 instead of the default SSH port 22
**Port forwarding (the key part):**
* `-L 8080:localhost:8080` - Creates a tunnel so when you access localhost:8080 on your local machine, it forwards to port `8080` on the remote server
* `-L 5000:localhost:5000` - Same thing for port `5000`
You can repeat the `-L` arguments to forward as many ports as you need.
**What this means:** After connecting, you can open your web browser and go to [https://localhost:8080](https://localhost:8080) or [http://localhost:5000](http://localhost:5000) on your local computer, and you'll actually be accessing services running on those ports on the remote server. It's like creating secure "tunnels" through the SSH connection to reach applications on the remote machine that might not be directly accessible from the internet.
## SSH Alternative - Jupyter Terminal
As a simple alternative to SSH, you might like to consider Jupyter Terminal instead. All instances started in Jupyter launch mode will have this enabled. It is a very straightforward web-based terminal with session persistence. It's great for a quick CLI session.
Access the terminal from the SSH connections interface.
### Direct vs Proxy Connections
Vast offers both proxy (default) and direct connection methods for SSH:
* **Proxy SSH**: Works on all machines, slower for data transfer, uses Vast proxy server
* **Direct SSH**: Requires machines with open ports, faster and more reliable, preferred method
We connect you to a tmux session by default for reliability and to prevent unintentional termination of foreground processes. You can create a new bash terminal window with `ctrl+b` + `c`. Cycle through your windows with `ctrl+b` + `n`
There is an excellent guide for getting to grips with tmux at [https://tmuxcheatsheet.com](https://tmuxcheatsheet.com/)
If, however, you would prefer to disable TMUX, you can apply the following either in a terminal or from your template's on-start section.
## SSH Local Port Forwarding
An often overlooked feature of SSH is its ability to forward local ports to another machine. When you access a server remotely over SSH, you can make ports from the remote machine available as if they were listening on your own device. This is a secure alternative to opening ports on the public interface as all data is transported over the SSH connection.
This SSH command connects to the remote instance and sets up **local port forwarding** (SSH tunneling):
**Connection details:**
* Connects to IP 180.123.123.123 as user root
* Uses port 1234 instead of the default SSH port 22
**Port forwarding (the key part):**
* `-L 8080:localhost:8080` - Creates a tunnel so when you access localhost:8080 on your local machine, it forwards to port `8080` on the remote server
* `-L 5000:localhost:5000` - Same thing for port `5000`
You can repeat the `-L` arguments to forward as many ports as you need.
**What this means:** After connecting, you can open your web browser and go to [https://localhost:8080](https://localhost:8080) or [http://localhost:5000](http://localhost:5000) on your local computer, and you'll actually be accessing services running on those ports on the remote server. It's like creating secure "tunnels" through the SSH connection to reach applications on the remote machine that might not be directly accessible from the internet.
## SSH Alternative - Jupyter Terminal
As a simple alternative to SSH, you might like to consider Jupyter Terminal instead. All instances started in Jupyter launch mode will have this enabled. It is a very straightforward web-based terminal with session persistence. It's great for a quick CLI session.
Access the terminal from the SSH connections interface.
 ### Permission Denied (publickey)
If you get this error when trying to SSH:
1. Ensure your SSH key is added to your [Vast account](https://cloud.vast.ai/manage-keys/)
2. Verify you're using the correct private key
3. Check key file permissions: `chmod 600 ~/.ssh/id_ed25519`
4. Use `-vv` flag for detailed debug info: `ssh -vv -p PORT root@IP`
* New account keys only apply to NEW instances created after adding the key
* Existing instances keep their original keys (won't get new keys automatically)
* For VM instances, changing keys requires recreating the VM
* To add keys to existing instances, use the instance-specific SSH interface
### General Connection Issues
You can often determine the exact cause of a connection failure by using the -vv arguments with ssh to get more information.
Common reasons include:
* Using the wrong private key
* Incorrect permissions for your private key
* Public key not added to instance or account
* Connecting to the wrong port
## SCP & SFTP File Transfer
Both **SCP** (Secure Copy Protocol) and **SFTP** (SSH File Transfer Protocol) are tools for securely transferring files that piggyback on the SSH protocol. They use the same authentication and encryption as SSH.
### SCP (Secure Copy Protocol)
* **What it is:** Simple, command-line tool for copying files between local and remote machines
* **Best for:** Quick, one-time file transfers
* **Syntax:** `scp -P source destination`
```bash Bash theme={null}
**Examples:**
Example 1 (unknown):
```unknown
```
Example 2 (unknown):
```unknown
1. Creates two files (by default in \~/.ssh/):
* id\_ed25519 → your **private key** (keep safe, never share).
* id\_ed25519.pub → your **public key** (safe to share, add to servers).
2. -C "[your\_email@example.com](mailto:your_email@example.com)" is optional. Whatever you put there is stored as a comment in the public key file (e.g., id\_ed25519.pub). It's just for identification (helpful if you use multiple keys), not for security.
When you run ssh-keygen -t ed25519 in **Windows PowerShell**, the keys are created in your Windows user profile folder:
`C:\Users\\.ssh\`
**2. Copy your public key.**
```
Example 3 (unknown):
```unknown
```
Example 4 (unknown):
```unknown
**3. Add it in your** [**vast account**](https://cloud.vast.ai/manage-keys/)
**Add & Generate SSH Key (using** [**Vast CLI**](/cli/get-started)**)**
1. **Install Vast CLI:**
```
---
## unlist volume
**URL:** llms-txt#unlist-volume
Source: https://docs.vast.ai/api-reference/volumes/unlist-volume
api-reference/openapi.json post /api/v0/volumes/unlist/
Remove a volume listing from the marketplace.
CLI Usage: `vastai unlist volume `
---
## streaming response from model API to client
**URL:** llms-txt#streaming-response-from-model-api-to-client
class GenerateStreamHandler(EndpointHandler[InputData]):
@property
def endpoint(self) -> str:
return "/generate_stream"
@classmethod
def payload_cls(cls) -> Type[InputData]:
return InputData
def generate_payload_json(self, payload: InputData) -> Dict[str, Any]:
return dataclasses.asdict(payload)
def make_benchmark_payload(self) -> InputData:
return InputData.for_test()
async def generate_client_response(
self, client_request: web.Request, model_response: ClientResponse
) -> Union[web.Response, web.StreamResponse]:
match model_response.status:
case 200:
log.debug("Streaming response...")
res = web.StreamResponse()
res.content_type = "text/event-stream"
await res.prepare(client_request)
async for chunk in model_response.content:
await res.write(chunk)
await res.write_eof()
log.debug("Done streaming response")
return res
case code:
log.debug("SENDING RESPONSE: ERROR: unknown code")
return web.Response(status=code)
---
## remove defjob
**URL:** llms-txt#remove-defjob
Source: https://docs.vast.ai/api-reference/machines/remove-defjob
api-reference/openapi.json delete /api/v0/machines/{machine_id}/defjob/
Deletes the default job (background instances) for a specified machine.
CLI Usage: `vastai remove defjob `
---
## Creating Templates for GROBID
**URL:** llms-txt#creating-templates-for-grobid
**Contents:**
- Introduction
- Find The Image and Tag You Want to Use
- Step 1 - Find a Suitable Image
- Step 2 - Selecting the Version Tag
- Configuring The Template
- Step 1 - Setting Your Chosen Image and Tag in Your Vast.ai Template
- Step 2 - Map Ports and Specify Your Image and Tag Combination
- Step 3 - Select the Launch Mode
- Step 4 - Look for CMD or ENTRYPOINT command
- Step 5 - Fill Out On-start Script section using the CMD command we just found
Source: https://docs.vast.ai/documentation/templates/examples/grobid
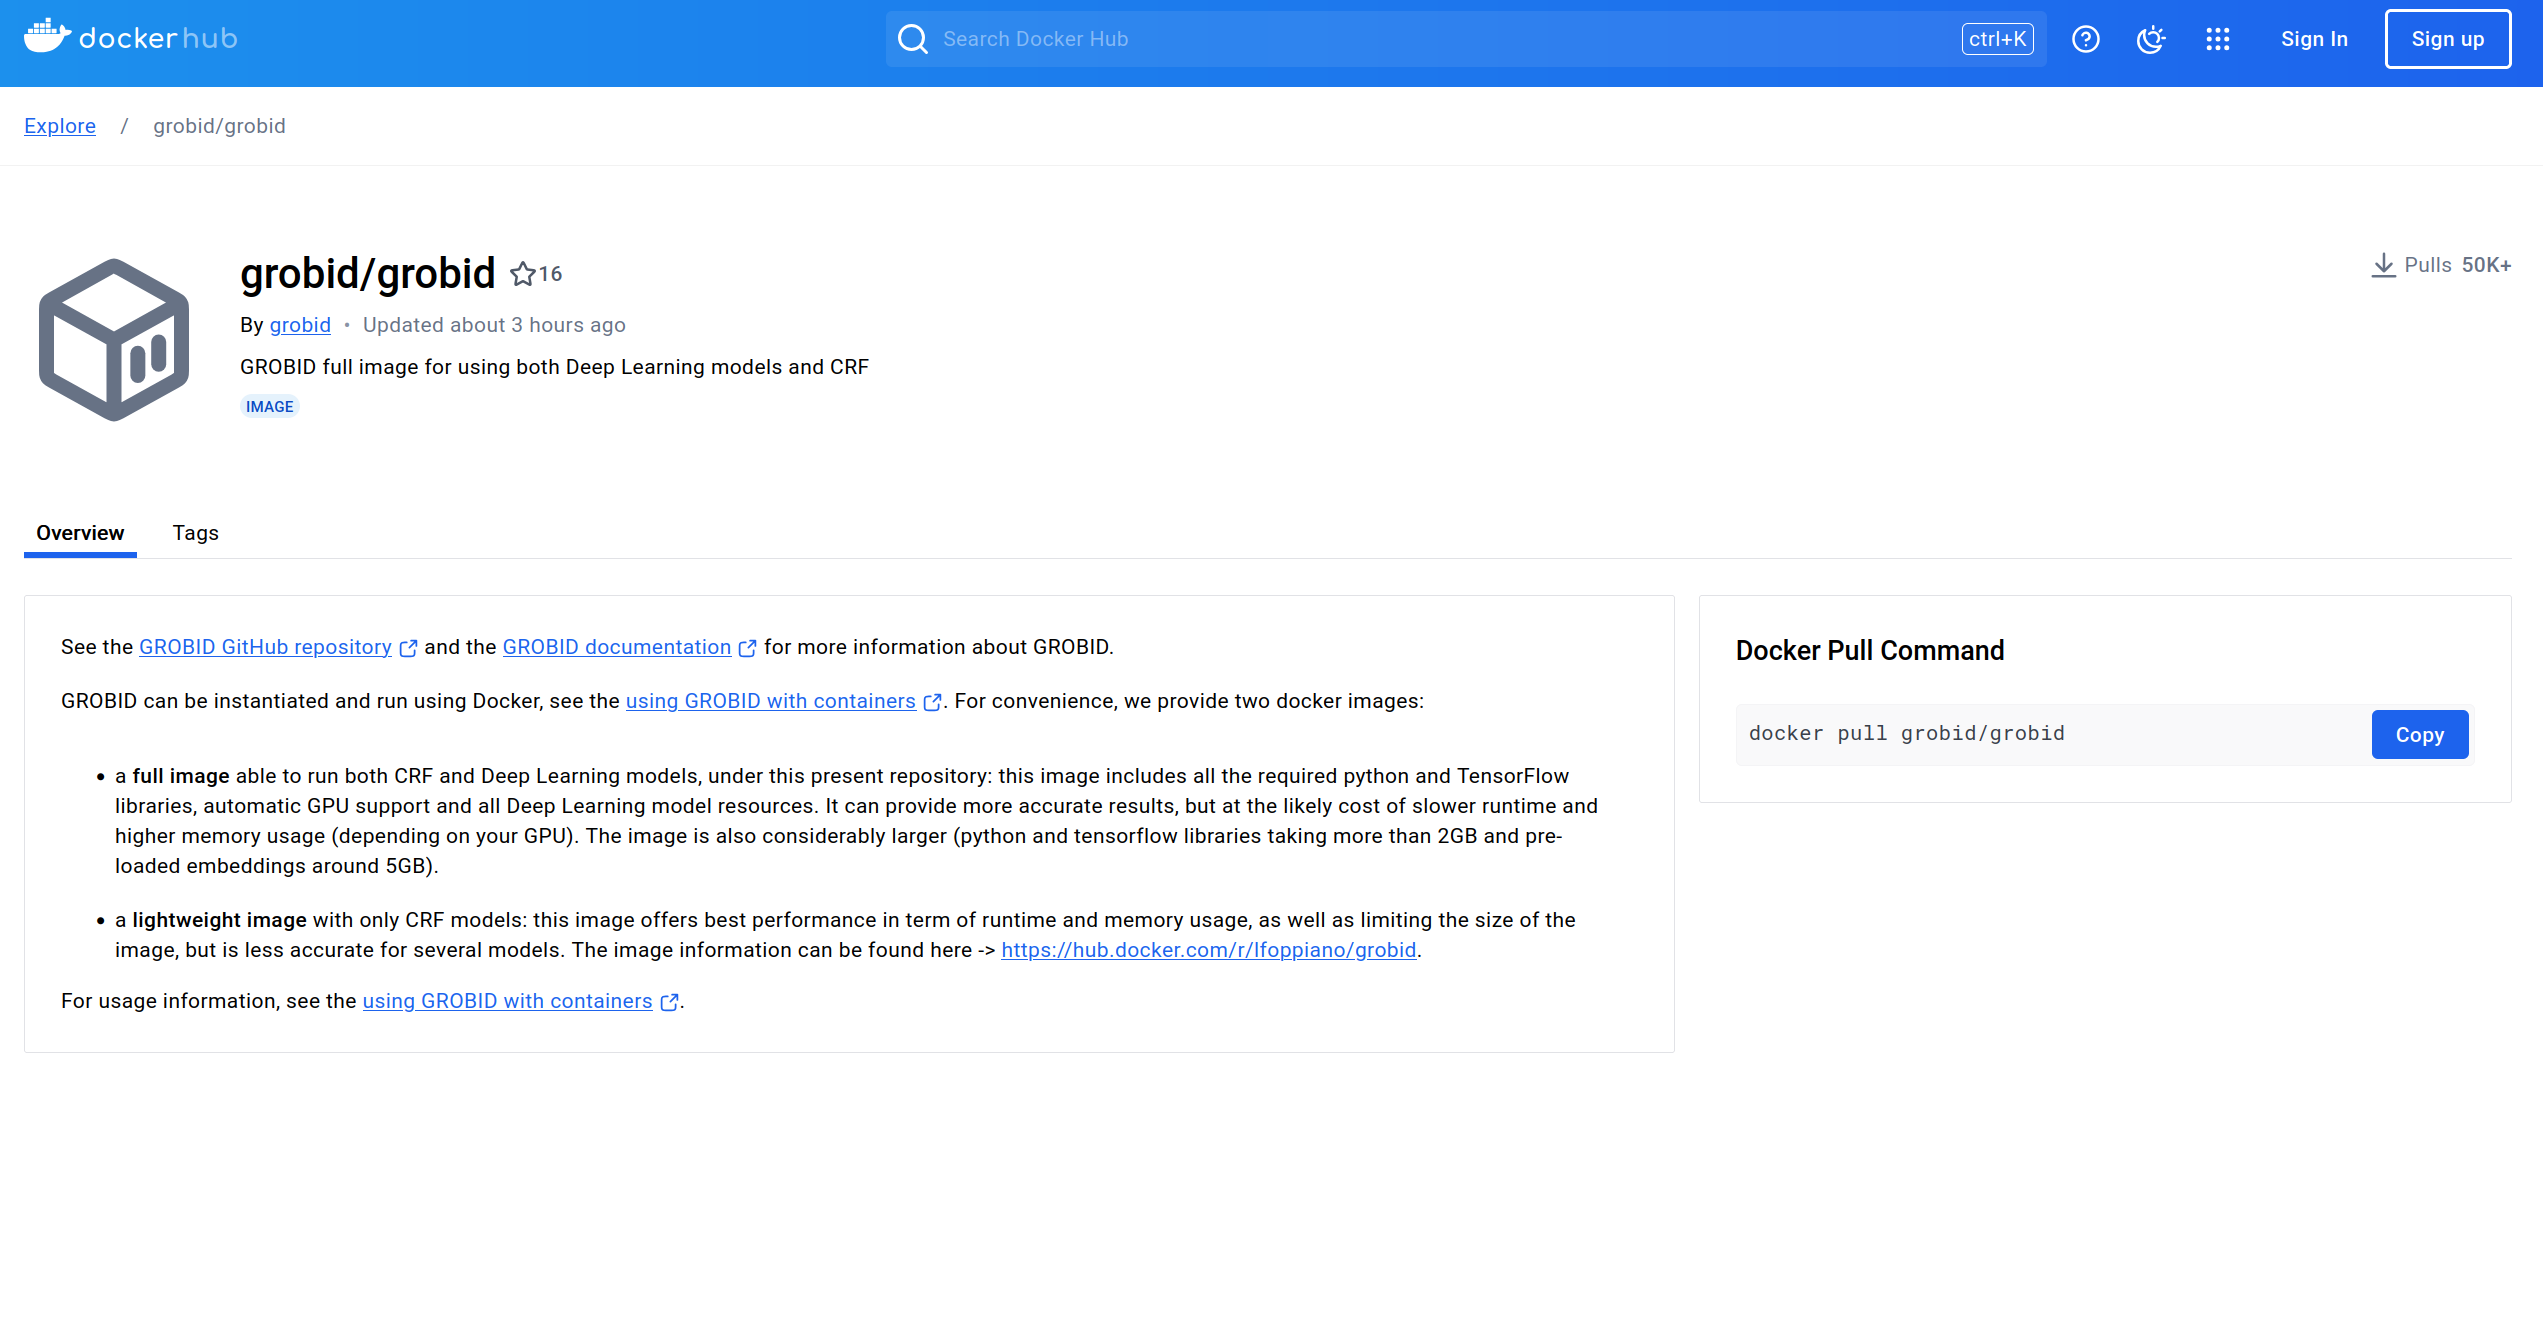
This guide demonstrates creating a template using an existing Docker image. See our [Creating Templates](/documentation/templates/creating-templates) guide for more details on template configuration. We will be using the image from [GROBID on dockerhub](https://hub.docker.com/r/grobid/grobid).
## Find The Image and Tag You Want to Use
### Step 1 - Find a Suitable Image
There are multiple GROBID images in dockerhub, but for this guide we will be using the official GROBID image.
### Step 2 - Selecting the Version Tag
If you don't already have a version you intend to use, we recommend selecting the latest stable version.

At the time of writing, the current stable version is 0.8.0, so that is the version we'll be using here.
## Configuring The Template
### Step 1 - Setting Your Chosen Image and Tag in Your Vast.ai Template
In the Docker Repository And Environment section, you will enter your image path and tag.

### Step 2 - Map Ports and Specify Your Image and Tag Combination
The overview page for this image at dockerhub has a link to their guide to [using GROBID with containers](https://grobid.readthedocs.io/en/latest/Grobid-docker/#crf-and-deep-learning-image), which you can read to get their recommendations for containerizing GROBID.
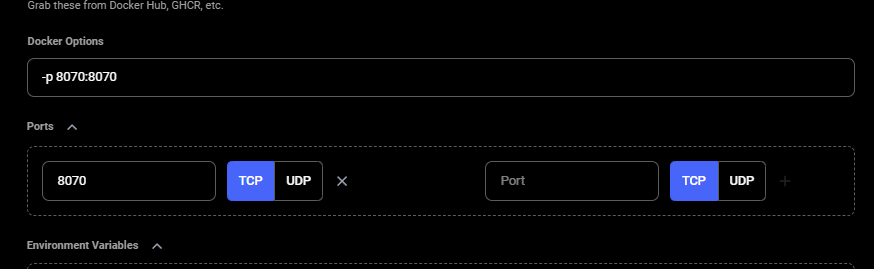
As we follow their guide to containerizing GROBID, we'll need to make sure the container's port 8070 is set to the host machine's port 8070. We will do that in the Vast.ai template. We use -p 8070:8070 as one of the docker run options.
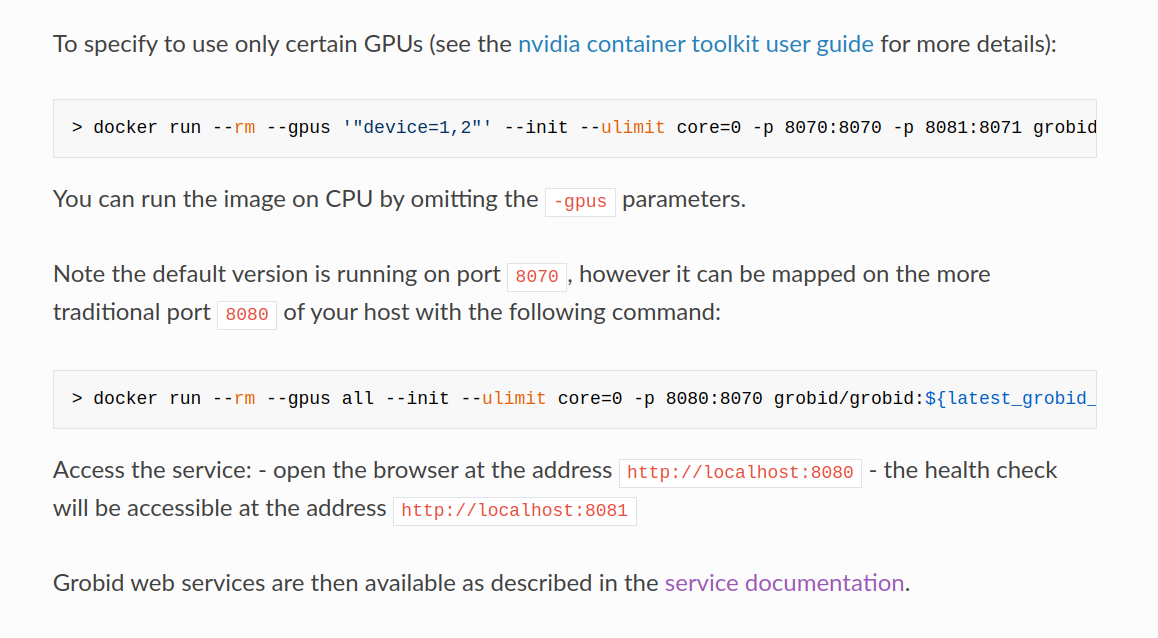
**Note:** Vast only allows -e and -p docker run options to set environment variables and expose ports.
### Step 3 - Select the Launch Mode
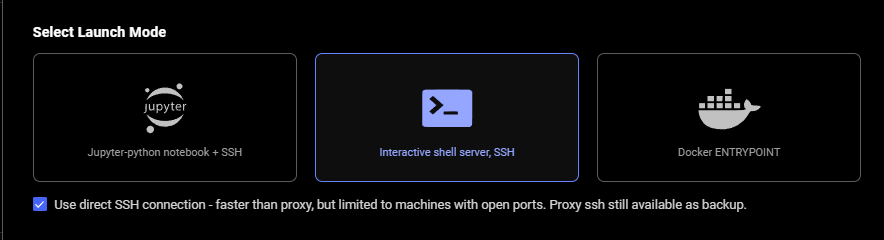
Here we will select the SSH launch mode.
### Step 4 - Look for CMD or ENTRYPOINT command

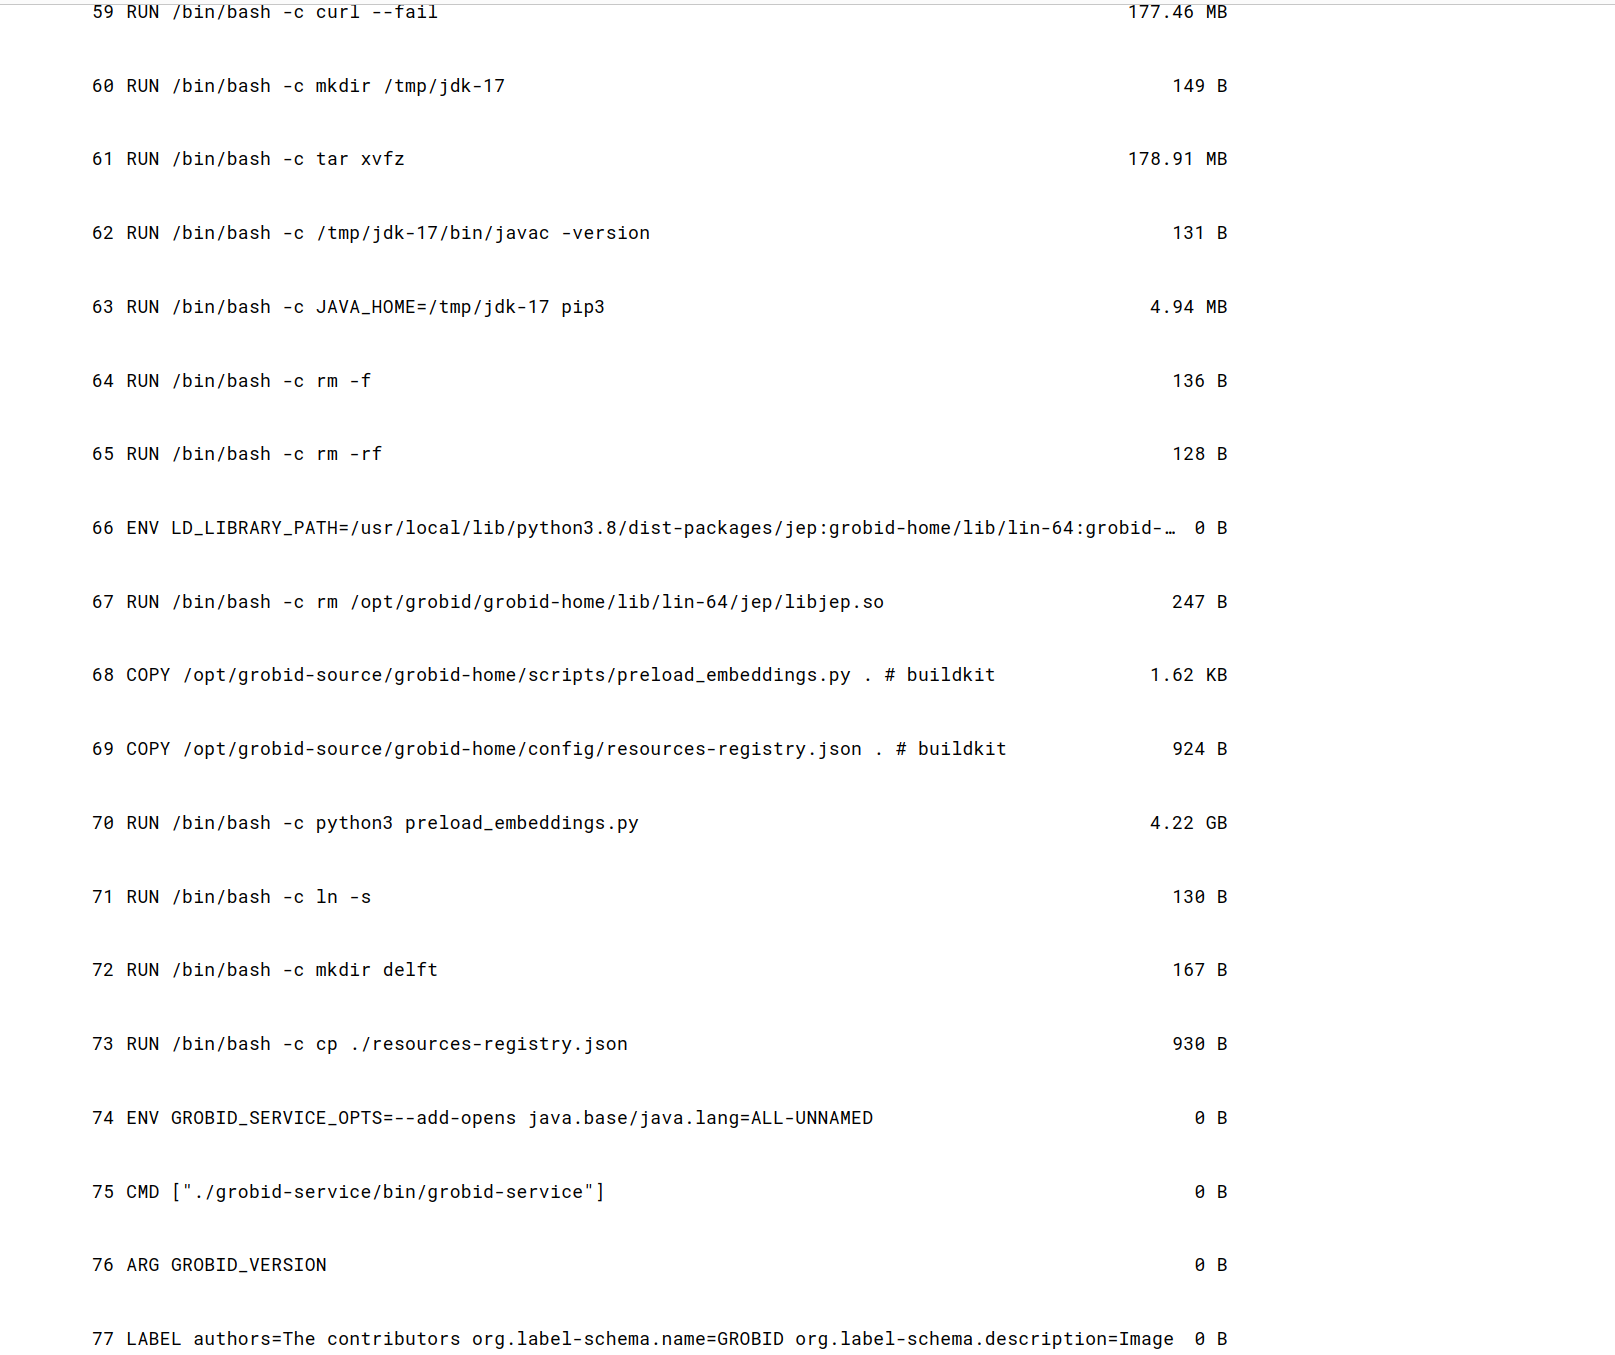
To find this for the template we are creating, we searched the [image's page in Dockerhub](https://hub.docker.com/r/grobid/grobid) and found the **CMD **command in the **Tags** tab under the link "0.8.0" highlighted in blue.
### Step 5 - Fill Out On-start Script section using the CMD command we just found
Next, we add the contents of the **CMD **command to the end of the bash commands section of the **On-start Script** fields.
Also, appended environment variables to /etc/environment file in our on-start section.
### Permission Denied (publickey)
If you get this error when trying to SSH:
1. Ensure your SSH key is added to your [Vast account](https://cloud.vast.ai/manage-keys/)
2. Verify you're using the correct private key
3. Check key file permissions: `chmod 600 ~/.ssh/id_ed25519`
4. Use `-vv` flag for detailed debug info: `ssh -vv -p PORT root@IP`
* New account keys only apply to NEW instances created after adding the key
* Existing instances keep their original keys (won't get new keys automatically)
* For VM instances, changing keys requires recreating the VM
* To add keys to existing instances, use the instance-specific SSH interface
### General Connection Issues
You can often determine the exact cause of a connection failure by using the -vv arguments with ssh to get more information.
Common reasons include:
* Using the wrong private key
* Incorrect permissions for your private key
* Public key not added to instance or account
* Connecting to the wrong port
## SCP & SFTP File Transfer
Both **SCP** (Secure Copy Protocol) and **SFTP** (SSH File Transfer Protocol) are tools for securely transferring files that piggyback on the SSH protocol. They use the same authentication and encryption as SSH.
### SCP (Secure Copy Protocol)
* **What it is:** Simple, command-line tool for copying files between local and remote machines
* **Best for:** Quick, one-time file transfers
* **Syntax:** `scp -P source destination`
```bash Bash theme={null}
**Examples:**
Example 1 (unknown):
```unknown
```
Example 2 (unknown):
```unknown
1. Creates two files (by default in \~/.ssh/):
* id\_ed25519 → your **private key** (keep safe, never share).
* id\_ed25519.pub → your **public key** (safe to share, add to servers).
2. -C "[your\_email@example.com](mailto:your_email@example.com)" is optional. Whatever you put there is stored as a comment in the public key file (e.g., id\_ed25519.pub). It's just for identification (helpful if you use multiple keys), not for security.
When you run ssh-keygen -t ed25519 in **Windows PowerShell**, the keys are created in your Windows user profile folder:
`C:\Users\\.ssh\`
**2. Copy your public key.**
```
Example 3 (unknown):
```unknown
```
Example 4 (unknown):
```unknown
**3. Add it in your** [**vast account**](https://cloud.vast.ai/manage-keys/)
**Add & Generate SSH Key (using** [**Vast CLI**](/cli/get-started)**)**
1. **Install Vast CLI:**
```
---
## unlist volume
**URL:** llms-txt#unlist-volume
Source: https://docs.vast.ai/api-reference/volumes/unlist-volume
api-reference/openapi.json post /api/v0/volumes/unlist/
Remove a volume listing from the marketplace.
CLI Usage: `vastai unlist volume `
---
## streaming response from model API to client
**URL:** llms-txt#streaming-response-from-model-api-to-client
class GenerateStreamHandler(EndpointHandler[InputData]):
@property
def endpoint(self) -> str:
return "/generate_stream"
@classmethod
def payload_cls(cls) -> Type[InputData]:
return InputData
def generate_payload_json(self, payload: InputData) -> Dict[str, Any]:
return dataclasses.asdict(payload)
def make_benchmark_payload(self) -> InputData:
return InputData.for_test()
async def generate_client_response(
self, client_request: web.Request, model_response: ClientResponse
) -> Union[web.Response, web.StreamResponse]:
match model_response.status:
case 200:
log.debug("Streaming response...")
res = web.StreamResponse()
res.content_type = "text/event-stream"
await res.prepare(client_request)
async for chunk in model_response.content:
await res.write(chunk)
await res.write_eof()
log.debug("Done streaming response")
return res
case code:
log.debug("SENDING RESPONSE: ERROR: unknown code")
return web.Response(status=code)
---
## remove defjob
**URL:** llms-txt#remove-defjob
Source: https://docs.vast.ai/api-reference/machines/remove-defjob
api-reference/openapi.json delete /api/v0/machines/{machine_id}/defjob/
Deletes the default job (background instances) for a specified machine.
CLI Usage: `vastai remove defjob `
---
## Creating Templates for GROBID
**URL:** llms-txt#creating-templates-for-grobid
**Contents:**
- Introduction
- Find The Image and Tag You Want to Use
- Step 1 - Find a Suitable Image
- Step 2 - Selecting the Version Tag
- Configuring The Template
- Step 1 - Setting Your Chosen Image and Tag in Your Vast.ai Template
- Step 2 - Map Ports and Specify Your Image and Tag Combination
- Step 3 - Select the Launch Mode
- Step 4 - Look for CMD or ENTRYPOINT command
- Step 5 - Fill Out On-start Script section using the CMD command we just found
Source: https://docs.vast.ai/documentation/templates/examples/grobid
This guide demonstrates creating a template using an existing Docker image. See our [Creating Templates](/documentation/templates/creating-templates) guide for more details on template configuration. We will be using the image from [GROBID on dockerhub](https://hub.docker.com/r/grobid/grobid).
## Find The Image and Tag You Want to Use
### Step 1 - Find a Suitable Image
There are multiple GROBID images in dockerhub, but for this guide we will be using the official GROBID image.

### Step 2 - Selecting the Version Tag
If you don't already have a version you intend to use, we recommend selecting the latest stable version.

At the time of writing, the current stable version is 0.8.0, so that is the version we'll be using here.
## Configuring The Template
### Step 1 - Setting Your Chosen Image and Tag in Your Vast.ai Template
In the Docker Repository And Environment section, you will enter your image path and tag.

### Step 2 - Map Ports and Specify Your Image and Tag Combination
The overview page for this image at dockerhub has a link to their guide to [using GROBID with containers](https://grobid.readthedocs.io/en/latest/Grobid-docker/#crf-and-deep-learning-image), which you can read to get their recommendations for containerizing GROBID.
As we follow their guide to containerizing GROBID, we'll need to make sure the container's port 8070 is set to the host machine's port 8070. We will do that in the Vast.ai template. We use -p 8070:8070 as one of the docker run options.

**Note:** Vast only allows -e and -p docker run options to set environment variables and expose ports.

### Step 3 - Select the Launch Mode
Here we will select the SSH launch mode.

### Step 4 - Look for CMD or ENTRYPOINT command

To find this for the template we are creating, we searched the [image's page in Dockerhub](https://hub.docker.com/r/grobid/grobid) and found the **CMD **command in the **Tags** tab under the link "0.8.0" highlighted in blue.

### Step 5 - Fill Out On-start Script section using the CMD command we just found
Next, we add the contents of the **CMD **command to the end of the bash commands section of the **On-start Script** fields.
Also, appended environment variables to /etc/environment file in our on-start section.
 This makes environment variables available to all users and processes and ensures they are persistent even if our instance/docker container is rebooted. We suggest doing the same for your templates.
### Step 6 - Name and Save The Template
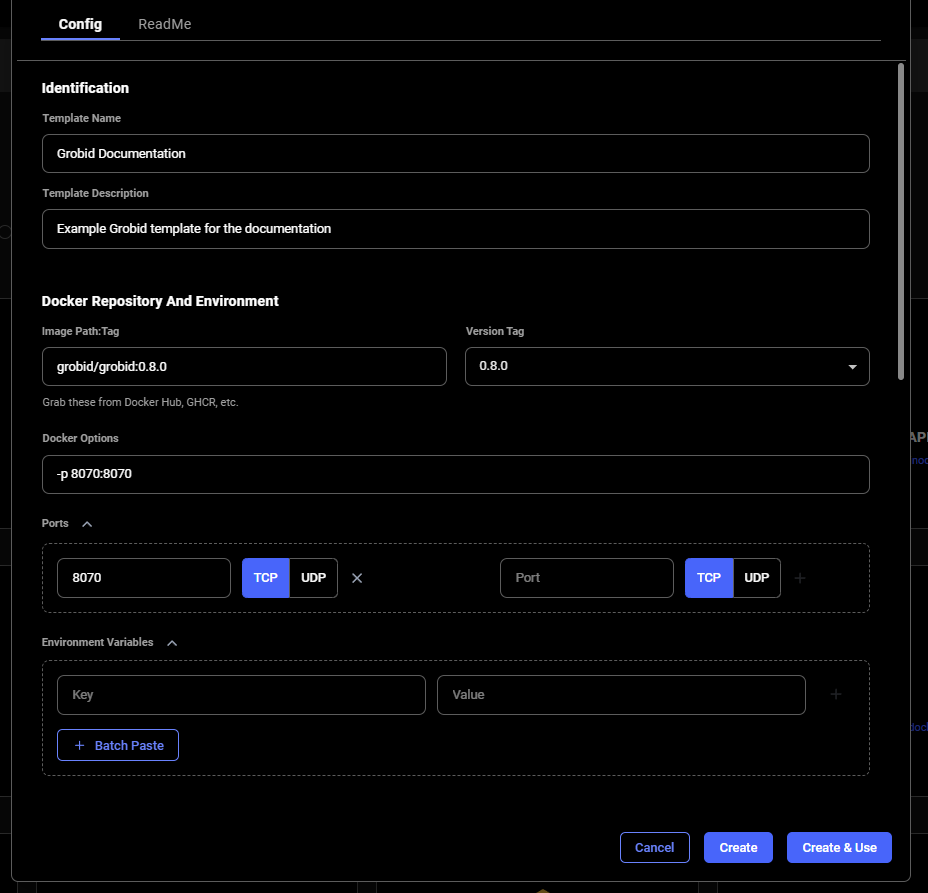
When you are finished setting up your template, If you haven't already done so, specify the template name and description.
Finally, click **Create & Use** to save the template and navigate to the GPU offers search page. You'll notice that your template is selected and ready to be used.
## Rent an Instance Using Your Template and Open GROBID Web App
Once you have selected an instance offer, You'll click on the **INSTANCES **link in the left menu and see your rented GPU instance that has your template applied.
This makes environment variables available to all users and processes and ensures they are persistent even if our instance/docker container is rebooted. We suggest doing the same for your templates.
### Step 6 - Name and Save The Template

When you are finished setting up your template, If you haven't already done so, specify the template name and description.
Finally, click **Create & Use** to save the template and navigate to the GPU offers search page. You'll notice that your template is selected and ready to be used.
## Rent an Instance Using Your Template and Open GROBID Web App
Once you have selected an instance offer, You'll click on the **INSTANCES **link in the left menu and see your rented GPU instance that has your template applied.
 When the instance is done loading and the **>\_CONNECT** state on the blue button appears, you should be able to see the ip range button at the top of the instance card.
 If you click the IP range button you will see a new modal has the IP and port information for your instance. You'll see the port 8070 that we set listed in Open Ports.
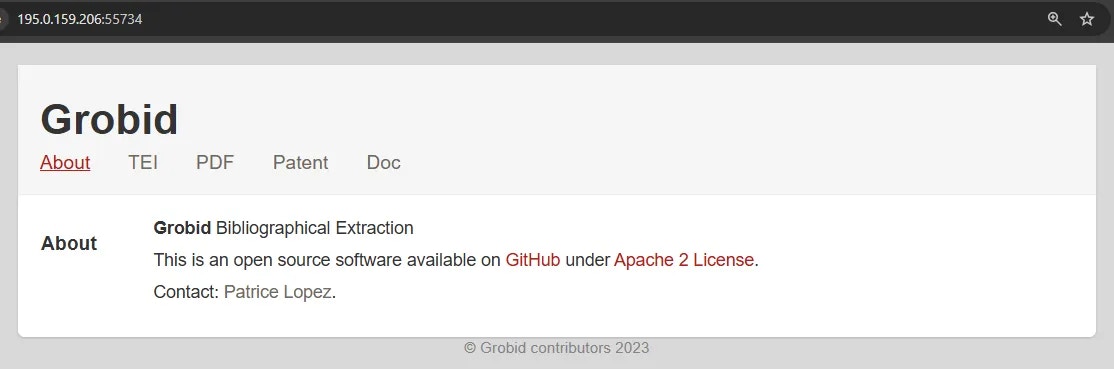
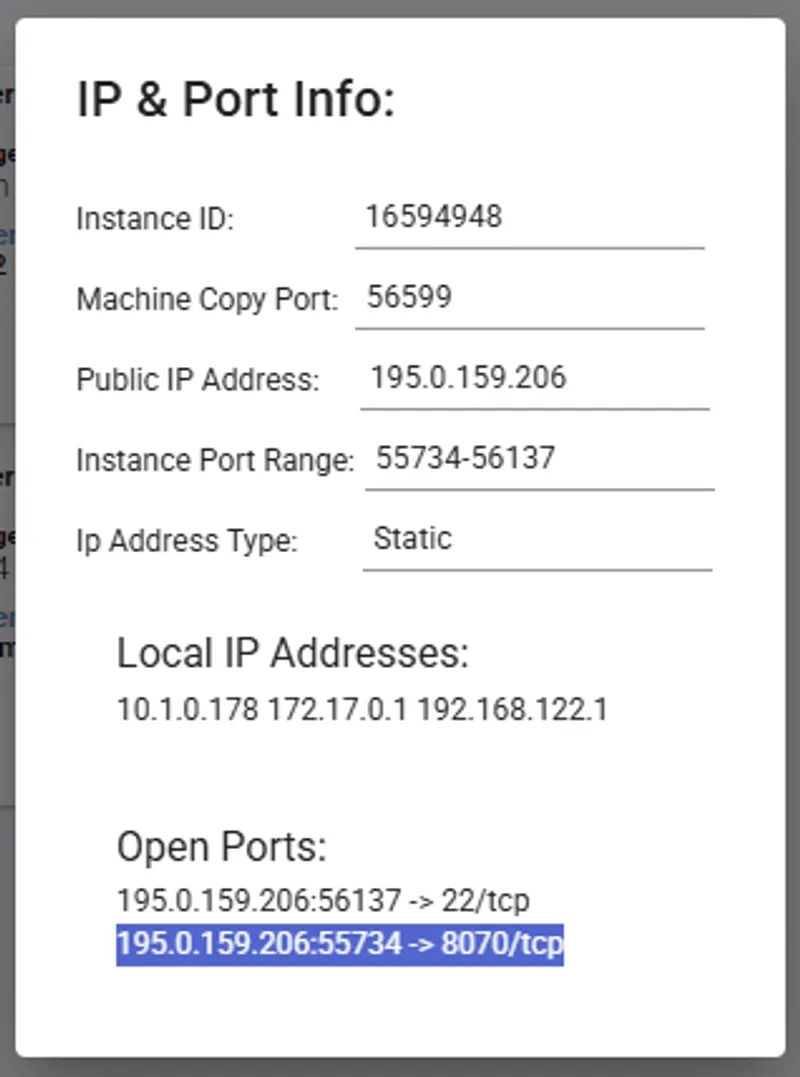 You can copy the machine IP and port and load the address (in this example: 195.0.159.206:55734) in a new browser tab or window. This address will load the GROBID web app.
 ## Additional Resources
[GROBID Documentation](https://grobid.readthedocs.io/en/latest/)
---
## delete volume
**URL:** llms-txt#delete-volume
Source: https://docs.vast.ai/api-reference/volumes/delete-volume
api-reference/openapi.json delete /api/v0/volumes/
Delete a volume by its ID.
CLI Usage: `vastai delete volume `
---
## Oobabooga (LLM webui)
**URL:** llms-txt#oobabooga-(llm-webui)
**Contents:**
- 1) Setup your Vast account
- 2) Pick the Oobabooga template
- 3) Allocate storage
- 4) Pick a GPU offer
- 5) Open Oobabooga
- 6) Download the LLM
- 7) Load the LLM
- 8) Start chatting!
- 9) Done? Destroy the instance
Source: https://docs.vast.ai/oobabooga-llm-webui
A large language model(LLM) learns to predict the next word in a sentence by analyzing the patterns and structures in the text it has been trained on. This enables it to generate human-like text based on the input it receives.
There are many popular Open Source LLMs: Falcon 40B, Guanaco 65B, LLaMA and Vicuna. Hugging Face maintains [a leaderboard](https://huggingface.co/spaces/HuggingFaceH4/open_llm_leaderboard) of the most popular Open Source models that they have available.
[Oobabooga](https://github.com/oobabooga/text-generation-webui) is a front end that uses Gradio to serve a simple web UI for interacting with the Open Source model. In this guide, we will show you how to run an LLM using Oobabooga on Vast.
## 1) Setup your Vast account
The first thing to do if you are new to Vast is to create an account and verify your email address. Then head to the Billing tab and add credits. Vast uses Stripe to processes credit card payments and also accepts major cryptocurrencies through Coinbase or Crypto.com. \$20 should be enough to start. You can setup auto-top ups so that your credit card is charged when your balance is low.
## 2) Pick the Oobabooga template
Go to the [Templates tab](https://cloud.vast.ai/templates/) and search for "Oobabooga" among recommended templates and select it.
## 3) Allocate storage
The default storage amount will not be enough for downloading an LLM. Use the slider under the Instance Configuration to allocate more storage. 100GB should be enough.
## Additional Resources
[GROBID Documentation](https://grobid.readthedocs.io/en/latest/)
---
## delete volume
**URL:** llms-txt#delete-volume
Source: https://docs.vast.ai/api-reference/volumes/delete-volume
api-reference/openapi.json delete /api/v0/volumes/
Delete a volume by its ID.
CLI Usage: `vastai delete volume `
---
## Oobabooga (LLM webui)
**URL:** llms-txt#oobabooga-(llm-webui)
**Contents:**
- 1) Setup your Vast account
- 2) Pick the Oobabooga template
- 3) Allocate storage
- 4) Pick a GPU offer
- 5) Open Oobabooga
- 6) Download the LLM
- 7) Load the LLM
- 8) Start chatting!
- 9) Done? Destroy the instance
Source: https://docs.vast.ai/oobabooga-llm-webui
A large language model(LLM) learns to predict the next word in a sentence by analyzing the patterns and structures in the text it has been trained on. This enables it to generate human-like text based on the input it receives.
There are many popular Open Source LLMs: Falcon 40B, Guanaco 65B, LLaMA and Vicuna. Hugging Face maintains [a leaderboard](https://huggingface.co/spaces/HuggingFaceH4/open_llm_leaderboard) of the most popular Open Source models that they have available.
[Oobabooga](https://github.com/oobabooga/text-generation-webui) is a front end that uses Gradio to serve a simple web UI for interacting with the Open Source model. In this guide, we will show you how to run an LLM using Oobabooga on Vast.
## 1) Setup your Vast account
The first thing to do if you are new to Vast is to create an account and verify your email address. Then head to the Billing tab and add credits. Vast uses Stripe to processes credit card payments and also accepts major cryptocurrencies through Coinbase or Crypto.com. \$20 should be enough to start. You can setup auto-top ups so that your credit card is charged when your balance is low.
## 2) Pick the Oobabooga template
Go to the [Templates tab](https://cloud.vast.ai/templates/) and search for "Oobabooga" among recommended templates and select it.
## 3) Allocate storage
The default storage amount will not be enough for downloading an LLM. Use the slider under the Instance Configuration to allocate more storage. 100GB should be enough.
 ## 4) Pick a GPU offer
You will need to understand how much GPU RAM the LLM requires before you pick a GPU. For example, the [Falcon 40B Instruct](https://huggingface.co/tiiuae/falcon-40b-instruct) model requires 85-100 GB of GPU RAM. Falcon 7B only requires 16GB. Other models do not have great documentation on how much GPU RAM they require. If the instance doesn't have enough GPU RAM, there will be an error when trying to load the model. You can use multiple GPUs in a single instance and add their GPU RAM together.
For this guide, we will load the Falcon 40B Instruct model on a 2X A6000 instance, which has 96GB of GPU RAM in total.
## 4) Pick a GPU offer
You will need to understand how much GPU RAM the LLM requires before you pick a GPU. For example, the [Falcon 40B Instruct](https://huggingface.co/tiiuae/falcon-40b-instruct) model requires 85-100 GB of GPU RAM. Falcon 7B only requires 16GB. Other models do not have great documentation on how much GPU RAM they require. If the instance doesn't have enough GPU RAM, there will be an error when trying to load the model. You can use multiple GPUs in a single instance and add their GPU RAM together.
For this guide, we will load the Falcon 40B Instruct model on a 2X A6000 instance, which has 96GB of GPU RAM in total.
 Click on the RENT button to start the instance which will download the docker container and boot up.
Once the instance boots up, the Open button will open port 7860 in a new browser window. This is the Oobabooga web interface.
The web gui can take an additional 1-2 minutes to load. If the button is stuck on "Connecting" for more than 10 minutes, then something has gone wrong. You can check the log for an error and/or contact us on website chat support for 24/7 help.
## 6) Download the LLM
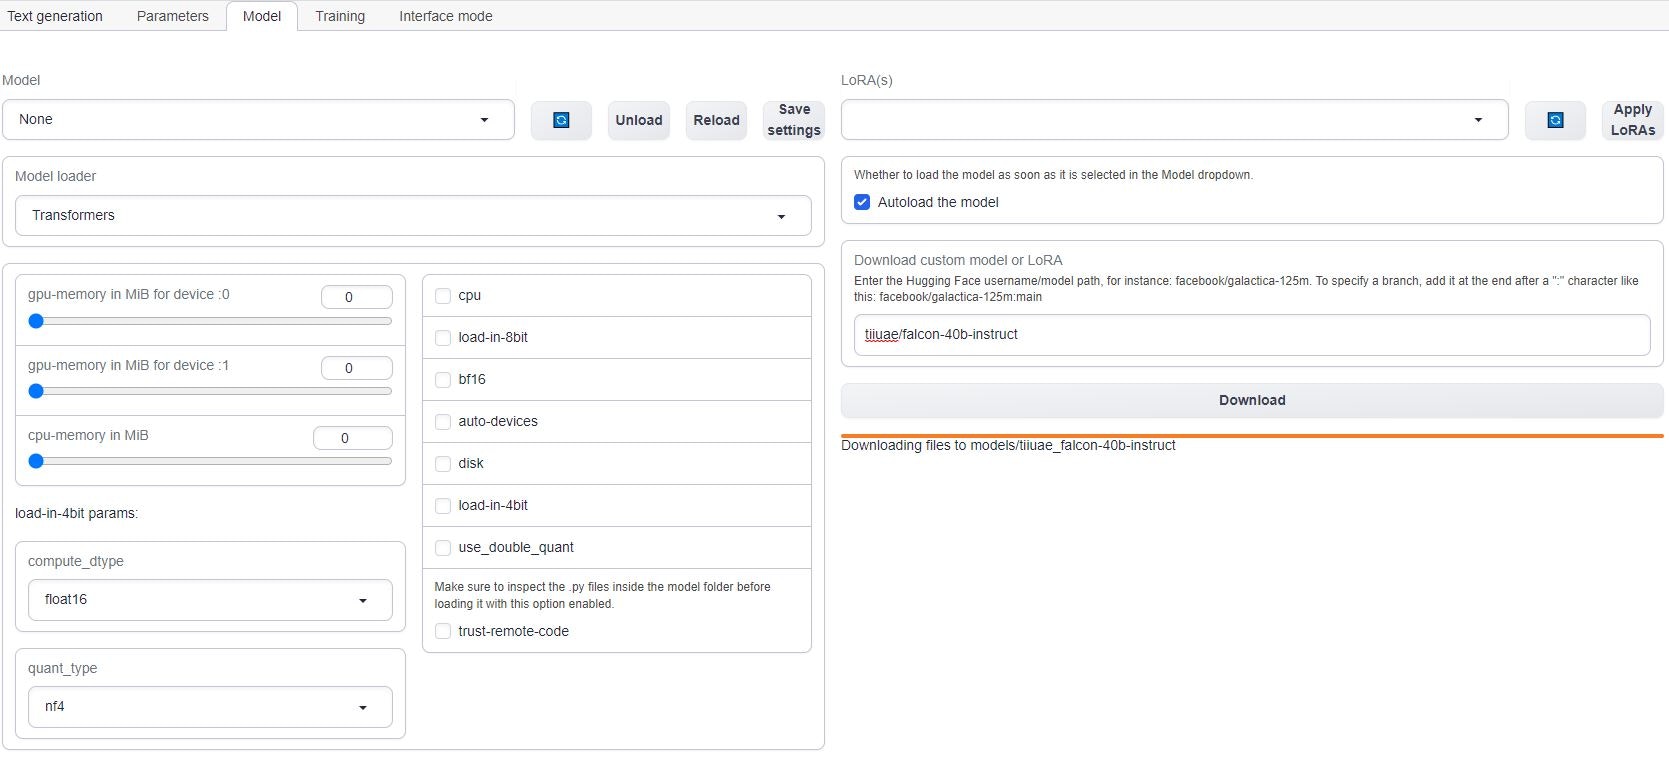
Click on the Model tab in the interface. Enter the Hugging Face username/model path, for instance: tiiuae/falcon-40b-instruct. To specify a branch, add it at the end after a ":" character like this: tiiuae/falcon-40b-instruct
The download will take 15-20 minutes depending on the machine's internet connection.
Click on the RENT button to start the instance which will download the docker container and boot up.
Once the instance boots up, the Open button will open port 7860 in a new browser window. This is the Oobabooga web interface.
The web gui can take an additional 1-2 minutes to load. If the button is stuck on "Connecting" for more than 10 minutes, then something has gone wrong. You can check the log for an error and/or contact us on website chat support for 24/7 help.
## 6) Download the LLM
Click on the Model tab in the interface. Enter the Hugging Face username/model path, for instance: tiiuae/falcon-40b-instruct. To specify a branch, add it at the end after a ":" character like this: tiiuae/falcon-40b-instruct
The download will take 15-20 minutes depending on the machine's internet connection.
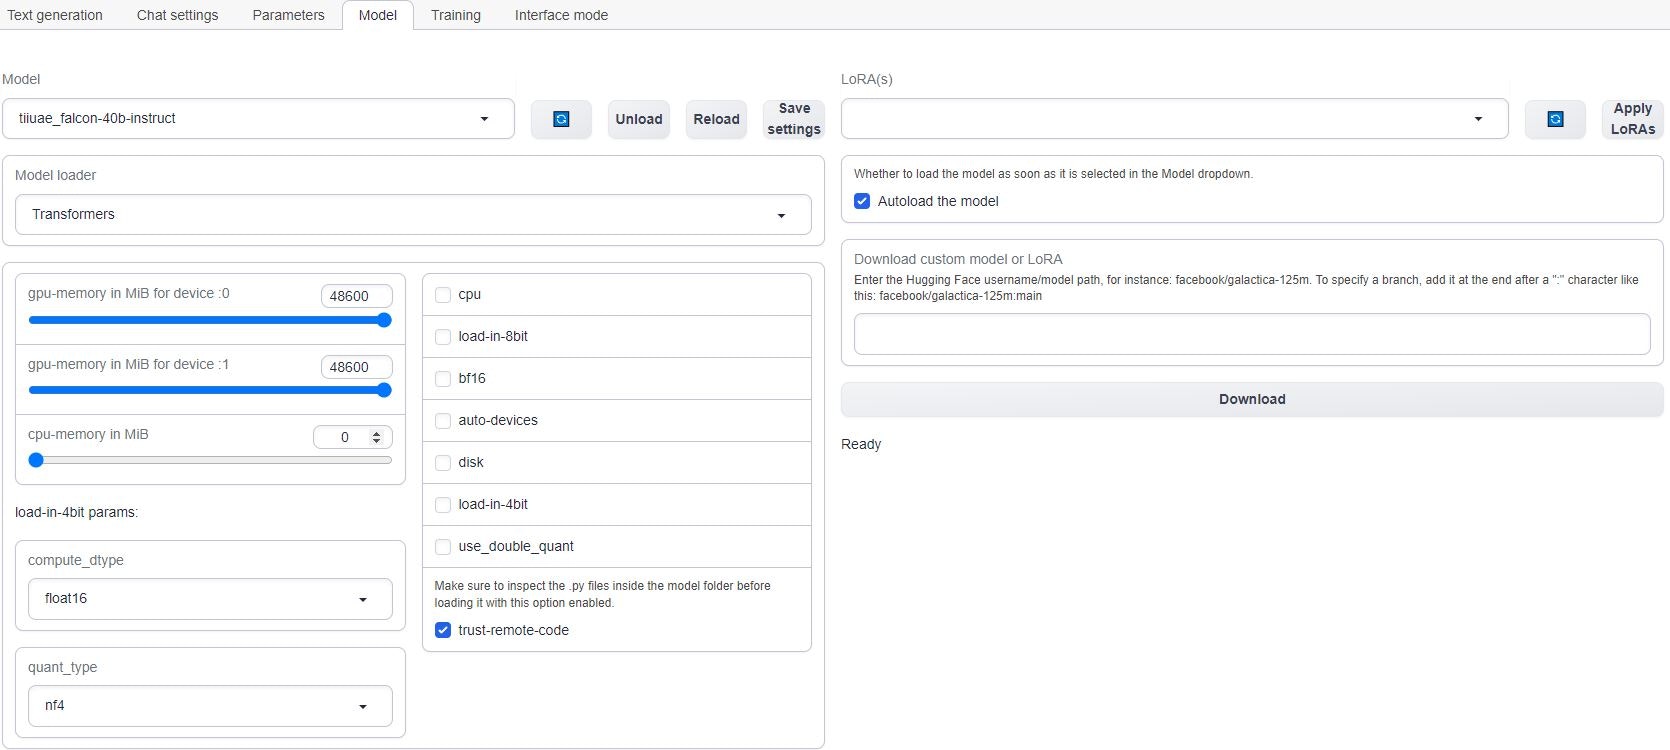
 To check the progress of the download, you can click on the log button on the Vast instance card on [cloud.vast.ai/instances/](https://cloud.vast.ai/instances/) which will show you the download speed for each of the LLM file segments.
If you are using multiple GPUs such as the 2X A6000 selected in this guide, you will need to move the memory slider all the way over for all the GPUs. You may also have to select the "trust-remote-code" option if you get that error. Once those items are fixed, you can reload the model.
To check the progress of the download, you can click on the log button on the Vast instance card on [cloud.vast.ai/instances/](https://cloud.vast.ai/instances/) which will show you the download speed for each of the LLM file segments.
If you are using multiple GPUs such as the 2X A6000 selected in this guide, you will need to move the memory slider all the way over for all the GPUs. You may also have to select the "trust-remote-code" option if you get that error. Once those items are fixed, you can reload the model.
 Any errrors loading the model will appear under the download button.
## 8) Start chatting!
Navigate to the Text generation tab to start chatting with the model. This is the most basic way to use Oobabooga, there are many other settings and things you can do with the interface.
## 9) Done? Destroy the instance
If you STOP the instance using the stop button, you will no longer pay the hourly GPU charges. **However you will still incur storage charges** because the data is still stored on the host machine. When you hit the START button to restart the instance, you are also not guaranteed that you can rent the GPU as someone else might have rented it while it was stopped.
To incur no other charges you have to DESTROY the instance using the trash can icon. **We recommend you destroy instances** so as not to incur storage charges while you are not using the system.
---
## Worker List
**URL:** llms-txt#worker-list
Source: https://docs.vast.ai/documentation/serverless/worker-list
Learn how to use the /get_endpoint_workers/ and /get_autogroup_workers/ endpoints to retrieve a list of GPU instances under an Endpoint and Worker Group. Understand the inputs, outputs, and examples for using the endpoints.
The `/get_endpoint_workers/` and `/get_autogroup_workers/` endpoints return a list of GPU instances under an Endpoint and \{\{Worker\_Group}}, respectively.
---
## Access Tokens
**URL:** llms-txt#access-tokens
CF_TUNNEL_TOKEN="" # Cloudflare Zero Trust token
CIVITAI_TOKEN="" # Access gated Civitai models
HF_TOKEN="" # Access gated HuggingFace models
---
## Video Generation Guide: Using ComfyUI on Vast.ai
**URL:** llms-txt#video-generation-guide:-using-comfyui-on-vast.ai
**Contents:**
- Prerequisites
- Setting Up Your Instance
- 1. Select the Right Template
- 2. **Edit your Template Configuration**
This guide will walk you through setting up and using ComfyUI for video generation on Vast.ai. ComfyUI provides a powerful node-based interface for creating advanced stable diffusion pipelines, making it ideal for video generation workflows.
* A Vast.ai account
* Basic familiarity with image or video generation models
* [(Optional) Read Jupyter guide](/documentation/instances/jupyter)
* [(Optional) SSH client installed on your local machine and SSH public key added in Account tab at cloud.vast.ai](/documentation/instances/sshscp)
## Setting Up Your Instance
### 1. Select the Right Template
Navigate to the Templates tab to view available templates. For video generation, we recommend searching for "ComfyUI" among the recommended templates. [The ComfyUI template](https://cloud.vast.ai/?ref_id=62897\&creator_id=62897\&name=ComfyUI) provides a powerful and modular stable diffusion GUI for designing and executing advanced pipelines using a graph/nodes/flowchart based interface.
**Template Features:**
* Access through both Jupyter and SSH
* Instance Portal
* Token-based authentication enabled by default
* Built-in provisioning script for models and custom nodes
### 2. **Edit your Template Configuration**
**Add/update these environment variables as needed:**
```bash Bash theme={null}
---
## show ssh-keys
**URL:** llms-txt#show-ssh-keys
Source: https://docs.vast.ai/api-reference/instances/show-ssh-keys
api-reference/openapi.json get /api/v0/instances/{instance_id}/ssh/
Retrieves the SSH keys associated with a specific instance.
CLI Usage: `vastai show ssh-keys `
---
## get endpoint workers
**URL:** llms-txt#get-endpoint-workers
Source: https://docs.vast.ai/api-reference/serverless/get-endpoint-workers
api-reference/openapi.json post /get_endpoint_workers/
Retrieves the current list and status of workers for a specific endpoint.
Useful for monitoring, debugging connectivity issues, and understanding resource usage.
CLI Usage: `vastai get endpoint workers `
---
## destroy team
**URL:** llms-txt#destroy-team
Source: https://docs.vast.ai/api-reference/team/destroy-team
api-reference/openapi.json delete /api/v0/team/
Deletes a team and all associated data including API keys, rights, invitations, memberships and metadata. The team owner's master API key is converted to a normal client key.
CLI Usage: `vastai destroy team`
---
## vLLM (LLM inference and serving)
**URL:** llms-txt#vllm-(llm-inference-and-serving)
**Contents:**
- Set Up Your Account
- Configure the vLLM Template
- Launch Your Instance
- vLLM API Usage
- Authentication Token
- Sample Curl Command
- vLLM with Python
- Further Reading
Source: https://docs.vast.ai/vllm-llm-inference-and-serving
Below is a guide for runing the [vLLM template](https://cloud.vast.ai/?creator_id=62897\&name=vLLM) on Vast. The template contains everything you need to get started, so you will only need to specify the model you want to serve and the corresponding vLLM configuration.
For simplicity, we have set the default template model as [DeepSeek-R1-Distill-Llama-8B](https://huggingface.co/deepseek-ai/DeepSeek-R1-Distill-Llama-8B) with a limited context window because it can run on a single GPU with only 21GB VRAM, but vLLM can scale easily over multiple GPUs to handle much larger models.
## Set Up Your Account
1. **Setup your Vast account and add credit:** Review the [quickstart guide](/documentation/get-started/quickstart) to get familar with the service if you do not have an account with credits loaded.
## Configure the vLLM Template
vLLM serve is launched automatically by the template and it will use the configuration defined in the environment variables `VLLM_MODEL` and `VLLM_ARGS`. Here's how you can set it up
1. Vist the [templates](https://cloud.vast.ai/templates/) page and find the recommended vLLM template.
2. Click the pencil button to open up the template editor.
3. If you would like to run a model other than the default, edit the `VLLM_MODEL`environment variable. The default value is `deepseek-ai/DeepSeek-R1-Distill-Llama-8B` which is a HuggingFace repository.
4. You can also set the arguments to pass to `vllm serve` by modifying the `VLLM_ARGS` environment variable. vLLM is highly configurable so it's a good idea to check the official documentation before changing anything here. All available startup arguments are listed in the [official vLLM documentation](https://docs.vllm.ai/en/latest/serving/engine_args.html).
5. Save the template. You will be able to find the version you have just modified in the templates page in the 'My Templates' section.
## Launch Your Instance
1. **Select the template** you just saved from the 'My Templates' section of the templates page.
2. Click the **Play icon** on this template to be taken to view the available offers.
3. Use the search filters to select a suitable GPU, ensuring that you have **sufficient VRAM** to load all of the model's layers to GPU.
4. From the search menu, ensure you have **sufficient disk space** for the model you plan to run. The disk slider is located under the template icon on the left hand column. Large models (e.g., 70B parameters) can require dozens of gigabytes of storage. For Deep Seek R1 8B, make sure to allocate over 17Gb of disk space using the slider.
5. Click **Rent** on a suitable instance and wait for it to load
Once the instance has loaded you'll be able to click the Open button to access the instance portal where you'll see links to the interactive vLLM API documentation and the Ray control panel.
As vLLM must download your model upon first run it may take some time before the API is available. You can follow the startup progress in the instance logs.
The vLLM API can be accessed programmatically at:
### Authentication Token
* When making requests, you must include an **Authorization** header with the token value of OPEN\_BUTTON\_TOKEN.
### Sample Curl Command
* -k: Allows curl to perform insecure SSL connections and transfers as Vast.ai uses a self-signed certificate.
* Replace **INSTANCE\_IP** and **EXTERNAL\_PORT** with the externally mapped port for 8000 from the IP button on the instance.
* Update the Authorization header value to match your **OPEN\_BUTTON\_TOKEN**. You can get that from any of the links in the Instance Portal or from the Open button on the instance card.
* Modify the prompt, model, and other fields (max\_tokens, temperature, etc.) as needed.
Although the instance starts the vllm serve function to provide an inference API, the template has been configured with Jupyter and SSH access so you can also interact with vLLM in code from your instance. To do this simply include the vllm modules at the top of your Python script:
Please see the template Readme file on our recommended vLLM template for advanced template configuration and other methods of connecting to and interacting with your instance.
**Examples:**
Example 1 (unknown):
```unknown
### Authentication Token
* When making requests, you must include an **Authorization** header with the token value of OPEN\_BUTTON\_TOKEN.
### Sample Curl Command
```
Example 2 (unknown):
```unknown
* -k: Allows curl to perform insecure SSL connections and transfers as Vast.ai uses a self-signed certificate.
* Replace **INSTANCE\_IP** and **EXTERNAL\_PORT** with the externally mapped port for 8000 from the IP button on the instance.
* Update the Authorization header value to match your **OPEN\_BUTTON\_TOKEN**. You can get that from any of the links in the Instance Portal or from the Open button on the instance card.
* Modify the prompt, model, and other fields (max\_tokens, temperature, etc.) as needed.
## vLLM with Python
Although the instance starts the vllm serve function to provide an inference API, the template has been configured with Jupyter and SSH access so you can also interact with vLLM in code from your instance. To do this simply include the vllm modules at the top of your Python script:
```
---
## Rental Types FAQ
**URL:** llms-txt#rental-types-faq
**Contents:**
- Rental Type Overview
- On-Demand (High Priority)
- Interruptible (Low Priority)
- How do interruptible instances compare to AWS Spot?
- What happens when my interruptible instance loses the bid?
- DLPerf Scoring
- What is DLPerf?
- Is DLPerf accurate for my workload?
Source: https://docs.vast.ai/documentation/reference/faq/rental-types
Understanding on-demand vs interruptible instances
<script
type="application/ld+json"
dangerouslySetInnerHTML={{
__html: JSON.stringify({
"@context": "https://schema.org",
"@type": "FAQPage",
"mainEntity": [
{
"@type": "Question",
"name": "What are the rental types available?",
"acceptedAnswer": {
"@type": "Answer",
"text": "We offer two rental types: On-Demand (High Priority) with fixed price set by the host, runs as long as you want, cannot be interrupted, more expensive but reliable. Interruptible (Low Priority) where you set a bid price, can be stopped by higher bids, saves 50-80% on costs, good for fault-tolerant workloads."
}
},
{
"@type": "Question",
"name": "How do interruptible instances compare to AWS Spot?",
"acceptedAnswer": {
"@type": "Answer",
"text": "Similarities: Both can be interrupted and offer significant savings. Differences: Vast.ai uses direct bidding (you control your bid price) while AWS uses market pricing. No 24-hour limit like GCE preemptible instances. Vast.ai instances can run indefinitely if not outbid."
}
},
{
"@type": "Question",
"name": "What happens when my interruptible instance loses the bid?",
"acceptedAnswer": {
"@type": "Answer",
"text": "Your instance is stopped (killing running processes). Important considerations: Save work frequently to disk, use cloud storage for backups, instance may wait long to resume, implement checkpointing for long jobs. Always design your workload to handle interruptions gracefully."
}
},
{
"@type": "Question",
"name": "What is DLPerf?",
"acceptedAnswer": {
"@type": "Answer",
"text": "DLPerf (Deep Learning Performance) is our scoring function that estimates performance for typical deep learning tasks. It predicts iterations/second for common tasks like training ResNet50 CNNs. Example scores: V100: ~21 DLPerf, 2080 Ti: ~14 DLPerf, 1080 Ti: ~10 DLPerf. A V100 (21) is roughly 2x faster than a 1080 Ti (10) for typical deep learning."
}
},
{
"@type": "Question",
"name": "Is DLPerf accurate for my workload?",
"acceptedAnswer": {
"@type": "Answer",
"text": "DLPerf is optimized for common deep learning tasks like CNN training (ResNet, VGG, etc.), Transformer models, and standard computer vision. It's less accurate for unusual compute patterns and not optimized for non-ML workloads. For specialized workloads, benchmark on different GPUs yourself. While not perfect, DLPerf is more useful than raw TFLOPS for most ML tasks."
}
}
]
})
}}
/>
## Rental Type Overview
We currently offer two rental types:
### On-Demand (High Priority)
* Fixed price set by the host
* Runs as long as you want
* Cannot be interrupted
* More expensive but reliable
### Interruptible (Low Priority)
* You set a bid price
* Can be stopped by higher bids
* Saves 50-80% on costs
* Good for fault-tolerant workloads
## How do interruptible instances compare to AWS Spot?
* Both can be interrupted
* Both offer significant savings
* Vast.ai uses direct bidding (you control your bid price)
* AWS uses market pricing
* No 24-hour limit like GCE preemptible instances
* Vast.ai instances can run indefinitely if not outbid
## What happens when my interruptible instance loses the bid?
Your instance is stopped (killing running processes). Important considerations:
* **Save work frequently** to disk
* **Use cloud storage** for backups
* **Instance may wait long** to resume
* **Implement checkpointing** for long jobs
When using interruptible instances, always design your workload to handle interruptions gracefully.
DLPerf (Deep Learning Performance) is our scoring function that estimates performance for typical deep learning tasks. It predicts iterations/second for common tasks like training ResNet50 CNNs.
* V100: \~21 DLPerf
* 2080 Ti: \~14 DLPerf
* 1080 Ti: \~10 DLPerf
A V100 (21) is roughly 2x faster than a 1080 Ti (10) for typical deep learning.
### Is DLPerf accurate for my workload?
DLPerf is optimized for common deep learning tasks:
* ✅ CNN training (ResNet, VGG, etc.)
* ✅ Transformer models
* ✅ Standard computer vision
* ⚠️ Less accurate for unusual compute patterns
* ⚠️ Not optimized for non-ML workloads
For specialized workloads, benchmark on different GPUs yourself. While not perfect, DLPerf is more useful than raw TFLOPS for most ML tasks.
---
## Teams Overview
**URL:** llms-txt#teams-overview
**Contents:**
- Introduction
- Key Features:
- Getting Started with Teams
- Creating Multiple Teams
- Conclusion
Source: https://docs.vast.ai/documentation/teams/teams-overview
<script
type="application/ld+json"
dangerouslySetInnerHTML={{
__html: JSON.stringify({
"@context": "https://schema.org",
"@type": "TechArticle",
"headline": "Vast.ai Teams Overview",
"description": "An introduction to Vast.ai's Teams feature for collaborative GPU computing environments, including key features like resource management, consolidated billing, and access controls.",
"author": {
"@type": "Organization",
"name": "Vast.ai"
},
"datePublished": "2025-01-13",
"dateModified": "2025-04-04",
"articleSection": "Teams Documentation",
"keywords": ["teams", "collaboration", "GPU computing", "resource management", "billing", "access controls", "vast.ai"]
})
}}
/>
Vast.ai's Teams feature extends our powerful GPU compute services to collaborative environments. It allows multiple users to work together seamlessly in a shared space, managing serverless workers for AI Inference and GPU computing tasks collectively.
* **Collaborative Environment**: Enable teams to work together in a shared space, managing resources and tasks collectively.
* **Resource Allocation & Management**: Team managers can manage access among team members, ensuring efficient use of GPU workers. (In the future, resource allocation will also be in play)
* **Consolidated Billing**: Simplifies the financial management by consolidating usage and billing across the team.
* **Performance Metrics & Access Controls**: Each team member can access shared metrics and logs, with custom access controls set by team owners.
## Getting Started with Teams
Ready to create your first team? Check out our [Team Creation guide](https://docs.vast.ai/teams-quickstart) for a step-by-step tutorial on creating a team, inviting members, and assigning roles.
## Creating Multiple Teams
Teams are created as separate accounts, allowing multiple teams to be created by a single user. Note: This feature is unavailble for Legacy Teams (accounts that were converted into teams directly). Each team operates independently, with its own members, roles, and permissions. Users can seamlessly switch between their personal and team accounts using the Context Switcher.
* **Independent Team Management:** Each team has its own and members and roles.
* **Shared Resources:** Each team shares resources such as instances, templates, machines, and certain settings with all team members.
* **Separate Billing & Credits:** Teams maintain their own separate balance/credit, billing information, and payment history, separate from personal accounts.
* **Easy Switching:** Users can navigate between personal and team accounts without affecting their workflow.
The Teams feature at Vast.ai is designed to bring a new level of collaboration and efficiency to your GPU computing tasks. Additionally, by bringing together the power of our Autoscaling system with these collaborative tools, your team will be well-equipped to tackle all kinds of complex, dynamic workloads effectively.
---
## Test with start (no-op if already running)
**URL:** llms-txt#test-with-start-(no-op-if-already-running)
vastai start instance $CONTAINER_ID
---
## show workergroup
**URL:** llms-txt#show-workergroup
Source: https://docs.vast.ai/api-reference/serverless/show-workergroup
api-reference/openapi.json get /api/v0/workergroups/
Retrieves the list of workergroups associated with the authenticated user.
CLI Usage: `vastai show workergroups`
---
## Overview & Prerequisites
**URL:** llms-txt#overview-&-prerequisites
Vast.ai provides pre-made serverless templates ([vLLM](/documentation/serverless/vllm), [ComfyUI](/documentation/serverless/comfy-ui)) for popular use cases, and can be used with minimal setup effort. In this guide, we will setup a serverless engine to handle inference requests to a model using vLLM, namely Qwen3-8B , using the pre-made Vast.ai vLLM serverless template. This prebuilt template bundles vLLM with scaling logic so you don’t have to write custom orchestration code. By the end of this guide, you will be able to host the Qwen3-8B model with dynamic scaling to meet your demand.
This guide assumes knowledge of the Vast CLI. An introduction for it can be found [here](/cli/get-started).
Before we start, there are a few things you will need:
1. A Vast.ai account with credits
2. A Vast.ai [API Key](/documentation/reference/keys)
3. A HuggingFace account with a [read-access API token](https://huggingface.co/docs/hub/en/security-tokens)
---
## This is the backend instance of pyworker. Only one must be made which uses EndpointHandlers to process
**URL:** llms-txt#this-is-the-backend-instance-of-pyworker.-only-one-must-be-made-which-uses-endpointhandlers-to-process
---
## create template
**URL:** llms-txt#create-template
Source: https://docs.vast.ai/api-reference/templates/create-template
api-reference/openapi.json post /api/v0/template/
Creates a new template for launching instances. If an identical template already exists, returns the existing template instead of creating a duplicate.
CLI Usage: `vastai create template [options]`
---
## This ensures files can be properly synced between instances
**URL:** llms-txt#this-ensures-files-can-be-properly-synced-between-instances
WORKDIR /opt/workspace-internal/
---
## Export variables with underscores
**URL:** llms-txt#export-variables-with-underscores
env | grep _ >> /etc/environment
---
## Instance Portal
**URL:** llms-txt#instance-portal
**Contents:**
- What is the Instance Portal?
- Loading Process
- Landing Page
- Tunnels Page
- Instance Logs Page
- Tools & Help Page
- Configuration
- In Place Configuration
- Disable Default Applictions
- Named Tunnels
Source: https://docs.vast.ai/documentation/instances/connect/instance-portal
## What is the Instance Portal?
The Instance Portal is the first application you will see after clicking the 'Open' button to access an instance that has been loaded with a [Vast.ai Docker image](https://github.com/vast-ai/base-image/). Many of our recommended templates include the Instance Portal.
Any errrors loading the model will appear under the download button.
## 8) Start chatting!
Navigate to the Text generation tab to start chatting with the model. This is the most basic way to use Oobabooga, there are many other settings and things you can do with the interface.
## 9) Done? Destroy the instance
If you STOP the instance using the stop button, you will no longer pay the hourly GPU charges. **However you will still incur storage charges** because the data is still stored on the host machine. When you hit the START button to restart the instance, you are also not guaranteed that you can rent the GPU as someone else might have rented it while it was stopped.
To incur no other charges you have to DESTROY the instance using the trash can icon. **We recommend you destroy instances** so as not to incur storage charges while you are not using the system.
---
## Worker List
**URL:** llms-txt#worker-list
Source: https://docs.vast.ai/documentation/serverless/worker-list
Learn how to use the /get_endpoint_workers/ and /get_autogroup_workers/ endpoints to retrieve a list of GPU instances under an Endpoint and Worker Group. Understand the inputs, outputs, and examples for using the endpoints.
The `/get_endpoint_workers/` and `/get_autogroup_workers/` endpoints return a list of GPU instances under an Endpoint and \{\{Worker\_Group}}, respectively.
---
## Access Tokens
**URL:** llms-txt#access-tokens
CF_TUNNEL_TOKEN="" # Cloudflare Zero Trust token
CIVITAI_TOKEN="" # Access gated Civitai models
HF_TOKEN="" # Access gated HuggingFace models
---
## Video Generation Guide: Using ComfyUI on Vast.ai
**URL:** llms-txt#video-generation-guide:-using-comfyui-on-vast.ai
**Contents:**
- Prerequisites
- Setting Up Your Instance
- 1. Select the Right Template
- 2. **Edit your Template Configuration**
This guide will walk you through setting up and using ComfyUI for video generation on Vast.ai. ComfyUI provides a powerful node-based interface for creating advanced stable diffusion pipelines, making it ideal for video generation workflows.
* A Vast.ai account
* Basic familiarity with image or video generation models
* [(Optional) Read Jupyter guide](/documentation/instances/jupyter)
* [(Optional) SSH client installed on your local machine and SSH public key added in Account tab at cloud.vast.ai](/documentation/instances/sshscp)
## Setting Up Your Instance
### 1. Select the Right Template
Navigate to the Templates tab to view available templates. For video generation, we recommend searching for "ComfyUI" among the recommended templates. [The ComfyUI template](https://cloud.vast.ai/?ref_id=62897\&creator_id=62897\&name=ComfyUI) provides a powerful and modular stable diffusion GUI for designing and executing advanced pipelines using a graph/nodes/flowchart based interface.
**Template Features:**
* Access through both Jupyter and SSH
* Instance Portal
* Token-based authentication enabled by default
* Built-in provisioning script for models and custom nodes
### 2. **Edit your Template Configuration**
**Add/update these environment variables as needed:**
```bash Bash theme={null}
---
## show ssh-keys
**URL:** llms-txt#show-ssh-keys
Source: https://docs.vast.ai/api-reference/instances/show-ssh-keys
api-reference/openapi.json get /api/v0/instances/{instance_id}/ssh/
Retrieves the SSH keys associated with a specific instance.
CLI Usage: `vastai show ssh-keys `
---
## get endpoint workers
**URL:** llms-txt#get-endpoint-workers
Source: https://docs.vast.ai/api-reference/serverless/get-endpoint-workers
api-reference/openapi.json post /get_endpoint_workers/
Retrieves the current list and status of workers for a specific endpoint.
Useful for monitoring, debugging connectivity issues, and understanding resource usage.
CLI Usage: `vastai get endpoint workers `
---
## destroy team
**URL:** llms-txt#destroy-team
Source: https://docs.vast.ai/api-reference/team/destroy-team
api-reference/openapi.json delete /api/v0/team/
Deletes a team and all associated data including API keys, rights, invitations, memberships and metadata. The team owner's master API key is converted to a normal client key.
CLI Usage: `vastai destroy team`
---
## vLLM (LLM inference and serving)
**URL:** llms-txt#vllm-(llm-inference-and-serving)
**Contents:**
- Set Up Your Account
- Configure the vLLM Template
- Launch Your Instance
- vLLM API Usage
- Authentication Token
- Sample Curl Command
- vLLM with Python
- Further Reading
Source: https://docs.vast.ai/vllm-llm-inference-and-serving
Below is a guide for runing the [vLLM template](https://cloud.vast.ai/?creator_id=62897\&name=vLLM) on Vast. The template contains everything you need to get started, so you will only need to specify the model you want to serve and the corresponding vLLM configuration.
For simplicity, we have set the default template model as [DeepSeek-R1-Distill-Llama-8B](https://huggingface.co/deepseek-ai/DeepSeek-R1-Distill-Llama-8B) with a limited context window because it can run on a single GPU with only 21GB VRAM, but vLLM can scale easily over multiple GPUs to handle much larger models.
## Set Up Your Account
1. **Setup your Vast account and add credit:** Review the [quickstart guide](/documentation/get-started/quickstart) to get familar with the service if you do not have an account with credits loaded.
## Configure the vLLM Template
vLLM serve is launched automatically by the template and it will use the configuration defined in the environment variables `VLLM_MODEL` and `VLLM_ARGS`. Here's how you can set it up
1. Vist the [templates](https://cloud.vast.ai/templates/) page and find the recommended vLLM template.
2. Click the pencil button to open up the template editor.
3. If you would like to run a model other than the default, edit the `VLLM_MODEL`environment variable. The default value is `deepseek-ai/DeepSeek-R1-Distill-Llama-8B` which is a HuggingFace repository.
4. You can also set the arguments to pass to `vllm serve` by modifying the `VLLM_ARGS` environment variable. vLLM is highly configurable so it's a good idea to check the official documentation before changing anything here. All available startup arguments are listed in the [official vLLM documentation](https://docs.vllm.ai/en/latest/serving/engine_args.html).
5. Save the template. You will be able to find the version you have just modified in the templates page in the 'My Templates' section.
## Launch Your Instance
1. **Select the template** you just saved from the 'My Templates' section of the templates page.
2. Click the **Play icon** on this template to be taken to view the available offers.
3. Use the search filters to select a suitable GPU, ensuring that you have **sufficient VRAM** to load all of the model's layers to GPU.
4. From the search menu, ensure you have **sufficient disk space** for the model you plan to run. The disk slider is located under the template icon on the left hand column. Large models (e.g., 70B parameters) can require dozens of gigabytes of storage. For Deep Seek R1 8B, make sure to allocate over 17Gb of disk space using the slider.
5. Click **Rent** on a suitable instance and wait for it to load
Once the instance has loaded you'll be able to click the Open button to access the instance portal where you'll see links to the interactive vLLM API documentation and the Ray control panel.
As vLLM must download your model upon first run it may take some time before the API is available. You can follow the startup progress in the instance logs.
The vLLM API can be accessed programmatically at:
### Authentication Token
* When making requests, you must include an **Authorization** header with the token value of OPEN\_BUTTON\_TOKEN.
### Sample Curl Command
* -k: Allows curl to perform insecure SSL connections and transfers as Vast.ai uses a self-signed certificate.
* Replace **INSTANCE\_IP** and **EXTERNAL\_PORT** with the externally mapped port for 8000 from the IP button on the instance.
* Update the Authorization header value to match your **OPEN\_BUTTON\_TOKEN**. You can get that from any of the links in the Instance Portal or from the Open button on the instance card.
* Modify the prompt, model, and other fields (max\_tokens, temperature, etc.) as needed.
Although the instance starts the vllm serve function to provide an inference API, the template has been configured with Jupyter and SSH access so you can also interact with vLLM in code from your instance. To do this simply include the vllm modules at the top of your Python script:
Please see the template Readme file on our recommended vLLM template for advanced template configuration and other methods of connecting to and interacting with your instance.
**Examples:**
Example 1 (unknown):
```unknown
### Authentication Token
* When making requests, you must include an **Authorization** header with the token value of OPEN\_BUTTON\_TOKEN.
### Sample Curl Command
```
Example 2 (unknown):
```unknown
* -k: Allows curl to perform insecure SSL connections and transfers as Vast.ai uses a self-signed certificate.
* Replace **INSTANCE\_IP** and **EXTERNAL\_PORT** with the externally mapped port for 8000 from the IP button on the instance.
* Update the Authorization header value to match your **OPEN\_BUTTON\_TOKEN**. You can get that from any of the links in the Instance Portal or from the Open button on the instance card.
* Modify the prompt, model, and other fields (max\_tokens, temperature, etc.) as needed.
## vLLM with Python
Although the instance starts the vllm serve function to provide an inference API, the template has been configured with Jupyter and SSH access so you can also interact with vLLM in code from your instance. To do this simply include the vllm modules at the top of your Python script:
```
---
## Rental Types FAQ
**URL:** llms-txt#rental-types-faq
**Contents:**
- Rental Type Overview
- On-Demand (High Priority)
- Interruptible (Low Priority)
- How do interruptible instances compare to AWS Spot?
- What happens when my interruptible instance loses the bid?
- DLPerf Scoring
- What is DLPerf?
- Is DLPerf accurate for my workload?
Source: https://docs.vast.ai/documentation/reference/faq/rental-types
Understanding on-demand vs interruptible instances
<script
type="application/ld+json"
dangerouslySetInnerHTML={{
__html: JSON.stringify({
"@context": "https://schema.org",
"@type": "FAQPage",
"mainEntity": [
{
"@type": "Question",
"name": "What are the rental types available?",
"acceptedAnswer": {
"@type": "Answer",
"text": "We offer two rental types: On-Demand (High Priority) with fixed price set by the host, runs as long as you want, cannot be interrupted, more expensive but reliable. Interruptible (Low Priority) where you set a bid price, can be stopped by higher bids, saves 50-80% on costs, good for fault-tolerant workloads."
}
},
{
"@type": "Question",
"name": "How do interruptible instances compare to AWS Spot?",
"acceptedAnswer": {
"@type": "Answer",
"text": "Similarities: Both can be interrupted and offer significant savings. Differences: Vast.ai uses direct bidding (you control your bid price) while AWS uses market pricing. No 24-hour limit like GCE preemptible instances. Vast.ai instances can run indefinitely if not outbid."
}
},
{
"@type": "Question",
"name": "What happens when my interruptible instance loses the bid?",
"acceptedAnswer": {
"@type": "Answer",
"text": "Your instance is stopped (killing running processes). Important considerations: Save work frequently to disk, use cloud storage for backups, instance may wait long to resume, implement checkpointing for long jobs. Always design your workload to handle interruptions gracefully."
}
},
{
"@type": "Question",
"name": "What is DLPerf?",
"acceptedAnswer": {
"@type": "Answer",
"text": "DLPerf (Deep Learning Performance) is our scoring function that estimates performance for typical deep learning tasks. It predicts iterations/second for common tasks like training ResNet50 CNNs. Example scores: V100: ~21 DLPerf, 2080 Ti: ~14 DLPerf, 1080 Ti: ~10 DLPerf. A V100 (21) is roughly 2x faster than a 1080 Ti (10) for typical deep learning."
}
},
{
"@type": "Question",
"name": "Is DLPerf accurate for my workload?",
"acceptedAnswer": {
"@type": "Answer",
"text": "DLPerf is optimized for common deep learning tasks like CNN training (ResNet, VGG, etc.), Transformer models, and standard computer vision. It's less accurate for unusual compute patterns and not optimized for non-ML workloads. For specialized workloads, benchmark on different GPUs yourself. While not perfect, DLPerf is more useful than raw TFLOPS for most ML tasks."
}
}
]
})
}}
/>
## Rental Type Overview
We currently offer two rental types:
### On-Demand (High Priority)
* Fixed price set by the host
* Runs as long as you want
* Cannot be interrupted
* More expensive but reliable
### Interruptible (Low Priority)
* You set a bid price
* Can be stopped by higher bids
* Saves 50-80% on costs
* Good for fault-tolerant workloads
## How do interruptible instances compare to AWS Spot?
* Both can be interrupted
* Both offer significant savings
* Vast.ai uses direct bidding (you control your bid price)
* AWS uses market pricing
* No 24-hour limit like GCE preemptible instances
* Vast.ai instances can run indefinitely if not outbid
## What happens when my interruptible instance loses the bid?
Your instance is stopped (killing running processes). Important considerations:
* **Save work frequently** to disk
* **Use cloud storage** for backups
* **Instance may wait long** to resume
* **Implement checkpointing** for long jobs
When using interruptible instances, always design your workload to handle interruptions gracefully.
DLPerf (Deep Learning Performance) is our scoring function that estimates performance for typical deep learning tasks. It predicts iterations/second for common tasks like training ResNet50 CNNs.
* V100: \~21 DLPerf
* 2080 Ti: \~14 DLPerf
* 1080 Ti: \~10 DLPerf
A V100 (21) is roughly 2x faster than a 1080 Ti (10) for typical deep learning.
### Is DLPerf accurate for my workload?
DLPerf is optimized for common deep learning tasks:
* ✅ CNN training (ResNet, VGG, etc.)
* ✅ Transformer models
* ✅ Standard computer vision
* ⚠️ Less accurate for unusual compute patterns
* ⚠️ Not optimized for non-ML workloads
For specialized workloads, benchmark on different GPUs yourself. While not perfect, DLPerf is more useful than raw TFLOPS for most ML tasks.
---
## Teams Overview
**URL:** llms-txt#teams-overview
**Contents:**
- Introduction
- Key Features:
- Getting Started with Teams
- Creating Multiple Teams
- Conclusion
Source: https://docs.vast.ai/documentation/teams/teams-overview
<script
type="application/ld+json"
dangerouslySetInnerHTML={{
__html: JSON.stringify({
"@context": "https://schema.org",
"@type": "TechArticle",
"headline": "Vast.ai Teams Overview",
"description": "An introduction to Vast.ai's Teams feature for collaborative GPU computing environments, including key features like resource management, consolidated billing, and access controls.",
"author": {
"@type": "Organization",
"name": "Vast.ai"
},
"datePublished": "2025-01-13",
"dateModified": "2025-04-04",
"articleSection": "Teams Documentation",
"keywords": ["teams", "collaboration", "GPU computing", "resource management", "billing", "access controls", "vast.ai"]
})
}}
/>
Vast.ai's Teams feature extends our powerful GPU compute services to collaborative environments. It allows multiple users to work together seamlessly in a shared space, managing serverless workers for AI Inference and GPU computing tasks collectively.
* **Collaborative Environment**: Enable teams to work together in a shared space, managing resources and tasks collectively.
* **Resource Allocation & Management**: Team managers can manage access among team members, ensuring efficient use of GPU workers. (In the future, resource allocation will also be in play)
* **Consolidated Billing**: Simplifies the financial management by consolidating usage and billing across the team.
* **Performance Metrics & Access Controls**: Each team member can access shared metrics and logs, with custom access controls set by team owners.
## Getting Started with Teams
Ready to create your first team? Check out our [Team Creation guide](https://docs.vast.ai/teams-quickstart) for a step-by-step tutorial on creating a team, inviting members, and assigning roles.
## Creating Multiple Teams
Teams are created as separate accounts, allowing multiple teams to be created by a single user. Note: This feature is unavailble for Legacy Teams (accounts that were converted into teams directly). Each team operates independently, with its own members, roles, and permissions. Users can seamlessly switch between their personal and team accounts using the Context Switcher.
* **Independent Team Management:** Each team has its own and members and roles.
* **Shared Resources:** Each team shares resources such as instances, templates, machines, and certain settings with all team members.
* **Separate Billing & Credits:** Teams maintain their own separate balance/credit, billing information, and payment history, separate from personal accounts.
* **Easy Switching:** Users can navigate between personal and team accounts without affecting their workflow.
The Teams feature at Vast.ai is designed to bring a new level of collaboration and efficiency to your GPU computing tasks. Additionally, by bringing together the power of our Autoscaling system with these collaborative tools, your team will be well-equipped to tackle all kinds of complex, dynamic workloads effectively.
---
## Test with start (no-op if already running)
**URL:** llms-txt#test-with-start-(no-op-if-already-running)
vastai start instance $CONTAINER_ID
---
## show workergroup
**URL:** llms-txt#show-workergroup
Source: https://docs.vast.ai/api-reference/serverless/show-workergroup
api-reference/openapi.json get /api/v0/workergroups/
Retrieves the list of workergroups associated with the authenticated user.
CLI Usage: `vastai show workergroups`
---
## Overview & Prerequisites
**URL:** llms-txt#overview-&-prerequisites
Vast.ai provides pre-made serverless templates ([vLLM](/documentation/serverless/vllm), [ComfyUI](/documentation/serverless/comfy-ui)) for popular use cases, and can be used with minimal setup effort. In this guide, we will setup a serverless engine to handle inference requests to a model using vLLM, namely Qwen3-8B , using the pre-made Vast.ai vLLM serverless template. This prebuilt template bundles vLLM with scaling logic so you don’t have to write custom orchestration code. By the end of this guide, you will be able to host the Qwen3-8B model with dynamic scaling to meet your demand.
This guide assumes knowledge of the Vast CLI. An introduction for it can be found [here](/cli/get-started).
Before we start, there are a few things you will need:
1. A Vast.ai account with credits
2. A Vast.ai [API Key](/documentation/reference/keys)
3. A HuggingFace account with a [read-access API token](https://huggingface.co/docs/hub/en/security-tokens)
---
## This is the backend instance of pyworker. Only one must be made which uses EndpointHandlers to process
**URL:** llms-txt#this-is-the-backend-instance-of-pyworker.-only-one-must-be-made-which-uses-endpointhandlers-to-process
---
## create template
**URL:** llms-txt#create-template
Source: https://docs.vast.ai/api-reference/templates/create-template
api-reference/openapi.json post /api/v0/template/
Creates a new template for launching instances. If an identical template already exists, returns the existing template instead of creating a duplicate.
CLI Usage: `vastai create template [options]`
---
## This ensures files can be properly synced between instances
**URL:** llms-txt#this-ensures-files-can-be-properly-synced-between-instances
WORKDIR /opt/workspace-internal/
---
## Export variables with underscores
**URL:** llms-txt#export-variables-with-underscores
env | grep _ >> /etc/environment
---
## Instance Portal
**URL:** llms-txt#instance-portal
**Contents:**
- What is the Instance Portal?
- Loading Process
- Landing Page
- Tunnels Page
- Instance Logs Page
- Tools & Help Page
- Configuration
- In Place Configuration
- Disable Default Applictions
- Named Tunnels
Source: https://docs.vast.ai/documentation/instances/connect/instance-portal
## What is the Instance Portal?
The Instance Portal is the first application you will see after clicking the 'Open' button to access an instance that has been loaded with a [Vast.ai Docker image](https://github.com/vast-ai/base-image/). Many of our recommended templates include the Instance Portal.
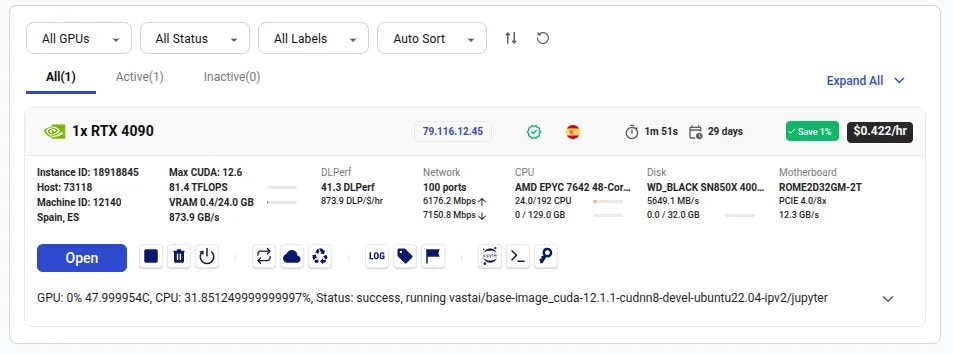 Upon opening the Instance Portal you will see a loading indicator for a short time.
 During this loading phase, a secure Cloudflare tunnel will be created for each of your instance's open ports and the browser will test whether these tunnel links are accessible.
The secure tunnel link will be formatted like this:
[https://four-randomly-selected-words.trycloudflare.com](https://four-randomly-selected-words.trycloudflare.com)
When the secure tunnel for port `1111` becomes accessible, the instance Portal will redirect to this link before revealing the full interface.
If it is taking too long for the tunnels to be ready, you will see the Instance Portal interface revealed at `http://ip_address:port_1111`
If you would like the default application URLs to be **https\://** rather than **http\://** you can add the following environment variable to your [account level environment variables](https://cloud.vast.ai/account/):
During this loading phase, a secure Cloudflare tunnel will be created for each of your instance's open ports and the browser will test whether these tunnel links are accessible.
The secure tunnel link will be formatted like this:
[https://four-randomly-selected-words.trycloudflare.com](https://four-randomly-selected-words.trycloudflare.com)
When the secure tunnel for port `1111` becomes accessible, the instance Portal will redirect to this link before revealing the full interface.
If it is taking too long for the tunnels to be ready, you will see the Instance Portal interface revealed at `http://ip_address:port_1111`
If you would like the default application URLs to be **https\://** rather than **http\://** you can add the following environment variable to your [account level environment variables](https://cloud.vast.ai/account/):
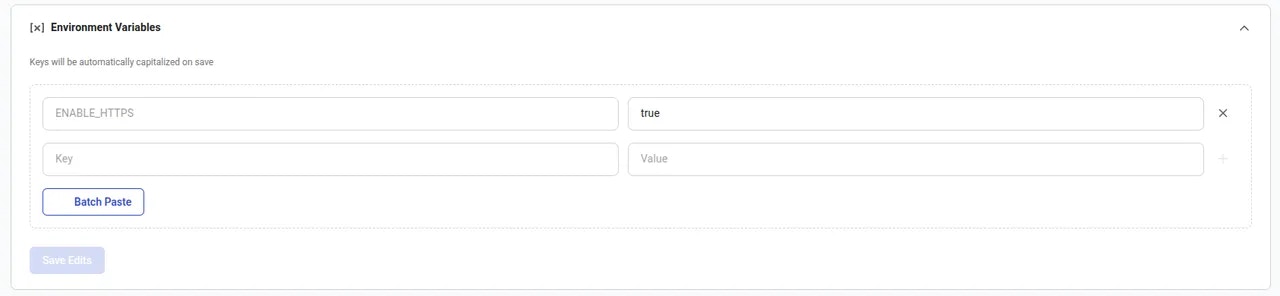 If you set this variable, it is important to add the Vast.ai Jupyter certificate to your local system to avoid browser warnings. See [this page](/documentation/instances/jupyter#1SmCz) for more information about installing the certificate.
The instance Portal has a simple interface to help you access other web applications that may be running in the instance. See the configuration section of this document for further details on application startup.
If you set this variable, it is important to add the Vast.ai Jupyter certificate to your local system to avoid browser warnings. See [this page](/documentation/instances/jupyter#1SmCz) for more information about installing the certificate.
The instance Portal has a simple interface to help you access other web applications that may be running in the instance. See the configuration section of this document for further details on application startup.
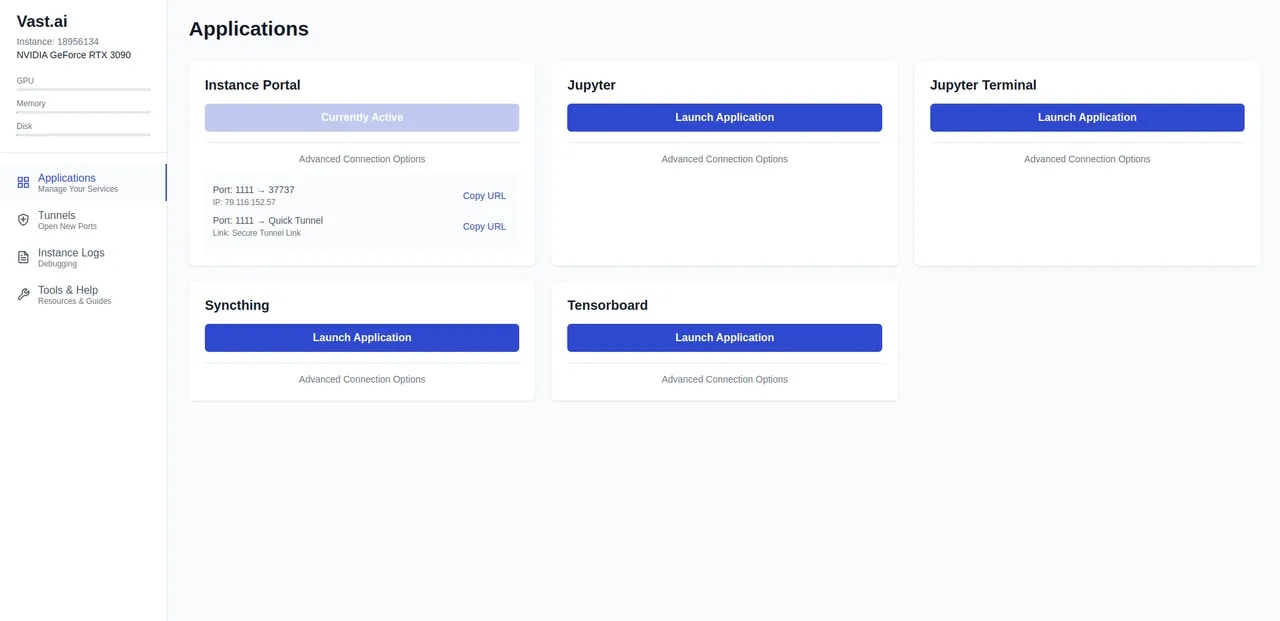 The large blue 'Launch Application' buttons will open your running applications in a new browser tab.
If a secure tunnel is available, the button will open the 'trycloudflare.com' link. If a tunnel is not yet available then the button will open the direct IP address link.
In both cases, a secure token is appended to the link to prevent unauthorised access to your applications.
You can also click the 'Advanced Connection Options' link to see all available connection methods.
Use this page to manage existing secure tunnels and add new tunnels to get access to ports that have not directly been opened in the instance
The large blue 'Launch Application' buttons will open your running applications in a new browser tab.
If a secure tunnel is available, the button will open the 'trycloudflare.com' link. If a tunnel is not yet available then the button will open the direct IP address link.
In both cases, a secure token is appended to the link to prevent unauthorised access to your applications.
You can also click the 'Advanced Connection Options' link to see all available connection methods.
Use this page to manage existing secure tunnels and add new tunnels to get access to ports that have not directly been opened in the instance
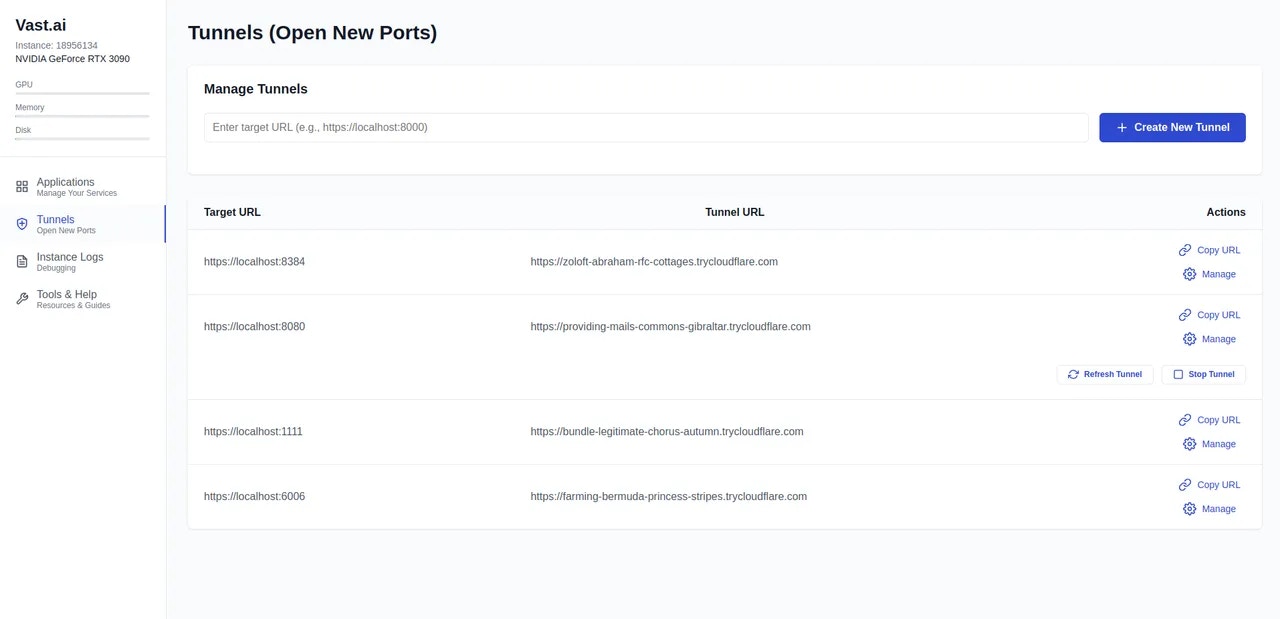 Use this interface to create links to applications you have started after configuring your instance. For example:
If you started an instance but later decide that you want to install some new software that listens on port `7860`, it will not be available directly if you did not configure the port when creating or editing the template.
Simply enter `http://localhost:7860` in the top input box and click the blue 'Create New Tunnel' button. A tunnel will be created for this port. It may take a moment to be available after creation.
You can use the 'Manage' buttons to stop existing tunnels or to refresh them if you want a new URL.
If you would like to link your own domain name to the instance then please see 'Named Tunnels' in the configuration section of this document.
## Instance Logs Page
The logs page will show a live stream of entries added to any `.log` files in the `/var/log/portal/` directory.
Use the 'Copy Logs' button to copy the currently displayed logging output to your clipboard. You can also use the 'Download Logs' button to download a zip file containing all files and directories in the `/var/log/` directory of your instance.
Use this interface to create links to applications you have started after configuring your instance. For example:
If you started an instance but later decide that you want to install some new software that listens on port `7860`, it will not be available directly if you did not configure the port when creating or editing the template.
Simply enter `http://localhost:7860` in the top input box and click the blue 'Create New Tunnel' button. A tunnel will be created for this port. It may take a moment to be available after creation.
You can use the 'Manage' buttons to stop existing tunnels or to refresh them if you want a new URL.
If you would like to link your own domain name to the instance then please see 'Named Tunnels' in the configuration section of this document.
## Instance Logs Page
The logs page will show a live stream of entries added to any `.log` files in the `/var/log/portal/` directory.
Use the 'Copy Logs' button to copy the currently displayed logging output to your clipboard. You can also use the 'Download Logs' button to download a zip file containing all files and directories in the `/var/log/` directory of your instance.
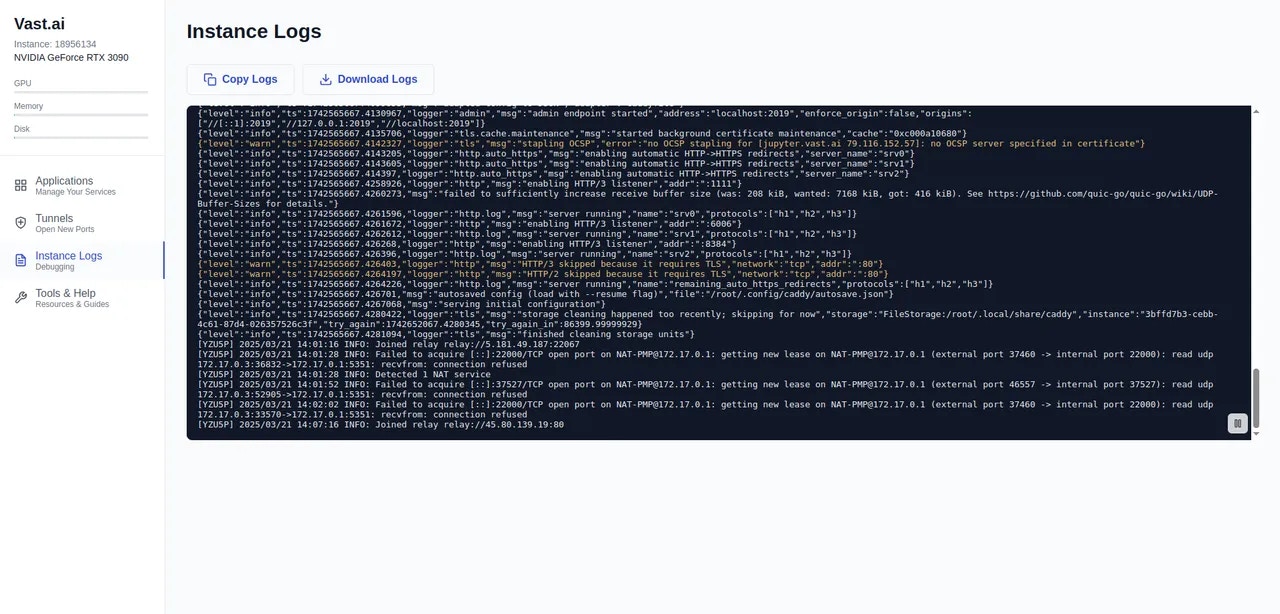 This page links to useful pages in the Vast.ai documentation to help you get the most from your instance.
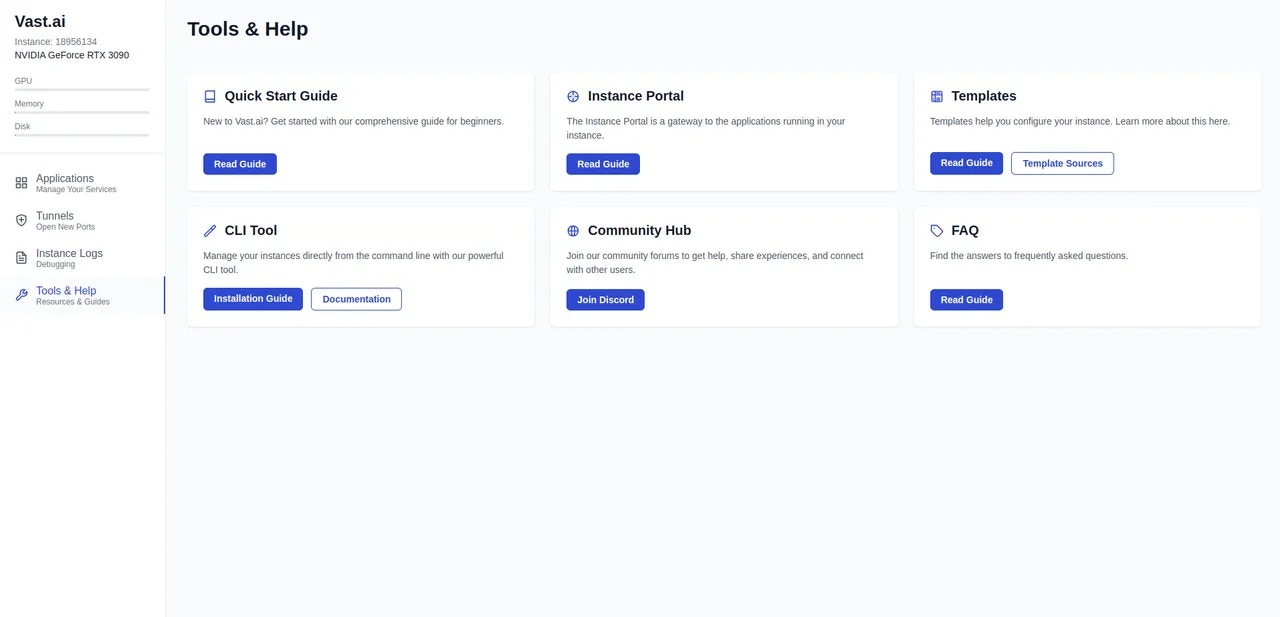 Initial configuration of the Instance Portal is via the `PORTAL_CONFIG` enviroment variable. The default value looks like this:
Each application is separated by a pipe (`|`) character, and each application option is separated by a colon (`:`)
For each application, we provide the following configuration options
* Interface to bind the application (currently always `localhost`)
* External port to proxy the application. This must have been added to the template. Eg. `-p 1111:1111`)
* Internal port where the running application will be bound
* URL path for links to open (often `/`)
* Application Name
Where the external port and internal port **are not equal**, a reverse proxy (Caddy) will make your application available on the external port.
Where the external port and internal port **are equal** the application will not be proxied to the external port but secure tunnel application links will be created.
### In Place Configuration
On first boot the configuration variable will be processed and is used to create the configuration file `/etc/portal.yaml`
You can edit this file in a running instance to add or remove applications from the interface.
Any applications you have added after the instance has started will not initially be reachable so you will need to reboot the instance.
### Disable Default Applictions
The startup scripts we use for the default applications we provide will read this configuration and will not start if they are not specified in the configuration file.
While the default behavior of the Instance Portal is to create 'quick' tunnels with a randomly assigned subdomain of 'trycloudflare.com', it is also possible to assign a pre-configured subdomain of your own domain name.
To do this you will need a free [Cloudflare Zero Trust](https://developers.cloudflare.com/cloudflare-one/connections/connect-networks/) account and a domain name linked to that account.
Here's an example of how your tunnel configuration might look in the Cloudflare dashboard:
Initial configuration of the Instance Portal is via the `PORTAL_CONFIG` enviroment variable. The default value looks like this:
Each application is separated by a pipe (`|`) character, and each application option is separated by a colon (`:`)
For each application, we provide the following configuration options
* Interface to bind the application (currently always `localhost`)
* External port to proxy the application. This must have been added to the template. Eg. `-p 1111:1111`)
* Internal port where the running application will be bound
* URL path for links to open (often `/`)
* Application Name
Where the external port and internal port **are not equal**, a reverse proxy (Caddy) will make your application available on the external port.
Where the external port and internal port **are equal** the application will not be proxied to the external port but secure tunnel application links will be created.
### In Place Configuration
On first boot the configuration variable will be processed and is used to create the configuration file `/etc/portal.yaml`
You can edit this file in a running instance to add or remove applications from the interface.
Any applications you have added after the instance has started will not initially be reachable so you will need to reboot the instance.
### Disable Default Applictions
The startup scripts we use for the default applications we provide will read this configuration and will not start if they are not specified in the configuration file.
While the default behavior of the Instance Portal is to create 'quick' tunnels with a randomly assigned subdomain of 'trycloudflare.com', it is also possible to assign a pre-configured subdomain of your own domain name.
To do this you will need a free [Cloudflare Zero Trust](https://developers.cloudflare.com/cloudflare-one/connections/connect-networks/) account and a domain name linked to that account.
Here's an example of how your tunnel configuration might look in the Cloudflare dashboard:
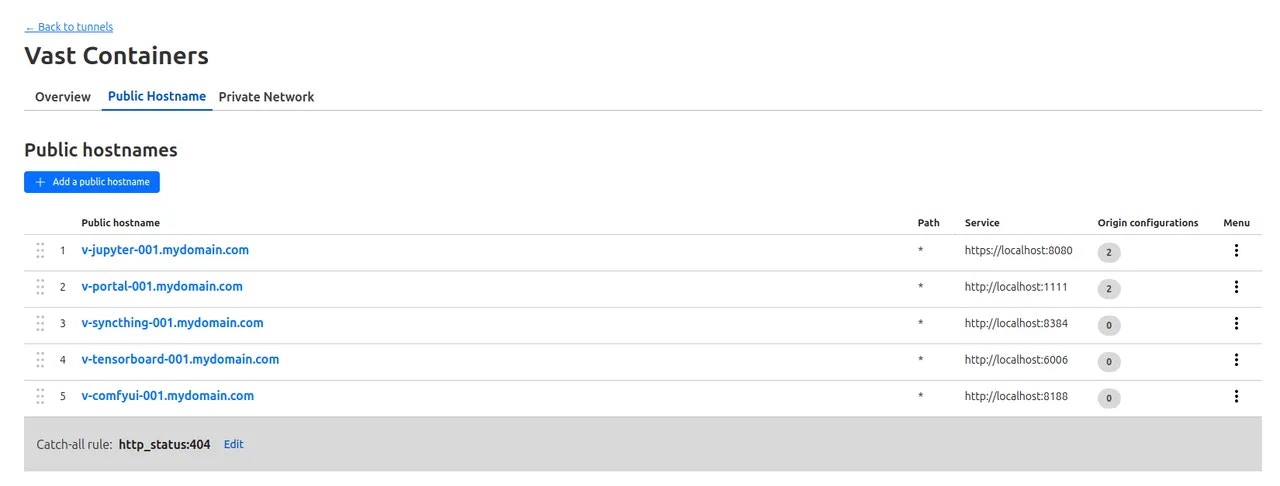 Once you have created your named tunnel, you can link it to your instance by providing the token associated with your tunnel as the value of environment variable `CF_TUNNEL_TOKEN`. You can save this in the 'Environment Variables' section in your [account settings](https://cloud.vast.ai/account/) or directly in the template if you are saving it privately.
If the instance is already running you can provide then token in the `/etc/environment` file and reboot the instance.
Named tunnels are generally more reliable than quick tunnels and will provide consistent URLs you can use to access applications running in an instance.
When named tunnels are configured, the 'Launch Application' button will direct to the named tunnel rather than the quick tunnel.
**Important: **Using the same tunnel token for multiple running instances is not possible and will cause broken links. If you need several instances then you will need a separate tunnel token for each of them.
---
## Hosting Overview
**URL:** llms-txt#hosting-overview
**Contents:**
- Account setup and hosting agreement
- Machine setup
- General concepts
- Listings and Contracts
- The Rental Contract
- Expiration date (end date)
- Min GPU
- On-demand Price
- Interruptible min price (optional)
- Reserved Discount Pricing Factor
Source: https://docs.vast.ai/documentation/host/hosting-overview
<script
type="application/ld+json"
dangerouslySetInnerHTML={{
__html: JSON.stringify({
"@context": "https://schema.org",
"@type": "FAQPage",
"mainEntity": [
{
"@type": "Question",
"name": "How do I host my machine(s) on Vast? How can I rent my PC?",
"acceptedAnswer": {
"@type": "Answer",
"text": "Hosting on Vast will require some Linux knowledge, as you will be maintaining a server. The setup guide is available at vast.ai/console/host/setup/. After the first paragraph of the guide there is a link to the hosting agreement. Once you agree, your account will be converted to a hosting account."
}
},
{
"@type": "Question",
"name": "How do I get an invoice?",
"acceptedAnswer": {
"@type": "Answer",
"text": "You can create an invoice by going to the Billing page, and then click the box for Include Charges under Generate Billing History."
}
},
{
"@type": "Question",
"name": "How do I check if my machine is listed?",
"acceptedAnswer": {
"@type": "Answer",
"text": "If your machine seems unlisted, try this command: vastai search offers 'machine_id=MACHINE_ID verified=any' to see if the CLI finds it. If there is a result, your machine is properly listed."
}
},
{
"@type": "Question",
"name": "Can you verify my machine?",
"acceptedAnswer": {
"@type": "Answer",
"text": "Verification is conducted in a randomized and automated fashion. We only run manual verification tests for datacenters and high end machines."
}
},
{
"@type": "Question",
"name": "How does verification work?",
"acceptedAnswer": {
"@type": "Answer",
"text": "Verification is mostly for higher end machines, mining rigs may never be verified. Verification is also based on supply vs demand and is machine/gpu specific. Right now the only machines which can expect fast verification are $10k+: H100 or A100 80GB should be tested quickly in a day or so. 8x4090, 4xA6000 should be tested in less than a week. For everything else we run more random auto verification roughly about once a week."
}
},
{
"@type": "Question",
"name": "How do I gain datacenter status?",
"acceptedAnswer": {
"@type": "Answer",
"text": "To apply for datacenter status we have a number of requirements. There is a minimum number of servers and the datacenter where the equipment is located will need to have a third party certification such as ISO 27001. Please read the complete requirement list and application instructions in the datacenter status documentation."
}
},
{
"@type": "Question",
"name": "How do I uninstall vast from my machine?",
"acceptedAnswer": {
"@type": "Answer",
"text": "You can use the uninstall script at https://s3.amazonaws.com/vast.ai/uninstall"
}
},
{
"@type": "Question",
"name": "Why is my machine not listed?",
"acceptedAnswer": {
"@type": "Answer",
"text": "You won't be able to see it on the GUI right away, but you can search using the CLI."
}
},
{
"@type": "Question",
"name": "How much can I make hosting on Vast?",
"acceptedAnswer": {
"@type": "Answer",
"text": "To get an understanding of prices, the best place is 500farms which is a third party website that monitors Vast listings at https://500.farm/vastai/charts/d/a6RgL05nk/vast-ai-stats"
}
},
{
"@type": "Question",
"name": "Why did the reliability on my machine decrease?",
"acceptedAnswer": {
"@type": "Answer",
"text": "If the machine loses connection or if there is a client instance that does not want to start the machine's reliability will drop."
}
}
]
})
}}
/>
Vast is a GPU marketplace. Hosts sell GPU resources on the marketplace. Hosts are responsible for:
* Setup: installing Ubuntu, creating disk partitions, installing NVIDIA drivers, opening network ports on the router and installing the Vast hosting software.
* Testing and troubleshooting all issues that can arise, such as driver conflicts, errors, bad GPUs, and bad network ports. **Vast does not offer support for getting your machine working.** There is a [host discord](https://discord.gg/hSuEbSQ4X8) with helpful members and the host-general channel is searchable for specific errors.
* Managing the listings and GPU offers for rentals, including setting pricing and end dates for the offers
* Planning for maintenance so that no client jobs are affected
## Account setup and hosting agreement
You must create a new account for hosting. If you are using Vast.ai as a client, do not use the same account. A single client and hosting account is not supported and you will quickly run into issues.
Once your account is created, open the [host setup guide](https://cloud.vast.ai/host/setup/). There is a link in the first paragraph to the hosting agreement. Read through the agreement. Once you accept, your account will then be converted to a hosting account. You will notice there is now a link to Machines in the navigation, along with some other changes. Your account can now list machines that are running the daemon software.
The [host setup guide](https://cloud.vast.ai/host/setup/) is the official documentation for setting up a machine on Vast.ai. Read through each section closely.
Common issues to check:
* Make sure to test the networking. Clients require open ports to directly connect to the machine for most jobs.
* Make sure to read the section on IOMMU if you have an AMD EPYC system.
* Make sure to disable auto-updates so that your machine doesn't drop a client job to update a driver.
Once you are ready to list your machine, come back to this guide to understand pricing and listing the rental contract.
Clients have high expectations coming from AWS or GCP.
As a host, plan to offer 100% uptime for your machine during the contracted period.
Expect that the GPU is going to be used at close to max capacity for the rental period.
Ensure that your Internet, power source and heat dissipation systems are all functioning and that you have thought through how hosting will affect each one of those items.
## Listings and Contracts
Hosts can create machine *listings* (offers) through the CLI command list machine or the machine control panel GUI on the host machines page.
The main listing parameters include:
* the pricing for GPUs,internet,storage
* the discount schedule param which determines the price difference between [on-demand](/documentation/instances/rental-types) and [reserved](/documentation/instances/rental-types) instances
* the min bid price for [interruptible](/documentation/instances/rental-types) instances
* the min\_gpu param controlling 'slicing' (explained below)
* the end/expiration date which determines how long the listing lasts
The listing offer is good until the end date.
When a client creates an instance on your machine, this creates a *contract* from your listing.
Once you list and get rental contracts, it is very important to honor the terms of the contract until the end date.
## The Rental Contract
By listing your machine or compute services, you are offering up a rental contract to potential clients.
Once a client accepts this listing, you and the client have entered into a rental agreement - a contract.
As the provider you are *promising* to provide the services as advertized in your listing:
* the provider must provide the hardware/services according to all the advertized specs
* the hardware can not be used for any other purposes
* the client's data must be isolated and protected according to the data protection policy
* the advertized services must be provided up until the end date (contract expiration)
For full details, see the [hosting agreement](https://cloud.vast.ai/host/agreement) and [Service Level Agreement](https://cloud.vast.ai/host/SLA_default).
### Expiration date (end date)
The expiration date can be set in the hosting interface by clicking on the date field under expiration and selecting a date for when the listing contract will expire.
The CLI command to 'list machine' includes a field for end date, which is the same date.
Make sure to set an end date **before** listing your machine, or else the listing will not expire.
The "client end date" is the date of the longest client contract on a given machine.
When clicking on the set pricing button, there is a min GPU field. The min GPU field allows you to set the smallest grouping of GPU rentals available on your machine in powers of 2, or down to 1. For example, if you have an 8X 3090 and set min gpu to 2, clients can create instances with 2, 4, or 8 GPUs. If you set min gpus to 1, then clients can make instances with 1, 2, 4 or 8 GPUs.
The on-demand price is the price per hour for the GPU rental. On demand rentals are the highest priority and if met will stop interruptibles.
### Interruptible min price (optional)
The interruptible price allows for the host to set the minimum interruptible price for a client to rent. Interruptibles work in a bidding system: clients set a bid price for their instance; the current highest bid is the instance that runs, the others are paused. [more info](https://vast.ai/faq#RentalTypes)
### Reserved Discount Pricing Factor
Reserved Instance Discounts are a feature for clients which allows them to rent machines over a long period of time at a reduced price. The Reserved Discount Pricing Factor represents the maximum possible discount a user can achieve on your machines.
The reserved discount pricing is determined by the hosts. If you intend to encourage a long term rental this is a factor that you may want to research. Use the filters in the UI to select reserved.
Once you have created your named tunnel, you can link it to your instance by providing the token associated with your tunnel as the value of environment variable `CF_TUNNEL_TOKEN`. You can save this in the 'Environment Variables' section in your [account settings](https://cloud.vast.ai/account/) or directly in the template if you are saving it privately.
If the instance is already running you can provide then token in the `/etc/environment` file and reboot the instance.
Named tunnels are generally more reliable than quick tunnels and will provide consistent URLs you can use to access applications running in an instance.
When named tunnels are configured, the 'Launch Application' button will direct to the named tunnel rather than the quick tunnel.
**Important: **Using the same tunnel token for multiple running instances is not possible and will cause broken links. If you need several instances then you will need a separate tunnel token for each of them.
---
## Hosting Overview
**URL:** llms-txt#hosting-overview
**Contents:**
- Account setup and hosting agreement
- Machine setup
- General concepts
- Listings and Contracts
- The Rental Contract
- Expiration date (end date)
- Min GPU
- On-demand Price
- Interruptible min price (optional)
- Reserved Discount Pricing Factor
Source: https://docs.vast.ai/documentation/host/hosting-overview
<script
type="application/ld+json"
dangerouslySetInnerHTML={{
__html: JSON.stringify({
"@context": "https://schema.org",
"@type": "FAQPage",
"mainEntity": [
{
"@type": "Question",
"name": "How do I host my machine(s) on Vast? How can I rent my PC?",
"acceptedAnswer": {
"@type": "Answer",
"text": "Hosting on Vast will require some Linux knowledge, as you will be maintaining a server. The setup guide is available at vast.ai/console/host/setup/. After the first paragraph of the guide there is a link to the hosting agreement. Once you agree, your account will be converted to a hosting account."
}
},
{
"@type": "Question",
"name": "How do I get an invoice?",
"acceptedAnswer": {
"@type": "Answer",
"text": "You can create an invoice by going to the Billing page, and then click the box for Include Charges under Generate Billing History."
}
},
{
"@type": "Question",
"name": "How do I check if my machine is listed?",
"acceptedAnswer": {
"@type": "Answer",
"text": "If your machine seems unlisted, try this command: vastai search offers 'machine_id=MACHINE_ID verified=any' to see if the CLI finds it. If there is a result, your machine is properly listed."
}
},
{
"@type": "Question",
"name": "Can you verify my machine?",
"acceptedAnswer": {
"@type": "Answer",
"text": "Verification is conducted in a randomized and automated fashion. We only run manual verification tests for datacenters and high end machines."
}
},
{
"@type": "Question",
"name": "How does verification work?",
"acceptedAnswer": {
"@type": "Answer",
"text": "Verification is mostly for higher end machines, mining rigs may never be verified. Verification is also based on supply vs demand and is machine/gpu specific. Right now the only machines which can expect fast verification are $10k+: H100 or A100 80GB should be tested quickly in a day or so. 8x4090, 4xA6000 should be tested in less than a week. For everything else we run more random auto verification roughly about once a week."
}
},
{
"@type": "Question",
"name": "How do I gain datacenter status?",
"acceptedAnswer": {
"@type": "Answer",
"text": "To apply for datacenter status we have a number of requirements. There is a minimum number of servers and the datacenter where the equipment is located will need to have a third party certification such as ISO 27001. Please read the complete requirement list and application instructions in the datacenter status documentation."
}
},
{
"@type": "Question",
"name": "How do I uninstall vast from my machine?",
"acceptedAnswer": {
"@type": "Answer",
"text": "You can use the uninstall script at https://s3.amazonaws.com/vast.ai/uninstall"
}
},
{
"@type": "Question",
"name": "Why is my machine not listed?",
"acceptedAnswer": {
"@type": "Answer",
"text": "You won't be able to see it on the GUI right away, but you can search using the CLI."
}
},
{
"@type": "Question",
"name": "How much can I make hosting on Vast?",
"acceptedAnswer": {
"@type": "Answer",
"text": "To get an understanding of prices, the best place is 500farms which is a third party website that monitors Vast listings at https://500.farm/vastai/charts/d/a6RgL05nk/vast-ai-stats"
}
},
{
"@type": "Question",
"name": "Why did the reliability on my machine decrease?",
"acceptedAnswer": {
"@type": "Answer",
"text": "If the machine loses connection or if there is a client instance that does not want to start the machine's reliability will drop."
}
}
]
})
}}
/>
Vast is a GPU marketplace. Hosts sell GPU resources on the marketplace. Hosts are responsible for:
* Setup: installing Ubuntu, creating disk partitions, installing NVIDIA drivers, opening network ports on the router and installing the Vast hosting software.
* Testing and troubleshooting all issues that can arise, such as driver conflicts, errors, bad GPUs, and bad network ports. **Vast does not offer support for getting your machine working.** There is a [host discord](https://discord.gg/hSuEbSQ4X8) with helpful members and the host-general channel is searchable for specific errors.
* Managing the listings and GPU offers for rentals, including setting pricing and end dates for the offers
* Planning for maintenance so that no client jobs are affected
## Account setup and hosting agreement
You must create a new account for hosting. If you are using Vast.ai as a client, do not use the same account. A single client and hosting account is not supported and you will quickly run into issues.
Once your account is created, open the [host setup guide](https://cloud.vast.ai/host/setup/). There is a link in the first paragraph to the hosting agreement. Read through the agreement. Once you accept, your account will then be converted to a hosting account. You will notice there is now a link to Machines in the navigation, along with some other changes. Your account can now list machines that are running the daemon software.
The [host setup guide](https://cloud.vast.ai/host/setup/) is the official documentation for setting up a machine on Vast.ai. Read through each section closely.
Common issues to check:
* Make sure to test the networking. Clients require open ports to directly connect to the machine for most jobs.
* Make sure to read the section on IOMMU if you have an AMD EPYC system.
* Make sure to disable auto-updates so that your machine doesn't drop a client job to update a driver.
Once you are ready to list your machine, come back to this guide to understand pricing and listing the rental contract.
Clients have high expectations coming from AWS or GCP.
As a host, plan to offer 100% uptime for your machine during the contracted period.
Expect that the GPU is going to be used at close to max capacity for the rental period.
Ensure that your Internet, power source and heat dissipation systems are all functioning and that you have thought through how hosting will affect each one of those items.
## Listings and Contracts
Hosts can create machine *listings* (offers) through the CLI command list machine or the machine control panel GUI on the host machines page.
The main listing parameters include:
* the pricing for GPUs,internet,storage
* the discount schedule param which determines the price difference between [on-demand](/documentation/instances/rental-types) and [reserved](/documentation/instances/rental-types) instances
* the min bid price for [interruptible](/documentation/instances/rental-types) instances
* the min\_gpu param controlling 'slicing' (explained below)
* the end/expiration date which determines how long the listing lasts
The listing offer is good until the end date.
When a client creates an instance on your machine, this creates a *contract* from your listing.
Once you list and get rental contracts, it is very important to honor the terms of the contract until the end date.
## The Rental Contract
By listing your machine or compute services, you are offering up a rental contract to potential clients.
Once a client accepts this listing, you and the client have entered into a rental agreement - a contract.
As the provider you are *promising* to provide the services as advertized in your listing:
* the provider must provide the hardware/services according to all the advertized specs
* the hardware can not be used for any other purposes
* the client's data must be isolated and protected according to the data protection policy
* the advertized services must be provided up until the end date (contract expiration)
For full details, see the [hosting agreement](https://cloud.vast.ai/host/agreement) and [Service Level Agreement](https://cloud.vast.ai/host/SLA_default).
### Expiration date (end date)
The expiration date can be set in the hosting interface by clicking on the date field under expiration and selecting a date for when the listing contract will expire.
The CLI command to 'list machine' includes a field for end date, which is the same date.
Make sure to set an end date **before** listing your machine, or else the listing will not expire.
The "client end date" is the date of the longest client contract on a given machine.
When clicking on the set pricing button, there is a min GPU field. The min GPU field allows you to set the smallest grouping of GPU rentals available on your machine in powers of 2, or down to 1. For example, if you have an 8X 3090 and set min gpu to 2, clients can create instances with 2, 4, or 8 GPUs. If you set min gpus to 1, then clients can make instances with 1, 2, 4 or 8 GPUs.
The on-demand price is the price per hour for the GPU rental. On demand rentals are the highest priority and if met will stop interruptibles.
### Interruptible min price (optional)
The interruptible price allows for the host to set the minimum interruptible price for a client to rent. Interruptibles work in a bidding system: clients set a bid price for their instance; the current highest bid is the instance that runs, the others are paused. [more info](https://vast.ai/faq#RentalTypes)
### Reserved Discount Pricing Factor
Reserved Instance Discounts are a feature for clients which allows them to rent machines over a long period of time at a reduced price. The Reserved Discount Pricing Factor represents the maximum possible discount a user can achieve on your machines.
The reserved discount pricing is determined by the hosts. If you intend to encourage a long term rental this is a factor that you may want to research. Use the filters in the UI to select reserved.
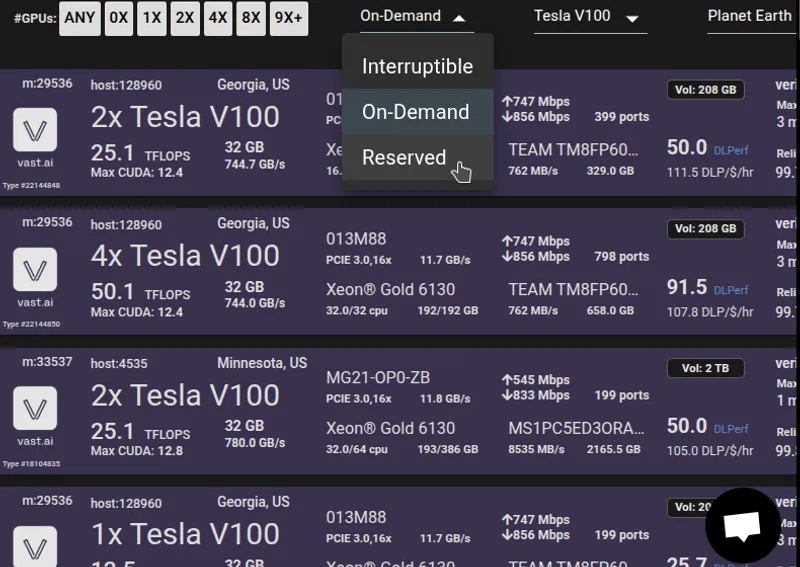 Once that filter is selected, hosts who offer that discount will become easily visible. Hover over the rental button to see the discount rates that are offered. The original vs. the updated price will be shown as denoted by a stikethrough in the original amount:
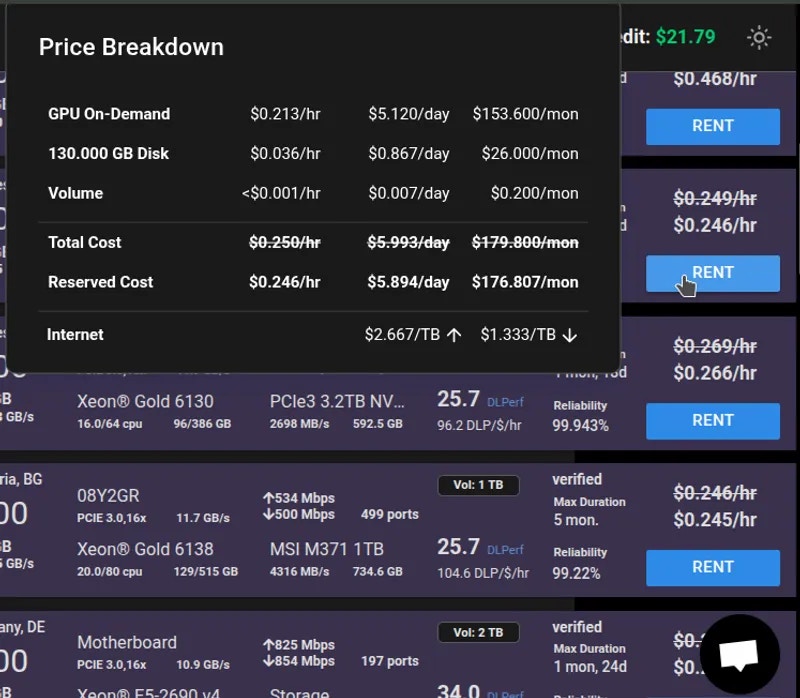 This discount is not static, but rather scales over time that the user rents the machine for. These values are determined by the individual host(s).
As a host, you can set this number yourself to 0 if you wish to opt out of this feature.
In addition to GPU contracts, hosts can now offer volume contracts on machines. This is a contract for storage space, and can be priced separately from GPU contracts. The space allocated for storage contracts is in the same pool of space as that for GPU contracts, meaning that space will not be subtracted from available offers unless it is in use.
When a client rents a volume listing, they rent a subset of the total space set for the listing, up to the total amount.
Allocated storage (that is, storage in use by client contracts) is subtracted from the total storage available on a machine, and split up proportionally among the machines GPUs in remaining ask contracts.
For example, on a machine with 1000Gb of disk available and 2 GPUs, a host can create a volume listing of up to 1000 Gb.
If they create a volume listing of 500 Gb, and it is not rented, the machine will be available for rent with 2 offers of 1xGPU 500Gb and 1 offer of 2xGPU 1000Gb.
If 200 Gb of the volume contract are rented, the GPU offers will reduce to 2 1xGPU 400Gb offers and 1 2xGPU 800Gb offer. The volume contract will still remain, as there is still available space, and update to offer 300Gb.
Similarly, if stored instances on the machine are taking up 800Gb, the volume offer will reduce to 200Gb.
If stored instances are only taking up 400 Gb, the volume offer will not update, as there is still enough space on the machine to cover the volume offer.
By default, volume offers will be listed with contract listings at the same disk price for half of the available space on the machine. Only rented space will impact the amount of space available for contract offers, not the space in the listing itself. You can control the amount of space listed with the -v CLI option, and the price of the space with the -z option.
Space is listed in Gigabytes, and price in \$/Gb/Month.
You can also directly list available space for volume contracts by running the `vastai list volume` command.
Volume offer end dates **must** align with normal contract offer end dates.
Setting an end date on a volume will not update if there is an existing contract offer.
Setting a contract offer end date will update volume offer end dates.
Volume contracts will be unlisted when the machine is unlisted. They can additionally be unlisted with the command:
### Out of sync Contracts
When a client deletes a volume, the space is automatically freed on the machine. If the machine is offline at this time, there is a job that runs hourly to free the space. If for some reason this is not working, or if you want to free the space automatically, you can run the command
This will automatically remove expired/deleted contracts from the machine, and available storage will update on offers.
## Extending contracts
To extend the current contracts for all clients on a given machine, change the expiration date to a later time with the same or lower pricing.
If you have raised the pricing, you cannot extend the current contract.
## Testing your own machine
It is vital to test your own machine to ensure the ports and software is running smoothly.
### Setup a separate client account
There are two supported ways to test your own machine. If you want to use the website GUI, you will need to setup a new account on a different email address, add a credit card and then find your machine and create instances on it like a client. This has the benefit of showing you the entire client experience. Testing the recommended Pytorch template is vital to ensure that SSH and Jupyter are working properly.
### Use the CLI (preferred)
The preferred method of testing your own machine is to run the [CLI](https://cloud.vast.ai/cli/). For Windows users, we suggest setting up [WSL](https://learn.microsoft.com/en-us/windows/wsl/install) which will require you to install Ubuntu on your Windows machine and change your bios settings to allow virtualization. Then you can start an Ubuntu terminal and run the CLI.
To rent your own machine you will need to first search the offers with your machine ID to find the ID and then create an instance using that ID. The show machine command will show all your connected machines.
Then for each machine id you will need to find the available instance IDs.
Replace 12345 with your actual machine ID in question.
You can see the number of available listings as well as information about the machine. This is the fastest way to also see all the offers listed for a given machine.
The website GUI stacks similar offers and so it is not easy to see all the listings for a given machine. That is not a problem for the CLI.
Take the ID number from the first column and use that to create a free instance on your own machine. This example loads the latest pytorch image along with both jupyter and ssh direct launch modes.
You can then look at your [instance tab](https://cloud.vast.ai/instances/) to make sure that pytorch loaded correctly along with jupyter and ssh. Click on the \<\_ button to get the ssh command to connect to the instance. Test the direct ssh command. Click on the open button to test jupyter. If the button is stuck "connecting" then there is most likely a problem with the port configuration on the router in front of the machine. Once finished, destroy the instance.
The proper way to perform maintenance on your machine is to wait until all active contracts have expired or the machine is vacant.
Unlisting will prevent new contracts from starting on the machine. However if you have a current client rental, you could set the end date to the client end date to allow for other clients to create instances on that machine that expire at the same date. Once the end date is reached, you can then unlist the machine and then perform maintenance.
For unplanned or unscheduled maintenance, use the CLI and the schedule maint command. That will notify the client that you **have** to take the machine down and that they should save their work. You can specify a date and duration.
To uninstall, use the Vast uninstall script located at [https://s3.amazonaws.com/vast.ai/uninstall](https://s3.amazonaws.com/vast.ai/uninstall).
### How do I host my machine(s) on Vast? How can I rent my PC?
Hosting on Vast will require some Linux knowledge, as you will be maintaining a server. Our setup guide is [here](https://vast.ai/console/host/setup/). After the first paragraph of the guide there is a link to the hosting agreement. Once you agree, your account will be converted to a hosting account. You can review our [FAQ](https://vast.ai/faq/#Hosting-General) that answers many of your hosting questions.
### How do I get an invoice?
You can create an invoice by going to the "Billing" page, and then click the box for "Include Charges" under "Generate Billing History".
### How do I check if my machine is listed?
If your machine seems unlisted, try this command `vastai search offers 'machine_id=MACHINE_ID verified=any'` to see if the CLI finds it. If there is a result, your machine is properly listed
### Can you verify my machine?
Verification is conducted in a randomized and automated fashion. We only run manual verification tests are for datacenters and high end machines.
### How does verification work?
Verification is mostly for higher end machines, mining rigs may never be verified.
Verification is also based on supply vs demand and is machine/gpu specific.
Right now the only machines which can expect fast verification are \$10k+:
H100 or A100 80GB - if not tested quickly in a day or so let us know.
8x4090, 4xA6000 - should be tested in less than a week, especially if you have a number of them
The only manual verification tests are for datacenters and high end machines.
For everything else we run more random auto verification roughly about once a week.
For datacenter partner inquiries email us at [contact@vast.ai](mailto:contact@vast.ai) directly.
### How do I gain datacenter status?
To apply for datacenter status we have a number of requirements. There is a minimum number of servers and the datacenter where the equipment is located will need to have a third party certification such as ISO 27001. Please read the complete requirement list and application instructions [here](/documentation/host/datacenter-status).
### How do I uninstall vast from my machine?
You can use the [uninstall script](https://s3.amazonaws.com/vast.ai/uninstall)
### Help I am getting this error on my machine?
For help with machine setup, specific questions about hardware, and for errors or other issues, go to [our discord](https://discord.gg/hSuEbSQ4X8).
### Why is my machine not listed?
You won't be able to see it on the GUI right away, but you can search using the [CLI](/documentation/instances/managing-instances).
### Can I send a message to a customer using my machine letting them know that I fixed an issue that they were having?
No, there is not an established process for hosts to message customers on Vast.
### I fear I will decrease my reliability from restarting my machine and potentially lose my verification.
Your machine's reliability does not directly affect your verification standing. Verification is independent of reliability. Though, whenever taking your machine offline and working on it you should procede with caution as it is easy to introduce new issues or errors that will cause your machine to be de-verified.
### How much can I make hosting on Vast?
To get an understanding of prices, the best place is 500farms which is a third party website that monitors Vast listings. The link is [here](https://500.farm/vastai/charts/d/a6RgL05nk/vast-ai-stats).
### Why did the reliability on my machine decrease?
If the machine loses connection or if there is a client instance that does not want to start the machine's reliability will drop.
### How do I minimize my reliability dropping?
Do not take your machine offline. If you must take your machine offline, minimize the time you have it offline. Note: reliability takes into account the average earnings of the machine, and machines with less earnings get penalized less from offline time.
### If someone has already used an image on my machine does redownload happen or is the system smart?
Prior images are cached.
### My storage for clients is somehow full. I just have a few jobs stored in my server and most of them are old and didn't delete once the job finished. A lot of them are really old, can I remove them to free up some space?
We suggest that you try cleaning up the docker build cache, as it sometimes frees up far more space than it claims. You can also clean up old unused images.
### I can't find my machine?
If your machine seems unlisted, try this command `vastai search offers 'machine_id=MACHINE_ID verified=any'` to see if the CLI finds it. If there is a result, your machine is properly listed.
### Why can't I see my machine on the Search page in the console?
There are over 10,000+ listings on Vast, and search only displays a small subset. You will usually not be able to find any one specific machine through most normal searches. This is expected and intentional behavior of our system. You can use `vastai search offers 'machine_id=MACHINE_ID verified=any'`, to see your machine's listing. If you want to get an understanding of the machines ranking above yours you can use very narrow filters to see what similar machines are ranking above you. For example, something like: `vastai search offers 'gpu_name=RTX_4090 cpu_ram>257 cpu_ram<258'` is a decently constrained search that will most likely include a given machine you are looking for (that fits these filters) amongst others that are similar. Keep in mind our Auto Sort that `search offers` defaults to is comprised of both ranking various factors as well as an element of randomness.
**Examples:**
Example 1 (unknown):
```unknown
You can also directly list available space for volume contracts by running the `vastai list volume` command.
```
Example 2 (unknown):
```unknown
Volume offer end dates **must** align with normal contract offer end dates.
Setting an end date on a volume will not update if there is an existing contract offer.
Setting a contract offer end date will update volume offer end dates.
Volume contracts will be unlisted when the machine is unlisted. They can additionally be unlisted with the command:
```
Example 3 (unknown):
```unknown
### Out of sync Contracts
When a client deletes a volume, the space is automatically freed on the machine. If the machine is offline at this time, there is a job that runs hourly to free the space. If for some reason this is not working, or if you want to free the space automatically, you can run the command
```
Example 4 (unknown):
```unknown
This will automatically remove expired/deleted contracts from the machine, and available storage will update on offers.
## Extending contracts
To extend the current contracts for all clients on a given machine, change the expiration date to a later time with the same or lower pricing.
If you have raised the pricing, you cannot extend the current contract.
## Testing your own machine
It is vital to test your own machine to ensure the ports and software is running smoothly.
### Setup a separate client account
There are two supported ways to test your own machine. If you want to use the website GUI, you will need to setup a new account on a different email address, add a credit card and then find your machine and create instances on it like a client. This has the benefit of showing you the entire client experience. Testing the recommended Pytorch template is vital to ensure that SSH and Jupyter are working properly.
### Use the CLI (preferred)
The preferred method of testing your own machine is to run the [CLI](https://cloud.vast.ai/cli/). For Windows users, we suggest setting up [WSL](https://learn.microsoft.com/en-us/windows/wsl/install) which will require you to install Ubuntu on your Windows machine and change your bios settings to allow virtualization. Then you can start an Ubuntu terminal and run the CLI.
To rent your own machine you will need to first search the offers with your machine ID to find the ID and then create an instance using that ID. The show machine command will show all your connected machines.
```
---
## Stable Diffusion
**URL:** llms-txt#stable-diffusion
**Contents:**
- 1) Setup your Vast account
- 2) Pick the webui template
- 3) Set your username and password
- 4) Pick a GPU offer
- 5) Connect and start making art
- 6) Upload other model checkpoints
- 7) Done? Destroy the instance
Source: https://docs.vast.ai/stable-diffusion
Stable Diffusion is a deep learning, text-to-image model that has been publicly released. It uses a variant of the diffusion model called latent diffusion. There are a few popular Open Source repos that create an easy to use web interface for typing in the prompts, managing the settings and seeing the images.
This guide will use the webui Github repo maintained by Automatic111 [here](https://github.com/AUTOMATIC1111/stable-diffusion-webui). The docker image used comes pre-loaded with Stable Diffusion v2.1, and it is possible to upload other models once you have the instance up and running. The recommend template will also setup Jupyter so you can use a web browser to download and upload files to the instance.
For all questions or issues with the web GUI, the project has a [readme](https://github.com/AUTOMATIC1111/stable-diffusion-webui) with links.
## 1) Setup your Vast account
The first thing to do if you are new to Vast is to create an account. Then head to the Billing tab and add credits. This is pretty self-explanatory. Vast uses Stripe to processes credit card payments and also accepts major cryptocurrencies through Crypto.com. \$20 should be enough to start. You pre-buy credits on Vast and then spend them down.
## 2) Pick the webui template
Click on the Change template button from the create page. Then click on the edit button on the Stable Diffusion template. We will need to set a username and password, so it is very important that we *edit* our template to set a username and password first.

## 3) Set your username and password
To set your username and password, go to the beginning of the Docker Options and add the arguments

You can also add the variables one by one in the env input

## 4) Pick a GPU offer
Stable Diffusion can only run on a 1X GPU so select 1X from the filter menu on the top nav. This will then update the interface to show 1X GPU offers. Note that some Stable Diffusion models require large amounts of GPU VRAM. For max settings, you want more GPU RAM. Use the GPU RAM slider in the interface to find offers with over 20GB. We recommend an A6000, A40 or A100 if you want to max the Stable Diffusion settings.
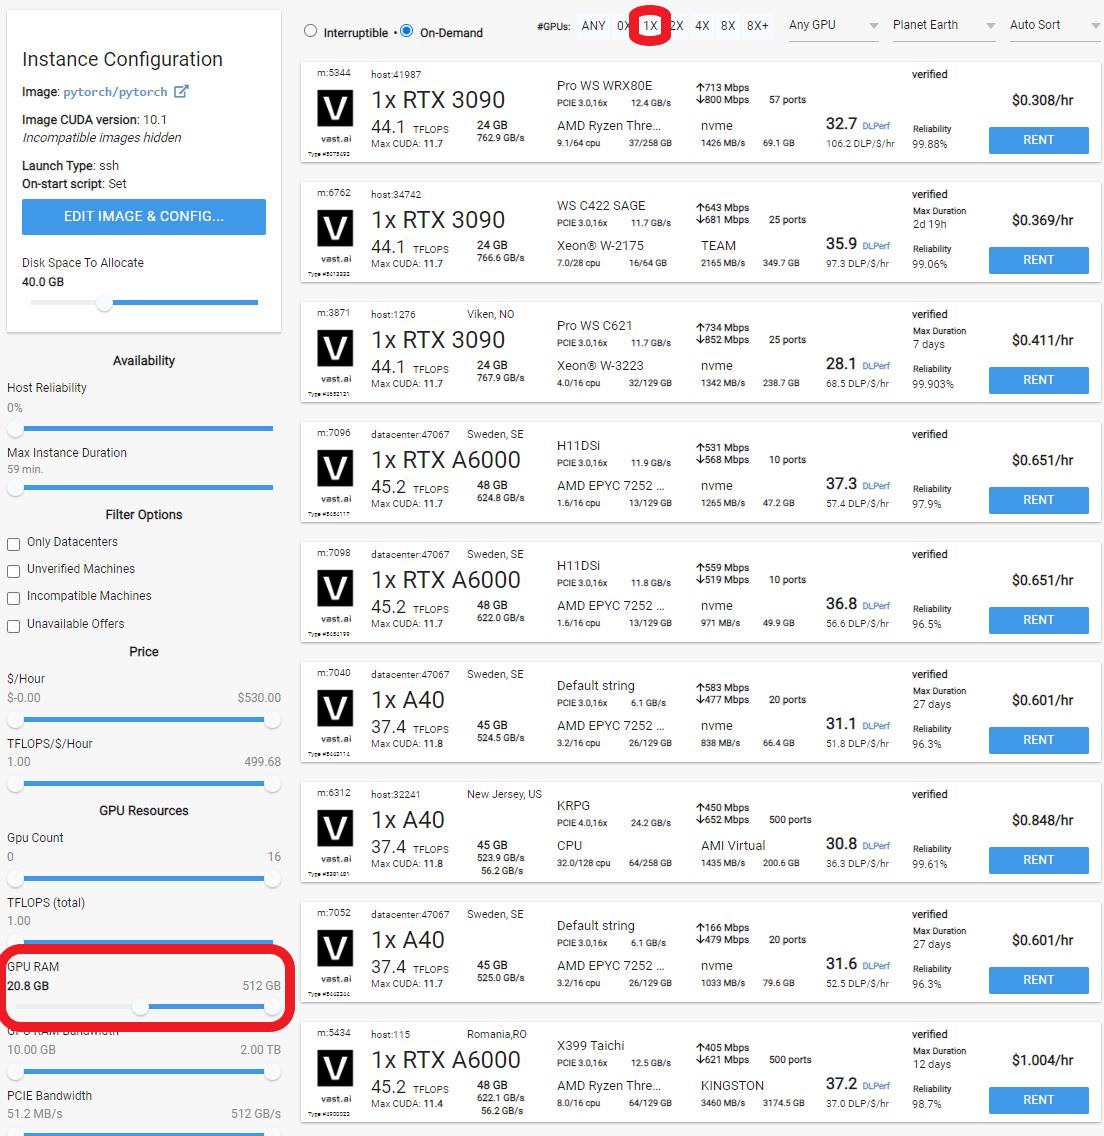
If available, it is also best to pick a host with the datacenter label, as those machines are more reliable.
Click the blue RENT button to spin up the instance. You can then watch progress from the instance tab.
## 5) Connect and start making art
The instance can take 3-5 minutes to start. Once it is ready a blue connect button will appear. Click on that to open the web gui.
**WARNING**
This discount is not static, but rather scales over time that the user rents the machine for. These values are determined by the individual host(s).
As a host, you can set this number yourself to 0 if you wish to opt out of this feature.
In addition to GPU contracts, hosts can now offer volume contracts on machines. This is a contract for storage space, and can be priced separately from GPU contracts. The space allocated for storage contracts is in the same pool of space as that for GPU contracts, meaning that space will not be subtracted from available offers unless it is in use.
When a client rents a volume listing, they rent a subset of the total space set for the listing, up to the total amount.
Allocated storage (that is, storage in use by client contracts) is subtracted from the total storage available on a machine, and split up proportionally among the machines GPUs in remaining ask contracts.
For example, on a machine with 1000Gb of disk available and 2 GPUs, a host can create a volume listing of up to 1000 Gb.
If they create a volume listing of 500 Gb, and it is not rented, the machine will be available for rent with 2 offers of 1xGPU 500Gb and 1 offer of 2xGPU 1000Gb.
If 200 Gb of the volume contract are rented, the GPU offers will reduce to 2 1xGPU 400Gb offers and 1 2xGPU 800Gb offer. The volume contract will still remain, as there is still available space, and update to offer 300Gb.
Similarly, if stored instances on the machine are taking up 800Gb, the volume offer will reduce to 200Gb.
If stored instances are only taking up 400 Gb, the volume offer will not update, as there is still enough space on the machine to cover the volume offer.
By default, volume offers will be listed with contract listings at the same disk price for half of the available space on the machine. Only rented space will impact the amount of space available for contract offers, not the space in the listing itself. You can control the amount of space listed with the -v CLI option, and the price of the space with the -z option.
Space is listed in Gigabytes, and price in \$/Gb/Month.
You can also directly list available space for volume contracts by running the `vastai list volume` command.
Volume offer end dates **must** align with normal contract offer end dates.
Setting an end date on a volume will not update if there is an existing contract offer.
Setting a contract offer end date will update volume offer end dates.
Volume contracts will be unlisted when the machine is unlisted. They can additionally be unlisted with the command:
### Out of sync Contracts
When a client deletes a volume, the space is automatically freed on the machine. If the machine is offline at this time, there is a job that runs hourly to free the space. If for some reason this is not working, or if you want to free the space automatically, you can run the command
This will automatically remove expired/deleted contracts from the machine, and available storage will update on offers.
## Extending contracts
To extend the current contracts for all clients on a given machine, change the expiration date to a later time with the same or lower pricing.
If you have raised the pricing, you cannot extend the current contract.
## Testing your own machine
It is vital to test your own machine to ensure the ports and software is running smoothly.
### Setup a separate client account
There are two supported ways to test your own machine. If you want to use the website GUI, you will need to setup a new account on a different email address, add a credit card and then find your machine and create instances on it like a client. This has the benefit of showing you the entire client experience. Testing the recommended Pytorch template is vital to ensure that SSH and Jupyter are working properly.
### Use the CLI (preferred)
The preferred method of testing your own machine is to run the [CLI](https://cloud.vast.ai/cli/). For Windows users, we suggest setting up [WSL](https://learn.microsoft.com/en-us/windows/wsl/install) which will require you to install Ubuntu on your Windows machine and change your bios settings to allow virtualization. Then you can start an Ubuntu terminal and run the CLI.
To rent your own machine you will need to first search the offers with your machine ID to find the ID and then create an instance using that ID. The show machine command will show all your connected machines.
Then for each machine id you will need to find the available instance IDs.
Replace 12345 with your actual machine ID in question.
You can see the number of available listings as well as information about the machine. This is the fastest way to also see all the offers listed for a given machine.
The website GUI stacks similar offers and so it is not easy to see all the listings for a given machine. That is not a problem for the CLI.
Take the ID number from the first column and use that to create a free instance on your own machine. This example loads the latest pytorch image along with both jupyter and ssh direct launch modes.
You can then look at your [instance tab](https://cloud.vast.ai/instances/) to make sure that pytorch loaded correctly along with jupyter and ssh. Click on the \<\_ button to get the ssh command to connect to the instance. Test the direct ssh command. Click on the open button to test jupyter. If the button is stuck "connecting" then there is most likely a problem with the port configuration on the router in front of the machine. Once finished, destroy the instance.
The proper way to perform maintenance on your machine is to wait until all active contracts have expired or the machine is vacant.
Unlisting will prevent new contracts from starting on the machine. However if you have a current client rental, you could set the end date to the client end date to allow for other clients to create instances on that machine that expire at the same date. Once the end date is reached, you can then unlist the machine and then perform maintenance.
For unplanned or unscheduled maintenance, use the CLI and the schedule maint command. That will notify the client that you **have** to take the machine down and that they should save their work. You can specify a date and duration.
To uninstall, use the Vast uninstall script located at [https://s3.amazonaws.com/vast.ai/uninstall](https://s3.amazonaws.com/vast.ai/uninstall).
### How do I host my machine(s) on Vast? How can I rent my PC?
Hosting on Vast will require some Linux knowledge, as you will be maintaining a server. Our setup guide is [here](https://vast.ai/console/host/setup/). After the first paragraph of the guide there is a link to the hosting agreement. Once you agree, your account will be converted to a hosting account. You can review our [FAQ](https://vast.ai/faq/#Hosting-General) that answers many of your hosting questions.
### How do I get an invoice?
You can create an invoice by going to the "Billing" page, and then click the box for "Include Charges" under "Generate Billing History".
### How do I check if my machine is listed?
If your machine seems unlisted, try this command `vastai search offers 'machine_id=MACHINE_ID verified=any'` to see if the CLI finds it. If there is a result, your machine is properly listed
### Can you verify my machine?
Verification is conducted in a randomized and automated fashion. We only run manual verification tests are for datacenters and high end machines.
### How does verification work?
Verification is mostly for higher end machines, mining rigs may never be verified.
Verification is also based on supply vs demand and is machine/gpu specific.
Right now the only machines which can expect fast verification are \$10k+:
H100 or A100 80GB - if not tested quickly in a day or so let us know.
8x4090, 4xA6000 - should be tested in less than a week, especially if you have a number of them
The only manual verification tests are for datacenters and high end machines.
For everything else we run more random auto verification roughly about once a week.
For datacenter partner inquiries email us at [contact@vast.ai](mailto:contact@vast.ai) directly.
### How do I gain datacenter status?
To apply for datacenter status we have a number of requirements. There is a minimum number of servers and the datacenter where the equipment is located will need to have a third party certification such as ISO 27001. Please read the complete requirement list and application instructions [here](/documentation/host/datacenter-status).
### How do I uninstall vast from my machine?
You can use the [uninstall script](https://s3.amazonaws.com/vast.ai/uninstall)
### Help I am getting this error on my machine?
For help with machine setup, specific questions about hardware, and for errors or other issues, go to [our discord](https://discord.gg/hSuEbSQ4X8).
### Why is my machine not listed?
You won't be able to see it on the GUI right away, but you can search using the [CLI](/documentation/instances/managing-instances).
### Can I send a message to a customer using my machine letting them know that I fixed an issue that they were having?
No, there is not an established process for hosts to message customers on Vast.
### I fear I will decrease my reliability from restarting my machine and potentially lose my verification.
Your machine's reliability does not directly affect your verification standing. Verification is independent of reliability. Though, whenever taking your machine offline and working on it you should procede with caution as it is easy to introduce new issues or errors that will cause your machine to be de-verified.
### How much can I make hosting on Vast?
To get an understanding of prices, the best place is 500farms which is a third party website that monitors Vast listings. The link is [here](https://500.farm/vastai/charts/d/a6RgL05nk/vast-ai-stats).
### Why did the reliability on my machine decrease?
If the machine loses connection or if there is a client instance that does not want to start the machine's reliability will drop.
### How do I minimize my reliability dropping?
Do not take your machine offline. If you must take your machine offline, minimize the time you have it offline. Note: reliability takes into account the average earnings of the machine, and machines with less earnings get penalized less from offline time.
### If someone has already used an image on my machine does redownload happen or is the system smart?
Prior images are cached.
### My storage for clients is somehow full. I just have a few jobs stored in my server and most of them are old and didn't delete once the job finished. A lot of them are really old, can I remove them to free up some space?
We suggest that you try cleaning up the docker build cache, as it sometimes frees up far more space than it claims. You can also clean up old unused images.
### I can't find my machine?
If your machine seems unlisted, try this command `vastai search offers 'machine_id=MACHINE_ID verified=any'` to see if the CLI finds it. If there is a result, your machine is properly listed.
### Why can't I see my machine on the Search page in the console?
There are over 10,000+ listings on Vast, and search only displays a small subset. You will usually not be able to find any one specific machine through most normal searches. This is expected and intentional behavior of our system. You can use `vastai search offers 'machine_id=MACHINE_ID verified=any'`, to see your machine's listing. If you want to get an understanding of the machines ranking above yours you can use very narrow filters to see what similar machines are ranking above you. For example, something like: `vastai search offers 'gpu_name=RTX_4090 cpu_ram>257 cpu_ram<258'` is a decently constrained search that will most likely include a given machine you are looking for (that fits these filters) amongst others that are similar. Keep in mind our Auto Sort that `search offers` defaults to is comprised of both ranking various factors as well as an element of randomness.
**Examples:**
Example 1 (unknown):
```unknown
You can also directly list available space for volume contracts by running the `vastai list volume` command.
```
Example 2 (unknown):
```unknown
Volume offer end dates **must** align with normal contract offer end dates.
Setting an end date on a volume will not update if there is an existing contract offer.
Setting a contract offer end date will update volume offer end dates.
Volume contracts will be unlisted when the machine is unlisted. They can additionally be unlisted with the command:
```
Example 3 (unknown):
```unknown
### Out of sync Contracts
When a client deletes a volume, the space is automatically freed on the machine. If the machine is offline at this time, there is a job that runs hourly to free the space. If for some reason this is not working, or if you want to free the space automatically, you can run the command
```
Example 4 (unknown):
```unknown
This will automatically remove expired/deleted contracts from the machine, and available storage will update on offers.
## Extending contracts
To extend the current contracts for all clients on a given machine, change the expiration date to a later time with the same or lower pricing.
If you have raised the pricing, you cannot extend the current contract.
## Testing your own machine
It is vital to test your own machine to ensure the ports and software is running smoothly.
### Setup a separate client account
There are two supported ways to test your own machine. If you want to use the website GUI, you will need to setup a new account on a different email address, add a credit card and then find your machine and create instances on it like a client. This has the benefit of showing you the entire client experience. Testing the recommended Pytorch template is vital to ensure that SSH and Jupyter are working properly.
### Use the CLI (preferred)
The preferred method of testing your own machine is to run the [CLI](https://cloud.vast.ai/cli/). For Windows users, we suggest setting up [WSL](https://learn.microsoft.com/en-us/windows/wsl/install) which will require you to install Ubuntu on your Windows machine and change your bios settings to allow virtualization. Then you can start an Ubuntu terminal and run the CLI.
To rent your own machine you will need to first search the offers with your machine ID to find the ID and then create an instance using that ID. The show machine command will show all your connected machines.
```
---
## Stable Diffusion
**URL:** llms-txt#stable-diffusion
**Contents:**
- 1) Setup your Vast account
- 2) Pick the webui template
- 3) Set your username and password
- 4) Pick a GPU offer
- 5) Connect and start making art
- 6) Upload other model checkpoints
- 7) Done? Destroy the instance
Source: https://docs.vast.ai/stable-diffusion
Stable Diffusion is a deep learning, text-to-image model that has been publicly released. It uses a variant of the diffusion model called latent diffusion. There are a few popular Open Source repos that create an easy to use web interface for typing in the prompts, managing the settings and seeing the images.
This guide will use the webui Github repo maintained by Automatic111 [here](https://github.com/AUTOMATIC1111/stable-diffusion-webui). The docker image used comes pre-loaded with Stable Diffusion v2.1, and it is possible to upload other models once you have the instance up and running. The recommend template will also setup Jupyter so you can use a web browser to download and upload files to the instance.
For all questions or issues with the web GUI, the project has a [readme](https://github.com/AUTOMATIC1111/stable-diffusion-webui) with links.
## 1) Setup your Vast account
The first thing to do if you are new to Vast is to create an account. Then head to the Billing tab and add credits. This is pretty self-explanatory. Vast uses Stripe to processes credit card payments and also accepts major cryptocurrencies through Crypto.com. \$20 should be enough to start. You pre-buy credits on Vast and then spend them down.
## 2) Pick the webui template
Click on the Change template button from the create page. Then click on the edit button on the Stable Diffusion template. We will need to set a username and password, so it is very important that we *edit* our template to set a username and password first.

## 3) Set your username and password
To set your username and password, go to the beginning of the Docker Options and add the arguments

You can also add the variables one by one in the env input

## 4) Pick a GPU offer
Stable Diffusion can only run on a 1X GPU so select 1X from the filter menu on the top nav. This will then update the interface to show 1X GPU offers. Note that some Stable Diffusion models require large amounts of GPU VRAM. For max settings, you want more GPU RAM. Use the GPU RAM slider in the interface to find offers with over 20GB. We recommend an A6000, A40 or A100 if you want to max the Stable Diffusion settings.

If available, it is also best to pick a host with the datacenter label, as those machines are more reliable.
Click the blue RENT button to spin up the instance. You can then watch progress from the instance tab.
## 5) Connect and start making art
The instance can take 3-5 minutes to start. Once it is ready a blue connect button will appear. Click on that to open the web gui.
**WARNING**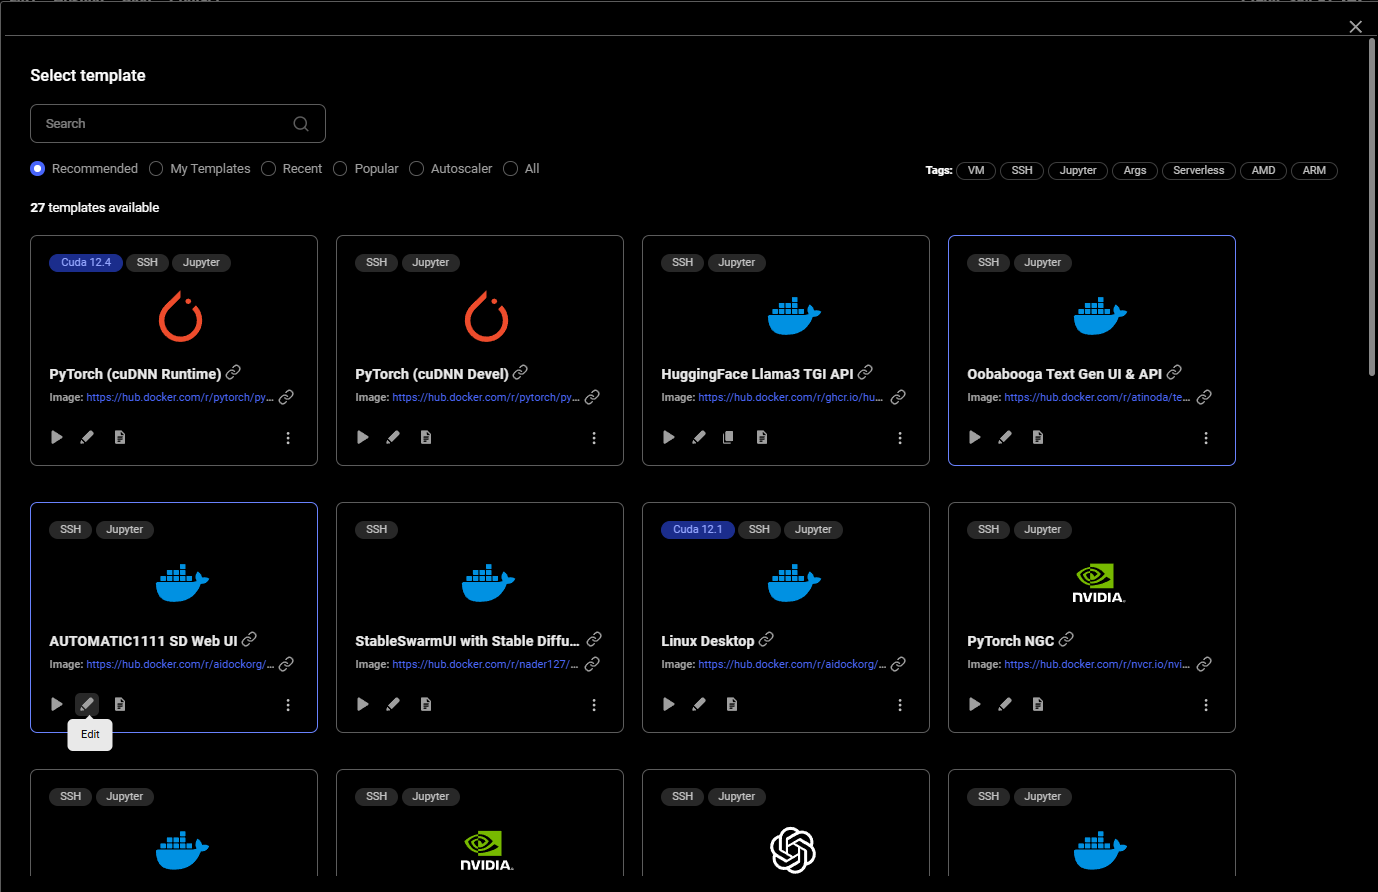
The web gui can take an additional 1-2 minutes to load. If you click on the connect button and get a blank page or error, simply wait 1-2 minutes and reload the page. And there you go! Please read the [Automatic111 documentation](https://github.com/AUTOMATIC1111/stable-diffusion-webui) for how the web GUI works. There are buttons to save and download the artwork, and also to zip it up. 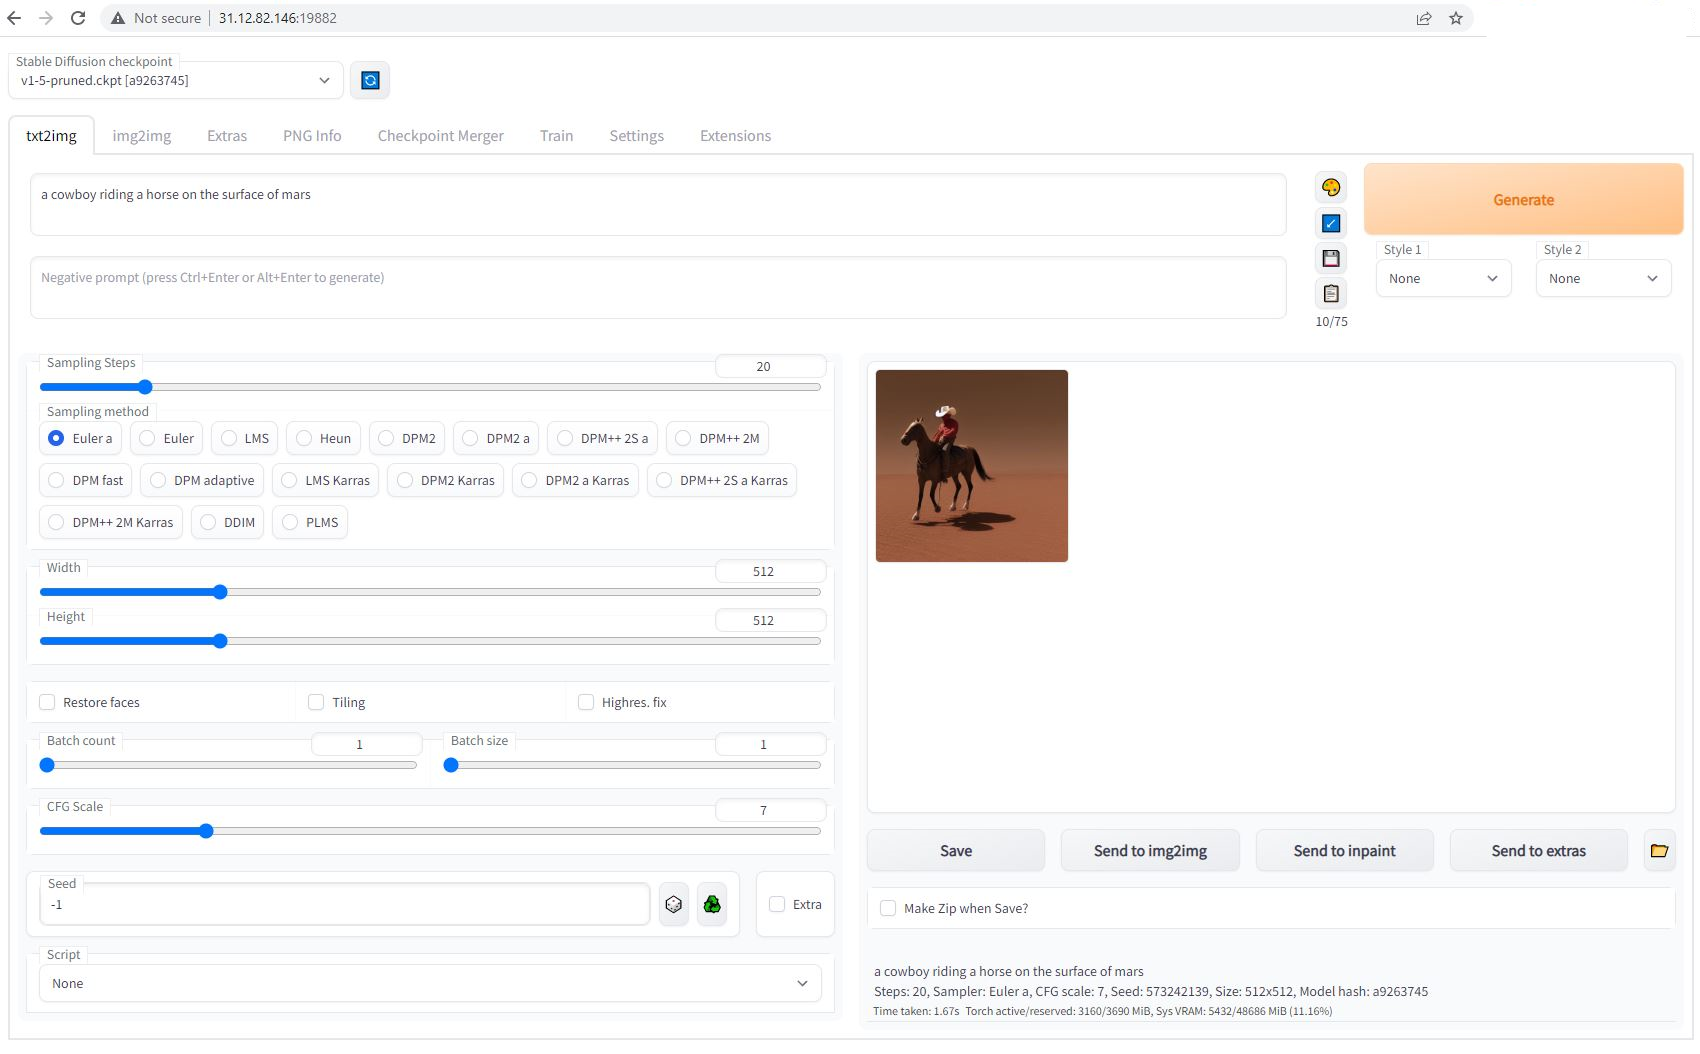 ## 6) Upload other model checkpoints The recommended template has both SSH and Jupyter HTTPS launch modes enabled. To upload a model checkpoint, the simplest way is to click on the Jupyter button on the instances card to open Jupyter and then to upload the .ckpt file to the /workspace/stable-diffusion-webui/models/Stable-diffusion directory. The Jupyter HTTPS launch mode will require you to install a certificate on your local machine. On macOS, this is not optional. Windows and Linux will show an error if the cert is not installed but there is a way to click through the error. To install the Jupyter certificate for Vast, follow the instructions [here](/documentation/instances/jupyter). To use SSH, you will need to create an SSH key and upload the public portion to Vast. Learn more [here](/documentation/instances/sshscp). For Linux/macOS users, SCP will also work. ## 7) Done? Destroy the instance After you generate your artwork and are done with the instance, you have a few options. If you STOP the instance using the stop button, you will no longer pay the hourly GPU charges. **However you will still incur storage charges** because the data is still stored on the host machine. When you hit the START button to restart the instance, you are also not guaranteed that you can rent the GPU as someone else might have rented it while it was stopped. We don't recommend that you stop an instance once done. To incur no other charges you have to DESTROY the instance using the trash can icon. **We recommend you destroy instances** so as not to incur storage charges while you are not using the system. --- ## Debugging **URL:** llms-txt#debugging **Contents:** - Worker Errors - Increasing Load - Decreasing Load Source: https://docs.vast.ai/documentation/serverless/debugging Learn how to debug issues with Vast.ai Serverless. Understand the worker errors, increasing and decreasing load, and how to check the instance logs. The [Vast PyWorker](https://github.com/vast-ai/pyworker/tree/main) framework automatically detects some errors, while others may cause the instance to timeout. When an error is detected, the Serverless system will destroy or reboot the instance. To manually debug an issue, check the instance logs available via the logs button on the instance page in the GUI. All PyWorker issues will be logged here. If further investigation is needed, ssh into the instance and find the model backend logs location by running: To handle high load on instances: * **Set **`test_workers`** high**: Create more instances initially for Worker Groups with anticipated high load. * **Adjust **`cold_workers`: Keep enough workers around to prevent them from being destroyed during low initial load. * **Increase **`cold_mult`: Quickly create instances by predicting higher future load based on current high load. Adjust back down once enough instances are created. * **Check **`max_workers`: Ensure this parameter is set high enough to create the necessary number of workers. To manage decreasing load: * **Reduce **`cold_workers`: Stop instances quickly when the load decreases to avoid unnecessary costs. The serverless system will handle this automatically, but manual adjustment can help if needed. **Examples:** Example 1 (unknown): ```unknown And PyWorker logs: ``` --- ## Copy entire directory **URL:** llms-txt#copy-entire-directory **Contents:** - SFTP (SSH File Transfer Protocol) scp -P -r myfolder/ root@:/workspace/ bash Bash theme={null} **Examples:** Example 1 (unknown): ```unknown ### SFTP (SSH File Transfer Protocol) * **What it is:** Interactive file transfer program with a full command set * **Best for:** Managing files, browsing directories, multiple operations * **Usage:** CLI or GUI tools available **Example:** ``` --- ## Getting Started With Serverless **URL:** llms-txt#getting-started-with-serverless Source: https://docs.vast.ai/documentation/serverless/getting-started-with-serverless Learn how to get started with Vast.ai Serverless. Understand the prerequisites, setup process, and how to use the serverless engine. For users not familiar with Vast.ai's Serverless engine, we recommend starting with the [Serverless Architecture documentation](/documentation/serverless/architecture). It will be helpful in understanding how the system operates, processes requests, and manages resources. --- ## Infinity Embeddings **URL:** llms-txt#infinity-embeddings Source: https://docs.vast.ai/infinity-embeddings --- ## Blender in the Cloud **URL:** llms-txt#blender-in-the-cloud **Contents:** - Step 1 - Open Blender in the Cloud Template - Step 2 - \[Optional] Check the Secure Cloud box - Step 3 - Filter for a GPU that you feel best suits your needs - Step 4 - Choose a GPU by Clicking "RENT" - Step 5 - Use Jupyter Direct HTTPS Launch Mode - Step 6 - Open Blender - Step 7 - Upload .blend file(s) through Jupyter Notebook - Step 8 - Open .blend file in Blender - Step 9 - Work on Your .blend file in Blender! - Step 10 - Download files as needed from Jupyter Notebook Source: https://docs.vast.ai/blender-in-the-cloud Blender is a free, open source 3D creation suite. It can be used to create animated films, visual effects, art, 3D-printed models, motion graphics, interactive 3D applications, virtual reality, and video games. It supports the entirety of the 3D pipeline—modeling, rigging, animation, simulation, rendering, compositing and motion tracking, even video editing and game creation. You can find more information about Blender at [blender.org](https://www.blender.org/). Animators, game developers, 3D modelers, visual effects artists, architects, and product designers are some people who use Blender. GPUs can speed up rendering in Blender. ## Step 1 - Open Blender in the Cloud Template Click on this link [Blender in the Cloud Template](https://cloud.vast.ai?ref_id=142678\&template_id=5846e4535b1ff5db56024c1c0711a0ce) to select the kasmweb/blender in the cloud template. ## Step 2 - \[Optional] Check the Secure Cloud box You can narrow your search results to only data center machines if you want insured security standards from our trusted datacenters. 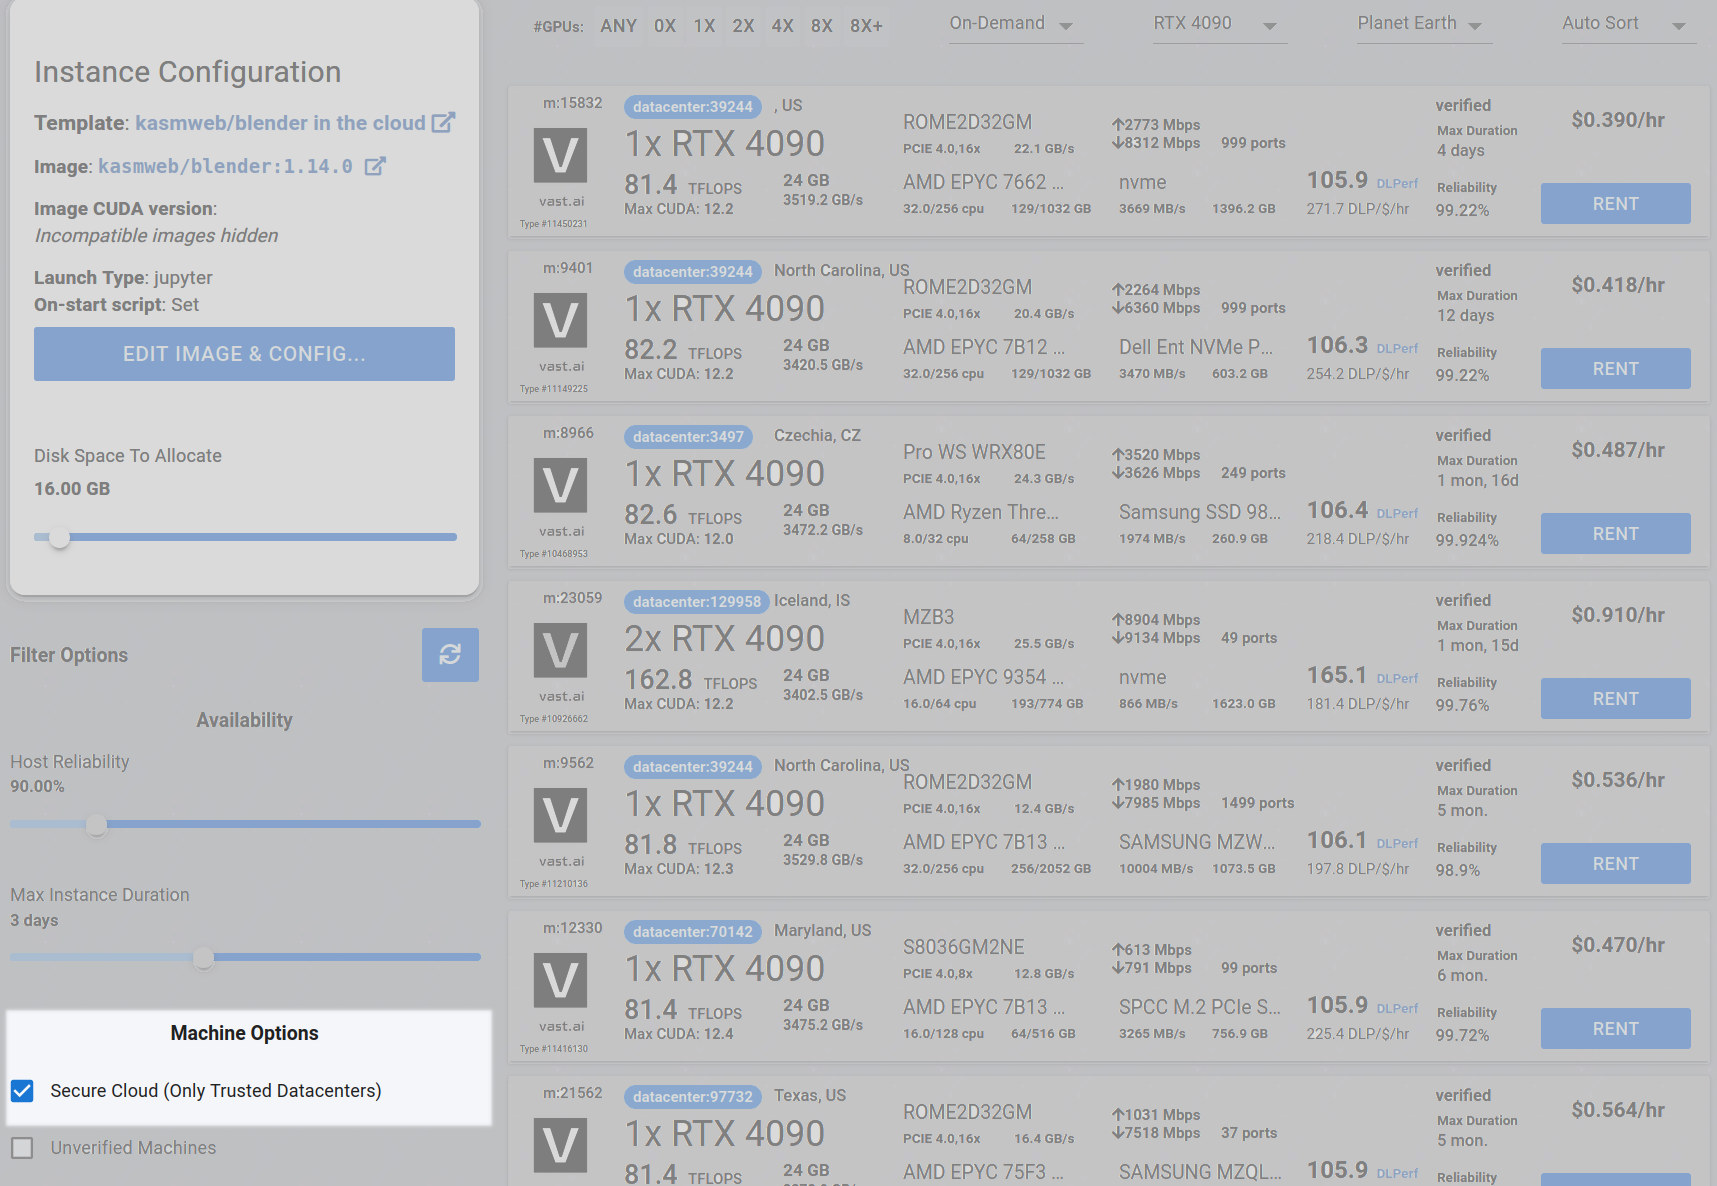 ## Step 3 - Filter for a GPU that you feel best suits your needs If you have questions about which GPU to choose, there is some data around NVIDIA Geforce RTX 4090 giving the best render speed with Blender. You can find other GPUs that work well with Blender here [Blender GPU Benchmarks](https://opendata.blender.org/benchmarks/query/?group_by=device_name\&blender_version=3.6.0). You can also find other options by searching on Google or asking ChatGPT. The version of Blender running within Vast while using the template linked above at the time of this writing is 3.6.2. Go to the GPUs filter and check the box for RTX 4090 or another GPU instance. 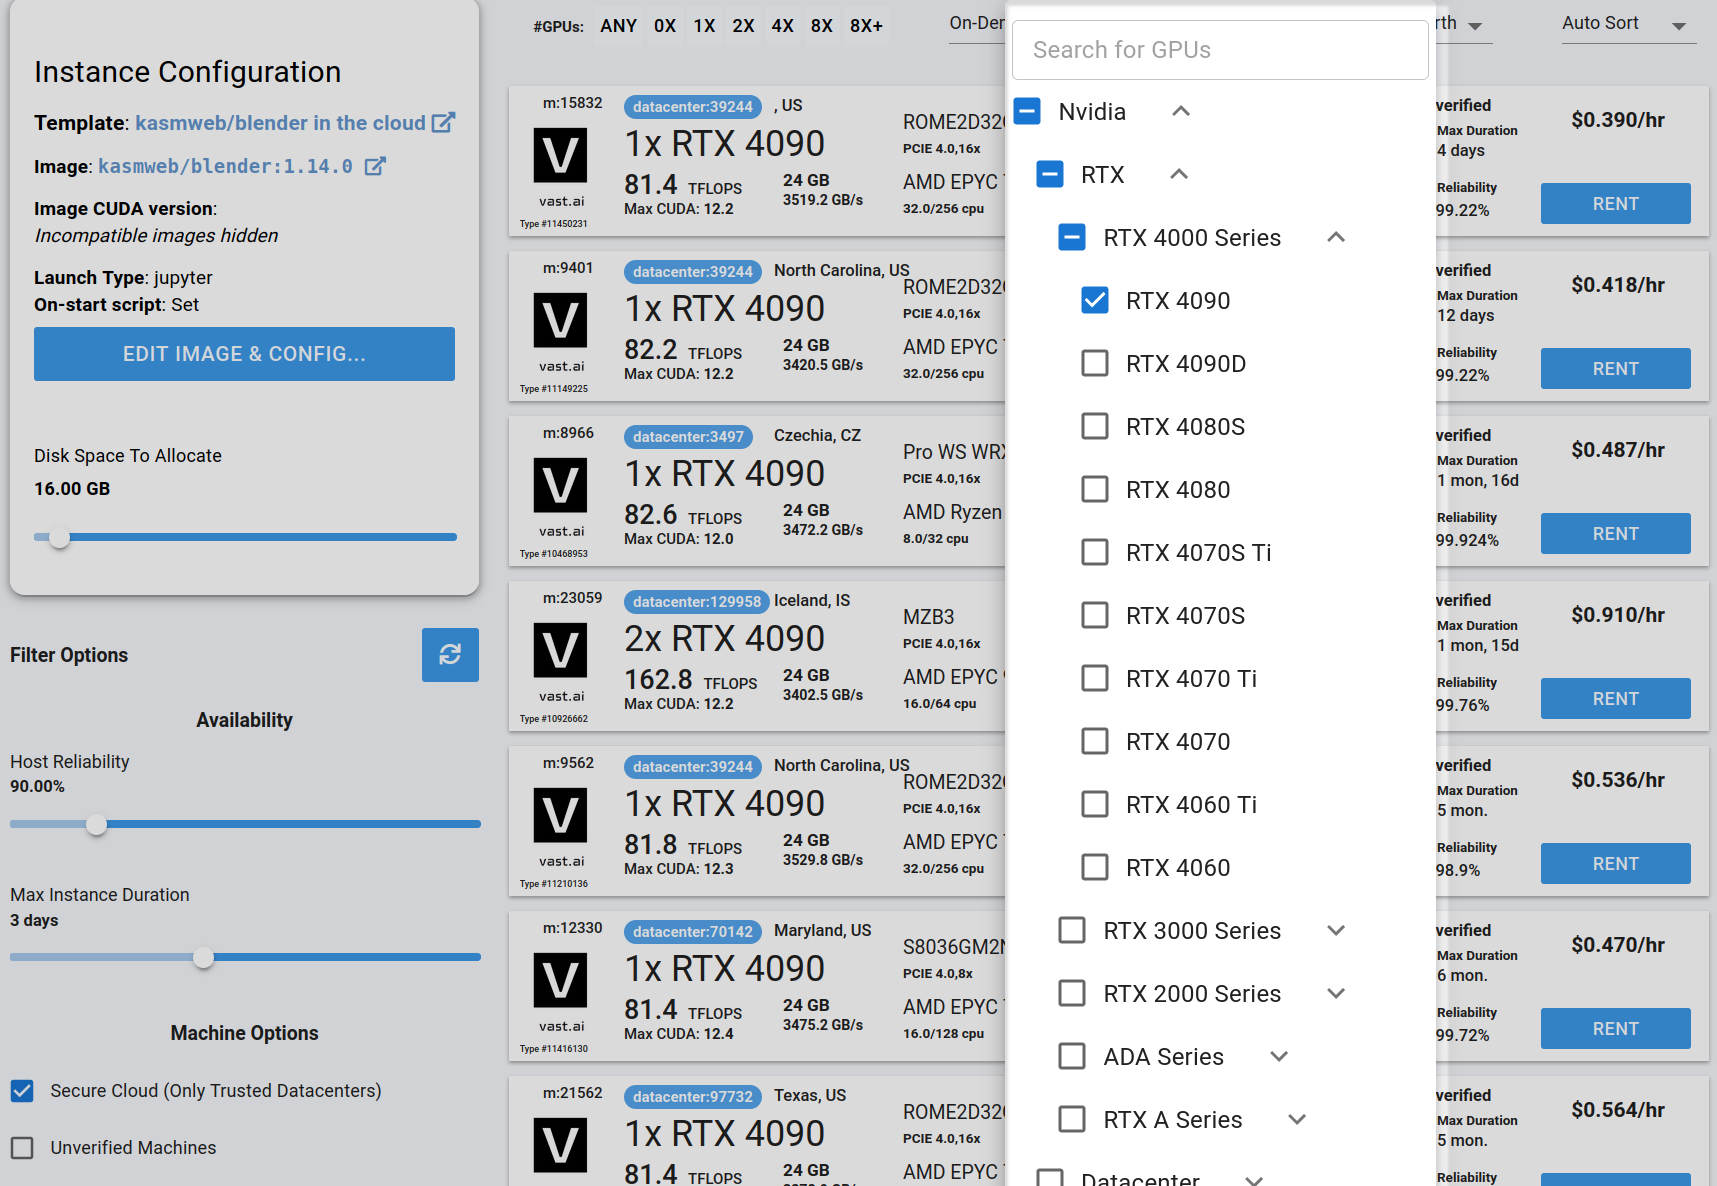 ## Step 4 - Choose a GPU by Clicking "RENT" Choose a GPU that meets your budget, desired reliability %, and other constraints by clicking "RENT". GPUs are sorted by a complex proprietary algorithm that aims to give users the best machines for their value by default. You can filter GPUs further per your requirements if desired. 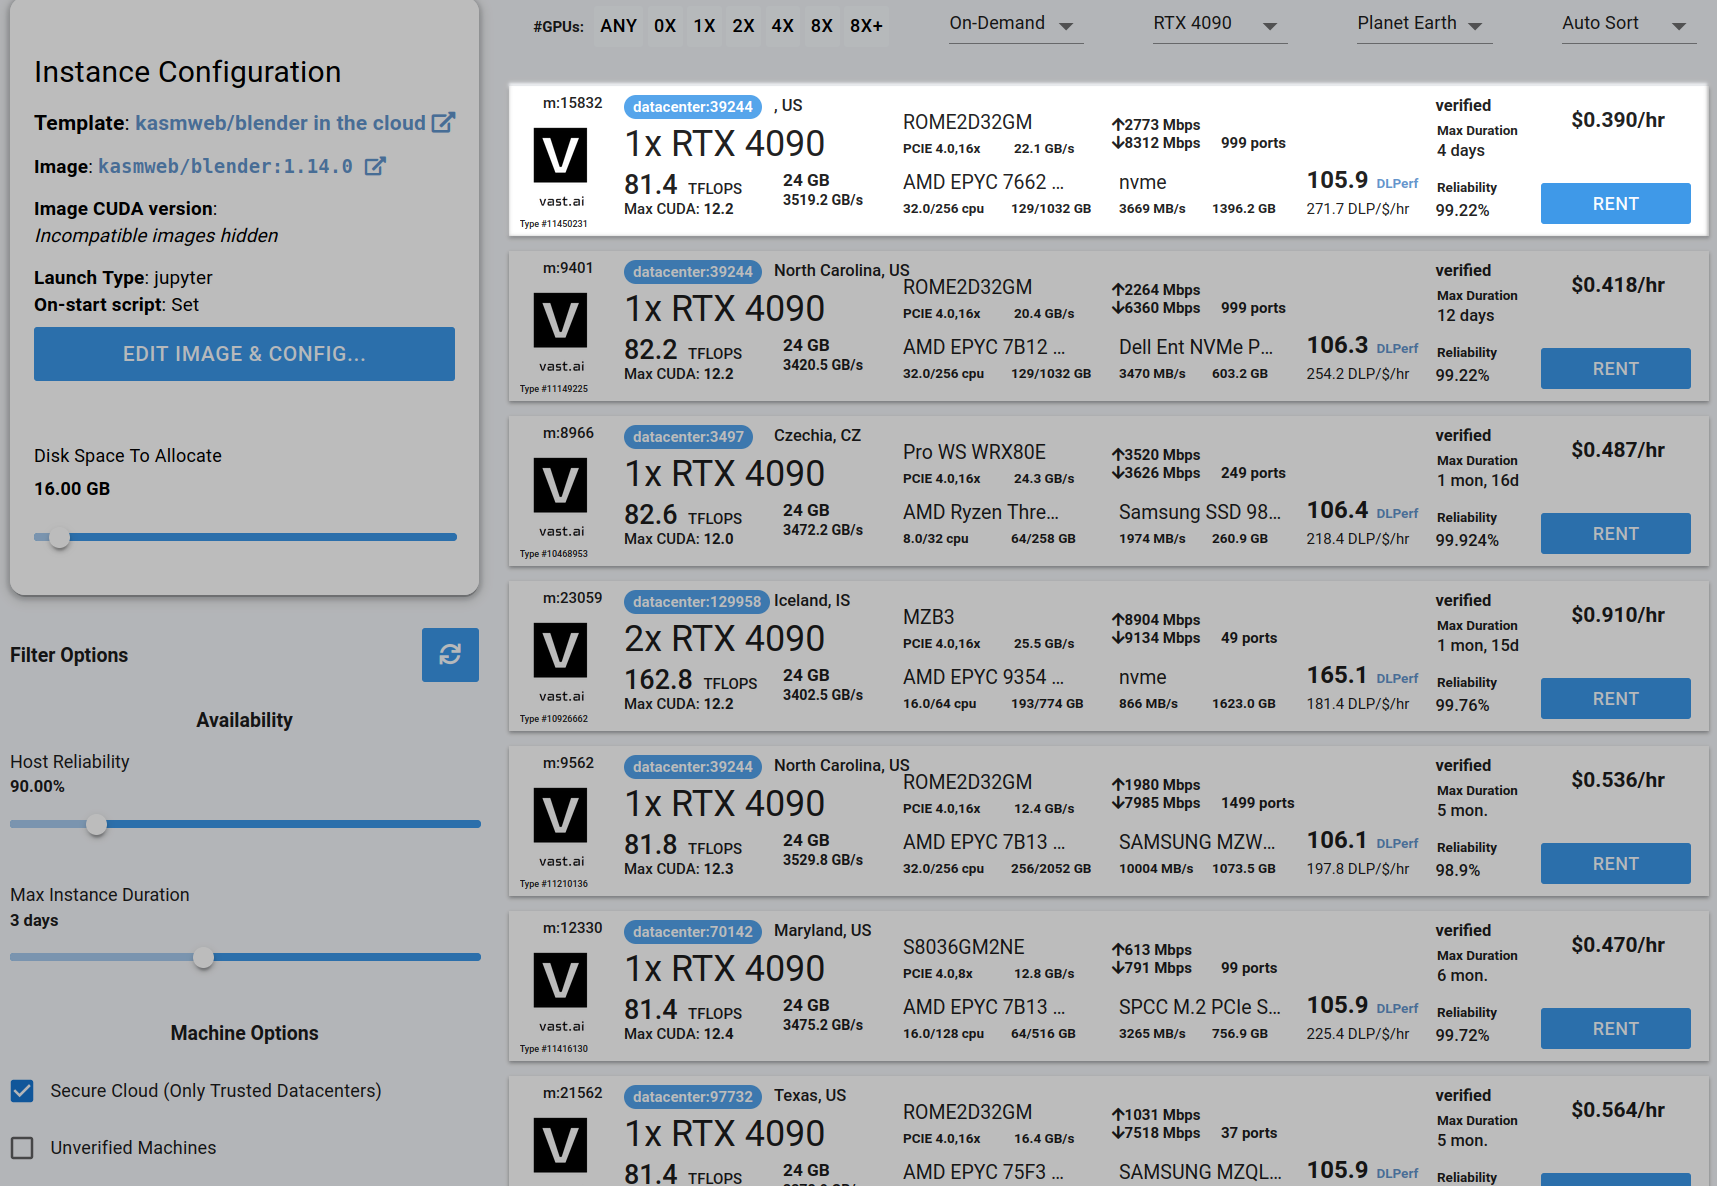 ## Step 5 - Use Jupyter Direct HTTPS Launch Mode Follow the instructions related to adding a certificate to your browser if you need to when it asks you to "Setup Jupyter Direct HTTPS" and click "CONTINUE". Here's more information on the Jupyter direct HTTPS Launch Mode and Installing the TLS certificate: [Jupyter](/documentation/instances/jupyter) 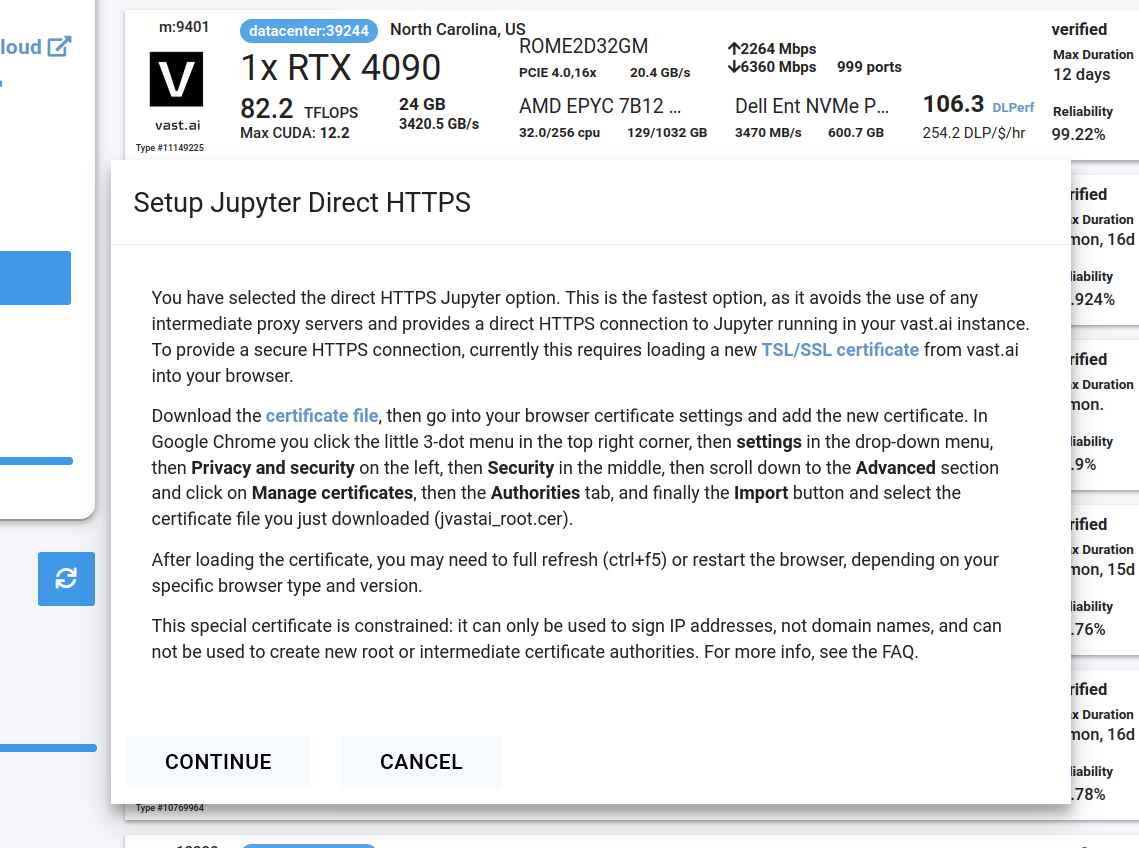 ## Step 6 - Open Blender Go to the Instances tab to see your instance being created with it "Creating". When the message on the blue button changes to "Open", click on Open to open Blender. 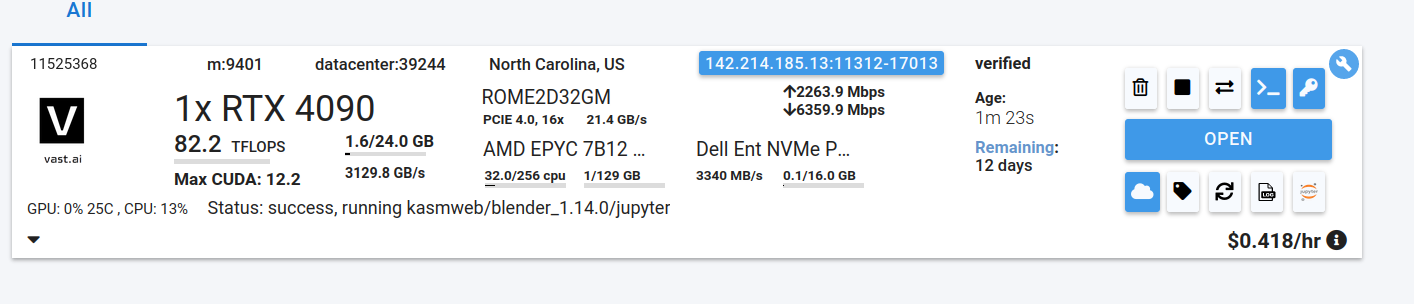 Here's more info about instances at Vast if you need to reference it: [Instances Guide](/documentation/instances/managing-instances) If you see an error that says something like "'clipboard-read' is not a valid value for enumeration PermissionName", please close that window. You should now see Blender! 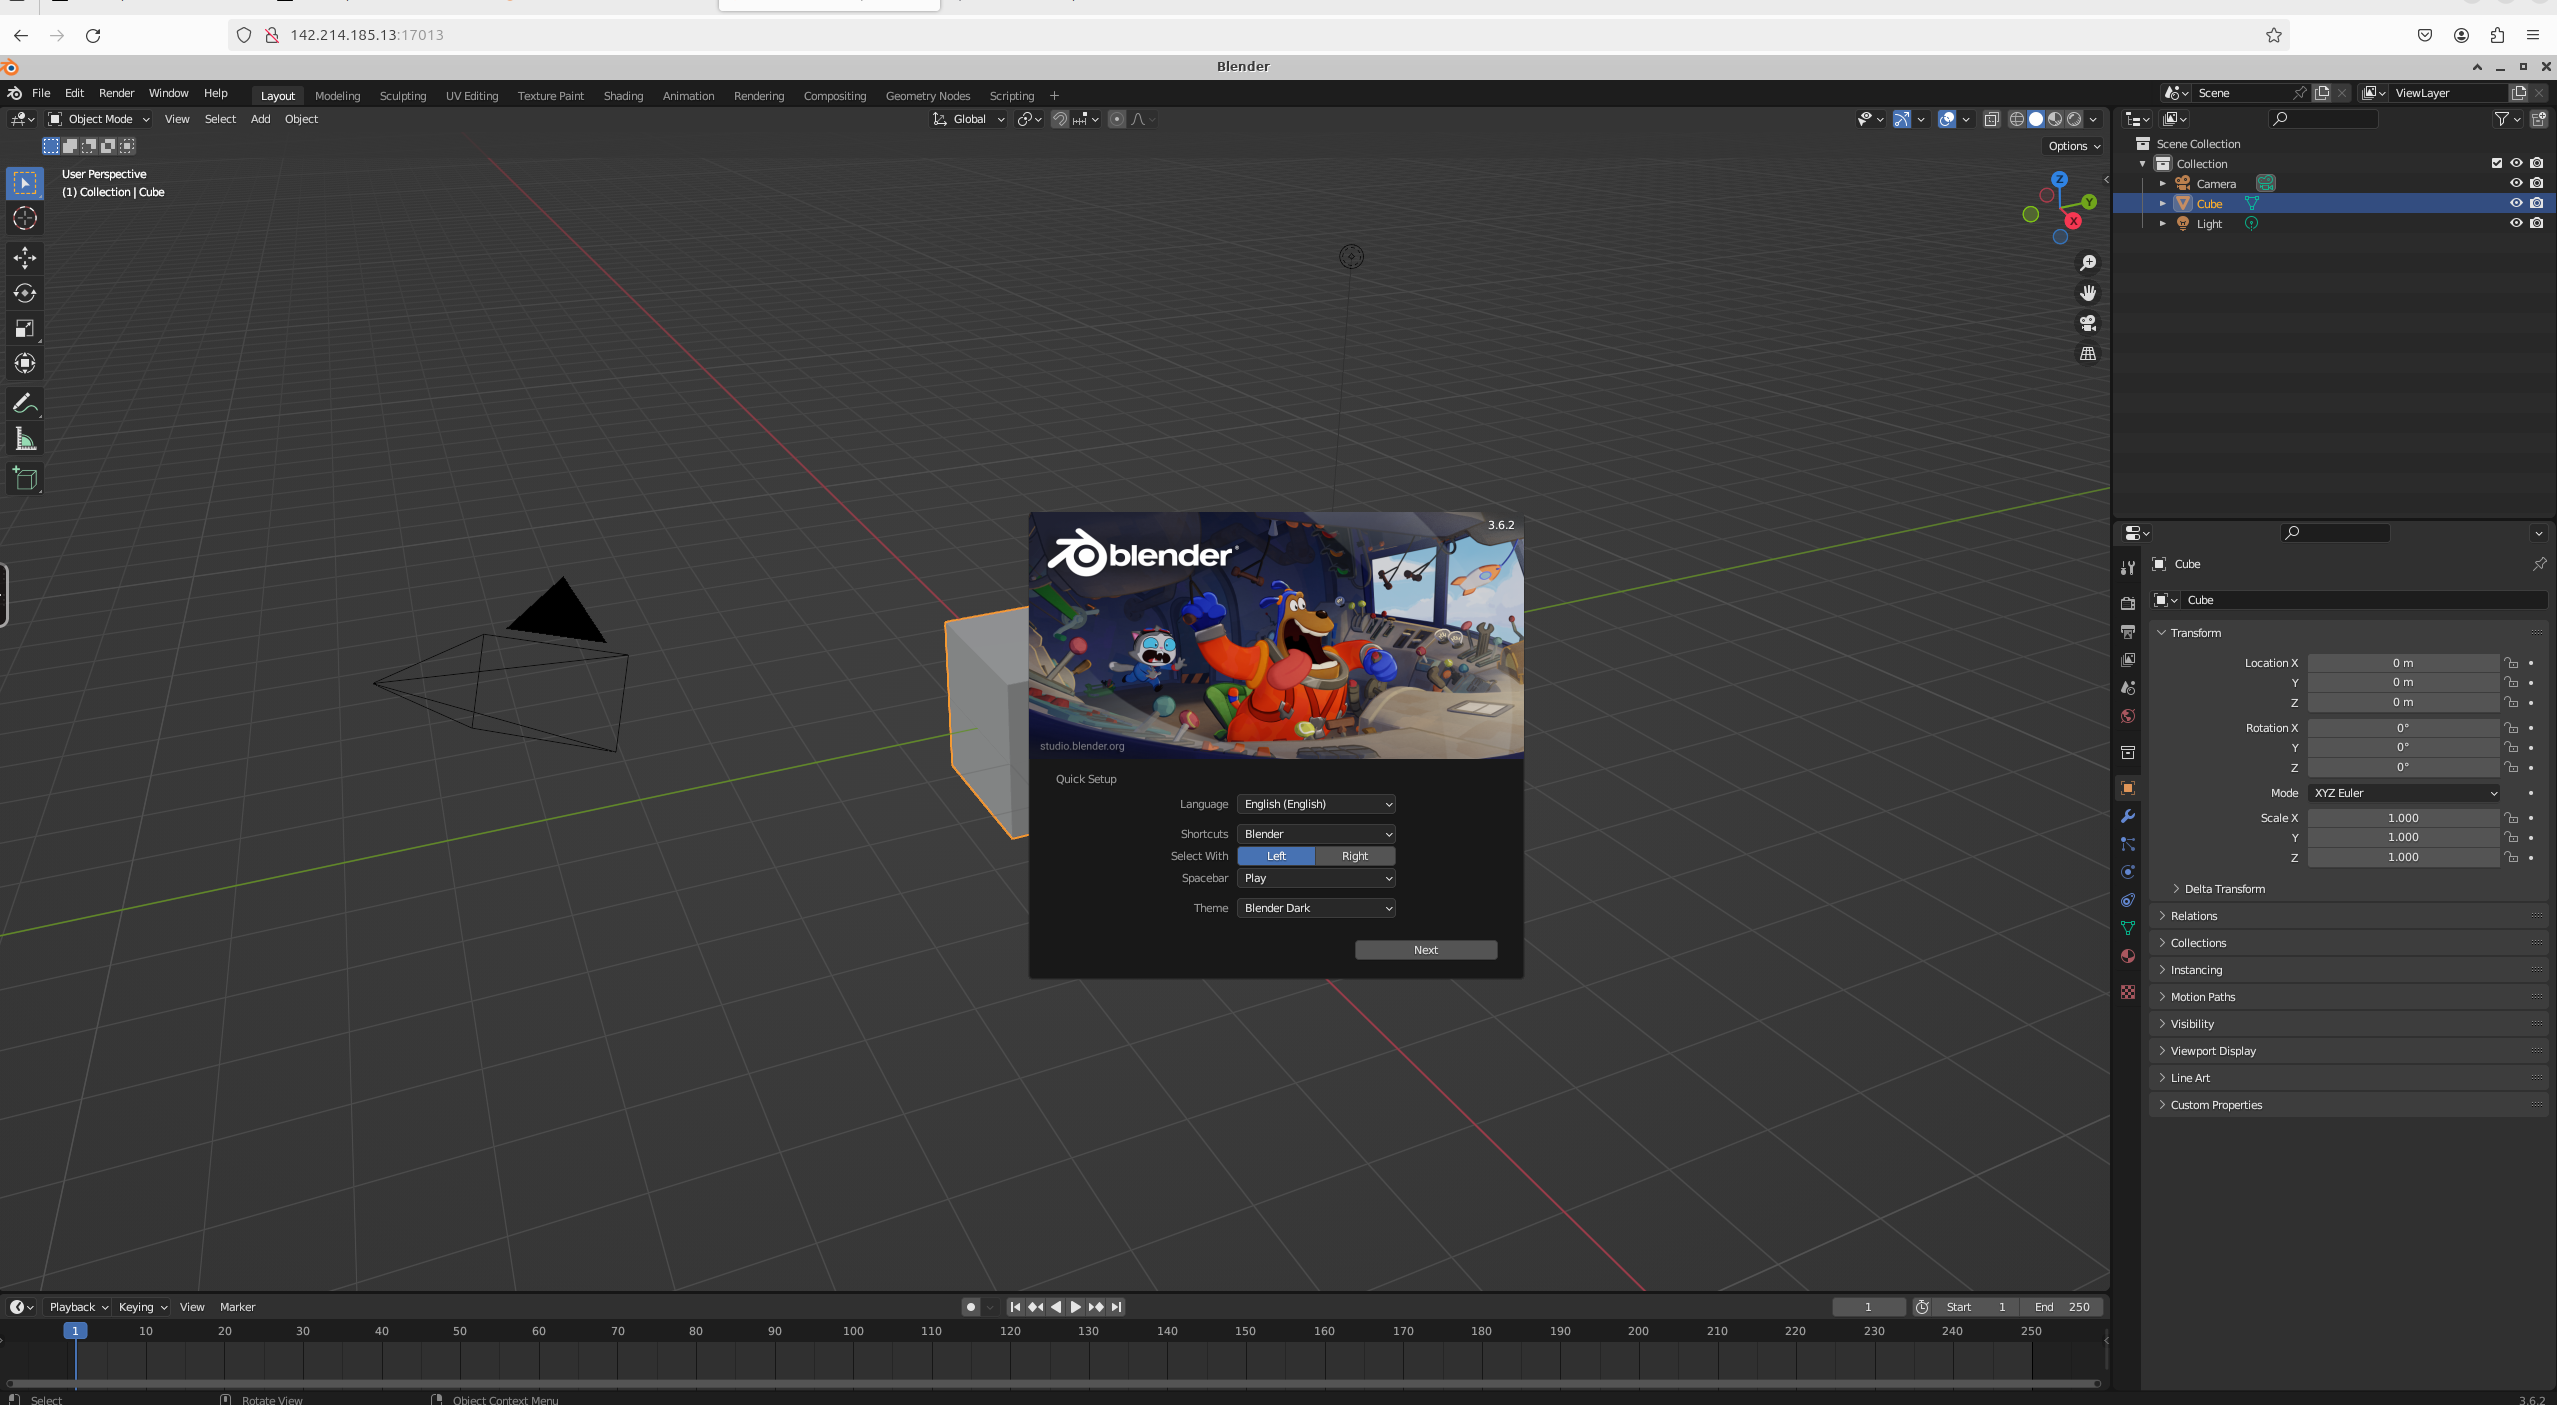 ## Step 7 - Upload .blend file(s) through Jupyter Notebook Click the Jupyter Notebook button to open Jupyter Notebook. 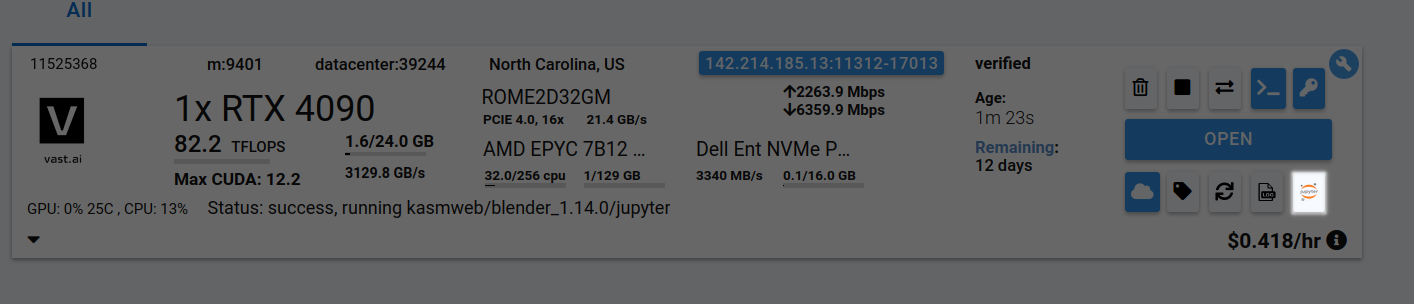 Go to your Jupyter Notebook, click the upload button on the top right, and upload one of your .blend files from your local computer to a directory in the Jupyter Notebook. In this case, I'm uploading basic\_particle\_simulation.blend to the Desktop directory.   ## Step 8 - Open .blend file in Blender Go back to the tab where Blender is running, click on File, click on Open, find your file, and open it. In this case, my basic\_particle\_simulation.blend is in the Desktop directory since that's where I uploaded it in Jupyter Notebook  ## Step 9 - Work on Your .blend file in Blender! 1. There you go! You should now able to see your .blend file in Blender in the Cloud using Vast.  ## Step 10 - Download files as needed from Jupyter Notebook 1. You can save files in Blender and download them by selecting the file(s) and clicking the Download button in Jupyter Notebook. 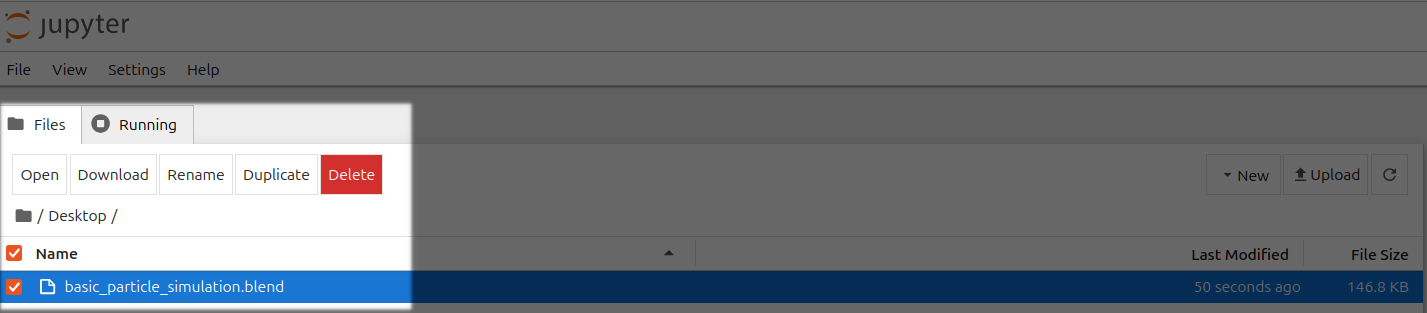 --- ## Template Settings **URL:** llms-txt#template-settings **Contents:** - Overview - Identification - Docker Repository And Environment - Select Launch Mode - On-start Script - Extra Filters - Docker Repository Authentication - Disk Space - Template Visibility - CLI Command Source: https://docs.vast.ai/documentation/templates/template-settings This guide documents all settings and options available when configuring a template. Use this guide when you need to understand what a specific setting does or how to configure a particular option. For a step-by-step tutorial on creating your first template, see [Creating Templates](/documentation/templates/creating-templates). For advanced customization techniques, see [Advanced Setup](/documentation/templates/advanced-setup). The first section helps you to keep your templates organized.
 This will be displayed in bold on the template card. Choose something that helps you identify the template amongst your other templates.
**Template Description**
This field helps describe the function and purpose of the template. Completely optional for your own purposes, but very helpful if you intend to make this template public or share it with others.
## Docker Repository And Environment
This is where you define the Docker image you want to run, along with any options we want to pass into the container.
This will be displayed in bold on the template card. Choose something that helps you identify the template amongst your other templates.
**Template Description**
This field helps describe the function and purpose of the template. Completely optional for your own purposes, but very helpful if you intend to make this template public or share it with others.
## Docker Repository And Environment
This is where you define the Docker image you want to run, along with any options we want to pass into the container.
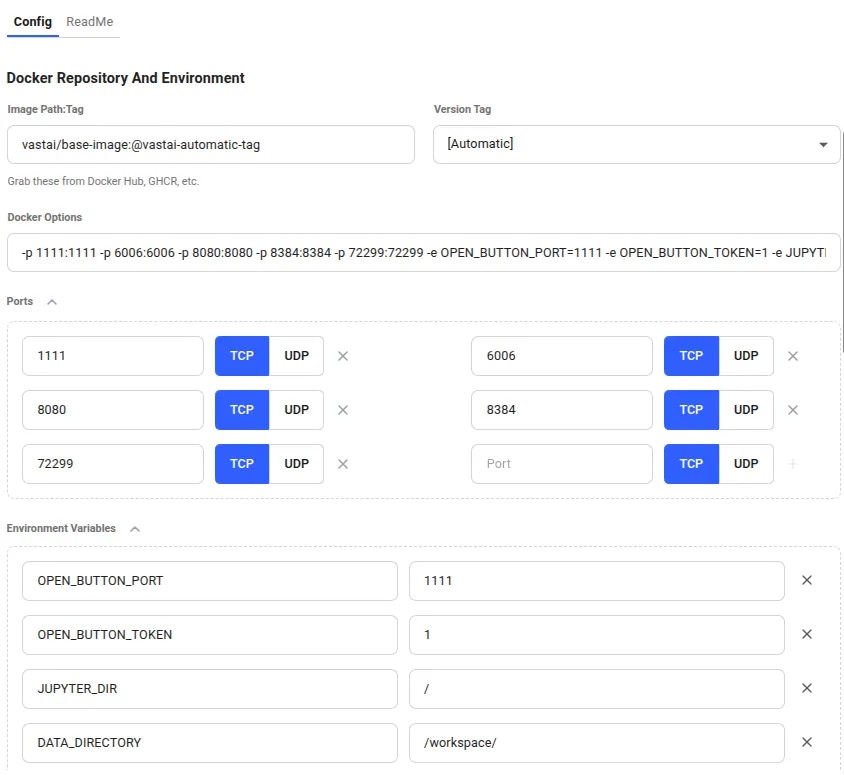 Here is where you can define the docker image to run. This field must be in the format `repository/image_name:tag`.
Many of our templates pull from DockerHub but you can use any container registry - Just remember to add the full path if you're using an alternative registry. Eg. `nvcr.io/nvidia/pytorch:25.04-py3`
You can use any Docker image:
* Public images from DockerHub (e.g., `nginx:latest`, `postgres:14`, `python:3.11`)
* Vast.ai base images (e.g., `vastai/base-image`, `vastai/pytorch`)
* Your own custom images from any registry
* Images from alternative registries (GitHub Container Registry, Google Container Registry, etc.)
For many registries we are able to pull the available list of tags so this field allows you to quickly select another version.
There is also a special `[Automatic]` tag you can use. With this selected, the machine you choose for your instance will pull the most recent docker image that is compatible with that machine's own CUDA version.
This will only work if the image tag contains the CUDA version string. For example: `my-image-cuda-12.8` would be loaded on a machine supporting CUDA 12.8, but a machine with only CUDA 12.6 would pull `my-image-cuda-12.6`
This field is a textual representation of the ports and environment variables declared in the sections beneath it. You can edit it directly or you can use the page widgets.
This field will only accept ports and environment variables. Other docker run options will be ignored.
To access your instance via the external IP address, you will need to add some ports to the template. You can add both TCP and UDP ports.
When your instance is created, a port will be randomly assigned to the external interface which will map into the instance port you selected.
You can also use SSH to open a tunnel to access ports. Use a command like:
The machine will forward traffic from the host machine's public port to the container port you specified.
**Environment Variables**
Here you can add any environment variables that your docker image requires. Do not save any sensitive information here if you are planning to make the template public.
Place any variables with sensitive values into the Environment Variables section of your [account settings page](https://cloud.vast.ai/account/). They will then be made available in any instance you create, regardless of the template used.
Special environment variables like `PROVISIONING_SCRIPT` and `PORTAL_CONFIG` can be used to customize Vast templates - see our [Advanced Setup](/documentation/templates/advanced-setup) guide for details.
You can find out more about port mapping and special environment variables in our [Docker Execution Environment](/documentation/instances/docker-execution-environment) guide.
## Select Launch Mode
Templates offer three launch modes you can select from. Our recommended templates will usually launch in Jupyter mode for easiest access, but you are free to choose whichever suits your needs.
Here is where you can define the docker image to run. This field must be in the format `repository/image_name:tag`.
Many of our templates pull from DockerHub but you can use any container registry - Just remember to add the full path if you're using an alternative registry. Eg. `nvcr.io/nvidia/pytorch:25.04-py3`
You can use any Docker image:
* Public images from DockerHub (e.g., `nginx:latest`, `postgres:14`, `python:3.11`)
* Vast.ai base images (e.g., `vastai/base-image`, `vastai/pytorch`)
* Your own custom images from any registry
* Images from alternative registries (GitHub Container Registry, Google Container Registry, etc.)
For many registries we are able to pull the available list of tags so this field allows you to quickly select another version.
There is also a special `[Automatic]` tag you can use. With this selected, the machine you choose for your instance will pull the most recent docker image that is compatible with that machine's own CUDA version.
This will only work if the image tag contains the CUDA version string. For example: `my-image-cuda-12.8` would be loaded on a machine supporting CUDA 12.8, but a machine with only CUDA 12.6 would pull `my-image-cuda-12.6`
This field is a textual representation of the ports and environment variables declared in the sections beneath it. You can edit it directly or you can use the page widgets.
This field will only accept ports and environment variables. Other docker run options will be ignored.
To access your instance via the external IP address, you will need to add some ports to the template. You can add both TCP and UDP ports.
When your instance is created, a port will be randomly assigned to the external interface which will map into the instance port you selected.
You can also use SSH to open a tunnel to access ports. Use a command like:
The machine will forward traffic from the host machine's public port to the container port you specified.
**Environment Variables**
Here you can add any environment variables that your docker image requires. Do not save any sensitive information here if you are planning to make the template public.
Place any variables with sensitive values into the Environment Variables section of your [account settings page](https://cloud.vast.ai/account/). They will then be made available in any instance you create, regardless of the template used.
Special environment variables like `PROVISIONING_SCRIPT` and `PORTAL_CONFIG` can be used to customize Vast templates - see our [Advanced Setup](/documentation/templates/advanced-setup) guide for details.
You can find out more about port mapping and special environment variables in our [Docker Execution Environment](/documentation/instances/docker-execution-environment) guide.
## Select Launch Mode
Templates offer three launch modes you can select from. Our recommended templates will usually launch in Jupyter mode for easiest access, but you are free to choose whichever suits your needs.
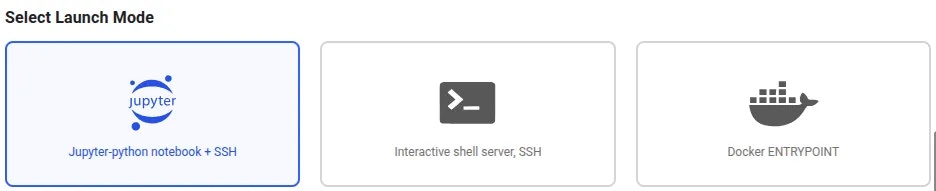 **Jupyter-python notebook + SSH**
When you run the template in this mode, we will install Jupyter and SSH at runtime. Jupyter will be available on mapped port `8080` and SSH will be available on mapped port `22`.
**Interactive shell server, SSH**
As above, but SSH only with no Jupyter installation.
In both Jupyter and SSH mode, the docker entrypoint for your image will not be run. It will be replaced with our instance setup script so you should use the on start section (documented below) to start any services.
**docker ENTRYPOINT**
In this mode, your Docker image will run precisely as it is. We will not include any additional software or access methods. If your Docker image does not offer SSH or another appropriate interface, please select one of the alternative modes if you need to interact with the running instance.
An additional field will be shown when using this launch mode to allow passing arguments to the image entrypoint.
**Jupyter-python notebook + SSH**
When you run the template in this mode, we will install Jupyter and SSH at runtime. Jupyter will be available on mapped port `8080` and SSH will be available on mapped port `22`.
**Interactive shell server, SSH**
As above, but SSH only with no Jupyter installation.
In both Jupyter and SSH mode, the docker entrypoint for your image will not be run. It will be replaced with our instance setup script so you should use the on start section (documented below) to start any services.
**docker ENTRYPOINT**
In this mode, your Docker image will run precisely as it is. We will not include any additional software or access methods. If your Docker image does not offer SSH or another appropriate interface, please select one of the alternative modes if you need to interact with the running instance.
An additional field will be shown when using this launch mode to allow passing arguments to the image entrypoint.
 Here you can enter a short Bash script which will be run during instance startup. It is only available when using the Jupyter or SSH launch modes, and is most useful for starting any services that your docker image would have launched if the entrypoint had been executed.
 **Additional On-start Script Examples**
You can execute custom startup scripts:
You can also overwrite existing files built into the image. Make sure you can switch to a user that has write permissions to that particular file.
For example, you can remove all instances of '-sslOnly' in a particular file using sed:
You can also make directories:
Make sure to append environment variables to /etc/environment file in your on-start section because this makes environment variables available to all users and processes and ensures they are persisted even if your instance/docker container is rebooted:
Also make sure to find the image's ENTRYPOINT or CMD command and call that command at the end of the on-start section. We overwrite that command to set up jupyter/ssh server, etc. under the hood.
Use this area to place restrictions on the machines that should show up in the search page when the template is selected.
**Additional On-start Script Examples**
You can execute custom startup scripts:
You can also overwrite existing files built into the image. Make sure you can switch to a user that has write permissions to that particular file.
For example, you can remove all instances of '-sslOnly' in a particular file using sed:
You can also make directories:
Make sure to append environment variables to /etc/environment file in your on-start section because this makes environment variables available to all users and processes and ensures they are persisted even if your instance/docker container is rebooted:
Also make sure to find the image's ENTRYPOINT or CMD command and call that command at the end of the on-start section. We overwrite that command to set up jupyter/ssh server, etc. under the hood.
Use this area to place restrictions on the machines that should show up in the search page when the template is selected.
 ## Docker Repository Authentication
If you are using a private Docker image then you will need to add authentication credentials so the machine running the instance can download it.
## Docker Repository Authentication
If you are using a private Docker image then you will need to add authentication credentials so the machine running the instance can download it.
 **Docker Registry Server Names**
You don't have to specify docker.io as the server name if your repository is Docker Hub. Docker automatically uses docker.io to pull the image if no other registry is specified.
You do have to specify your server name if your repository is something else. For example:
* GitHub Container Registry (GHCR) - Server Name: `ghcr.io`
* Google Container Registry (GCR) - Server Name: `gcr.io`
By setting the disk space in the template, you can ensure that new instances created from the template will use this amount as a minimum.
**Docker Registry Server Names**
You don't have to specify docker.io as the server name if your repository is Docker Hub. Docker automatically uses docker.io to pull the image if no other registry is specified.
You do have to specify your server name if your repository is something else. For example:
* GitHub Container Registry (GHCR) - Server Name: `ghcr.io`
* Google Container Registry (GCR) - Server Name: `gcr.io`
By setting the disk space in the template, you can ensure that new instances created from the template will use this amount as a minimum.
 ## Template Visibility
Any template marked as public will be available in the template search system, while private images will not.
Private templates can still be used by others if you have shared the template URL.
## Template Visibility
Any template marked as public will be available in the template search system, while private images will not.
Private templates can still be used by others if you have shared the template URL.
 Never save a template as public if it contains sensitive information or secrets. Use the account level environment variables as an alternative.
Templates can be translated directly into CLI launch commands. This read-only area shows what you would need to type or copy to the CLI if you wanted to programatically launch an instance this way.
Never save a template as public if it contains sensitive information or secrets. Use the account level environment variables as an alternative.
Templates can be translated directly into CLI launch commands. This read-only area shows what you would need to type or copy to the CLI if you wanted to programatically launch an instance this way.
 To learn more about starting instance from the CLI, check out our [quickstart guide](/cli/get-started).
Finally, you can save the template. If you are creating a new template or editing one which is not associated with your account - Such as one of our recommended templates - The buttons you see will be labelled 'Create'. For your own templates, you will see them labelled 'Save'
To learn more about starting instance from the CLI, check out our [quickstart guide](/cli/get-started).
Finally, you can save the template. If you are creating a new template or editing one which is not associated with your account - Such as one of our recommended templates - The buttons you see will be labelled 'Create'. For your own templates, you will see them labelled 'Save'
 The 'Create' button will create a copy of the template in the 'My Templates' section of the [templates page](https://cloud.vast.ai/templates/) for you to use later. The 'Create & Use' button will save the template, load it and then open up the [offers page](https://cloud.vast.ai/create/).
**Examples:**
Example 1 (unknown):
```unknown
The machine will forward traffic from the host machine's public port to the container port you specified.
**Environment Variables**
Here you can add any environment variables that your docker image requires. Do not save any sensitive information here if you are planning to make the template public.
Place any variables with sensitive values into the Environment Variables section of your [account settings page](https://cloud.vast.ai/account/). They will then be made available in any instance you create, regardless of the template used.
Special environment variables like `PROVISIONING_SCRIPT` and `PORTAL_CONFIG` can be used to customize Vast templates - see our [Advanced Setup](/documentation/templates/advanced-setup) guide for details.
You can find out more about port mapping and special environment variables in our [Docker Execution Environment](/documentation/instances/docker-execution-environment) guide.
## Select Launch Mode
Templates offer three launch modes you can select from. Our recommended templates will usually launch in Jupyter mode for easiest access, but you are free to choose whichever suits your needs.
**Jupyter-python notebook + SSH**
When you run the template in this mode, we will install Jupyter and SSH at runtime. Jupyter will be available on mapped port `8080` and SSH will be available on mapped port `22`.
**Interactive shell server, SSH**
As above, but SSH only with no Jupyter installation.
In both Jupyter and SSH mode, the docker entrypoint for your image will not be run. It will be replaced with our instance setup script so you should use the on start section (documented below) to start any services.
**docker ENTRYPOINT**
In this mode, your Docker image will run precisely as it is. We will not include any additional software or access methods. If your Docker image does not offer SSH or another appropriate interface, please select one of the alternative modes if you need to interact with the running instance.
An additional field will be shown when using this launch mode to allow passing arguments to the image entrypoint.
## On-start Script
Here you can enter a short Bash script which will be run during instance startup. It is only available when using the Jupyter or SSH launch modes, and is most useful for starting any services that your docker image would have launched if the entrypoint had been executed.
**Additional On-start Script Examples**
You can execute custom startup scripts:
```
Example 2 (unknown):
```unknown
You can also overwrite existing files built into the image. Make sure you can switch to a user that has write permissions to that particular file.
For example, you can remove all instances of '-sslOnly' in a particular file using sed:
```
Example 3 (unknown):
```unknown
You can also make directories:
```
Example 4 (unknown):
```unknown
Make sure to append environment variables to /etc/environment file in your on-start section because this makes environment variables available to all users and processes and ensures they are persisted even if your instance/docker container is rebooted:
```
---
## search network volumes
**URL:** llms-txt#search-network-volumes
Source: https://docs.vast.ai/api-reference/network-volumes/search-network-volumes
api-reference/openapi.json post /api/v0/network_volumes/search/
Search for available network volume offers with advanced filtering and sorting.
CLI Usage: `vastai search network-volumes [--order ]`
---
## get workergroup logs
**URL:** llms-txt#get-workergroup-logs
Source: https://docs.vast.ai/api-reference/serverless/get-workergroup-logs
api-reference/openapi.json post /get_workergroup_logs/
Retrieves logs for a specific workergroup by ID.
CLI Usage: `vastai get workergroup logs [--tail ]`
---
## Host Payouts
**URL:** llms-txt#host-payouts
**Contents:**
- Common Questions
- When will I get paid?
- Why does it show paid on my invoice when I don't see the payment in my account yet?
- Can I generate an invoice?
- How much can I make hosting on Vast?
Source: https://docs.vast.ai/documentation/host/payment
<script
type="application/ld+json"
dangerouslySetInnerHTML={{
__html: JSON.stringify({
"@context": "https://schema.org",
"@type": "FAQPage",
"mainEntity": [
{
"@type": "Question",
"name": "When will I get paid?",
"acceptedAnswer": {
"@type": "Answer",
"text": "It takes 2 weeks to get your first payout. The pay period ends and goes pending, then you are paid for that pay period the following Friday."
}
},
{
"@type": "Question",
"name": "Why does it show paid on my invoice when I don't see the payment in my account yet?",
"acceptedAnswer": {
"@type": "Answer",
"text": "The paid status on invoices is marked as such when we send the payment list out to Paypal, Wise, Stripe, etc. This does not accurately represent the payment's status within Paypal, Wise, Stripe, etc., but rather shows the status of the payment solely within our system."
}
},
{
"@type": "Question",
"name": "Can I generate an invoice?",
"acceptedAnswer": {
"@type": "Answer",
"text": "You can create an invoice by going to the Billing page, and then click the box for Include Charges under Generate Billing History."
}
},
{
"@type": "Question",
"name": "How much can I make hosting on Vast?",
"acceptedAnswer": {
"@type": "Answer",
"text": "To get an understanding of prices, the best place is 500farms which is a third party website that monitors Vast listings. The link is https://500.farm/vastai/charts/d/a6RgL05nk/vast-ai-stats"
}
}
]
})
}}
/>
### When will I get paid?
It takes 2 weeks to get your first payout. The pay period ends and goes pending, then you are paid for that pay period the following Friday.
### Why does it show paid on my invoice when I don't see the payment in my account yet?
The paid status on invoices is marked as such when we send the payment list out to Paypal, Wise, Stripe, etc. This does not accurately represent the payment's status within Paypal, Wise, Stripe, etc., bu rather shows the status of the payment solely within our system.
### Can I generate an invoice?
You can create an invoice by going to the "Billing" page, and then click the box for "Include Charges" under "Generate Billing History".
### How much can I make hosting on Vast?
To get an understanding of prices, the best place is 500farms which is a third party website that monitors Vast listings. The link is [here](https://500.farm/vastai/charts/d/a6RgL05nk/vast-ai-stats).
---
## Instances Overview
**URL:** llms-txt#instances-overview
**Contents:**
- What Are Instances?
- Core Concepts
- Next Steps
Source: https://docs.vast.ai/documentation/instances/overview
Instances are Docker containers that give you exclusive GPU access for training, inference, and development. Pay by the second, connect via SSH or Jupyter.
## What Are Instances?
Instances are containerized environments where you rent dedicated GPUs from Vast.ai's marketplace. Each instance:
* Provides exclusive GPU access (never shared between users)
* Runs your choice of Docker image
* Includes proportional CPU, RAM, and storage
* Connects via SSH, Jupyter, or custom entrypoint
* Bills by the second for actual usage
New to Vast.ai? Start with the [Quickstart Guide](/documentation/get-started/quickstart).
Market-driven rates for GPU, storage, and bandwidth
On-demand, Reserved, and Interruptible options
Pre-configured environments or custom Docker images
Find and rent GPUs by model, location, and price
SSH, Jupyter, and Entrypoint connection methods
Start, stop, connect, and monitor your instances
Container storage and persistent volumes
Move data between instances, cloud, and local storage
Sync with Google Drive, S3, and other cloud providers
**New to Vast.ai?**
[Start with the Quickstart Guide →](/documentation/get-started/quickstart) for a complete walkthrough
**Ready to rent?**
[Understand pricing →](/documentation/instances/pricing) | [Choose a template →](/documentation/instances/templates) | [Find GPUs →](/documentation/instances/choose-an-instance)
**Need help connecting?**
[Connection methods →](/documentation/instances/connect/overview) | [SSH guide →](/documentation/instances/connect/ssh)
---
## Download some useful files
**URL:** llms-txt#download-some-useful-files
wget -P "${WORKSPACE}/" https://example.org/my-application.tar.gz
tar xvf ${WORKSPACE}/my-application.tar.gz"
---
## Endpoint Parameters
**URL:** llms-txt#endpoint-parameters
**Contents:**
- cold\_mult
- cold\_workers
- max\_workers
- min\_load
- target\_util
A multiplier applied to your target capacity for longer-term planning (1+ hours). This parameter controls how much extra capacity the serverless engine will plan for in the future compared to immediate needs. For example, if your current target capacity is 100 tokens/sec and cold\_mult is 2.0, the system will plan to have capacity for 200 tokens/sec for longer-term scenarios.
This helps ensure your endpoint has sufficient "cold" (stopped but ready) workers available to handle future load spikes without delay. A higher value means more aggressive capacity planning and better preparedness for sudden traffic increases, while a lower value reduces costs from maintaining stopped instances.
If not specified during endpoint creation, the default value is 2.5.
The minimum number of workers that must be kept in a "ready quick" state before the serverless engine is allowed to destroy any workers. A worker is considered "ready quick" if it's either:
\- Actively serving (status = "idle" with model loaded)
\- Stopped but ready (status = "stopped" with model loaded)
Cold workers are not shut-down, they are stopped but have the model fully loaded. This means they can start serving requests very quickly (seconds) without having to re-download the model or benchmark the GPU performance.
If not specified during endpoint creation, the default value is 5.
A hard upper limit on the total number of worker instances (ready, stopped, loading, etc.) that your endpoint can have at any given time.
If not specified during endpoint creation, the default value is 20.
A minimum baseline load (measured in tokens/second for LLMs) that the serverless system will assume your Endpoint needs to handle, regardless of actual measured traffic. This acts as a "floor" for load predictions across all time horizons (1 second to 24+ hours), ensuring your endpoint maintains minimum capacity even during periods of zero or very low traffic.
For example, if your min\_load is set to 100 tokens/second, but your endpoint currently has zero traffic, the serverless system will still plan capacity as if you need to handle at least 100 tokens/second. This prevents the endpoint from scaling down to zero capacity and ensures you're always ready for incoming requests.
If not specified during endpoint creation, the default value is 10.
The target utilization ratio determines how much spare capacity (headroom) the serverless system maintains. For example, if your predicted load is 900 tokens/second and target\_util is 0.9, the serverless engine will plan for 1000 tokens/second of capacity (900 ÷ 0.9 = 1000), leaving 100 tokens/second (11%) as buffer for traffic spikes.
A lower target\_util means more headroom:
\- target\_util = 0.9 → 11.1% spare capacity relative to load
\- target\_util = 0.8 → 25% spare capacity relative to load
\- target\_util = 0.5 → 100% spare capacity relative to load
\- target\_util = 0.4 → 150% spare capacity relative to load
If not specified during endpoint creation, the default value is 0.9.
---
## list machine
**URL:** llms-txt#list-machine
Source: https://docs.vast.ai/api-reference/machines/list-machine
api-reference/openapi.json put /api/v0/machines/create_asks/
Creates or updates ask contracts for a machine to list it for rent on the vast.ai platform.
Allows setting pricing, minimum GPU requirements, end date and discount rates.
CLI Usage: `vastai list machine [options]`
---
## update ssh key
**URL:** llms-txt#update-ssh-key
Source: https://docs.vast.ai/api-reference/accounts/update-ssh-key
api-reference/openapi.json put /api/v0/ssh/{id}/
Updates the specified SSH key with the provided value.
CLI Usage: `vastai update ssh-key `
---
## Multi-Node training using Torch + NCCL
**URL:** llms-txt#multi-node-training-using-torch-+-nccl
**Contents:**
- Creating a Virtual Cluster
- TCP Initialization for NCCL + PyTorch
- Finding the IPv4 address for TCP rendezvous
- Running the training script
- Example
Source: https://docs.vast.ai/multi-node-training-using-torch-nccl
Need RoCE or Infiniband? Submit a [cluster request](https://vast.ai/products/clusters). Availability currently limited to A100/H100/H200 machines.
Note: Private networking currently only available on Docker-based templates; not available for VM-based templates.
NCCL expects all nodes to be on the same network. By default, Vast instances on different physical machines are on separate bridge networks isolated from the host's LAN and must go through a NAT to reach the outside internet.
Vast now supports creating *overlay* networks for instances, allowing client instances on different machines on the same physical LAN to share a private, virtual LAN separate from both the host network and the networks of other clients' instances.
Overlay networks can be created for instances located in the same *physical cluster* --- these are groups of machines that support fast local networking to each other.
This allows direct communication between the instances on all ports, which is expected by NCCL.
## Creating a Virtual Cluster
* Make sure to update to/install the newest version of the CLI first: go to our [CLI docs](https://cloud.vast.ai/cli/) and copy+run the command starting with `wget`.
* View physical clusters with instances matching your requirements by running `./vast search offers --raw cluster_id!=None [YOUR_INSTANCE_SEARCH_FILTERS] | grep cluster_id`
* This will print out cluster\_ids for clusters with offers available for instances matching your search parameters.
* For a detailed view of the available offers within a specific cluster, run `./vast search offers cluster_id=CLUSTER_ID [YOUR_INSTANCE_SEARCH_FILTERS]`
* Once you've chosen a physical cluster, create your overlay network inside the cluster---
* `./vast create overlay CLUSTER_ID NAME_FOR_NETWORK_TO_CREATE`
* Search for instance offers in the physical cluster you created your overlay network in---
* `./vast search offers cluster_id=CLUSTER_ID [YOUR_INSTANCE_SEARCH_FILTERS]`
* Create instances attached to your overlay by appending `--env "-n YOUR_NETWORK_NAME"` to your `./vast create instance` command.
## TCP Initialization for NCCL + PyTorch
Depending on your setup, you will have one or more worker processes running on each node. NCCL expects each worker process to be assigned a unique rank that's an integer from 0-(NUM\_WORKERS - 1).
NCCL expects to be able to perform a TCP rendezvous during initialization at the local IP address of the node running the rank 0 worker process.
### Finding the IPv4 address for TCP rendezvous
* On the node that will run the rank 0 worker, run `ip a` (`apt install iproute2` if not already installed).
* You should have three network interfaces: `lo`, `eth0`, and `eth1`.
* Unless you added/removed networks after instant creation, `eth0` should be the interface to the overlay network between your instances. ( `lo` is the loopback interface; `eth1` is a bridge to the host machine's gateway to the external internet).
* Under the `eth0` entry, there should be the line that starts with `inet IPv4ADDRESS/MASK`, this `IPv4ADDRESS` will be the address you will want to use for TCP initialization.
### Running the training script
* In your training script, you'll want to initialize your process group at the beginning every worker process with the parameters `backend='nccl'` and `init_method = 'tcp://IPv4ADDRESS:PORT'` where `IPv4ADDRESS` is the IPv4 address of your `eth0` device as found using the instructions above, and port is a free port number chosen between 1000 and 65535 (all ports are exposed between instances on the same overlay network).
* You may need to set the `NCCL_SOCKET_IFNAME=eth0` environment variable for the script, as NCCL is sometimes unable to detect that the `eth1` device on the different nodes are not directly connected to each other.
* Other debugging notes:
* NCCL may not initialize all channels until the first communication function is called.
* Setting the `NCCL_DEBUG=INFO` environment variable may be useful for getting additional debug info.
* PyTorch sometimes does not block on communication methods finishing until the output tensors area actually used.
Here we will use a python script called `nccl_speedtest.py` using the following contents:
```python icon="python" Python theme={null}
import torch as t
import torch.distributed as dist
import sys
import time
import string
---
## Referral Program
**URL:** llms-txt#referral-program
**Contents:**
- How It Works
- Payout Rules — Important!
- Getting Your Referral Link
- Using Templates for Referrals
- Bigger Opportunities
- Common Questions
- Where can I find referral link for my template?
Source: https://docs.vast.ai/documentation/reference/referral-program
<script
type="application/ld+json"
dangerouslySetInnerHTML={{
__html: JSON.stringify({
"@context": "https://schema.org",
"@type": "HowTo",
"name": "How to Use the Vast.ai Referral Program",
"description": "Turn your audience into earnings by sharing your Vast.ai referral link and earning 3% of their lifetime spend.",
"step": [
{
"@type": "HowToStep",
"name": "Create a Dedicated Referral Account",
"text": "To receive cash payouts outside of Vast, you must use a dedicated referral account. If you've ever rented instances or hosted machines on an account, you cannot cash out until your referral earnings exceed your lifetime instance spend. Create a new account specifically for referrals to be payout-eligible."
},
{
"@type": "HowToStep",
"name": "Get Your Referral Link",
"text": "Go to Settings and find your Referral Link section. Copy the link to share it with your audience. You can also create template referral links: Open your Templates page, go to My Templates, click the three-dot menu on each template card, and select Copy Referral Link."
},
{
"@type": "HowToStep",
"name": "Share Your Link",
"text": "Post your referral link on your site, in videos, blogs, GitHub repos, or wherever your audience is. When someone creates a new client account through your link and buys credits, you get 3% of everything they spend for the lifetime of their account."
},
{
"@type": "HowToStep",
"name": "Earn and Cash Out",
"text": "You earn 3% of their lifetime spend as referral credits. Use credits on Vast to rent instances, or withdraw up to 75% as cash via Stripe Connect, PayPal, or Wise. Note: You can't refer yourself or any account connected to you."
},
{
"@type": "HowToStep",
"name": "Use Templates for Better Conversions (Optional)",
"text": "Create a public template with pre-configured Docker image, launch modes, onstart script, and environment variables. Share its template referral link. Your audience clicks, Vast loads with your settings, they sign up, and you earn. This is perfect for GitHub repos, videos, and blog posts."
}
]
})
}}
/>
Turn your audience into earnings! Share your unique Vast.ai referral link (or a public template link), and when someone creates a **new client account** and buys credits, you get **3%** of everything they spend — for the **lifetime** of their account.
Better yet, you can cash out **75% of those referral credits** via **Stripe Connect, PayPal, or Wise**.
In order to receive payouts for referrals you MUST create a new account. You are unlikely to be able to receive payouts to any bank account outside Vast if the account you are using for referrals has ever rented instances or hosted machines
1. **Share Your Link** – Post it on your site, in videos, blogs, or wherever your audience is.
2. **They Join & Buy Credits** – New users sign up through your link and purchase credits.
3. **You Earn** – Get 3% of their lifetime spend as referral credits.
4. **Cash Out or Spend** – Use credits on Vast, or withdraw up to 75% as cash.
If someone spends $1,000 over time, you get $30 in referral credits — forever.
## Payout Rules — Important!
To **receive cash payouts** (outside of Vast), you **must** use a **dedicated referral account**:
* If you’ve **ever rented instances or hosted machines** on an account, you **cannot** cash out until your referral earnings exceed your lifetime instance spend.
* If you just want credits to rent Vast instances, you can use your main account.
**Why a separate account?**
The 'Create' button will create a copy of the template in the 'My Templates' section of the [templates page](https://cloud.vast.ai/templates/) for you to use later. The 'Create & Use' button will save the template, load it and then open up the [offers page](https://cloud.vast.ai/create/).
**Examples:**
Example 1 (unknown):
```unknown
The machine will forward traffic from the host machine's public port to the container port you specified.
**Environment Variables**
Here you can add any environment variables that your docker image requires. Do not save any sensitive information here if you are planning to make the template public.
Place any variables with sensitive values into the Environment Variables section of your [account settings page](https://cloud.vast.ai/account/). They will then be made available in any instance you create, regardless of the template used.
Special environment variables like `PROVISIONING_SCRIPT` and `PORTAL_CONFIG` can be used to customize Vast templates - see our [Advanced Setup](/documentation/templates/advanced-setup) guide for details.
You can find out more about port mapping and special environment variables in our [Docker Execution Environment](/documentation/instances/docker-execution-environment) guide.
## Select Launch Mode
Templates offer three launch modes you can select from. Our recommended templates will usually launch in Jupyter mode for easiest access, but you are free to choose whichever suits your needs.
**Jupyter-python notebook + SSH**
When you run the template in this mode, we will install Jupyter and SSH at runtime. Jupyter will be available on mapped port `8080` and SSH will be available on mapped port `22`.
**Interactive shell server, SSH**
As above, but SSH only with no Jupyter installation.
In both Jupyter and SSH mode, the docker entrypoint for your image will not be run. It will be replaced with our instance setup script so you should use the on start section (documented below) to start any services.
**docker ENTRYPOINT**
In this mode, your Docker image will run precisely as it is. We will not include any additional software or access methods. If your Docker image does not offer SSH or another appropriate interface, please select one of the alternative modes if you need to interact with the running instance.
An additional field will be shown when using this launch mode to allow passing arguments to the image entrypoint.
## On-start Script
Here you can enter a short Bash script which will be run during instance startup. It is only available when using the Jupyter or SSH launch modes, and is most useful for starting any services that your docker image would have launched if the entrypoint had been executed.
**Additional On-start Script Examples**
You can execute custom startup scripts:
```
Example 2 (unknown):
```unknown
You can also overwrite existing files built into the image. Make sure you can switch to a user that has write permissions to that particular file.
For example, you can remove all instances of '-sslOnly' in a particular file using sed:
```
Example 3 (unknown):
```unknown
You can also make directories:
```
Example 4 (unknown):
```unknown
Make sure to append environment variables to /etc/environment file in your on-start section because this makes environment variables available to all users and processes and ensures they are persisted even if your instance/docker container is rebooted:
```
---
## search network volumes
**URL:** llms-txt#search-network-volumes
Source: https://docs.vast.ai/api-reference/network-volumes/search-network-volumes
api-reference/openapi.json post /api/v0/network_volumes/search/
Search for available network volume offers with advanced filtering and sorting.
CLI Usage: `vastai search network-volumes [--order ]`
---
## get workergroup logs
**URL:** llms-txt#get-workergroup-logs
Source: https://docs.vast.ai/api-reference/serverless/get-workergroup-logs
api-reference/openapi.json post /get_workergroup_logs/
Retrieves logs for a specific workergroup by ID.
CLI Usage: `vastai get workergroup logs [--tail ]`
---
## Host Payouts
**URL:** llms-txt#host-payouts
**Contents:**
- Common Questions
- When will I get paid?
- Why does it show paid on my invoice when I don't see the payment in my account yet?
- Can I generate an invoice?
- How much can I make hosting on Vast?
Source: https://docs.vast.ai/documentation/host/payment
<script
type="application/ld+json"
dangerouslySetInnerHTML={{
__html: JSON.stringify({
"@context": "https://schema.org",
"@type": "FAQPage",
"mainEntity": [
{
"@type": "Question",
"name": "When will I get paid?",
"acceptedAnswer": {
"@type": "Answer",
"text": "It takes 2 weeks to get your first payout. The pay period ends and goes pending, then you are paid for that pay period the following Friday."
}
},
{
"@type": "Question",
"name": "Why does it show paid on my invoice when I don't see the payment in my account yet?",
"acceptedAnswer": {
"@type": "Answer",
"text": "The paid status on invoices is marked as such when we send the payment list out to Paypal, Wise, Stripe, etc. This does not accurately represent the payment's status within Paypal, Wise, Stripe, etc., but rather shows the status of the payment solely within our system."
}
},
{
"@type": "Question",
"name": "Can I generate an invoice?",
"acceptedAnswer": {
"@type": "Answer",
"text": "You can create an invoice by going to the Billing page, and then click the box for Include Charges under Generate Billing History."
}
},
{
"@type": "Question",
"name": "How much can I make hosting on Vast?",
"acceptedAnswer": {
"@type": "Answer",
"text": "To get an understanding of prices, the best place is 500farms which is a third party website that monitors Vast listings. The link is https://500.farm/vastai/charts/d/a6RgL05nk/vast-ai-stats"
}
}
]
})
}}
/>
### When will I get paid?
It takes 2 weeks to get your first payout. The pay period ends and goes pending, then you are paid for that pay period the following Friday.
### Why does it show paid on my invoice when I don't see the payment in my account yet?
The paid status on invoices is marked as such when we send the payment list out to Paypal, Wise, Stripe, etc. This does not accurately represent the payment's status within Paypal, Wise, Stripe, etc., bu rather shows the status of the payment solely within our system.
### Can I generate an invoice?
You can create an invoice by going to the "Billing" page, and then click the box for "Include Charges" under "Generate Billing History".
### How much can I make hosting on Vast?
To get an understanding of prices, the best place is 500farms which is a third party website that monitors Vast listings. The link is [here](https://500.farm/vastai/charts/d/a6RgL05nk/vast-ai-stats).
---
## Instances Overview
**URL:** llms-txt#instances-overview
**Contents:**
- What Are Instances?
- Core Concepts
- Next Steps
Source: https://docs.vast.ai/documentation/instances/overview
Instances are Docker containers that give you exclusive GPU access for training, inference, and development. Pay by the second, connect via SSH or Jupyter.
## What Are Instances?
Instances are containerized environments where you rent dedicated GPUs from Vast.ai's marketplace. Each instance:
* Provides exclusive GPU access (never shared between users)
* Runs your choice of Docker image
* Includes proportional CPU, RAM, and storage
* Connects via SSH, Jupyter, or custom entrypoint
* Bills by the second for actual usage
New to Vast.ai? Start with the [Quickstart Guide](/documentation/get-started/quickstart).
Market-driven rates for GPU, storage, and bandwidth
On-demand, Reserved, and Interruptible options
Pre-configured environments or custom Docker images
Find and rent GPUs by model, location, and price
SSH, Jupyter, and Entrypoint connection methods
Start, stop, connect, and monitor your instances
Container storage and persistent volumes
Move data between instances, cloud, and local storage
Sync with Google Drive, S3, and other cloud providers
**New to Vast.ai?**
[Start with the Quickstart Guide →](/documentation/get-started/quickstart) for a complete walkthrough
**Ready to rent?**
[Understand pricing →](/documentation/instances/pricing) | [Choose a template →](/documentation/instances/templates) | [Find GPUs →](/documentation/instances/choose-an-instance)
**Need help connecting?**
[Connection methods →](/documentation/instances/connect/overview) | [SSH guide →](/documentation/instances/connect/ssh)
---
## Download some useful files
**URL:** llms-txt#download-some-useful-files
wget -P "${WORKSPACE}/" https://example.org/my-application.tar.gz
tar xvf ${WORKSPACE}/my-application.tar.gz"
---
## Endpoint Parameters
**URL:** llms-txt#endpoint-parameters
**Contents:**
- cold\_mult
- cold\_workers
- max\_workers
- min\_load
- target\_util
A multiplier applied to your target capacity for longer-term planning (1+ hours). This parameter controls how much extra capacity the serverless engine will plan for in the future compared to immediate needs. For example, if your current target capacity is 100 tokens/sec and cold\_mult is 2.0, the system will plan to have capacity for 200 tokens/sec for longer-term scenarios.
This helps ensure your endpoint has sufficient "cold" (stopped but ready) workers available to handle future load spikes without delay. A higher value means more aggressive capacity planning and better preparedness for sudden traffic increases, while a lower value reduces costs from maintaining stopped instances.
If not specified during endpoint creation, the default value is 2.5.
The minimum number of workers that must be kept in a "ready quick" state before the serverless engine is allowed to destroy any workers. A worker is considered "ready quick" if it's either:
\- Actively serving (status = "idle" with model loaded)
\- Stopped but ready (status = "stopped" with model loaded)
Cold workers are not shut-down, they are stopped but have the model fully loaded. This means they can start serving requests very quickly (seconds) without having to re-download the model or benchmark the GPU performance.
If not specified during endpoint creation, the default value is 5.
A hard upper limit on the total number of worker instances (ready, stopped, loading, etc.) that your endpoint can have at any given time.
If not specified during endpoint creation, the default value is 20.
A minimum baseline load (measured in tokens/second for LLMs) that the serverless system will assume your Endpoint needs to handle, regardless of actual measured traffic. This acts as a "floor" for load predictions across all time horizons (1 second to 24+ hours), ensuring your endpoint maintains minimum capacity even during periods of zero or very low traffic.
For example, if your min\_load is set to 100 tokens/second, but your endpoint currently has zero traffic, the serverless system will still plan capacity as if you need to handle at least 100 tokens/second. This prevents the endpoint from scaling down to zero capacity and ensures you're always ready for incoming requests.
If not specified during endpoint creation, the default value is 10.
The target utilization ratio determines how much spare capacity (headroom) the serverless system maintains. For example, if your predicted load is 900 tokens/second and target\_util is 0.9, the serverless engine will plan for 1000 tokens/second of capacity (900 ÷ 0.9 = 1000), leaving 100 tokens/second (11%) as buffer for traffic spikes.
A lower target\_util means more headroom:
\- target\_util = 0.9 → 11.1% spare capacity relative to load
\- target\_util = 0.8 → 25% spare capacity relative to load
\- target\_util = 0.5 → 100% spare capacity relative to load
\- target\_util = 0.4 → 150% spare capacity relative to load
If not specified during endpoint creation, the default value is 0.9.
---
## list machine
**URL:** llms-txt#list-machine
Source: https://docs.vast.ai/api-reference/machines/list-machine
api-reference/openapi.json put /api/v0/machines/create_asks/
Creates or updates ask contracts for a machine to list it for rent on the vast.ai platform.
Allows setting pricing, minimum GPU requirements, end date and discount rates.
CLI Usage: `vastai list machine [options]`
---
## update ssh key
**URL:** llms-txt#update-ssh-key
Source: https://docs.vast.ai/api-reference/accounts/update-ssh-key
api-reference/openapi.json put /api/v0/ssh/{id}/
Updates the specified SSH key with the provided value.
CLI Usage: `vastai update ssh-key `
---
## Multi-Node training using Torch + NCCL
**URL:** llms-txt#multi-node-training-using-torch-+-nccl
**Contents:**
- Creating a Virtual Cluster
- TCP Initialization for NCCL + PyTorch
- Finding the IPv4 address for TCP rendezvous
- Running the training script
- Example
Source: https://docs.vast.ai/multi-node-training-using-torch-nccl
Need RoCE or Infiniband? Submit a [cluster request](https://vast.ai/products/clusters). Availability currently limited to A100/H100/H200 machines.
Note: Private networking currently only available on Docker-based templates; not available for VM-based templates.
NCCL expects all nodes to be on the same network. By default, Vast instances on different physical machines are on separate bridge networks isolated from the host's LAN and must go through a NAT to reach the outside internet.
Vast now supports creating *overlay* networks for instances, allowing client instances on different machines on the same physical LAN to share a private, virtual LAN separate from both the host network and the networks of other clients' instances.
Overlay networks can be created for instances located in the same *physical cluster* --- these are groups of machines that support fast local networking to each other.
This allows direct communication between the instances on all ports, which is expected by NCCL.
## Creating a Virtual Cluster
* Make sure to update to/install the newest version of the CLI first: go to our [CLI docs](https://cloud.vast.ai/cli/) and copy+run the command starting with `wget`.
* View physical clusters with instances matching your requirements by running `./vast search offers --raw cluster_id!=None [YOUR_INSTANCE_SEARCH_FILTERS] | grep cluster_id`
* This will print out cluster\_ids for clusters with offers available for instances matching your search parameters.
* For a detailed view of the available offers within a specific cluster, run `./vast search offers cluster_id=CLUSTER_ID [YOUR_INSTANCE_SEARCH_FILTERS]`
* Once you've chosen a physical cluster, create your overlay network inside the cluster---
* `./vast create overlay CLUSTER_ID NAME_FOR_NETWORK_TO_CREATE`
* Search for instance offers in the physical cluster you created your overlay network in---
* `./vast search offers cluster_id=CLUSTER_ID [YOUR_INSTANCE_SEARCH_FILTERS]`
* Create instances attached to your overlay by appending `--env "-n YOUR_NETWORK_NAME"` to your `./vast create instance` command.
## TCP Initialization for NCCL + PyTorch
Depending on your setup, you will have one or more worker processes running on each node. NCCL expects each worker process to be assigned a unique rank that's an integer from 0-(NUM\_WORKERS - 1).
NCCL expects to be able to perform a TCP rendezvous during initialization at the local IP address of the node running the rank 0 worker process.
### Finding the IPv4 address for TCP rendezvous
* On the node that will run the rank 0 worker, run `ip a` (`apt install iproute2` if not already installed).
* You should have three network interfaces: `lo`, `eth0`, and `eth1`.
* Unless you added/removed networks after instant creation, `eth0` should be the interface to the overlay network between your instances. ( `lo` is the loopback interface; `eth1` is a bridge to the host machine's gateway to the external internet).
* Under the `eth0` entry, there should be the line that starts with `inet IPv4ADDRESS/MASK`, this `IPv4ADDRESS` will be the address you will want to use for TCP initialization.
### Running the training script
* In your training script, you'll want to initialize your process group at the beginning every worker process with the parameters `backend='nccl'` and `init_method = 'tcp://IPv4ADDRESS:PORT'` where `IPv4ADDRESS` is the IPv4 address of your `eth0` device as found using the instructions above, and port is a free port number chosen between 1000 and 65535 (all ports are exposed between instances on the same overlay network).
* You may need to set the `NCCL_SOCKET_IFNAME=eth0` environment variable for the script, as NCCL is sometimes unable to detect that the `eth1` device on the different nodes are not directly connected to each other.
* Other debugging notes:
* NCCL may not initialize all channels until the first communication function is called.
* Setting the `NCCL_DEBUG=INFO` environment variable may be useful for getting additional debug info.
* PyTorch sometimes does not block on communication methods finishing until the output tensors area actually used.
Here we will use a python script called `nccl_speedtest.py` using the following contents:
```python icon="python" Python theme={null}
import torch as t
import torch.distributed as dist
import sys
import time
import string
---
## Referral Program
**URL:** llms-txt#referral-program
**Contents:**
- How It Works
- Payout Rules — Important!
- Getting Your Referral Link
- Using Templates for Referrals
- Bigger Opportunities
- Common Questions
- Where can I find referral link for my template?
Source: https://docs.vast.ai/documentation/reference/referral-program
<script
type="application/ld+json"
dangerouslySetInnerHTML={{
__html: JSON.stringify({
"@context": "https://schema.org",
"@type": "HowTo",
"name": "How to Use the Vast.ai Referral Program",
"description": "Turn your audience into earnings by sharing your Vast.ai referral link and earning 3% of their lifetime spend.",
"step": [
{
"@type": "HowToStep",
"name": "Create a Dedicated Referral Account",
"text": "To receive cash payouts outside of Vast, you must use a dedicated referral account. If you've ever rented instances or hosted machines on an account, you cannot cash out until your referral earnings exceed your lifetime instance spend. Create a new account specifically for referrals to be payout-eligible."
},
{
"@type": "HowToStep",
"name": "Get Your Referral Link",
"text": "Go to Settings and find your Referral Link section. Copy the link to share it with your audience. You can also create template referral links: Open your Templates page, go to My Templates, click the three-dot menu on each template card, and select Copy Referral Link."
},
{
"@type": "HowToStep",
"name": "Share Your Link",
"text": "Post your referral link on your site, in videos, blogs, GitHub repos, or wherever your audience is. When someone creates a new client account through your link and buys credits, you get 3% of everything they spend for the lifetime of their account."
},
{
"@type": "HowToStep",
"name": "Earn and Cash Out",
"text": "You earn 3% of their lifetime spend as referral credits. Use credits on Vast to rent instances, or withdraw up to 75% as cash via Stripe Connect, PayPal, or Wise. Note: You can't refer yourself or any account connected to you."
},
{
"@type": "HowToStep",
"name": "Use Templates for Better Conversions (Optional)",
"text": "Create a public template with pre-configured Docker image, launch modes, onstart script, and environment variables. Share its template referral link. Your audience clicks, Vast loads with your settings, they sign up, and you earn. This is perfect for GitHub repos, videos, and blog posts."
}
]
})
}}
/>
Turn your audience into earnings! Share your unique Vast.ai referral link (or a public template link), and when someone creates a **new client account** and buys credits, you get **3%** of everything they spend — for the **lifetime** of their account.
Better yet, you can cash out **75% of those referral credits** via **Stripe Connect, PayPal, or Wise**.
In order to receive payouts for referrals you MUST create a new account. You are unlikely to be able to receive payouts to any bank account outside Vast if the account you are using for referrals has ever rented instances or hosted machines
1. **Share Your Link** – Post it on your site, in videos, blogs, or wherever your audience is.
2. **They Join & Buy Credits** – New users sign up through your link and purchase credits.
3. **You Earn** – Get 3% of their lifetime spend as referral credits.
4. **Cash Out or Spend** – Use credits on Vast, or withdraw up to 75% as cash.
If someone spends $1,000 over time, you get $30 in referral credits — forever.
## Payout Rules — Important!
To **receive cash payouts** (outside of Vast), you **must** use a **dedicated referral account**:
* If you’ve **ever rented instances or hosted machines** on an account, you **cannot** cash out until your referral earnings exceed your lifetime instance spend.
* If you just want credits to rent Vast instances, you can use your main account.
**Why a separate account?**It keeps your referral earnings clear and makes sure you’re payout-eligible. **Example:** * You’ve earned \$300 in referral credits. * Lifetime charges on your account: \$855. * Since $300 < $855, you can't cash out until referral earnings exceed \$855. ## Getting Your Referral Link 1. Create a new account for referrals. 2. Go to [**Settings**](https://cloud.vast.ai/account/) → **Referral Link**.
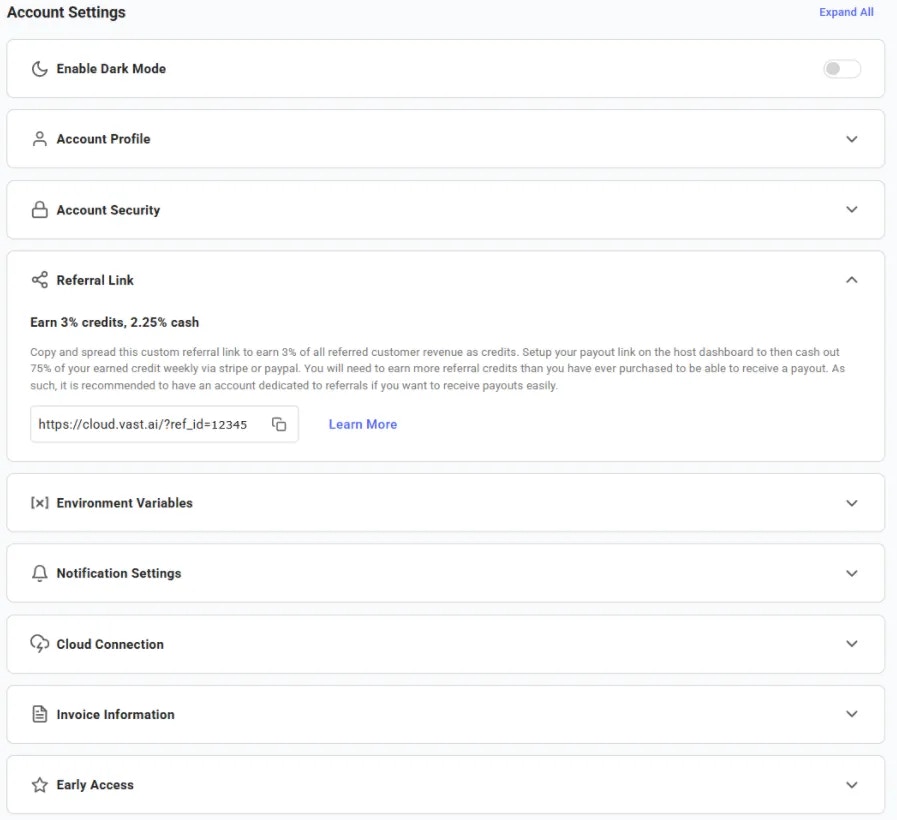 3. Copy the link.
4. Share it!
**Note:** You can’t refer yourself or any account connected to you — those won’t earn rewards.
## Using Templates for Referrals
Want to make referrals even easier? Use [**Templates page**](https://cloud.vast.ai/templates/) to create your template.
A template can pre-load:
* A Docker image
* Launch mode(s)
* Onstart script
* Environment variables
**Example:** The Stable Diffusion template loads the image, sets up Automatic1111 WebUI, starts Jupyter, and preps the environment — ready to go.
Create [your own template](/documentation/templates/creating-templates) for a use case, set it to **public**, then share its **template referral link.** The link will have this format:
**Note:** You can’t refer yourself or any account connected to you — those won’t earn rewards.
Your audience clicks → Vast loads with your settings → they sign up → you earn.
**Where to use it:** GitHub repos, videos, blog posts — anywhere your audience needs a “click and run” setup.
## Bigger Opportunities
For large-scale referral or marketing collaborations, reach us at **[support@vast.ai](mailto:support@vast.ai)**.
### Where can I find referral link for my template?
Open your **Templates **page -> My Templates. On each template card, click the **three-dot menu **and select **Copy Referral Link**. This gives you a ready-to-share link that includes your referral ID and the template ID — perfect for sharing with your audience.
3. Copy the link.
4. Share it!
**Note:** You can’t refer yourself or any account connected to you — those won’t earn rewards.
## Using Templates for Referrals
Want to make referrals even easier? Use [**Templates page**](https://cloud.vast.ai/templates/) to create your template.
A template can pre-load:
* A Docker image
* Launch mode(s)
* Onstart script
* Environment variables
**Example:** The Stable Diffusion template loads the image, sets up Automatic1111 WebUI, starts Jupyter, and preps the environment — ready to go.
Create [your own template](/documentation/templates/creating-templates) for a use case, set it to **public**, then share its **template referral link.** The link will have this format:
**Note:** You can’t refer yourself or any account connected to you — those won’t earn rewards.
Your audience clicks → Vast loads with your settings → they sign up → you earn.
**Where to use it:** GitHub repos, videos, blog posts — anywhere your audience needs a “click and run” setup.
## Bigger Opportunities
For large-scale referral or marketing collaborations, reach us at **[support@vast.ai](mailto:support@vast.ai)**.
### Where can I find referral link for my template?
Open your **Templates **page -> My Templates. On each template card, click the **three-dot menu **and select **Copy Referral Link**. This gives you a ready-to-share link that includes your referral ID and the template ID — perfect for sharing with your audience.
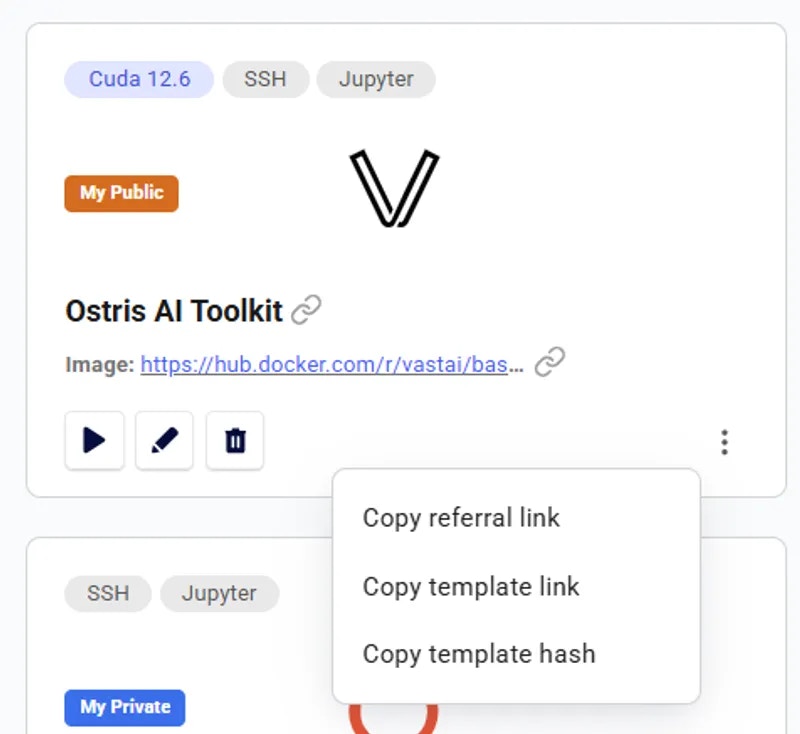 ---
## Quantized GGUF models (cloned)
**URL:** llms-txt#quantized-gguf-models-(cloned)
**Contents:**
- Llama.cpp
- Open WebUI Template
- Pulling the model
- Serving the model
- Building Llama.cpp
- Further Reading
Source: https://docs.vast.ai/quantized-gguf-models-cloned
Here's a step-by-step guide to running quantized LLM models in multi-part GGUF format. We will use [Unsloth's Deepseek-R1 Q8\_0 model](https://huggingface.co/unsloth/DeepSeek-R1-GGUF) as an example. This model is very large and will require an 8xH200 machine configuration, but you can also follow this guide for much smaller models.
Before moving on with the guide,** Setup your Vast account and add credit**. Review the [quickstart guide](/documentation/get-started/quickstart) to get familar with the service if you do not have an account with credits loaded.
Llama.cpp is the recommended method for loading these models as it is able to directly load a split file of many parts without first merging them.
While it's easy to build llama.cpp inside one of our instances, we will focus on running this model in the Open WebUI template which contains a pre-compiled CUDA compatible versions of llama-server and llama-cli.
## Open WebUI Template
OpenWebui + Ollama is one of our recommended templates. While its default setup uses Ollama as a backend, it can also access an OpenAI-compatible API and it has been pre-configured to find one running on `http://localhost:20000`
A full guide to getting started with the OpenWebUI template is available [here](/ollama-webui)
Ensure you have enough disk space and a suitable configuration. For Deepseek-R1 Q8\_0 you'll need:
* At least 800GB VRAM
* 700GB storage space
The recommended configuration for this particular model is 8 x H200 with 750GB storage.
Once you have loaded up the template, you'll need to open up a terminal where we will pull and then serve the model.
### Pulling the model
You will want to download the models from the [Deepseek-R1 Q8\_0 model](https://huggingface.co/unsloth/DeepSeek-R1-GGUF) hugging face repo to the `/workspace/llama.cpp/models` directory on your instance. We have included a script with the [Ollama + Open WebUI](https://cloud.vast.ai?ref_id=62897\&template_id=d8aa06abd242979cee20d6646068167d) template that you may use to easily download the models.
This download will take some time as HuggingFace limits download speed, so even on an instance with very fast download speeds it may take up to an hour to completely download.
### Serving the model
Once the dowload has completed it's time to serve the model using the pre-built `llama-server` application.
Again, from the terminal, type the following:
This command will load all of the model layers into GPU VRAM and begin serving the API at http\://localhost:20000
Once the model has finished loading to the GPU, it will be availabe directly from the OpenWebui interface in the model selector. Again, this may take some time to load and if you already have OpenWebui open then you may need to refresh the page.
## Building Llama.cpp
If you prefer to build llama.cpp yourself, you can simply run the following from any Vast-built template. The Recommended Nvidia CUDA template would be an ideal start.
These commands will build the `llama-quantize` `llama-cli` `llama-server` and `llama-gguf-split` tools.
For advanced build instructions you should see the [official documentation](https://github.com/ggerganov/llama.cpp?tab=readme-ov-file#building-the-project) on GitHub.
Please see the template Readme for advanced template configuration, particularly if you would like to modify the template to make the llama-server API available externally with authentication or via a SSH tunnel.
**Examples:**
Example 1 (unknown):
```unknown
This download will take some time as HuggingFace limits download speed, so even on an instance with very fast download speeds it may take up to an hour to completely download.
### Serving the model
Once the dowload has completed it's time to serve the model using the pre-built `llama-server` application.
Again, from the terminal, type the following:
```
Example 2 (unknown):
```unknown
This command will load all of the model layers into GPU VRAM and begin serving the API at http\://localhost:20000
Once the model has finished loading to the GPU, it will be availabe directly from the OpenWebui interface in the model selector. Again, this may take some time to load and if you already have OpenWebui open then you may need to refresh the page.
## Building Llama.cpp
If you prefer to build llama.cpp yourself, you can simply run the following from any Vast-built template. The Recommended Nvidia CUDA template would be an ideal start.
```
---
## Using wget
**URL:** llms-txt#using-wget
wget your_dataset_url
---
## unlist machine
**URL:** llms-txt#unlist-machine
Source: https://docs.vast.ai/api-reference/machines/unlist-machine
api-reference/openapi.json delete /api/v0/machines/{machine_id}/asks/
Removes all 'ask' type offer contracts for a specified machine, effectively unlisting it from being available for rent.
CLI Usage: `vastai unlist machine `
---
## Run this script on both nodes, setting one as RANK 0 and the other as RANK 1
**URL:** llms-txt#run-this-script-on-both-nodes,-setting-one-as-rank-0-and-the-other-as-rank-1
---
## This class is the implementer for the '/generate' endpoint of model API
**URL:** llms-txt#this-class-is-the-implementer-for-the-'/generate'-endpoint-of-model-api
@dataclasses.dataclass
class GenerateHandler(EndpointHandler[InputData]):
@property
def endpoint(self) -> str:
# the API endpoint
return "/generate"
@classmethod
def payload_cls(cls) -> Type[InputData]:
return InputData
def generate_payload_json(self, payload: InputData) -> Dict[str, Any]:
"""
defines how to convert `InputData` defined above, to
json data to be sent to the model API
"""
return dataclasses.asdict(payload)
def make_benchmark_payload(self) -> InputData:
"""
defines how to generate an InputData for benchmarking. This needs to be defined in only
one EndpointHandler, the one passed to the backend as the benchmark handler
"""
return InputData.for_test()
async def generate_client_response(
self, client_request: web.Request, model_response: ClientResponse
) -> Union[web.Response, web.StreamResponse]:
"""
defines how to convert a model API response to a response to PyWorker client
"""
_ = client_request
match model_response.status:
case 200:
log.debug("SUCCESS")
data = await model_response.json()
return web.json_response(data=data)
case code:
log.debug("SENDING RESPONSE: ERROR: unknown code")
return web.Response(status=code)
---
## Teams Roles
**URL:** llms-txt#teams-roles
**Contents:**
- What Are Team Roles?
- Types of Team Roles
- Creating Custom Roles
- Role Syntax
- Best Practices for Using Team Roles
- Conclusion
Source: https://docs.vast.ai/documentation/teams/teams-roles
<script
type="application/ld+json"
dangerouslySetInnerHTML={{
__html: JSON.stringify({
"@context": "https://schema.org",
"@type": "TechArticle",
"headline": "Understanding Team Roles on Vast.ai",
"description": "A comprehensive guide to team roles on Vast.ai including default roles (Owner, Manager, Member), custom roles with tailored permissions, role syntax, and best practices for managing access control.",
"author": {
"@type": "Organization",
"name": "Vast.ai"
},
"datePublished": "2025-01-13",
"dateModified": "2025-04-04",
"articleSection": "Teams Documentation",
"keywords": ["team roles", "permissions", "access control", "custom roles", "vast.ai", "collaboration", "security"]
})
}}
/>
## What Are Team Roles?
Team roles in Vast.ai's platform are designed to streamline collaboration and enhance security by assigning specific permissions and access levels to different members of a team. These roles determine what actions a team member can perform and what data they can access within the team's shared workspace/context.
### Types of Team Roles
1. **Default Roles**: These are the standard roles with preset permissions, suitable for common team structures:
* *Owner*: Full access to all team resources, settings, and member management.
* *Manager*: All permissions of Team Owner apart from Team Deletion.
* *Member*: Has ability to view, create, and interact with instances, but no access to billing info, team management, autoscaler, machines, etc.
2. **Custom Roles**: Custom roles allow team managers to create roles with custom, tailored permissions via permission groups. This feature is particularly useful for teams with unique workflow requirements or specific security protocols.
For more information on Permission Groups and what they allow access to, [click here](/cli/installation).
### Creating Custom Roles
* **Accessing Role Management**: Custom roles can be created and managed through the **Roles** tab of the **Members** Page on the Vast.ai platform.
* **Defining Permissions**: When creating a custom role, you can select from a wide range of read/write permissions, such as instance creation, billing access, etc. This allows for precise control over what each role can and cannot do.
* **Assigning Custom Roles**: Once a custom role is created, it can be assigned to team members through the team management interface.
You can create roles either in the Vast CLI or on your team dashbaord if you have permission to create roles within your team (team\_write).
---
## Quantized GGUF models (cloned)
**URL:** llms-txt#quantized-gguf-models-(cloned)
**Contents:**
- Llama.cpp
- Open WebUI Template
- Pulling the model
- Serving the model
- Building Llama.cpp
- Further Reading
Source: https://docs.vast.ai/quantized-gguf-models-cloned
Here's a step-by-step guide to running quantized LLM models in multi-part GGUF format. We will use [Unsloth's Deepseek-R1 Q8\_0 model](https://huggingface.co/unsloth/DeepSeek-R1-GGUF) as an example. This model is very large and will require an 8xH200 machine configuration, but you can also follow this guide for much smaller models.
Before moving on with the guide,** Setup your Vast account and add credit**. Review the [quickstart guide](/documentation/get-started/quickstart) to get familar with the service if you do not have an account with credits loaded.
Llama.cpp is the recommended method for loading these models as it is able to directly load a split file of many parts without first merging them.
While it's easy to build llama.cpp inside one of our instances, we will focus on running this model in the Open WebUI template which contains a pre-compiled CUDA compatible versions of llama-server and llama-cli.
## Open WebUI Template
OpenWebui + Ollama is one of our recommended templates. While its default setup uses Ollama as a backend, it can also access an OpenAI-compatible API and it has been pre-configured to find one running on `http://localhost:20000`
A full guide to getting started with the OpenWebUI template is available [here](/ollama-webui)
Ensure you have enough disk space and a suitable configuration. For Deepseek-R1 Q8\_0 you'll need:
* At least 800GB VRAM
* 700GB storage space
The recommended configuration for this particular model is 8 x H200 with 750GB storage.
Once you have loaded up the template, you'll need to open up a terminal where we will pull and then serve the model.
### Pulling the model
You will want to download the models from the [Deepseek-R1 Q8\_0 model](https://huggingface.co/unsloth/DeepSeek-R1-GGUF) hugging face repo to the `/workspace/llama.cpp/models` directory on your instance. We have included a script with the [Ollama + Open WebUI](https://cloud.vast.ai?ref_id=62897\&template_id=d8aa06abd242979cee20d6646068167d) template that you may use to easily download the models.
This download will take some time as HuggingFace limits download speed, so even on an instance with very fast download speeds it may take up to an hour to completely download.
### Serving the model
Once the dowload has completed it's time to serve the model using the pre-built `llama-server` application.
Again, from the terminal, type the following:
This command will load all of the model layers into GPU VRAM and begin serving the API at http\://localhost:20000
Once the model has finished loading to the GPU, it will be availabe directly from the OpenWebui interface in the model selector. Again, this may take some time to load and if you already have OpenWebui open then you may need to refresh the page.
## Building Llama.cpp
If you prefer to build llama.cpp yourself, you can simply run the following from any Vast-built template. The Recommended Nvidia CUDA template would be an ideal start.
These commands will build the `llama-quantize` `llama-cli` `llama-server` and `llama-gguf-split` tools.
For advanced build instructions you should see the [official documentation](https://github.com/ggerganov/llama.cpp?tab=readme-ov-file#building-the-project) on GitHub.
Please see the template Readme for advanced template configuration, particularly if you would like to modify the template to make the llama-server API available externally with authentication or via a SSH tunnel.
**Examples:**
Example 1 (unknown):
```unknown
This download will take some time as HuggingFace limits download speed, so even on an instance with very fast download speeds it may take up to an hour to completely download.
### Serving the model
Once the dowload has completed it's time to serve the model using the pre-built `llama-server` application.
Again, from the terminal, type the following:
```
Example 2 (unknown):
```unknown
This command will load all of the model layers into GPU VRAM and begin serving the API at http\://localhost:20000
Once the model has finished loading to the GPU, it will be availabe directly from the OpenWebui interface in the model selector. Again, this may take some time to load and if you already have OpenWebui open then you may need to refresh the page.
## Building Llama.cpp
If you prefer to build llama.cpp yourself, you can simply run the following from any Vast-built template. The Recommended Nvidia CUDA template would be an ideal start.
```
---
## Using wget
**URL:** llms-txt#using-wget
wget your_dataset_url
---
## unlist machine
**URL:** llms-txt#unlist-machine
Source: https://docs.vast.ai/api-reference/machines/unlist-machine
api-reference/openapi.json delete /api/v0/machines/{machine_id}/asks/
Removes all 'ask' type offer contracts for a specified machine, effectively unlisting it from being available for rent.
CLI Usage: `vastai unlist machine `
---
## Run this script on both nodes, setting one as RANK 0 and the other as RANK 1
**URL:** llms-txt#run-this-script-on-both-nodes,-setting-one-as-rank-0-and-the-other-as-rank-1
---
## This class is the implementer for the '/generate' endpoint of model API
**URL:** llms-txt#this-class-is-the-implementer-for-the-'/generate'-endpoint-of-model-api
@dataclasses.dataclass
class GenerateHandler(EndpointHandler[InputData]):
@property
def endpoint(self) -> str:
# the API endpoint
return "/generate"
@classmethod
def payload_cls(cls) -> Type[InputData]:
return InputData
def generate_payload_json(self, payload: InputData) -> Dict[str, Any]:
"""
defines how to convert `InputData` defined above, to
json data to be sent to the model API
"""
return dataclasses.asdict(payload)
def make_benchmark_payload(self) -> InputData:
"""
defines how to generate an InputData for benchmarking. This needs to be defined in only
one EndpointHandler, the one passed to the backend as the benchmark handler
"""
return InputData.for_test()
async def generate_client_response(
self, client_request: web.Request, model_response: ClientResponse
) -> Union[web.Response, web.StreamResponse]:
"""
defines how to convert a model API response to a response to PyWorker client
"""
_ = client_request
match model_response.status:
case 200:
log.debug("SUCCESS")
data = await model_response.json()
return web.json_response(data=data)
case code:
log.debug("SENDING RESPONSE: ERROR: unknown code")
return web.Response(status=code)
---
## Teams Roles
**URL:** llms-txt#teams-roles
**Contents:**
- What Are Team Roles?
- Types of Team Roles
- Creating Custom Roles
- Role Syntax
- Best Practices for Using Team Roles
- Conclusion
Source: https://docs.vast.ai/documentation/teams/teams-roles
<script
type="application/ld+json"
dangerouslySetInnerHTML={{
__html: JSON.stringify({
"@context": "https://schema.org",
"@type": "TechArticle",
"headline": "Understanding Team Roles on Vast.ai",
"description": "A comprehensive guide to team roles on Vast.ai including default roles (Owner, Manager, Member), custom roles with tailored permissions, role syntax, and best practices for managing access control.",
"author": {
"@type": "Organization",
"name": "Vast.ai"
},
"datePublished": "2025-01-13",
"dateModified": "2025-04-04",
"articleSection": "Teams Documentation",
"keywords": ["team roles", "permissions", "access control", "custom roles", "vast.ai", "collaboration", "security"]
})
}}
/>
## What Are Team Roles?
Team roles in Vast.ai's platform are designed to streamline collaboration and enhance security by assigning specific permissions and access levels to different members of a team. These roles determine what actions a team member can perform and what data they can access within the team's shared workspace/context.
### Types of Team Roles
1. **Default Roles**: These are the standard roles with preset permissions, suitable for common team structures:
* *Owner*: Full access to all team resources, settings, and member management.
* *Manager*: All permissions of Team Owner apart from Team Deletion.
* *Member*: Has ability to view, create, and interact with instances, but no access to billing info, team management, autoscaler, machines, etc.
2. **Custom Roles**: Custom roles allow team managers to create roles with custom, tailored permissions via permission groups. This feature is particularly useful for teams with unique workflow requirements or specific security protocols.
For more information on Permission Groups and what they allow access to, [click here](/cli/installation).
### Creating Custom Roles
* **Accessing Role Management**: Custom roles can be created and managed through the **Roles** tab of the **Members** Page on the Vast.ai platform.
* **Defining Permissions**: When creating a custom role, you can select from a wide range of read/write permissions, such as instance creation, billing access, etc. This allows for precise control over what each role can and cannot do.
* **Assigning Custom Roles**: Once a custom role is created, it can be assigned to team members through the team management interface.
You can create roles either in the Vast CLI or on your team dashbaord if you have permission to create roles within your team (team\_write).
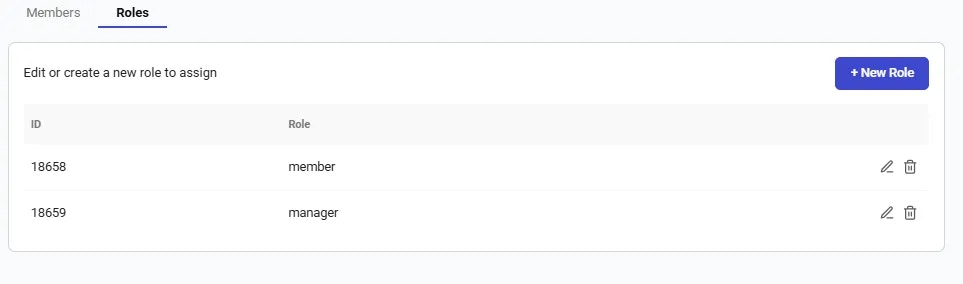 You can easily edit any roles on your team using the team dashboard. When editing a role you should see the same series of checkboxes and categories as before.
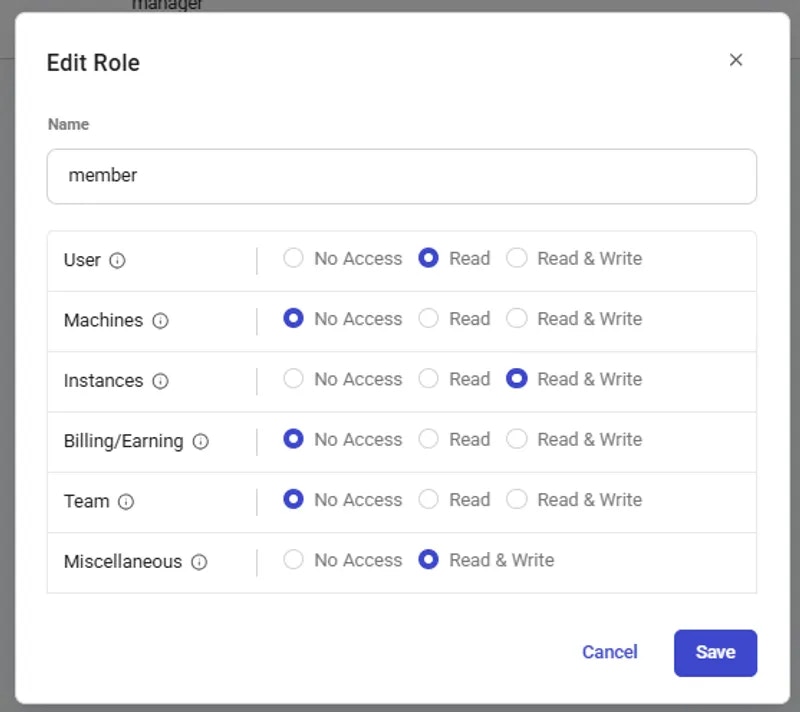 All team roles are created through the team dashboard using the role editor. You can also create roles through the Vast CLI by passing in a permissions JSON object that delegates what group of endpoints can be accessed.
Currently, the system only supports groups of endpoint categories, but soon it will be extended for further granularity.
The current activated scopes are as follows
* **misc**: Supports uncategorized operations like search offers, getting logs from various sources, etc
* **user\_read**: Allows the usage of obtaining basic user data like email, credits, etc. Essential for web usage.
* **user\_write**: Allows the ability to change account settings such as email, password, 2FA, etc.
* **instance\_read**: Grants ability to view instances, and certain read-only instance operations
* **instance\_write**: Grants access to instances and all relevant operations such as starting/stopping instances, cloud copy, reserving credits, etc
* **billing\_read**: Ability to view billing page and get billing information
* **billing\_write**: Ability to change billing page information
* **machine\_read**: Read access to machines owned by the team
* **machine\_write**: Ability to add/remove machines, and also edit machine settings
An example of a permissions json would look like this:
In order to create a granular team roles you must either use the CLI or the API. In the above example, the only API under team\_read that the user would have access to would be viewing the list of team members.
For more information on Permissions [click here](/cli/installation).
### Best Practices for Using Team Roles
* **Clear Role Definitions**: Clearly define the responsibilities and permissions for each role to avoid confusion and ensure effective collaboration.
* **Use Custom Roles Judiciously**: Create custom roles when predefined roles do not meet your specific needs. Be mindful of the permissions assigned to ensure team security and efficiency.
Team roles are a fundamental aspect of managing a secure environment for collaboration on the Vast.ai platform. By effectively utilizing predefined and custom roles, teams can ensure that each member has the appropriate level of access and control, fostering a productive and secure working environment.
---
## Complete Guide to Running Virtual Machines on Vast.ai
**URL:** llms-txt#complete-guide-to-running-virtual-machines-on-vast.ai
**Contents:**
- Introduction
- Prerequisites
- VM vs Docker: Understanding the Differences
- VM Advantages
- VM Limitations
- Common Use Cases
- Deep Learning Development Environments
- Development and Testing
- Production Workloads
- Research and Academic Use
Vast.ai provides virtual machine (VM) capabilities alongside its Docker-based instance rentals. This guide walks you through everything you need to know about running VMs on machines with GPUs found at Vast.
* A Vast.ai account
* [SSH client installed on your local machine and SSH public key added the Keys section at cloud.vast.ai](/documentation/instances/sshscp)
* [(Optional) Install and use vast-cli](/cli/get-started)
## VM vs Docker: Understanding the Differences
* Full support for init managers like `systemd`
* Enable running Docker, Kubernetes, and Snap applications
* Perfect for containerization within your instance
* Process tracing support via `ptrace`
* Ideal for debugging and system monitoring
* Complete system isolation
* Full control over the virtual environment
* Longer instance creation and boot times compared to Docker
* Higher disk space requirements
* Limited machine selection
* Fewer preconfigured templates
* Currently restricted to SSH-only launch mode
### Deep Learning Development Environments
* **Custom ML Framework Setups**: Run multiple ML framework versions simultaneously with full control over CUDA versions, perfect for maintaining compatibility with legacy projects while using newer frameworks.
* **Distributed Training Systems**: Set up complete Kubernetes clusters for distributed machine learning, enabling efficient training of large models across multiple nodes.
### Development and Testing
* **Docker Compose Development**: Deploy and test multi-container applications with full Docker Compose support, including volume mounts and network configurations not possible in regular Docker instances.
* **CUDA Performance Profiling**: Profile CUDA applications with full system access and hardware counters, enabling detailed performance analysis and optimization.
* **Containerization Development**: Test Docker and Kubernetes configurations in fully isolated environments with Docker-in-Docker capabilities.
* **System-Level Development**: Develop and test custom drivers and kernel modules with direct access to system resources.
### Production Workloads
* **Database Systems**: Run database servers with full control over system parameters and storage configurations for optimal performance.
* **Web Services**: Deploy web applications requiring specific system-level configurations or systemd integration.
### Research and Academic Use
* **Reproducible Research**: Create and preserve complete system environments to ensure research reproducibility across different setups.
* **GPU Architecture Research**: Conduct low-level GPU research with direct hardware access and custom driver configurations.
**Isolated Security Research**: Perform security testing and malware analysis in completely isolated environments without risking host system contamination.
### Legacy Application Support
**Legacy Software**: Run older applications that require specific operating system versions or library combinations not available in containers.
### Resource-Intensive Applications
* **High-Performance Computing**: Configure custom parallel computing environments with specific network and scheduler requirements.
* **Graphics and Rendering**: Set up rendering systems with precise control over GPU configurations and driver versions.
**SSH Key Setup (Required)**
NOTE: You must add your SSH public key to the Keys section after logging into your Vast.ai account before creating a VM instance. If you start a VM before any SSH keys have been added to your account, the VM will not be accessible.
Steps to setup your SSH key:
1. Generate an SSH key and copy your public key
2. Access your account settings page
3. Navigate to the SSH keys section
4. Add your public key
NOTE: SSH keys cannot be modified once a VM is running
## Creating and Configuring VMs
### Search for Ubuntu VM Template
Go to [Templates tab](https://cloud.vast.ai/templates/) and search for recommended Ubuntu 22.04 VM template.
### Edit Template as Needed
When you find the Ubuntu 22.04 VM template, you can edit the template.
### **Environment Variables**
You can set environment variables by editing the VM template and adding a specific environment variable name and value in the Environment Variables section or adding a line like this to "Docker options" field:
Variables are written to `/etc/environment.`To use these environment variables in a script once you're inside your machine, run this command:
### Expose Ports Publicly
You can expose ports publicly by editing the VM template and adding specific ports in Ports section or adding a line similar to this in "Docker options" field:
### Specify On-Start Script Configuration
The On-start script field allows specifying a script to run on instance start. Unlike in docker-based instances, the interpreter must be specified by a shebang. Here's an example for bash:
Rent a machine of your choice from the [Search tab](https://cloud.vast.ai/create/).
You can see the instance being created in the Instances tab. It can take some time to load.
## Connect to Your VM
Once the blue button the instance card says **>\_CONNECT**, you can click the button and copy the ssh command to execute in your terminal in your Mac or Linux-based computer. You can also use [Powershell or Windows Putty tools](/documentation/instances/sshscp) if you have a Windows computer.
### Cloud Copy Utility
* Different from Docker-based instances
* Use cli command: `vastai vm copy $SRC_VM_ID $DEST_VM_ID`
* Limitations:
* Only supports full VM migration
* Copying between VMs only (no external storage support)
* No individual folder copy support
* **Resource Management**
* Monitor disk usage due to higher overhead
* Plan for longer boot times in your workflows
* **Security**
* Keep SSH keys secure
* Configure firewall rules appropriately
* Regular security updates
* **Performance Optimization**
* Use appropriate VM sizes for your workload
* Monitor resource utilization
* Clean up unused resources
* **VM Won't Start**
* Check if SSH key is added in Account
* Verify that rented machine supports VMs
* **Environment Variables Not Working**
* Ensure variables are properly set in Docker options
* Check if `/etc/environment` is being sourced
* Verify script permissions
* **Connectivity Issues**
* Verify SSH key permissions
* Check network configuration
* Confirm port forwarding setup
* Try a different host machine
### Support Resources
* [Vast.ai documentation](/documentation/get-started/index)
* [Vast.ai Discord](https://discord.gg/hSuEbSQ4X8)
* [Support chat at Vast.ai](https://vast.ai/)
Virtual Machines on Vast.ai provide powerful capabilities for specific use cases, particularly those requiring full system control or containerization support. While they have some limitations compared to Docker instances, their flexibility and isolation make them ideal for many advanced computing scenarios.
**Examples:**
Example 1 (unknown):
```unknown
Variables are written to `/etc/environment.`To use these environment variables in a script once you're inside your machine, run this command:
```
Example 2 (unknown):
```unknown
### Expose Ports Publicly
You can expose ports publicly by editing the VM template and adding specific ports in Ports section or adding a line similar to this in "Docker options" field:
```
Example 3 (unknown):
```unknown
### Specify On-Start Script Configuration
The On-start script field allows specifying a script to run on instance start. Unlike in docker-based instances, the interpreter must be specified by a shebang. Here's an example for bash:
```
---
## Establish connection
**URL:** llms-txt#establish-connection
**Contents:**
- VS Code Integration
- Install the Remote SSH extension
- Open Remote Window
- Windows GUI Clients
sftp -P root@
Welcome to vast.ai. If authentication fails, try again after a few seconds, and double check your ssh key.
Have fun!
Connected to 79.116.73.220.
sftp> ls
hasbooted onstart.sh
```
Note that both scp and sftp take the `-P` argument in uppercase. This differs from the ssh command which uses lowercase.
## VS Code Integration
Once you have your ssh keys set up, connecting to VS Code is quite straightforward. We will cover the basics here.
### Install the Remote SSH extension
You will need to add the remote extension named 'Remote - SSH'.
All team roles are created through the team dashboard using the role editor. You can also create roles through the Vast CLI by passing in a permissions JSON object that delegates what group of endpoints can be accessed.
Currently, the system only supports groups of endpoint categories, but soon it will be extended for further granularity.
The current activated scopes are as follows
* **misc**: Supports uncategorized operations like search offers, getting logs from various sources, etc
* **user\_read**: Allows the usage of obtaining basic user data like email, credits, etc. Essential for web usage.
* **user\_write**: Allows the ability to change account settings such as email, password, 2FA, etc.
* **instance\_read**: Grants ability to view instances, and certain read-only instance operations
* **instance\_write**: Grants access to instances and all relevant operations such as starting/stopping instances, cloud copy, reserving credits, etc
* **billing\_read**: Ability to view billing page and get billing information
* **billing\_write**: Ability to change billing page information
* **machine\_read**: Read access to machines owned by the team
* **machine\_write**: Ability to add/remove machines, and also edit machine settings
An example of a permissions json would look like this:
In order to create a granular team roles you must either use the CLI or the API. In the above example, the only API under team\_read that the user would have access to would be viewing the list of team members.
For more information on Permissions [click here](/cli/installation).
### Best Practices for Using Team Roles
* **Clear Role Definitions**: Clearly define the responsibilities and permissions for each role to avoid confusion and ensure effective collaboration.
* **Use Custom Roles Judiciously**: Create custom roles when predefined roles do not meet your specific needs. Be mindful of the permissions assigned to ensure team security and efficiency.
Team roles are a fundamental aspect of managing a secure environment for collaboration on the Vast.ai platform. By effectively utilizing predefined and custom roles, teams can ensure that each member has the appropriate level of access and control, fostering a productive and secure working environment.
---
## Complete Guide to Running Virtual Machines on Vast.ai
**URL:** llms-txt#complete-guide-to-running-virtual-machines-on-vast.ai
**Contents:**
- Introduction
- Prerequisites
- VM vs Docker: Understanding the Differences
- VM Advantages
- VM Limitations
- Common Use Cases
- Deep Learning Development Environments
- Development and Testing
- Production Workloads
- Research and Academic Use
Vast.ai provides virtual machine (VM) capabilities alongside its Docker-based instance rentals. This guide walks you through everything you need to know about running VMs on machines with GPUs found at Vast.
* A Vast.ai account
* [SSH client installed on your local machine and SSH public key added the Keys section at cloud.vast.ai](/documentation/instances/sshscp)
* [(Optional) Install and use vast-cli](/cli/get-started)
## VM vs Docker: Understanding the Differences
* Full support for init managers like `systemd`
* Enable running Docker, Kubernetes, and Snap applications
* Perfect for containerization within your instance
* Process tracing support via `ptrace`
* Ideal for debugging and system monitoring
* Complete system isolation
* Full control over the virtual environment
* Longer instance creation and boot times compared to Docker
* Higher disk space requirements
* Limited machine selection
* Fewer preconfigured templates
* Currently restricted to SSH-only launch mode
### Deep Learning Development Environments
* **Custom ML Framework Setups**: Run multiple ML framework versions simultaneously with full control over CUDA versions, perfect for maintaining compatibility with legacy projects while using newer frameworks.
* **Distributed Training Systems**: Set up complete Kubernetes clusters for distributed machine learning, enabling efficient training of large models across multiple nodes.
### Development and Testing
* **Docker Compose Development**: Deploy and test multi-container applications with full Docker Compose support, including volume mounts and network configurations not possible in regular Docker instances.
* **CUDA Performance Profiling**: Profile CUDA applications with full system access and hardware counters, enabling detailed performance analysis and optimization.
* **Containerization Development**: Test Docker and Kubernetes configurations in fully isolated environments with Docker-in-Docker capabilities.
* **System-Level Development**: Develop and test custom drivers and kernel modules with direct access to system resources.
### Production Workloads
* **Database Systems**: Run database servers with full control over system parameters and storage configurations for optimal performance.
* **Web Services**: Deploy web applications requiring specific system-level configurations or systemd integration.
### Research and Academic Use
* **Reproducible Research**: Create and preserve complete system environments to ensure research reproducibility across different setups.
* **GPU Architecture Research**: Conduct low-level GPU research with direct hardware access and custom driver configurations.
**Isolated Security Research**: Perform security testing and malware analysis in completely isolated environments without risking host system contamination.
### Legacy Application Support
**Legacy Software**: Run older applications that require specific operating system versions or library combinations not available in containers.
### Resource-Intensive Applications
* **High-Performance Computing**: Configure custom parallel computing environments with specific network and scheduler requirements.
* **Graphics and Rendering**: Set up rendering systems with precise control over GPU configurations and driver versions.
**SSH Key Setup (Required)**
NOTE: You must add your SSH public key to the Keys section after logging into your Vast.ai account before creating a VM instance. If you start a VM before any SSH keys have been added to your account, the VM will not be accessible.
Steps to setup your SSH key:
1. Generate an SSH key and copy your public key
2. Access your account settings page
3. Navigate to the SSH keys section
4. Add your public key
NOTE: SSH keys cannot be modified once a VM is running
## Creating and Configuring VMs
### Search for Ubuntu VM Template
Go to [Templates tab](https://cloud.vast.ai/templates/) and search for recommended Ubuntu 22.04 VM template.
### Edit Template as Needed
When you find the Ubuntu 22.04 VM template, you can edit the template.
### **Environment Variables**
You can set environment variables by editing the VM template and adding a specific environment variable name and value in the Environment Variables section or adding a line like this to "Docker options" field:
Variables are written to `/etc/environment.`To use these environment variables in a script once you're inside your machine, run this command:
### Expose Ports Publicly
You can expose ports publicly by editing the VM template and adding specific ports in Ports section or adding a line similar to this in "Docker options" field:
### Specify On-Start Script Configuration
The On-start script field allows specifying a script to run on instance start. Unlike in docker-based instances, the interpreter must be specified by a shebang. Here's an example for bash:
Rent a machine of your choice from the [Search tab](https://cloud.vast.ai/create/).
You can see the instance being created in the Instances tab. It can take some time to load.
## Connect to Your VM
Once the blue button the instance card says **>\_CONNECT**, you can click the button and copy the ssh command to execute in your terminal in your Mac or Linux-based computer. You can also use [Powershell or Windows Putty tools](/documentation/instances/sshscp) if you have a Windows computer.
### Cloud Copy Utility
* Different from Docker-based instances
* Use cli command: `vastai vm copy $SRC_VM_ID $DEST_VM_ID`
* Limitations:
* Only supports full VM migration
* Copying between VMs only (no external storage support)
* No individual folder copy support
* **Resource Management**
* Monitor disk usage due to higher overhead
* Plan for longer boot times in your workflows
* **Security**
* Keep SSH keys secure
* Configure firewall rules appropriately
* Regular security updates
* **Performance Optimization**
* Use appropriate VM sizes for your workload
* Monitor resource utilization
* Clean up unused resources
* **VM Won't Start**
* Check if SSH key is added in Account
* Verify that rented machine supports VMs
* **Environment Variables Not Working**
* Ensure variables are properly set in Docker options
* Check if `/etc/environment` is being sourced
* Verify script permissions
* **Connectivity Issues**
* Verify SSH key permissions
* Check network configuration
* Confirm port forwarding setup
* Try a different host machine
### Support Resources
* [Vast.ai documentation](/documentation/get-started/index)
* [Vast.ai Discord](https://discord.gg/hSuEbSQ4X8)
* [Support chat at Vast.ai](https://vast.ai/)
Virtual Machines on Vast.ai provide powerful capabilities for specific use cases, particularly those requiring full system control or containerization support. While they have some limitations compared to Docker instances, their flexibility and isolation make them ideal for many advanced computing scenarios.
**Examples:**
Example 1 (unknown):
```unknown
Variables are written to `/etc/environment.`To use these environment variables in a script once you're inside your machine, run this command:
```
Example 2 (unknown):
```unknown
### Expose Ports Publicly
You can expose ports publicly by editing the VM template and adding specific ports in Ports section or adding a line similar to this in "Docker options" field:
```
Example 3 (unknown):
```unknown
### Specify On-Start Script Configuration
The On-start script field allows specifying a script to run on instance start. Unlike in docker-based instances, the interpreter must be specified by a shebang. Here's an example for bash:
```
---
## Establish connection
**URL:** llms-txt#establish-connection
**Contents:**
- VS Code Integration
- Install the Remote SSH extension
- Open Remote Window
- Windows GUI Clients
sftp -P root@
Welcome to vast.ai. If authentication fails, try again after a few seconds, and double check your ssh key.
Have fun!
Connected to 79.116.73.220.
sftp> ls
hasbooted onstart.sh
```
Note that both scp and sftp take the `-P` argument in uppercase. This differs from the ssh command which uses lowercase.
## VS Code Integration
Once you have your ssh keys set up, connecting to VS Code is quite straightforward. We will cover the basics here.
### Install the Remote SSH extension
You will need to add the remote extension named 'Remote - SSH'.
 ### Open Remote Window


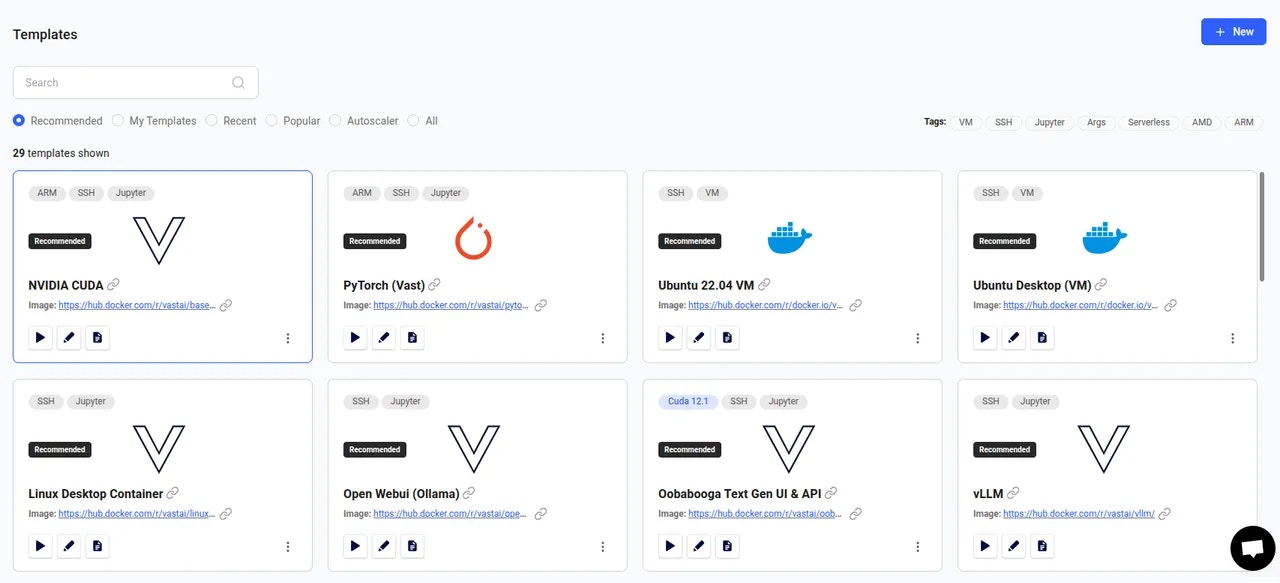 Browse through the templates until you find one that meets your requirements. In this guide we will use NVIDIA CUDA, which is the first on the list. It's a great starter template as it just includes the CUDA development environment, plus a few extras to improve the user experience.
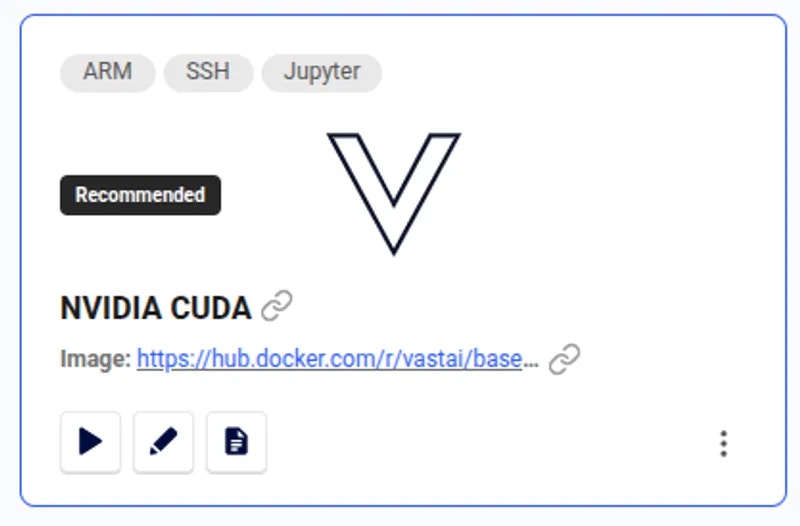 Now, click the 'play' button. This will load the template and take you to the available offers.
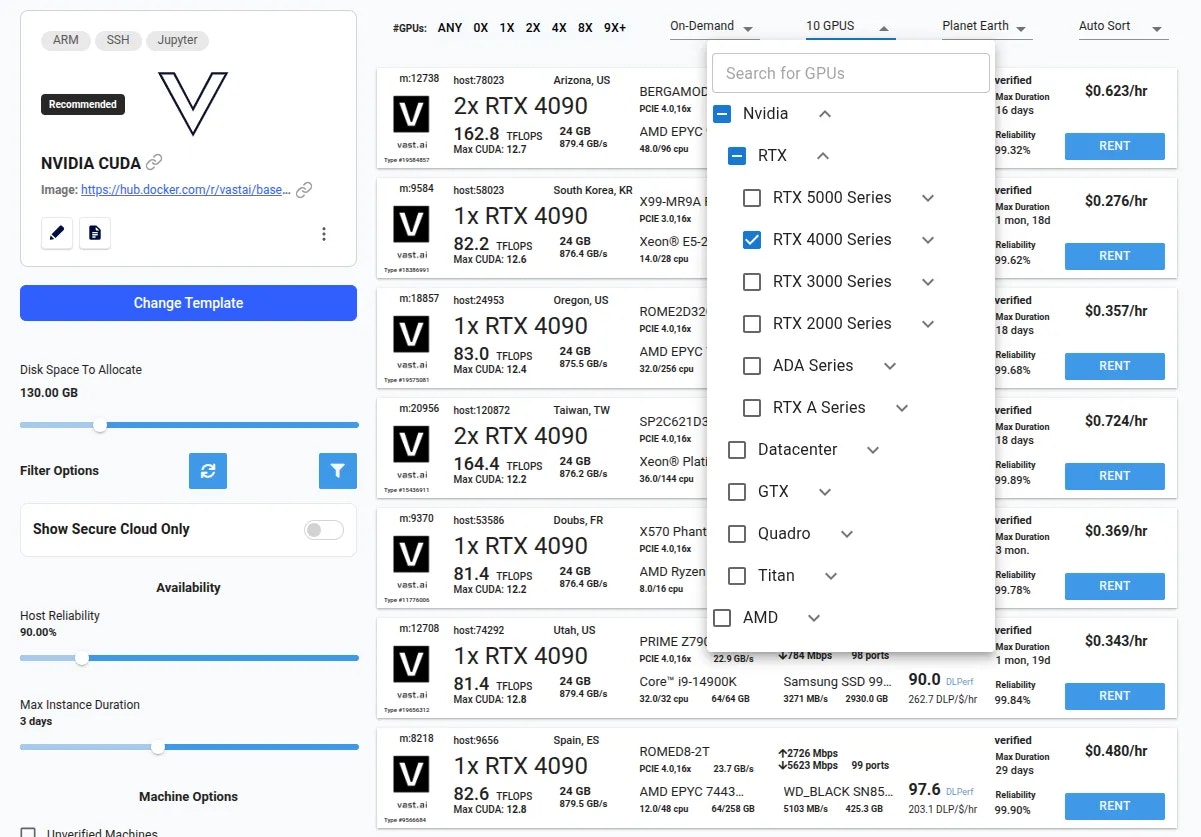 There are filters available at the top of the page to help you target a particular GPU. You will also find many additional filters on the left of the page for more fine-grained control over the instances you find.
When you have found a suitable offer, simply click the 'RENT' button to create your new instance.
You can now visit [cloud.vast.ai/instances](https://cloud.vast.ai/instances/) where you will find your running instance. It may take a few minutes to be ready as everything is being set up.
There are filters available at the top of the page to help you target a particular GPU. You will also find many additional filters on the left of the page for more fine-grained control over the instances you find.
When you have found a suitable offer, simply click the 'RENT' button to create your new instance.
You can now visit [cloud.vast.ai/instances](https://cloud.vast.ai/instances/) where you will find your running instance. It may take a few minutes to be ready as everything is being set up.
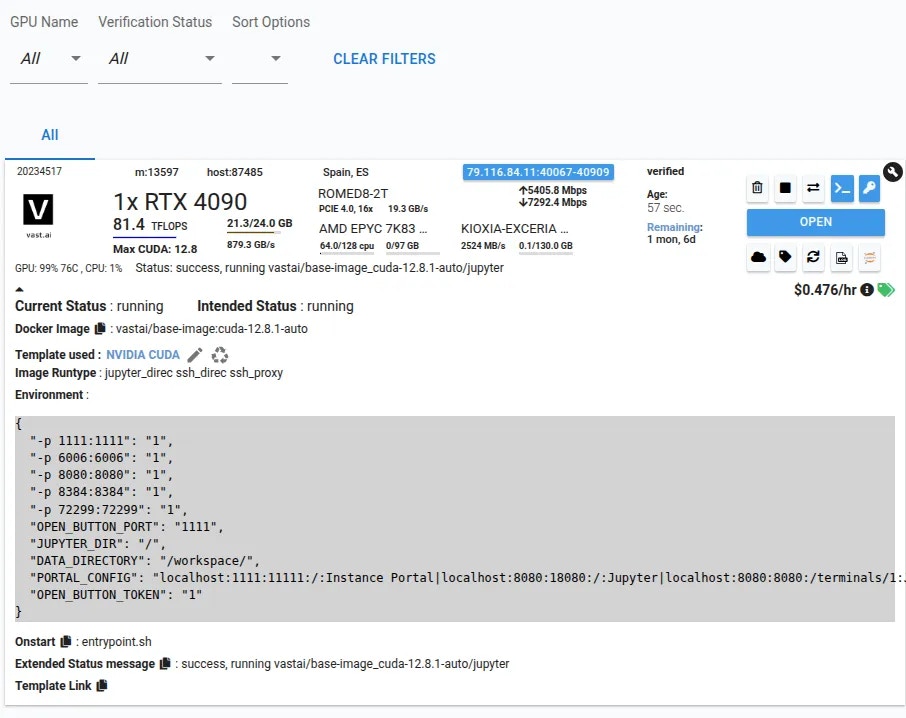 When it is ready you will see the blue open button. This indicates that the instance is ready to connect.
The action of the open button depends on the template you have chosen - In this example you will be transferred to the [Instance Portal](/documentation/instances/instance-portal). To learn how to configure Instance Portal links, see our [Advanced Setup](/documentation/templates/advanced-setup#portal-config) guide.
Now that you've run your first template:
* **Understand templates better** - See [Introduction](/documentation/templates/introduction) to learn about templates and Vast's template ecosystem
* **Create your own template** - Follow our [Creating Templates](/documentation/templates/creating-templates) tutorial
* **Explore advanced features** - Check out [Advanced Setup](/documentation/templates/advanced-setup) for provisioning scripts and custom images
---
## show connections
**URL:** llms-txt#show-connections
Source: https://docs.vast.ai/api-reference/accounts/show-connections
api-reference/openapi.json get /api/v0/users/cloud_integrations/
Retrieves the list of cloud connections associated with the authenticated user.
CLI Usage: `vastai show connections`
---
## All resources
**URL:** llms-txt#all-resources
---
## Activate the main virtual environment
**URL:** llms-txt#activate-the-main-virtual-environment
. /venv/main/bin/activate
---
## Pricing
**URL:** llms-txt#pricing
**Contents:**
- GPU Recruitment
- Suspending an Endpoint
- Stopping an Endpoint
- Billing by Instance State
Source: https://docs.vast.ai/documentation/serverless/pricing
Learn how Vast.ai Serverless pricing works - GPU recruitment, endpoint suspension, and stopping.
Vast.ai Serverless offers pay-as-you-go pricing for all workloads at the same rates as Vast.ai's non-Serverless GPU instances. Each instance accrues cost on a per second basis.
This guide explains how pricing works.
As the Serverless engine takes requests, it will automatically scale its number of workers up or down depending on the incoming and forecasted demand. When scaling up,
the engine searches over the Vast.ai marketplace for GPU instances that offer the best performance / price ratio. Once determined, the GPU instance(s) is recruited into
the Serverless engine, and its cost (\$/hr) is added to the running sum of all GPU instances running on your Serverless engine.
As the request demand falls off, the engine will remove GPU instance(s) and your credit account immediatley stops being charged for those corresponding instance(s).
Visit the [Billing Help](/documentation/reference/billing#ugwiY) page to see details on GPU instance costs.
## Suspending an Endpoint
By suspending an Endpoint, the Endpoint will no longer recruit any new GPU instances, but will continue to use the instances it currently has. This is a way to cap the
number of instances an Endpoint can manage, and therefore limit costs.
## Stopping an Endpoint
Stopping an Endpoint will pause the recruitment of GPU instances, and put the existing instances into the "Stopped" state, preventing any work from being sent to
the Endpoint group. The instances will still charge the small storage cost, but active rental and bandwidth costs will not be charged to the user account.
## Billing by Instance State
The specific charges depend on the instance's state:
| State | GPU compute | Storage | Bandwidth in | Bandwidth out |
| -------- | ----------- | ------- | ------------ | ------------- |
| Ready | Billed | Billed | Billed | Billed |
| Loading | Billed | Billed | Billed | Billed |
| Creating | Not billed | Billed | Billed | Billed |
| Inactive | Not billed | Billed | Billed | Billed |
GPU compute refers to the per-second GPU rental charges. See the [Billing Help](/documentation/reference/billing#ugwiY) page for rate details.
---
## Linux Virtual Machines
**URL:** llms-txt#linux-virtual-machines
Source: https://docs.vast.ai/linux-virtual-machines
---
## Example /root/onstart.sh
**URL:** llms-txt#example-/root/onstart.sh
**Contents:**
- Environment Configuration
- How do I set environment variables?
#!/bin/bash
cd /workspace
python train.py --resume
bash theme={null}
-e TZ=UTC -e TASKID="TEST"
bash theme={null}
**Examples:**
Example 1 (unknown):
```unknown
## Environment Configuration
### How do I set environment variables?
Use the `-e` Docker syntax in the docker create/run options:
```
Example 2 (unknown):
```unknown
To make variables visible in SSH/Jupyter sessions, export them to `/etc/environment`:
```
---
## unlist network-volume
**URL:** llms-txt#unlist-network-volume
Source: https://docs.vast.ai/api-reference/network-volumes/unlist-network-volume
api-reference/openapi.json post /api/v0/network_volumes/unlist/
Unlists a network volume for rent.
CLI Usage: `vastai unlist volume `
---
## vLLM
**URL:** llms-txt#vllm
Source: https://docs.vast.ai/documentation/serverless/vllm
Learn how to use vLLM with Vast.ai Serverless for large language model inference.
The vLLM Serverless template can be used to infer LLMs on Vast GPU instances. This page documents required environment variables and endpoints to get started.
A full PyWorker and Client implementation can be found [here](https://github.com/vast-ai/pyworker/tree/main), which implements the endpoints below.
---
## tests nccl bandwidth between two nodes.
**URL:** llms-txt#tests-nccl-bandwidth-between-two-nodes.
---
## set defjob
**URL:** llms-txt#set-defjob
Source: https://docs.vast.ai/api-reference/machines/set-defjob
api-reference/openapi.json put /api/v0/machines/create_bids/
Creates default jobs (background instances) for a specified machine with the given parameters.
CLI Usage: `vastai set defjob --price_gpu --price_inetu --price_inetd --image
When it is ready you will see the blue open button. This indicates that the instance is ready to connect.
The action of the open button depends on the template you have chosen - In this example you will be transferred to the [Instance Portal](/documentation/instances/instance-portal). To learn how to configure Instance Portal links, see our [Advanced Setup](/documentation/templates/advanced-setup#portal-config) guide.
Now that you've run your first template:
* **Understand templates better** - See [Introduction](/documentation/templates/introduction) to learn about templates and Vast's template ecosystem
* **Create your own template** - Follow our [Creating Templates](/documentation/templates/creating-templates) tutorial
* **Explore advanced features** - Check out [Advanced Setup](/documentation/templates/advanced-setup) for provisioning scripts and custom images
---
## show connections
**URL:** llms-txt#show-connections
Source: https://docs.vast.ai/api-reference/accounts/show-connections
api-reference/openapi.json get /api/v0/users/cloud_integrations/
Retrieves the list of cloud connections associated with the authenticated user.
CLI Usage: `vastai show connections`
---
## All resources
**URL:** llms-txt#all-resources
---
## Activate the main virtual environment
**URL:** llms-txt#activate-the-main-virtual-environment
. /venv/main/bin/activate
---
## Pricing
**URL:** llms-txt#pricing
**Contents:**
- GPU Recruitment
- Suspending an Endpoint
- Stopping an Endpoint
- Billing by Instance State
Source: https://docs.vast.ai/documentation/serverless/pricing
Learn how Vast.ai Serverless pricing works - GPU recruitment, endpoint suspension, and stopping.
Vast.ai Serverless offers pay-as-you-go pricing for all workloads at the same rates as Vast.ai's non-Serverless GPU instances. Each instance accrues cost on a per second basis.
This guide explains how pricing works.
As the Serverless engine takes requests, it will automatically scale its number of workers up or down depending on the incoming and forecasted demand. When scaling up,
the engine searches over the Vast.ai marketplace for GPU instances that offer the best performance / price ratio. Once determined, the GPU instance(s) is recruited into
the Serverless engine, and its cost (\$/hr) is added to the running sum of all GPU instances running on your Serverless engine.
As the request demand falls off, the engine will remove GPU instance(s) and your credit account immediatley stops being charged for those corresponding instance(s).
Visit the [Billing Help](/documentation/reference/billing#ugwiY) page to see details on GPU instance costs.
## Suspending an Endpoint
By suspending an Endpoint, the Endpoint will no longer recruit any new GPU instances, but will continue to use the instances it currently has. This is a way to cap the
number of instances an Endpoint can manage, and therefore limit costs.
## Stopping an Endpoint
Stopping an Endpoint will pause the recruitment of GPU instances, and put the existing instances into the "Stopped" state, preventing any work from being sent to
the Endpoint group. The instances will still charge the small storage cost, but active rental and bandwidth costs will not be charged to the user account.
## Billing by Instance State
The specific charges depend on the instance's state:
| State | GPU compute | Storage | Bandwidth in | Bandwidth out |
| -------- | ----------- | ------- | ------------ | ------------- |
| Ready | Billed | Billed | Billed | Billed |
| Loading | Billed | Billed | Billed | Billed |
| Creating | Not billed | Billed | Billed | Billed |
| Inactive | Not billed | Billed | Billed | Billed |
GPU compute refers to the per-second GPU rental charges. See the [Billing Help](/documentation/reference/billing#ugwiY) page for rate details.
---
## Linux Virtual Machines
**URL:** llms-txt#linux-virtual-machines
Source: https://docs.vast.ai/linux-virtual-machines
---
## Example /root/onstart.sh
**URL:** llms-txt#example-/root/onstart.sh
**Contents:**
- Environment Configuration
- How do I set environment variables?
#!/bin/bash
cd /workspace
python train.py --resume
bash theme={null}
-e TZ=UTC -e TASKID="TEST"
bash theme={null}
**Examples:**
Example 1 (unknown):
```unknown
## Environment Configuration
### How do I set environment variables?
Use the `-e` Docker syntax in the docker create/run options:
```
Example 2 (unknown):
```unknown
To make variables visible in SSH/Jupyter sessions, export them to `/etc/environment`:
```
---
## unlist network-volume
**URL:** llms-txt#unlist-network-volume
Source: https://docs.vast.ai/api-reference/network-volumes/unlist-network-volume
api-reference/openapi.json post /api/v0/network_volumes/unlist/
Unlists a network volume for rent.
CLI Usage: `vastai unlist volume `
---
## vLLM
**URL:** llms-txt#vllm
Source: https://docs.vast.ai/documentation/serverless/vllm
Learn how to use vLLM with Vast.ai Serverless for large language model inference.
The vLLM Serverless template can be used to infer LLMs on Vast GPU instances. This page documents required environment variables and endpoints to get started.
A full PyWorker and Client implementation can be found [here](https://github.com/vast-ai/pyworker/tree/main), which implements the endpoints below.
---
## tests nccl bandwidth between two nodes.
**URL:** llms-txt#tests-nccl-bandwidth-between-two-nodes.
---
## set defjob
**URL:** llms-txt#set-defjob
Source: https://docs.vast.ai/api-reference/machines/set-defjob
api-reference/openapi.json put /api/v0/machines/create_bids/
Creates default jobs (background instances) for a specified machine with the given parameters.
CLI Usage: `vastai set defjob --price_gpu --price_inetu --price_inetd --image 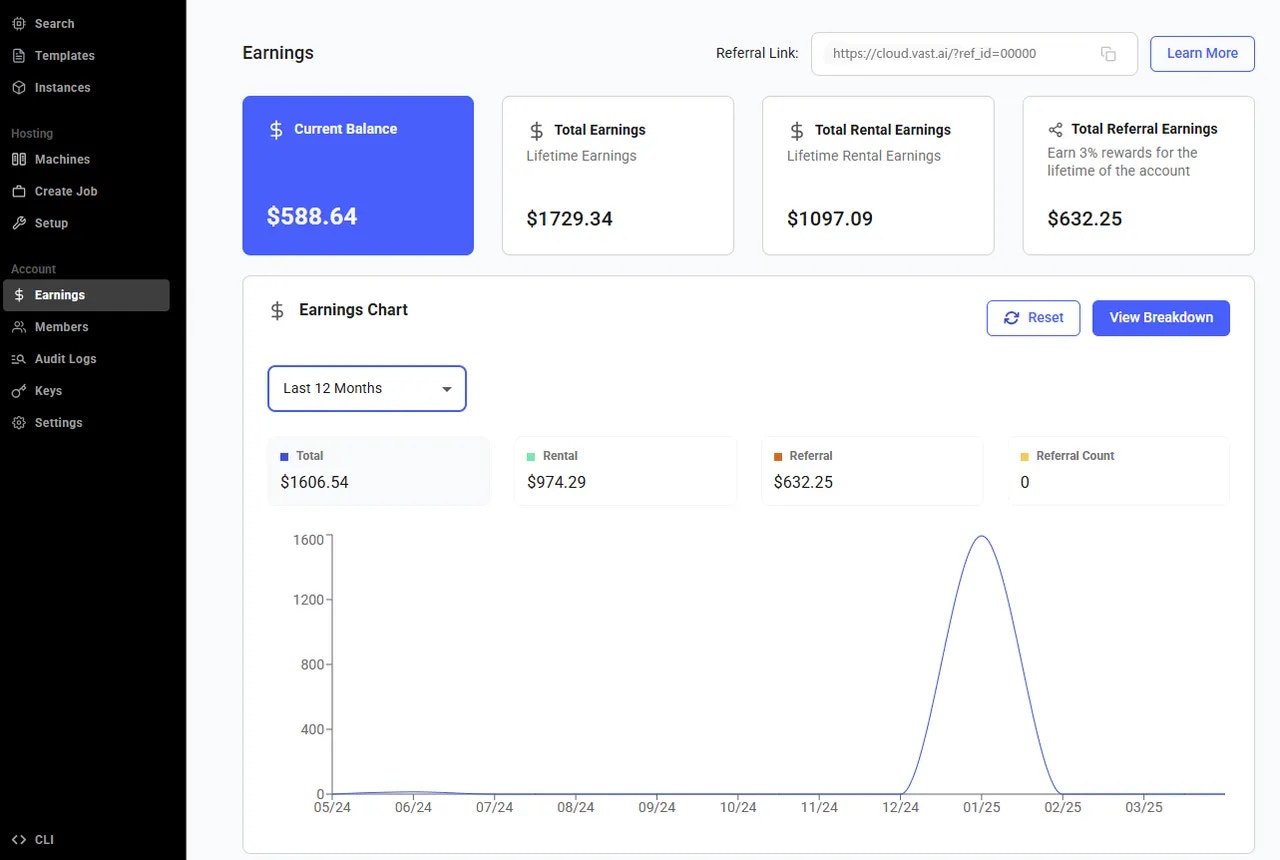 The **Earnings **page gives you a transparent view of your referral program performance and accumulated rewards. Here’s what each section means:
* **Current Balance:** This is the amount you’ve earned so far from your referred users but **haven’t been paid out yet. **It keeps growing as your referrals continue to use the platform.
* **Total Earnings**: This shows your **lifetime earnings **the total amount you’ve earned from all your referrals since you joined the earnings program or started hosting. It includes both paid and unpaid amounts.
* **Total Referral Count**: This number represents the **total users you’ve referred **who have successfully created accounts through your referral link. It’s a great way to track how your outreach is growing!
* **Total Rental Earnings **(host only)**: **This shows the total lifetime amount you’ve earned from your machine being rented out on the platform.
* **Total Referral Earnings** (host only): This shows the total lifetime amout you've earned from all your referrals.
Additionally, there is the **Earning Chart** section that provides a clear visual overview of your earning history.
The **Earnings **page gives you a transparent view of your referral program performance and accumulated rewards. Here’s what each section means:
* **Current Balance:** This is the amount you’ve earned so far from your referred users but **haven’t been paid out yet. **It keeps growing as your referrals continue to use the platform.
* **Total Earnings**: This shows your **lifetime earnings **the total amount you’ve earned from all your referrals since you joined the earnings program or started hosting. It includes both paid and unpaid amounts.
* **Total Referral Count**: This number represents the **total users you’ve referred **who have successfully created accounts through your referral link. It’s a great way to track how your outreach is growing!
* **Total Rental Earnings **(host only)**: **This shows the total lifetime amount you’ve earned from your machine being rented out on the platform.
* **Total Referral Earnings** (host only): This shows the total lifetime amout you've earned from all your referrals.
Additionally, there is the **Earning Chart** section that provides a clear visual overview of your earning history.
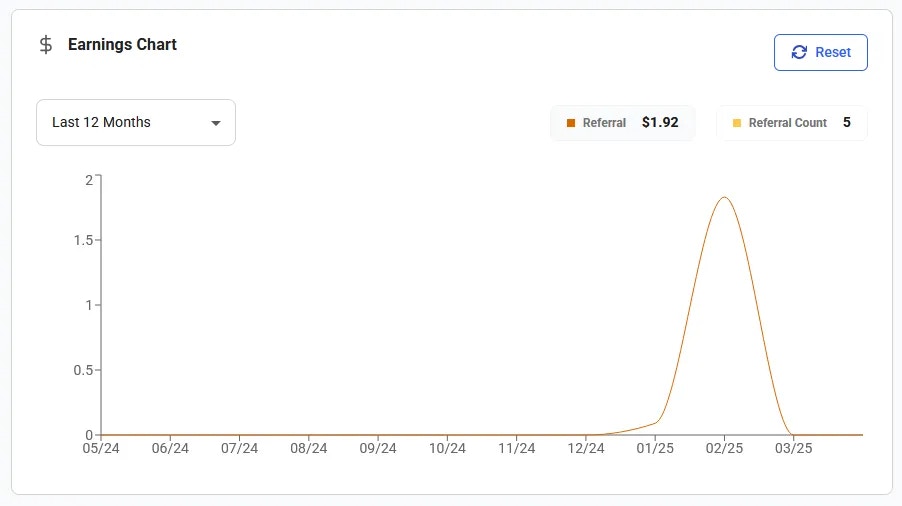 The **Template Performance** chart displays the earnings hystory from templates.
You can view your payout history for a selected date range. Here you can generate and download invoices for your earning payouts.
The **Template Performance** chart displays the earnings hystory from templates.
You can view your payout history for a selected date range. Here you can generate and download invoices for your earning payouts.
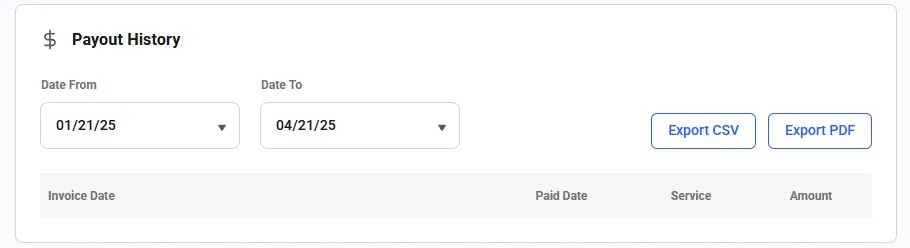 In the **Payout Account** section, you can set up a payout account.
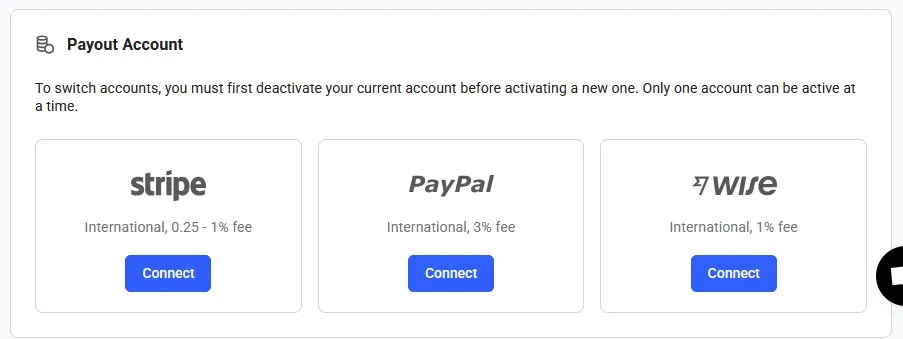 ### How can I have earnings as a Vast user?
You can generate earnings by gaining Vast credit through template creaton via our referral program. You can find more information about Vast's referral program [here](/documentation/reference/referral-program).
---
## it is nearly identical to handler as above, but it calls a different model API endpoint and it streams the
**URL:** llms-txt#it-is-nearly-identical-to-handler-as-above,-but-it-calls-a-different-model-api-endpoint-and-it-streams-the
---
## Authentication
**URL:** llms-txt#authentication
WEB_ENABLE_HTTPS=false # Enable/disable direct HTTPS
WEB_ENABLE_AUTH=true # Enable/disable authentication
---
## Windows SSH Guide
**URL:** llms-txt#windows-ssh-guide
**Contents:**
- Windows Powershell
- Jupyter Terminal - SSH Alternative
- GUI Setup Guide (Windows)
- PuTTY
- MobaXterm
- Other GUI Clients
Source: https://docs.vast.ai/documentation/instances/connect/windows-guide
Learn how to securely connect to Vast.ai instances using SSH on Windows. Understand the basics of SSH, how to generate and add keys, and how to use PuTTY and MobaXterm for GUI-based connections.
## Windows Powershell
Modern versions of Windows support running CLI ssh commands in PowerShell. We recommemnd you use the CLI wherever possible.
This guide will focus only on **Windows GUI tools.** If you would like to proceed with the CLI, please navigate to the [full SSH guide](/documentation/instances/sshscp) for setup information.
## Jupyter Terminal - SSH Alternative
As a simple alternative to SSH, you might like to consider Jupyter Terminal instead. All instances started in Jupyter launch mode will have this enabled. It is a very straightforward web-based terminal with session persistence. It's great for a quick CLI session.
Access the terminal from the SSH connections interface
### How can I have earnings as a Vast user?
You can generate earnings by gaining Vast credit through template creaton via our referral program. You can find more information about Vast's referral program [here](/documentation/reference/referral-program).
---
## it is nearly identical to handler as above, but it calls a different model API endpoint and it streams the
**URL:** llms-txt#it-is-nearly-identical-to-handler-as-above,-but-it-calls-a-different-model-api-endpoint-and-it-streams-the
---
## Authentication
**URL:** llms-txt#authentication
WEB_ENABLE_HTTPS=false # Enable/disable direct HTTPS
WEB_ENABLE_AUTH=true # Enable/disable authentication
---
## Windows SSH Guide
**URL:** llms-txt#windows-ssh-guide
**Contents:**
- Windows Powershell
- Jupyter Terminal - SSH Alternative
- GUI Setup Guide (Windows)
- PuTTY
- MobaXterm
- Other GUI Clients
Source: https://docs.vast.ai/documentation/instances/connect/windows-guide
Learn how to securely connect to Vast.ai instances using SSH on Windows. Understand the basics of SSH, how to generate and add keys, and how to use PuTTY and MobaXterm for GUI-based connections.
## Windows Powershell
Modern versions of Windows support running CLI ssh commands in PowerShell. We recommemnd you use the CLI wherever possible.
This guide will focus only on **Windows GUI tools.** If you would like to proceed with the CLI, please navigate to the [full SSH guide](/documentation/instances/sshscp) for setup information.
## Jupyter Terminal - SSH Alternative
As a simple alternative to SSH, you might like to consider Jupyter Terminal instead. All instances started in Jupyter launch mode will have this enabled. It is a very straightforward web-based terminal with session persistence. It's great for a quick CLI session.
Access the terminal from the SSH connections interface

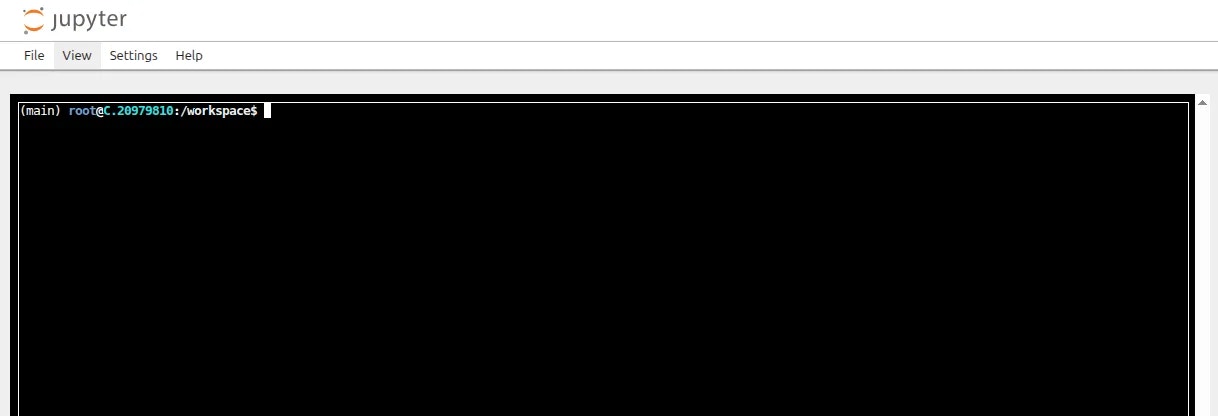 ## GUI Setup Guide (Windows)
Several GUI tools are available to help with SSH connectivity. While it is often most straightforward to use the terminal we will cover some of the popular options here.
For each application we will assume the following:
* IP address: 142.114.29.158
* Port: 46230
* Username: root
To find your own connection details you can click the SSH button on your instance card.
## GUI Setup Guide (Windows)
Several GUI tools are available to help with SSH connectivity. While it is often most straightforward to use the terminal we will cover some of the popular options here.
For each application we will assume the following:
* IP address: 142.114.29.158
* Port: 46230
* Username: root
To find your own connection details you can click the SSH button on your instance card.

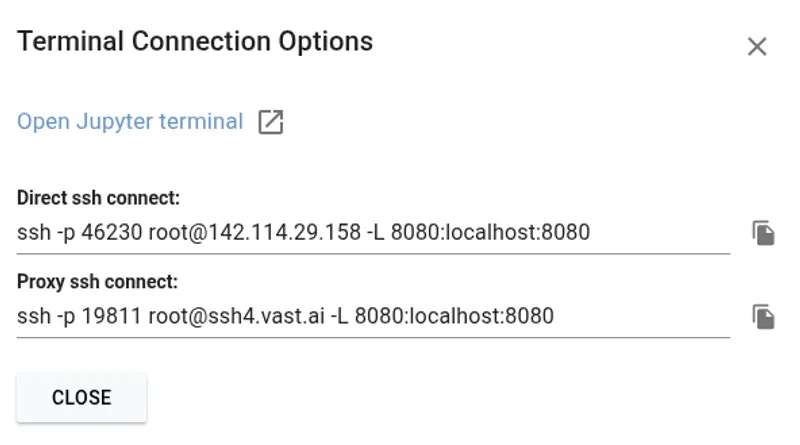 [PuTTY](https://www.chiark.greenend.org.uk/~sgtatham/putty/) consists of two important components - PuTTY for making connections and PuTTYGen for creating SSH keys.
First, we will generate a public and private key pair. PuTTy uses its own `.ppk` private key type.
Open PuTTYGen and click the 'Generate' button. You will be asked to move your mouse around until the green bar is full.
[PuTTY](https://www.chiark.greenend.org.uk/~sgtatham/putty/) consists of two important components - PuTTY for making connections and PuTTYGen for creating SSH keys.
First, we will generate a public and private key pair. PuTTy uses its own `.ppk` private key type.
Open PuTTYGen and click the 'Generate' button. You will be asked to move your mouse around until the green bar is full.
 Once the key generation has completed, save both your public and private key somewhere safe such as in your Documents folder. Optionally you can enter a passphrase for your private key for added security.
Next, copy the full public key to the clipboard and add it to your account at [https://cloud.vast.ai/manage-keys/](https://cloud.vast.ai/manage-keys/)
Any keys stored at the account level will automatically be added to new instances as they are created. If you have an existing instance you can add keys to it from the instance card.
Once the key generation has completed, save both your public and private key somewhere safe such as in your Documents folder. Optionally you can enter a passphrase for your private key for added security.
Next, copy the full public key to the clipboard and add it to your account at [https://cloud.vast.ai/manage-keys/](https://cloud.vast.ai/manage-keys/)
Any keys stored at the account level will automatically be added to new instances as they are created. If you have an existing instance you can add keys to it from the instance card.

 Now that we have a suitable key to use, close PuTTYGen and open the main PuTTY application.
In the 'Session' tab, enter the **IP address** and the **port**
Now that we have a suitable key to use, close PuTTYGen and open the main PuTTY application.
In the 'Session' tab, enter the **IP address** and the **port**
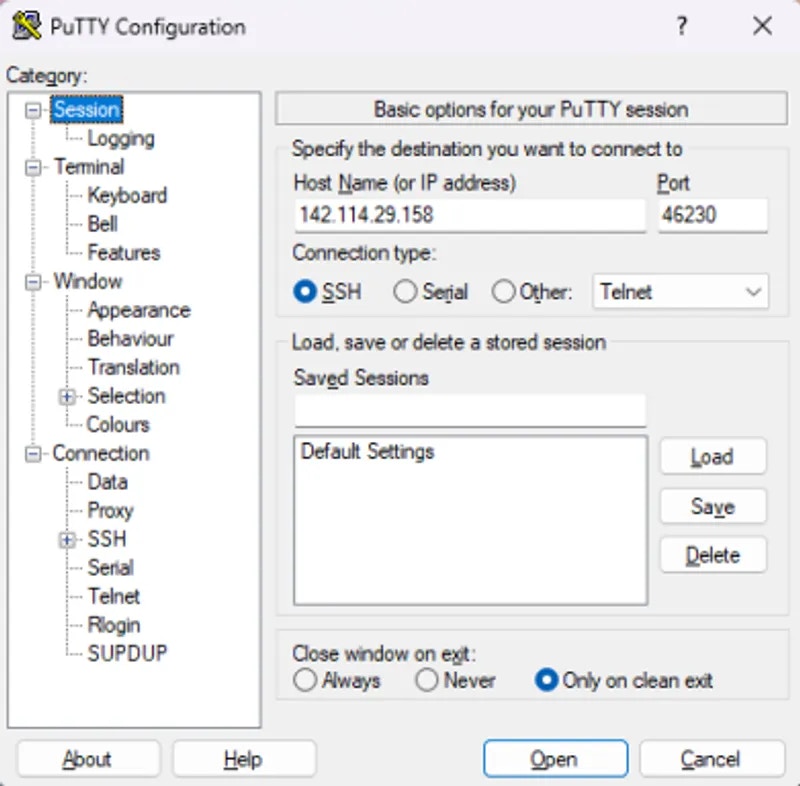 Next, move to the 'Connection -> Data\` tab and set the Auto-login username to 'root'
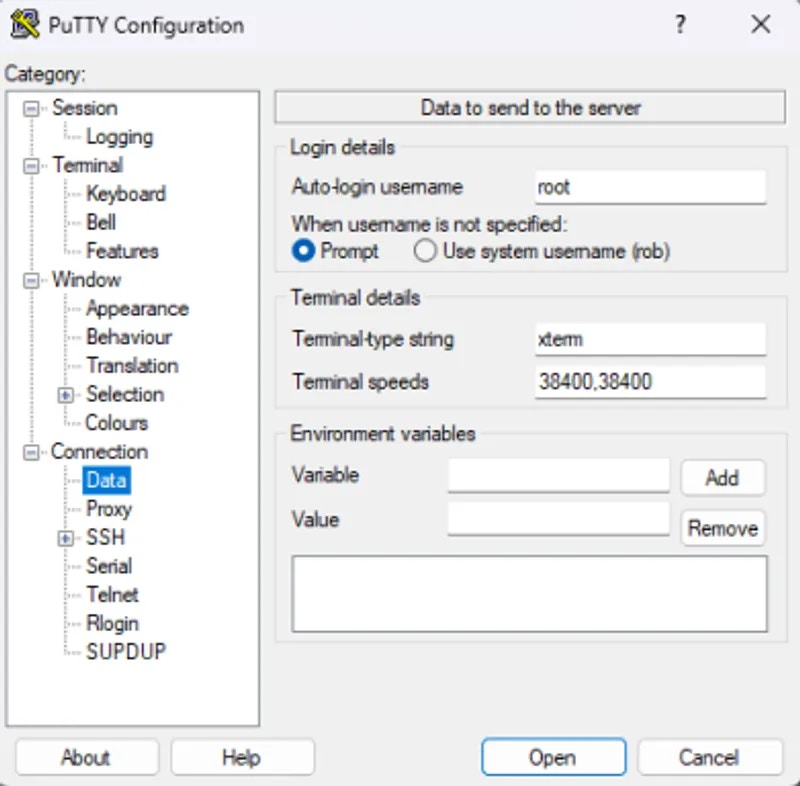 Now navigate to 'Connection -> SSH -> Auth -> Credentials' and browse for the private key (.ppk) that you saved earlier.
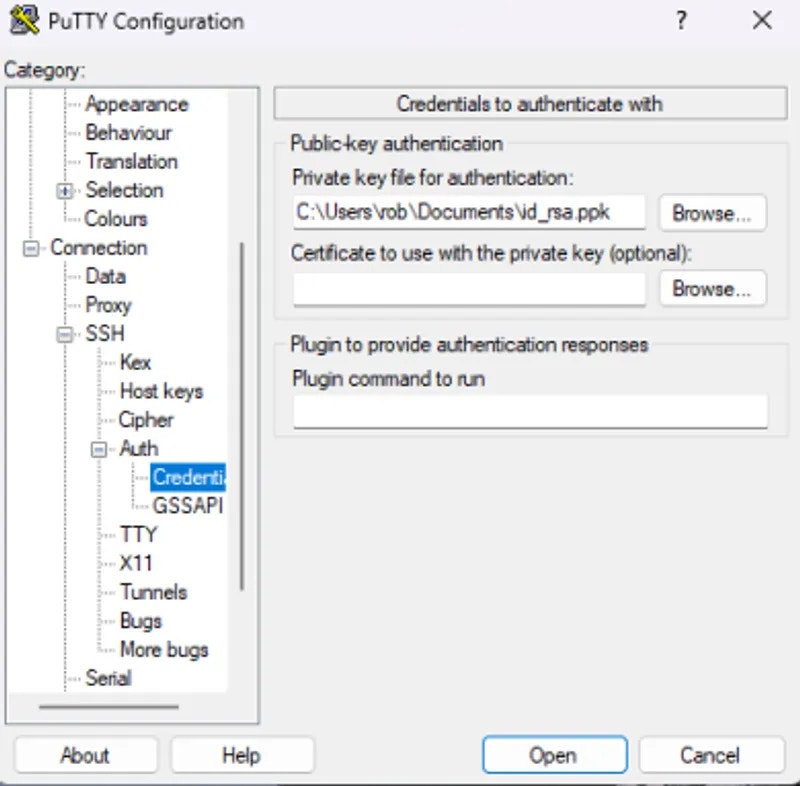 Finally navigate back to the 'Sessions' tab to save the connection details. Here I have saved the session with the instance ID so that I can access it again later.
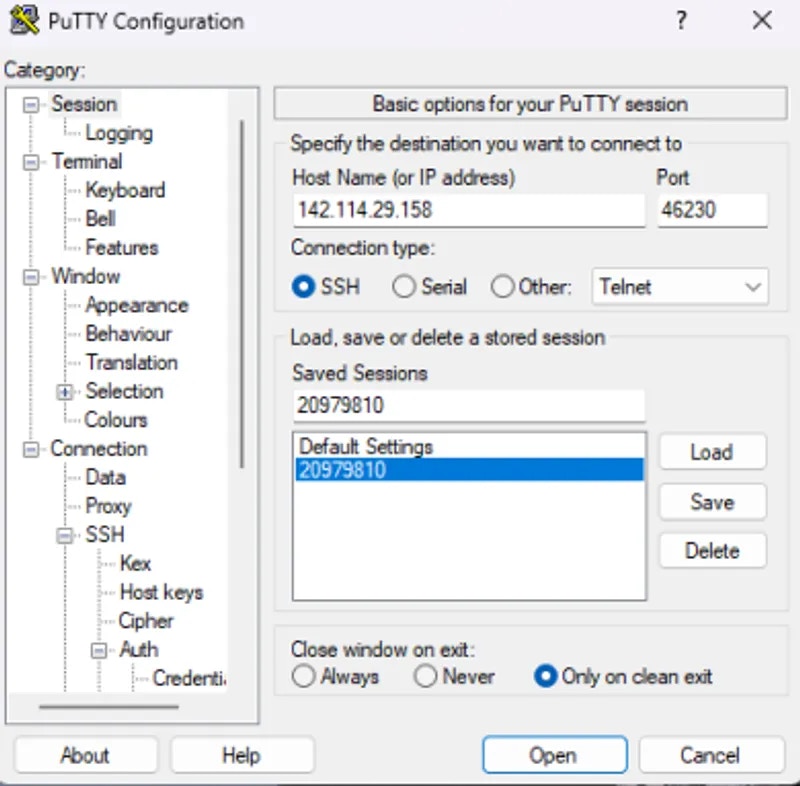 Finally, Click the 'Open' button to be connected to your instance.
PuTTY has many additional features to explore. Find the full documentation [here.](https://www.chiark.greenend.org.uk/~sgtatham/putty/docs.html)
First, we need to create a public and private key pair. MobaXterm uses puTTY style `.ppk` keys.
Open the application and navigate to Tools -> MobaKeyGen (SSH Key Generator)
Glick the 'Generate' button. You will be asked to move your mouse around until the green bar is full.
Finally, Click the 'Open' button to be connected to your instance.
PuTTY has many additional features to explore. Find the full documentation [here.](https://www.chiark.greenend.org.uk/~sgtatham/putty/docs.html)
First, we need to create a public and private key pair. MobaXterm uses puTTY style `.ppk` keys.
Open the application and navigate to Tools -> MobaKeyGen (SSH Key Generator)
Glick the 'Generate' button. You will be asked to move your mouse around until the green bar is full.
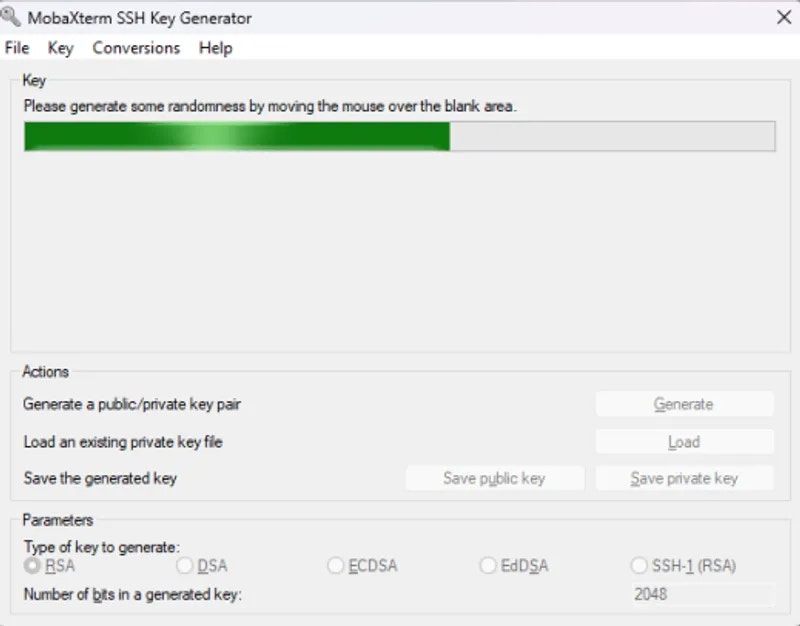 Once the key generation has completed, save both your public and private key somewhere safe such as in your Documents folder. Optionally you can enter a passphrase for your private key for added security.
Next, copy the full public key to the clipboard and add it to your account at [https://cloud.vast.ai/manage-keys/](https://cloud.vast.ai/manage-keys/)
Any keys stored at the account level will automatically be added to new instances as they are created. If you have an existing instance you can add keys to it from the instance card.
Once the key generation has completed, save both your public and private key somewhere safe such as in your Documents folder. Optionally you can enter a passphrase for your private key for added security.
Next, copy the full public key to the clipboard and add it to your account at [https://cloud.vast.ai/manage-keys/](https://cloud.vast.ai/manage-keys/)
Any keys stored at the account level will automatically be added to new instances as they are created. If you have an existing instance you can add keys to it from the instance card.
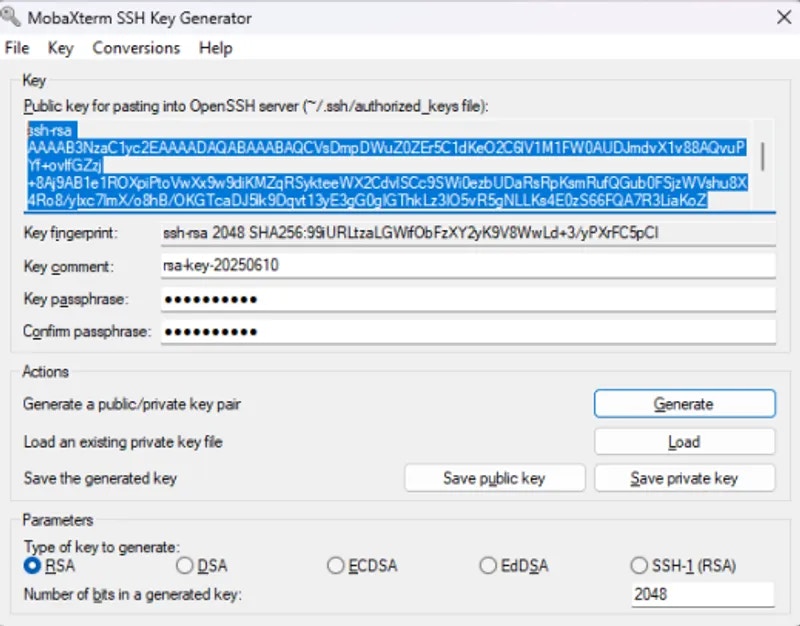
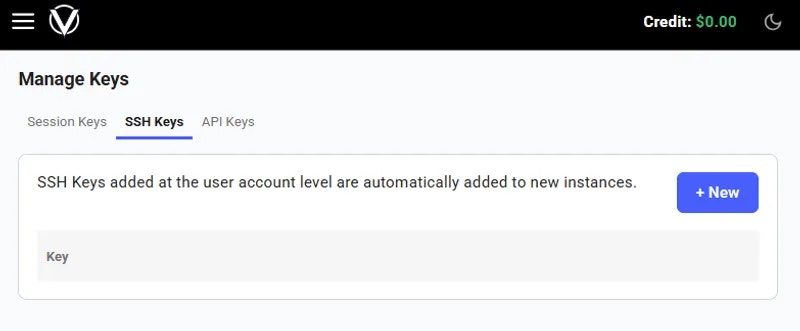 Now you can close the key generation interface. We will create a new session.
Navigate to Sessions -> New Session -> SSH
Now you can close the key generation interface. We will create a new session.
Navigate to Sessions -> New Session -> SSH
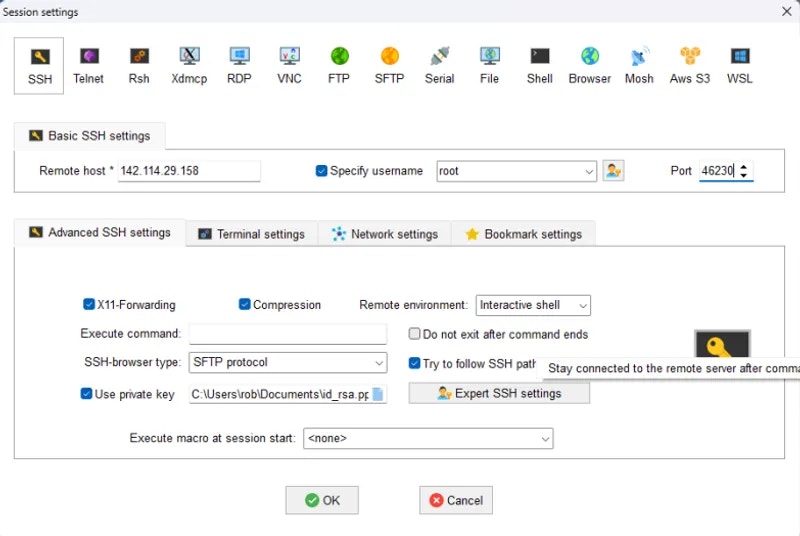 Important details to complete:
* Remote Host
* Specify Username (root)
* Port
* Use private key
Click 'OK' and you will be connected to the instance.
Important details to complete:
* Remote Host
* Specify Username (root)
* Port
* Use private key
Click 'OK' and you will be connected to the instance.
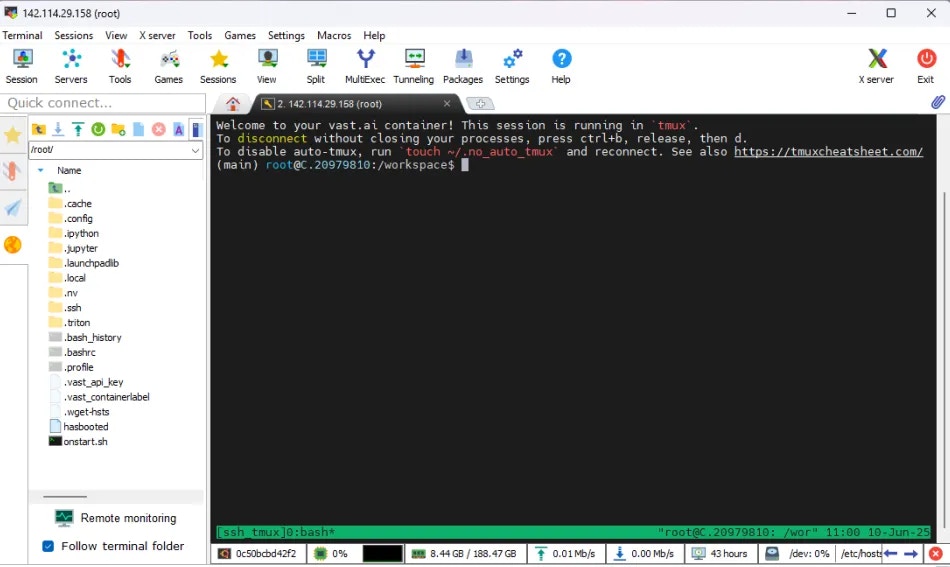 You can find the documentation for MobaXterm [here](https://mobaxterm.mobatek.net/documentation.html).
### Other GUI Clients
Many GUI clients are available for Windows and other operating systems, and although it is not possible to cover all of these here, the key things to remember when setting up are:
* Create a public and private key pair
* Add the public key to your vast account and any running instances
* Keep the private key safe
* Ensure you are connecting to the correct IP address and port as user `root`
---
## Welcome to Vast.ai
**URL:** llms-txt#welcome-to-vast.ai
Source: https://docs.vast.ai/documentation/get-started/index
Step-by-step Vast.ai developer documentation with examples, guides, and API references.
<script
type="application/ld+json"
dangerouslySetInnerHTML={{
__html: JSON.stringify({
"@context": "https://schema.org",
"@type": "WebSite",
"name": "Vast.ai Documentation",
"url": "https://docs.vast.ai",
"description": "Step-by-step Vast.ai developer documentation with examples, guides, and API references.",
"publisher": {
"@type": "Organization",
"name": "Vast.ai",
"url": "https://vast.ai"
}
})
}}
/>
---
## prepay instance
**URL:** llms-txt#prepay-instance
Source: https://docs.vast.ai/api-reference/instances/prepay-instance
api-reference/openapi.json put /api/v0/instances/prepay/{id}/
Deposit credits into a reserved instance to receive usage discounts.
The discount rate is calculated based on how many months of usage the prepaid amount covers. Maximum discount is typically 40%.
CLI Usage: `vastai prepay instance `
---
## Serving Infinity Embeddings with Vast.ai
**URL:** llms-txt#serving-infinity-embeddings-with-vast.ai
**Contents:**
- Background:
- Deploying the Image:
- Hosting a Single Embedding Model:
- Connecting and Testing:
Infinity Embeddings is a helpful serving framework to serve embedding models. It is particularly great at enabling embedding, re-ranking, and classification out of the box. It supports multiple different runtime frameworks to deploy on different types of GPU’s while still achieving great speed. Infinity Embeddings also supports dynamic batching, which allows it to process requests faster under significant load.
One of its best features is that you can deploy multiple models on the same GPU at the same time, which is particularly helpful as often times embedding models are much smaller than GPU RAM. We also love that it complies with the OpenAI embeddings spec, which enables developers to quickly integrate this into their application for rag, clustering, classification and re-ranking tasks.
This guide will show you how to setup Infinity Embeddings to serve an LLM on Vast. We reference a note book that you can use [here](
You can find the documentation for MobaXterm [here](https://mobaxterm.mobatek.net/documentation.html).
### Other GUI Clients
Many GUI clients are available for Windows and other operating systems, and although it is not possible to cover all of these here, the key things to remember when setting up are:
* Create a public and private key pair
* Add the public key to your vast account and any running instances
* Keep the private key safe
* Ensure you are connecting to the correct IP address and port as user `root`
---
## Welcome to Vast.ai
**URL:** llms-txt#welcome-to-vast.ai
Source: https://docs.vast.ai/documentation/get-started/index
Step-by-step Vast.ai developer documentation with examples, guides, and API references.
<script
type="application/ld+json"
dangerouslySetInnerHTML={{
__html: JSON.stringify({
"@context": "https://schema.org",
"@type": "WebSite",
"name": "Vast.ai Documentation",
"url": "https://docs.vast.ai",
"description": "Step-by-step Vast.ai developer documentation with examples, guides, and API references.",
"publisher": {
"@type": "Organization",
"name": "Vast.ai",
"url": "https://vast.ai"
}
})
}}
/>
---
## prepay instance
**URL:** llms-txt#prepay-instance
Source: https://docs.vast.ai/api-reference/instances/prepay-instance
api-reference/openapi.json put /api/v0/instances/prepay/{id}/
Deposit credits into a reserved instance to receive usage discounts.
The discount rate is calculated based on how many months of usage the prepaid amount covers. Maximum discount is typically 40%.
CLI Usage: `vastai prepay instance `
---
## Serving Infinity Embeddings with Vast.ai
**URL:** llms-txt#serving-infinity-embeddings-with-vast.ai
**Contents:**
- Background:
- Deploying the Image:
- Hosting a Single Embedding Model:
- Connecting and Testing:
Infinity Embeddings is a helpful serving framework to serve embedding models. It is particularly great at enabling embedding, re-ranking, and classification out of the box. It supports multiple different runtime frameworks to deploy on different types of GPU’s while still achieving great speed. Infinity Embeddings also supports dynamic batching, which allows it to process requests faster under significant load.
One of its best features is that you can deploy multiple models on the same GPU at the same time, which is particularly helpful as often times embedding models are much smaller than GPU RAM. We also love that it complies with the OpenAI embeddings spec, which enables developers to quickly integrate this into their application for rag, clustering, classification and re-ranking tasks.
This guide will show you how to setup Infinity Embeddings to serve an LLM on Vast. We reference a note book that you can use [here](f86a1c070d/files/serve_infinity_on_vast.ipynb)
Once you create your account, you can go [here](https://cloud.vast.ai/cli/) to set your API Key.
For serving an LLM, we're looking for a machine that has a static IP address, ports available to host on, plus a single modern GPU with decent RAM since these embedding models will be small. We will query the vast API to get a list of these types of machines.
## Deploying the Image:
### Hosting a Single Embedding Model:
For now, we'll host just one embedding model.
The easiest way to deploy a single model on this instance is to use the command line. Copy and paste a specific instance id you choose from the list above into `instance-id` below.
We particularly need `v2` so that we use the correct version of the api, `--port 8000` so it serves on the correct model, and `--model-id michaelfeil/bge-small-en-v1.5` to serve the correct model.
## Connecting and Testing:
Once your instance is done setting up, you should see something like this:

Click on the highlighted button to see the IP address and correct port for our requests. To connect to your instance, we'll first need to get the IP address and port number.
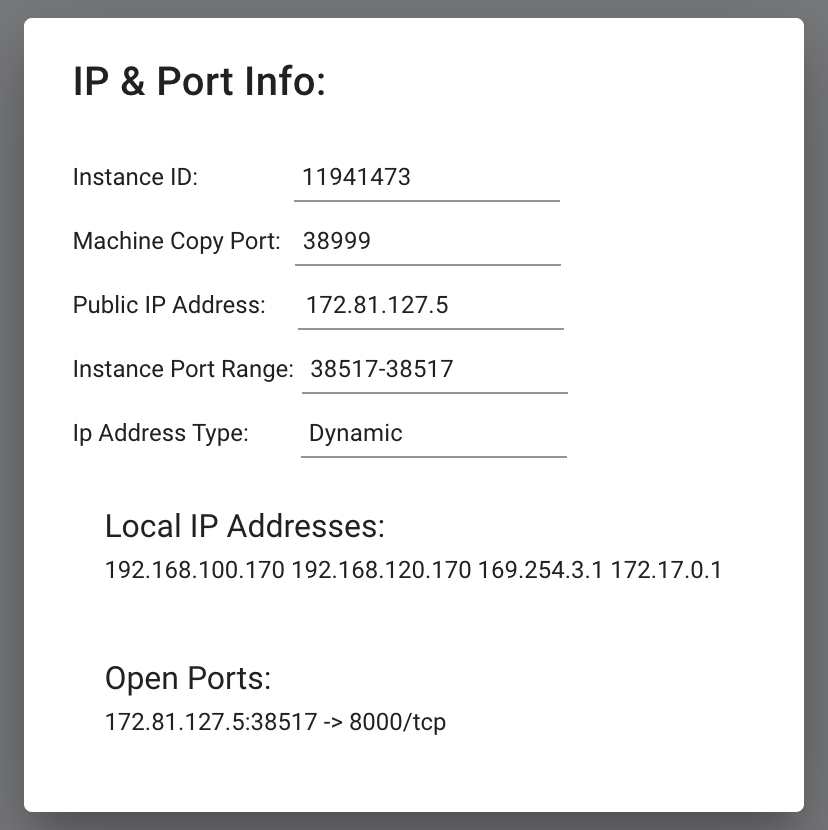
Now we'll call this with the Open AI SDK:
We will copy over the IP address and the port into the cell below.
```python icon="python" Python theme={null}
from openai import OpenAI
**Examples:**
Example 1 (unknown):
```unknown
Once you create your account, you can go [here](https://cloud.vast.ai/cli/) to set your API Key.
```
Example 2 (unknown):
```unknown
For serving an LLM, we're looking for a machine that has a static IP address, ports available to host on, plus a single modern GPU with decent RAM since these embedding models will be small. We will query the vast API to get a list of these types of machines.
```
Example 3 (unknown):
```unknown
## Deploying the Image:
### Hosting a Single Embedding Model:
For now, we'll host just one embedding model.
The easiest way to deploy a single model on this instance is to use the command line. Copy and paste a specific instance id you choose from the list above into `instance-id` below.
We particularly need `v2` so that we use the correct version of the api, `--port 8000` so it serves on the correct model, and `--model-id michaelfeil/bge-small-en-v1.5` to serve the correct model.
```
Example 4 (unknown):
```unknown
## Connecting and Testing:
Once your instance is done setting up, you should see something like this:

Click on the highlighted button to see the IP address and correct port for our requests. To connect to your instance, we'll first need to get the IP address and port number.

Now we'll call this with the Open AI SDK:
```
---
## International Hosts
**URL:** llms-txt#international-hosts
Vast.ai does not provide any tax documents or tax advice to hosts that reside and have their machines located outside the United States.
---
## Running Image Generation on Vast.ai: A Complete Guide
**URL:** llms-txt#running-image-generation-on-vast.ai:-a-complete-guide
**Contents:**
- Introduction
- Prerequisites
- Setting Up Your Environment
- 1. Selecting the Right Template
This guide walks you through setting up and running image generation workloads on Vast.ai, a marketplace for renting GPU compute power. Whether you're using Stable Diffusion or other image generation models, this guide will help you get started efficiently.
* A Vast.ai account
* Basic familiarity with image generation models
* [(Optional) Read Jupyter guide](/documentation/instances/jupyter)
* [(Optional) SSH client installed on your local machine and SSH public key added the Keys section at cloud.vast.ai](/documentation/instances/sshscp)
* (Optional) Basic understanding of model management
## Setting Up Your Environment
### 1. Selecting the Right Template
Navigate to the [Templates tab](https://cloud.vast.ai/templates/) to view available templates. For image generation, we recommend searching for "SD Web UI Forge" among the recommended templates.
* **Stable Diffusion Web UI Forge Template**
* Pre-installed with:
* Latest SD Web UI version
* Popular extensions
* Common models
* Optimized settings for vast.ai
Choose this template if:
* You want a ready-to-use environment for image generation
* You need a user-friendly web interface
* You want access to multiple models and extensions
* You're looking for an optimized setup
Edit the template and add/update key environment variables if needed:
```bash Bash theme={null}
---
## POST [https://run.vast.ai/get\_endpoint\_logs/](https://run.vast.ai/get_endpoint_logs/)
**URL:** llms-txt#post-[https://run.vast.ai/get\_endpoint\_logs/](https://run.vast.ai/get_endpoint_logs/)
**Contents:**
- Inputs
- Outputs
- Example: Fetching Endpoint Logs with cURL
* One of the following:
* `id`(int): ID of your endpoint
* `endpoint`(string): Name of your endpoint
* `api_key`(string): The Vast API key associated with the account that controls the Endpoint.
* `info0`: The contents of the `info0` log
* `info1`: The contents of the `info1` log
* `trace`: The contents of the `trace` log
* `debug`: The contents of the `debug` log
## Example: Fetching Endpoint Logs with cURL
**Examples:**
Example 1 (unknown):
```unknown
## Outputs
* `info0`: The contents of the `info0` log
* `info1`: The contents of the `info1` log
* `trace`: The contents of the `trace` log
* `debug`: The contents of the `debug` log
## Example: Fetching Endpoint Logs with cURL
```
---
## Mining on Bittensor
**URL:** llms-txt#mining-on-bittensor
Source: https://docs.vast.ai/mining-on-bittensor
---
## this is a simple ping handler for pyworker
**URL:** llms-txt#this-is-a-simple-ping-handler-for-pyworker
async def handle_ping(_: web.Request):
return web.Response(body="pong")
---
## Architecture
**URL:** llms-txt#architecture
**Contents:**
- Endpoints and Worker Groups
- System Architecture
- Example Workflow
- Two-Step Routing Process
Source: https://docs.vast.ai/documentation/serverless/architecture
Understand the architecture of Vast.ai Serverless, including the Serverless System, GPU Instances, and User (Client Application). Learn how the system works, how to use the routing process, and how to create Worker Groups.
The Vast.ai Serverless solution manages groups of GPU instances to efficiently serve applications, automatically scaling up or down based on load metrics defined by the Vast PyWorker. It streamlines instance management, performance measurement, and error handling.
## Endpoints and Worker Groups
The Serverless system needs to be configured at two levels:
* **Endpoints:** The highest level clustering of instances for the Serverless system, consisting of a named endpoint string, a collection of Worker groups, and hyperparameters.
* **Worker Groups**: A lower level organization that lives within an Endpoint. It consists of a [template](/documentation/instances/templates) (with extra filters for search), a set of GPU instances (workers) created from that template, and hyperparameters. Multiple Worker Groups can exist within an Endpoint.
Having two-level scaling provides several benefits:
1. **Comparing Performance Metrics Across Hardware**: Suppose you want to run the same templates on different hardware to compare performance metrics. You can create several groups, each configured to run on specific hardware. By leaving this setup running for a period of time, you can review the metrics and select
the most suitable hardware for your users' needs.
2. **Smooth Rollout of a New Model**: If you're using TGI to handle LLM inference with LLama3 and want to transition to LLama4, you can do so gradually. For a smooth rollout where only 10% of user requests are handled by LLama4, you can create a new Worker Group under the existing Endpoint. Let it run for a while,
review the metrics, and then fully switch to LLama4 when ready.
3. **Handling Diverse Workloads with Multiple Models**: You can create an Endpoint to manage LLM inference using TGI. Within this group, you can set up multiple
Worker Groups, each using a different LLM to serve requests. This approach is beneficial when you need a few resource-intensive models to handle most requests, while smaller, more cost-effective models manage overflow during workload spikes.
It's important to note that having multiple Worker Groups within a single Endpoint is not always necessary. For most users, a single Worker Group within an Endpoint provides an optimal setup.
You can create Worker Groups using our [Serverless-Compatible Templates](/documentation/serverless/text-generation-inference-tgi), which are customized versions of popular templates on Vast, designed to be used on the serverless system.
## System Architecture
The system architecture for an application using Vast.ai Serverless includes the following components:
* **Serverless System**
* **GPU Instances**
* **User (Client Application)**
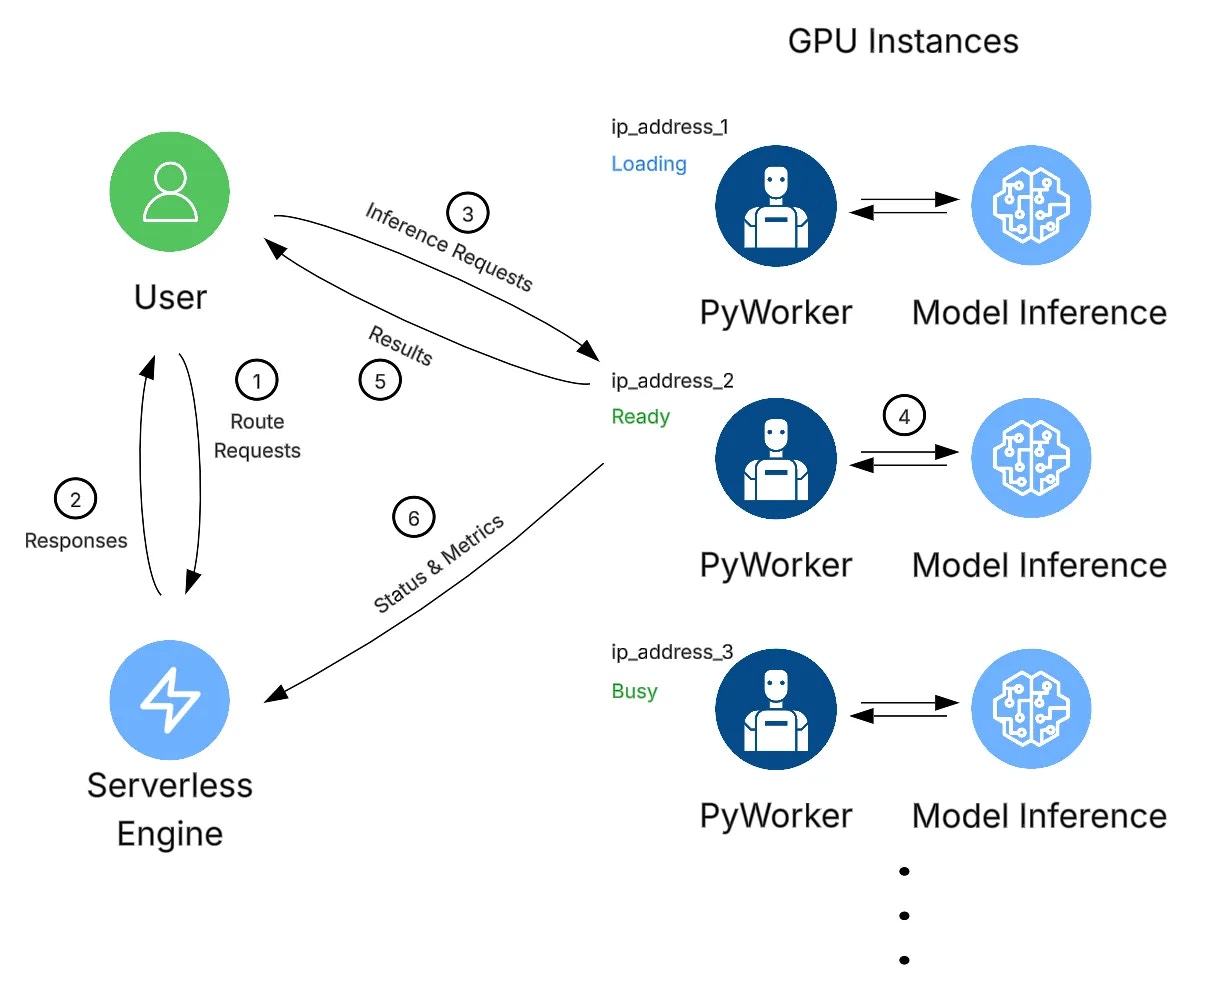 ### Example Workflow
1. A client initiates a request to the Serverless system by invoking the `https://run.vast.ai/route/` endpoint.
2. The Serverless system returns a suitable worker address. In the example above, this would be `ip_address_2` since that GPU instance is 'Ready'.
3. The client calls the GPU instance's specific API endpoint, passing the authentication info returned by `/route/` along with payload parameters.
4. The PyWorker on the GPU instance receives the payload and forwards it to the ML model. After model inference, the PyWorker receives the results.
5. The PyWorker sends the model results back to the client.
6. Independently and concurrently, each PyWorker in the Endpoint sends its operational metrics to the Serverless system, which it uses to make scaling decisions.
### Two-Step Routing Process
This 2-step routing process is used for security and flexibility. By having the client send payloads directly to the GPU instances, your payload information is never stored on Vast servers.
The `/route/` endpoint signs its messages with a public key available at `https://run.vast.ai/pubkey/`, allowing the GPU worker to validate requests and prevent unauthorized usage.
---
## Storage Types
**URL:** llms-txt#storage-types
**Contents:**
- Storage Overview
- Container Storage
- Key Characteristics
- Default Allocation
- Best Practices
- Volumes
- Key Features
- Volume Limitations
- Storage Costs
- Data Persistence Strategy
Source: https://docs.vast.ai/documentation/instances/storage/types
Understand the different storage options available on Vast.ai instances, including container storage and volumes.
Vast.ai provides two main types of storage for your instances:
1. **Container Storage** - Temporary storage within the Docker container
2. **Volumes** - Persistent local storage that can be attached to instances
Container storage is the default storage allocated to every instance when it's created.
### Key Characteristics
* **Size is fixed at creation**: You must specify the disk size when creating the instance
* **Cannot be resized**: Once created, the allocation cannot be changed
* **Persists while instance exists**: Data remains even when instance is stopped
* **Deleted with instance**: All data is permanently lost when instance is destroyed
* **Charged continuously**: Storage costs apply even when instance is stopped
### Default Allocation
* Minimum: 10GB (default)
* Maximum: Varies by host machine capacity
* Set via disk size slider during instance creation
Storage charges continue even when instances are stopped. To stop storage billing, you must destroy the instance completely.
1. **Estimate generously**: Better to have extra space than run out mid-task
2. **Monitor usage**: Check disk space regularly with `df -h`
3. **Clean up regularly**: Remove unnecessary files to free space
4. **Back up important data**: Container storage is lost when instance is destroyed
Volumes provide persistent storage that survives instance destruction and can be reattached to new instances.
* **Local only**: Tied to the physical machine where created
* **Persistent**: Survives instance destruction
* **Reattachable**: Can be mounted to new instances on same machine
* **Fixed size**: Cannot be resized after creation
* **Separate billing**: Charged independently from instances
### Volume Limitations
* Cannot migrate between different physical machines
* Can only attach to instances on the same host
* Must destroy attached instance before deleting volume
* Size must be specified at creation time
For detailed volume management, see [Volumes](/documentation/instances/storage/volumes).
Storage pricing varies by host and includes:
1. **Container storage**: Charged per GB while instance exists
2. **Volume storage**: Charged per GB while volume exists
3. **Different rates**: Stopped instances may have higher storage rates than running instances
## Data Persistence Strategy
Use container storage for:
* Temporary files
* Build artifacts
* Cache data
* Working datasets
Use volumes or cloud sync for:
* Trained models
* Datasets
* Code repositories
* Configuration files
1. **Volumes**: For same-machine persistence
2. **Cloud Sync**: For off-machine backup (Google Drive, S3, etc.)
3. **Instance-to-instance copy**: Transfer between instances
4. **SCP/SFTP**: Download to local machine
### Can I increase storage after instance creation?
No, container storage size is fixed at creation. You can:
* Create a new instance with more storage and [transfer your data](/documentation/instances/storage/data-movement)
* Attach a volume for additional space
* Use cloud storage for overflow
### What happens to my data when the instance stops?
* Container storage: Data persists, charges continue
* Volumes: Data persists, charges continue
* No data is lost when stopping instances
### How do I avoid storage charges?
* Destroy instances you're not using
* Delete unneeded volumes
* Transfer important data to local/cloud storage first
* [Volumes](/documentation/instances/storage/volumes) - Create and manage persistent volumes
* [Data Movement](/documentation/instances/storage/data-movement) - Transfer files between instances
* [Cloud Sync](/documentation/instances/storage/cloud-sync) - Connect to cloud storage providers
* [Cloud Backups](/documentation/instances/storage/cloud-backups) - Automate backup strategies
---
## Instances FAQ
**URL:** llms-txt#instances-faq
**Contents:**
- Instance Lifecycle
- What does "Lifetime" mean on my instance?
- How can I restart programs when my instance restarts?
Source: https://docs.vast.ai/documentation/reference/faq/instances
Questions about creating and managing instances
<script
type="application/ld+json"
dangerouslySetInnerHTML={{
__html: JSON.stringify({
"@context": "https://schema.org",
"@type": "FAQPage",
"mainEntity": [
{
"@type": "Question",
"name": "What does Lifetime mean on my instance?",
"acceptedAnswer": {
"@type": "Answer",
"text": "Every instance offer has a Max Duration. When you accept an offer and create an instance, this becomes the instance lifetime and begins counting down. When the lifetime expires, the instance is automatically stopped. The host can extend the contract (adding more lifetime), but this is at their discretion. Always assume your instance will be lost once the lifetime expires and copy out any important data before then."
}
},
{
"@type": "Question",
"name": "How can I restart programs when my instance restarts?",
"acceptedAnswer": {
"@type": "Answer",
"text": "For custom command instances: Your command runs automatically on startup. For SSH instances: Place startup commands in /root/onstart.sh. This script runs automatically on container startup."
}
},
{
"@type": "Question",
"name": "How do I set environment variables?",
"acceptedAnswer": {
"@type": "Answer",
"text": "Use the -e Docker syntax in the docker create/run options: -e TZ=UTC -e TASKID=TEST. To make variables visible in SSH/Jupyter sessions, export them to /etc/environment. You can also set global environment variables in your account Settings page."
}
},
{
"@type": "Question",
"name": "How do I get the instance ID from within the container?",
"acceptedAnswer": {
"@type": "Answer",
"text": "Use the VAST_CONTAINERLABEL environment variable: echo $VAST_CONTAINERLABEL. This will output something like C.38250."
}
},
{
"@type": "Question",
"name": "How can I find OPEN_BUTTON_TOKEN?",
"acceptedAnswer": {
"@type": "Answer",
"text": "SSH into your instance or open Jupyter terminal and run: echo $OPEN_BUTTON_TOKEN. Alternatively, check the instance logs."
}
},
{
"@type": "Question",
"name": "How do I stop an instance from within itself?",
"acceptedAnswer": {
"@type": "Answer",
"text": "A special instance API key is pre-installed. Install the CLI with pip install vastai, then use vastai stop instance $CONTAINER_ID to stop the instance. If $CONTAINER_ID is not defined, check your environment variables with env."
}
},
{
"@type": "Question",
"name": "Can I run Docker within my instance?",
"acceptedAnswer": {
"@type": "Answer",
"text": "No, Vast.ai does not support Docker-in-Docker due to security constraints. Each Docker container must run on a separate instance."
}
},
{
"@type": "Question",
"name": "Can I change disk size after creating an instance?",
"acceptedAnswer": {
"@type": "Answer",
"text": "No. Disk size is permanent and cannot be changed after instance creation. If you run out of space, you'll need to create a new instance with a larger disk. Always allocate more space than you think you need to avoid interruptions."
}
},
{
"@type": "Question",
"name": "What happens to my data when an instance stops?",
"acceptedAnswer": {
"@type": "Answer",
"text": "Stopped instances: Data persists, storage charges continue. Destroyed instances: All data is permanently deleted. Lifetime expired: Instance stops, data remains until destroyed. Always backup important data to external storage."
}
}
]
})
}}
/>
## Instance Lifecycle
### What does "Lifetime" mean on my instance?
Every instance offer has a **Max Duration**. When you accept an offer and create an instance, this becomes the instance lifetime and begins counting down. When the lifetime expires, the instance is automatically stopped.
The host can extend the contract (adding more lifetime), but this is at their discretion. **Important:** Always assume your instance will be lost once the lifetime expires and copy out any important data before then.
### How can I restart programs when my instance restarts?
**For custom command instances:** Your command runs automatically on startup.
**For SSH instances:** Place startup commands in `/root/onstart.sh`. This script runs automatically on container startup.
```bash theme={null}
---
## Blender Batch Rendering
**URL:** llms-txt#blender-batch-rendering
**Contents:**
- Step 1 - Open Vast's Blender Batch Renderer Template
- Step 2 - Check the Secure Cloud box if you want a secure machine from trusted datacenters (Optional)
- Step 3 - Filter for a GPU that you feel best suits your needs
- Step 4 - Choose a GPU by Clicking "RENT"
- Step 5 - Use Jupyter Direct HTTPS Launch Mode
- Step 6 - Click the Open Button or Jupyter Notebook button to open Jupyter Notebook
- Step 7 - To Render Animation For Each Blend File In Batch Of Blend Files
- Step 8 - To Render Animation For Xth Frame of Each Blend File In Batch Of Blend Files
Source: https://docs.vast.ai/blender-batch-rendering
Blender is a free, open source 3D creation suite. It can be used to create animated films, visual effects, art, 3D-printed models, motion graphics, interactive 3D applications, virtual reality, and video games. It supports the entirety of the 3D pipeline—modeling, rigging, animation, simulation, rendering, compositing and motion tracking, even video editing and game creation. You can find more information about Blender at [blender.org](https://www.blender.org/).
Animators, game developers, 3D modelers, visual effects artists, architects, and product designers are some people who use Blender.
GPUs can speed up rendering in Blender.
You can save time by automating away the rendering of animations for batch of blend files.
## Step 1 - Open Vast's Blender Batch Renderer Template
Click on this link [Blender Batch Renderer Template](https://cloud.vast.ai/?ref_id=142678\&template_id=7b570ea8454e5f2b4b026139709fa0e8) to select the vast/blender-batch-renderer template.
## Step 2 - Check the Secure Cloud box if you want a secure machine from trusted datacenters (Optional)
You can narrow your search results to only data center machines if you want insured security standards from our trusted datacenters.

## Step 3 - Filter for a GPU that you feel best suits your needs
If you have questions about which GPU to choose, there is some data around NVIDIA Geforce RTX 4090 giving the best render speed with Blender. You can find other GPUs that work well with Blender here [Blender GPU Benchmarks](https://opendata.blender.org/benchmarks/query/?group_by=device_name\&blender_version=3.6.0). You can also find other options by searching on Google or asking ChatGPT.
The version of Blender running within Vast while using the template linked above at the time of this writing is 3.6.2.
Go to the GPUs filter and check the box for RTX 4090 or another GPU instance.

## Step 4 - Choose a GPU by Clicking "RENT"
Choose a GPU that meets your budget, desired reliability %, and other constraints by clicking "RENT". GPUs are sorted by a complex proprietary algorithm that aims to give users the best machines for their value by default.
You can filter GPUs further per your requirements if desired.

## Step 5 - Use Jupyter Direct HTTPS Launch Mode
Follow the instructions related to adding a certificate to your browser if you need to when it asks you to "Setup Jupyter Direct HTTPS" and click "CONTINUE". Here's more information on the Jupyter direct HTTPS Launch Mode and Installing the TLS certificate: [Jupyter](/documentation/instances/jupyter).

## Step 6 - Click the Open Button or Jupyter Notebook button to open Jupyter Notebook

## Step 7 - To Render Animation For Each Blend File In Batch Of Blend Files
If you want to render a respective animation for each blend file in a batch of blend files, follow the following steps.
Go to /Desktop/render\_animation\_for\_each\_blend\_file\_in\_batch\_of\_blend\_files/ folder in Jupyter Notebook
Upload .blend files to /Desktop/render\_animation\_for\_each\_blend\_file\_in\_batch\_of\_blend\_files/ folder
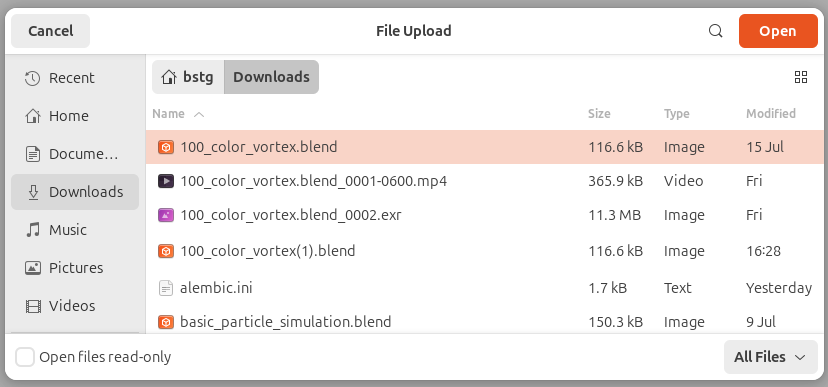
Open render\_animation\_for\_each\_blend\_file\_in\_batch\_of\_blend\_files.ipynb

Click the Run tab and click Run All Cells
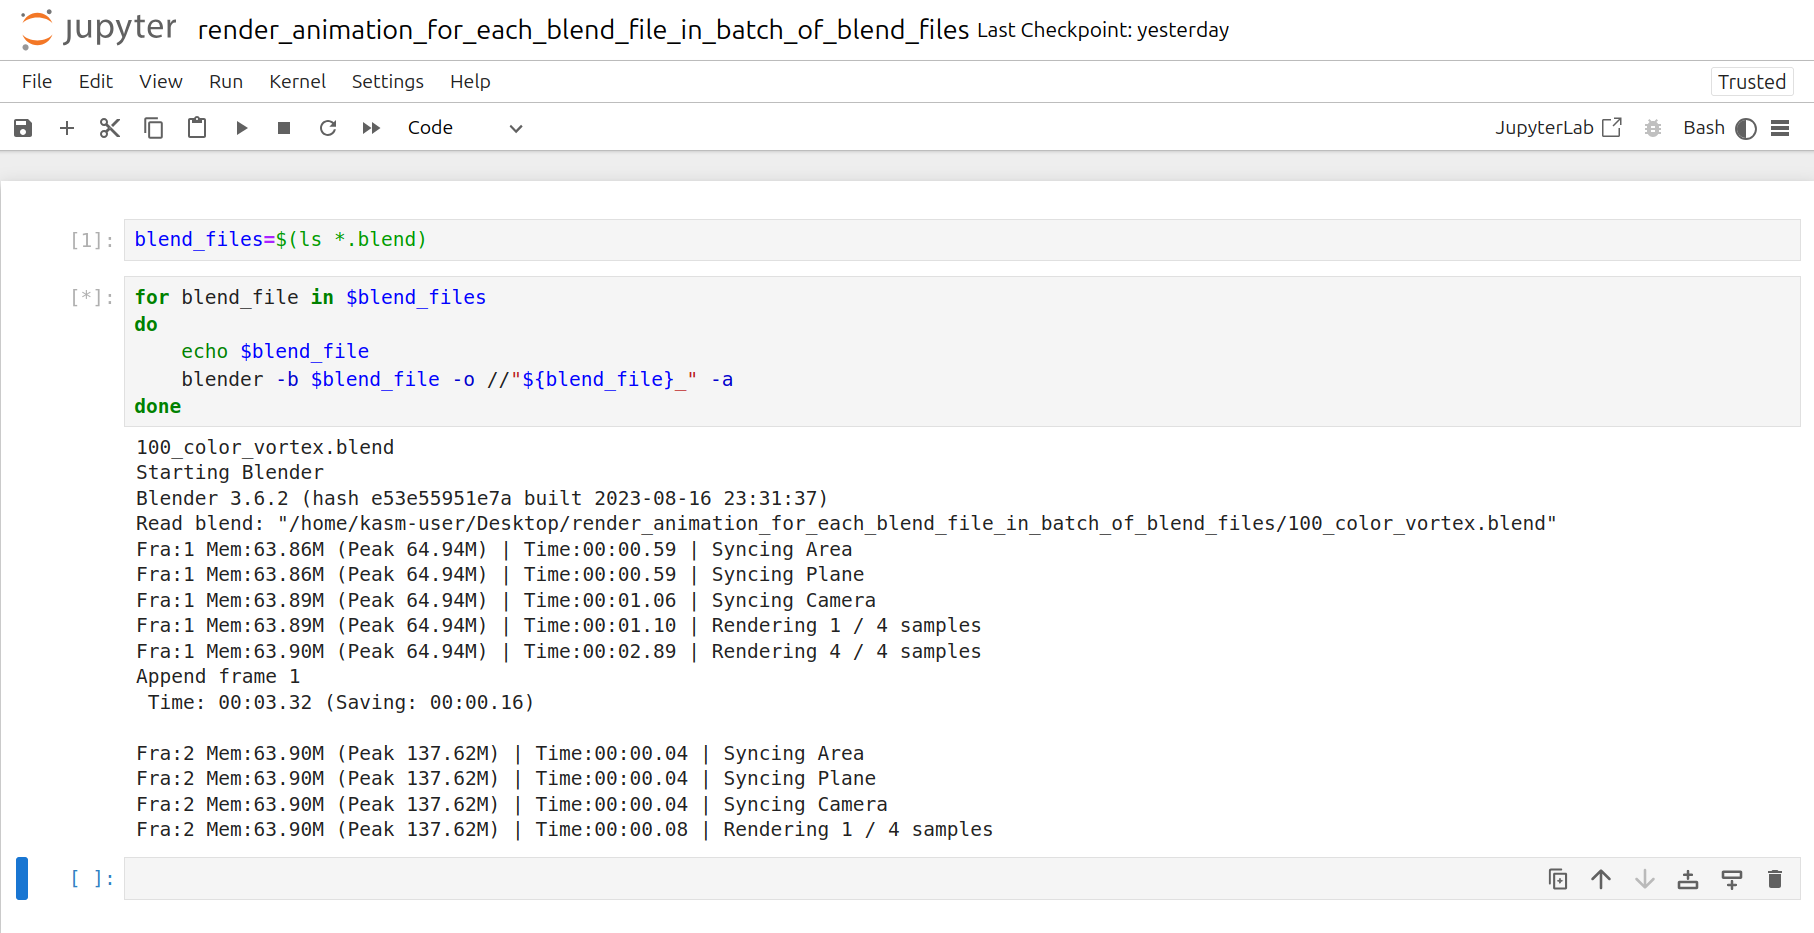
Now a corresponding animation will be rendered for each .blend file you have uploaded to this folder.
You can also close out your jupyter notebook tab in your browser and this notebook will keep running as long as your instance in Vast is running.
## Step 8 - To Render Animation For Xth Frame of Each Blend File In Batch Of Blend Files
If you want to render a respective animation for the Xth frame of each blend file in a batch of blend files, follow the following steps.
Go to /Desktop/render\_Xth\_frame\_of\_batch\_of\_blend\_files/ folder in Jupyter Notebook
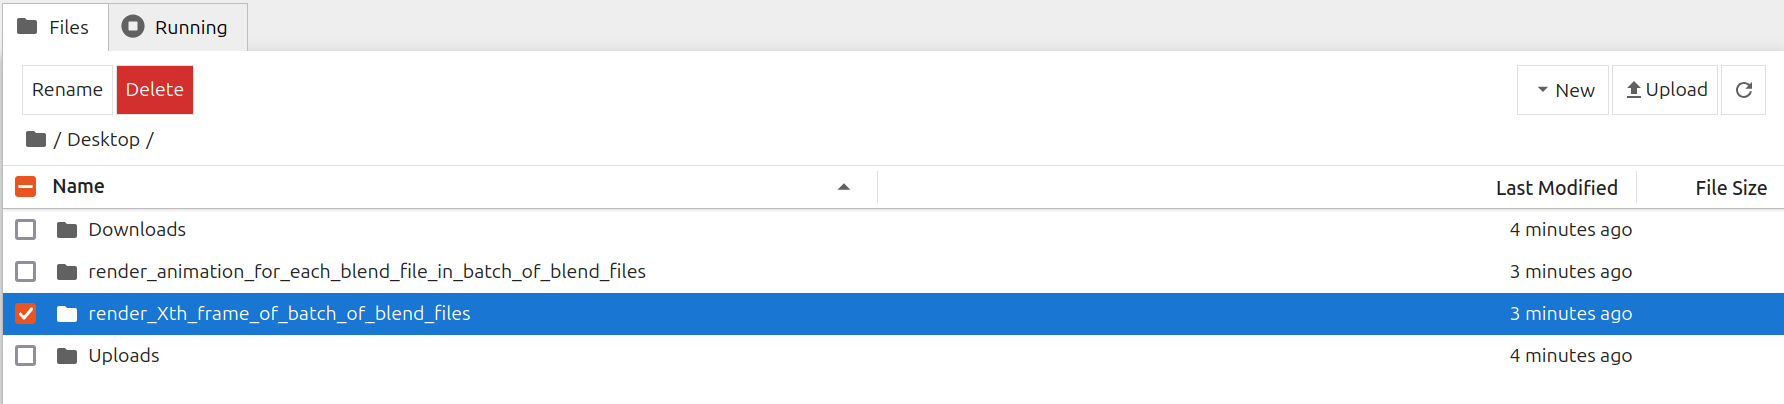
Upload .blend files to /Desktop/render\_Xth\_frame\_of\_batch\_of\_blend\_files/ folder
Open render\_Xth\_frame\_of\_batch\_of\_blend\_files.ipynb

Set frame\_number equal to a particular frame number. For ex. frame\_number=2
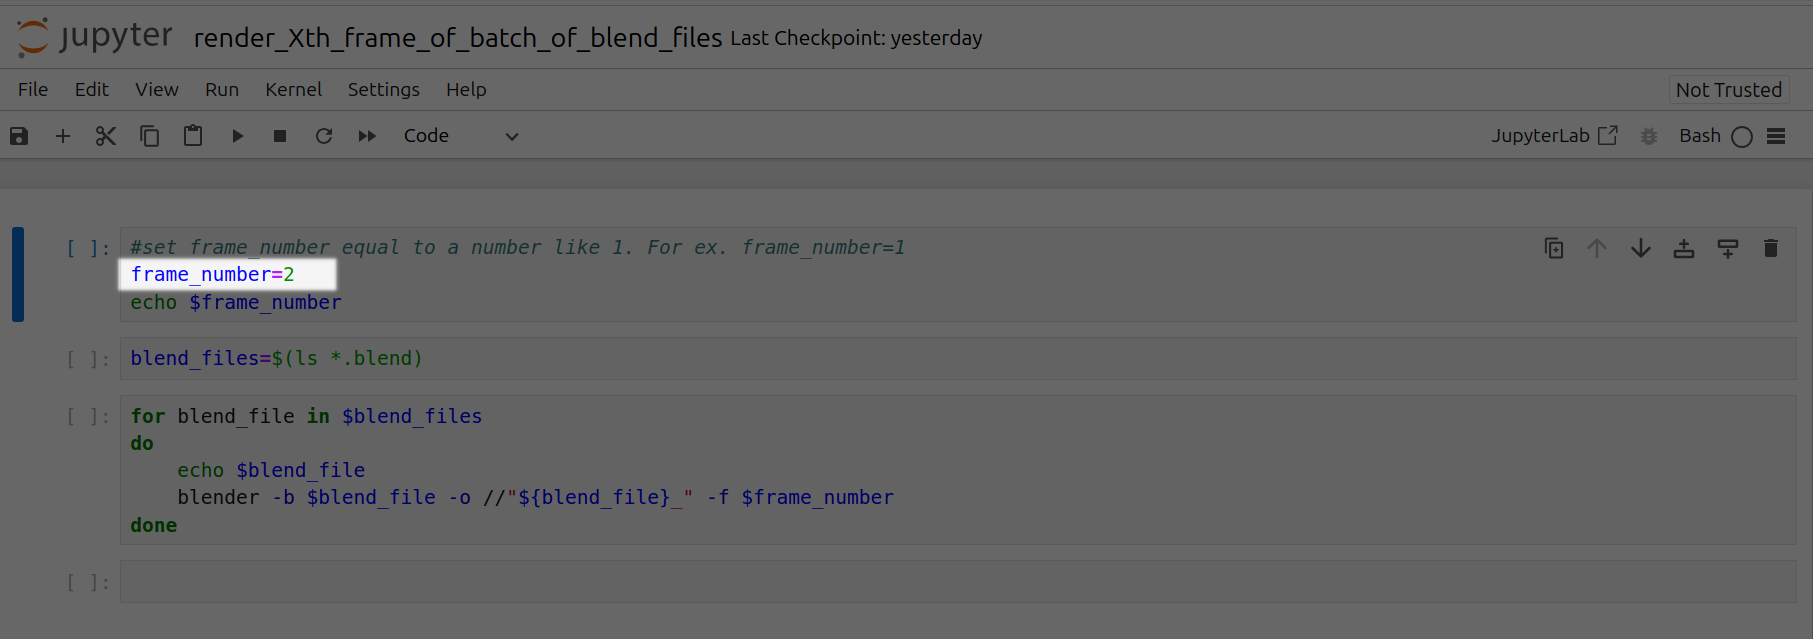
Click the Run tab and click Run All Cells
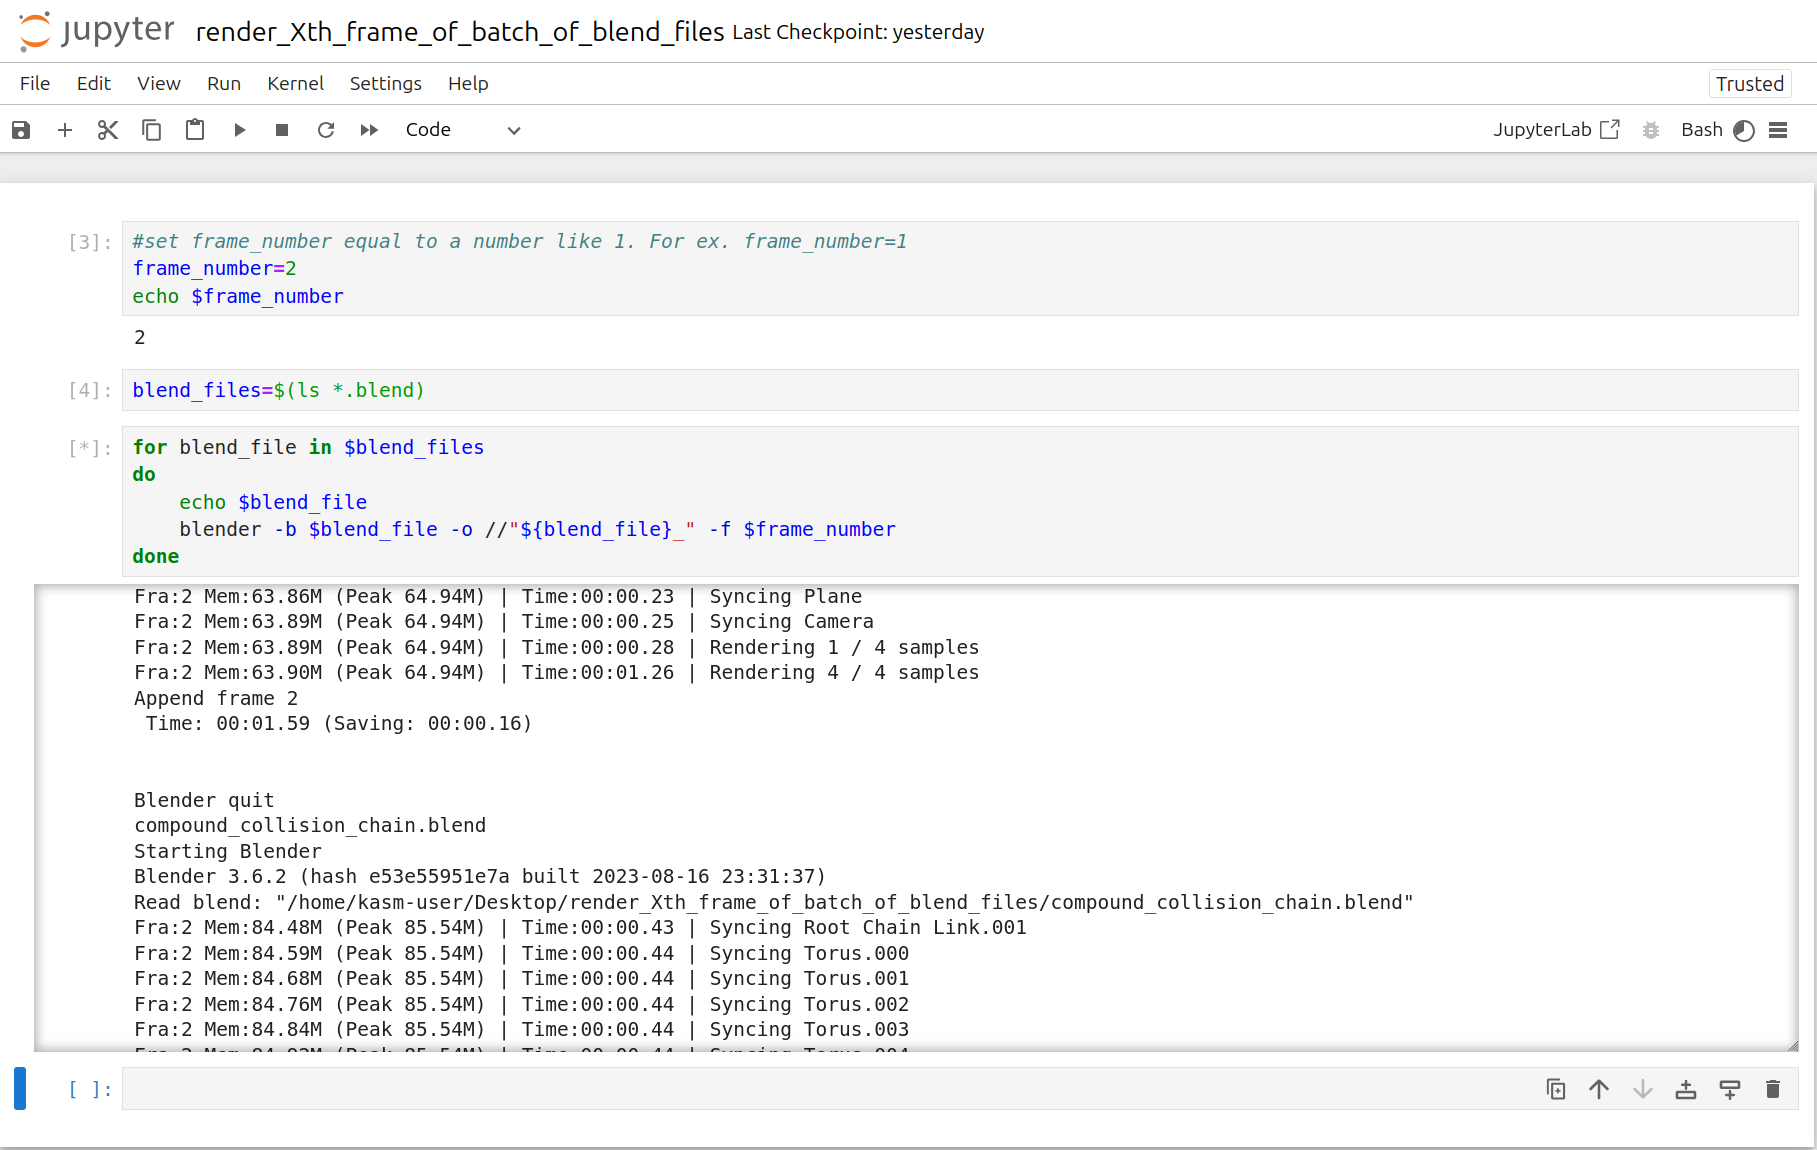
Now a corresponding animation will be rendered for each Xth frame of each .blend file you have uploaded to this folder.
You can also close out your jupyter notebook tab in your browser and this notebook will keep running as long as your instance in Vast is running.
---
## Recommended settings for different GPU sizes
**URL:** llms-txt#recommended-settings-for-different-gpu-sizes
**Contents:**
- Advanced Features
- Custom Scripts
- Extensions Management
- API Usage
8GB GPU:
- max_batch_count: 4
- max_batch_size: 2
12GB GPU:
- max_batch_count: 6
- max_batch_size: 3
24GB+ GPU:
- max_batch_count: 10
- max_batch_size: 5
bash Bash theme={null}
/workspace/stable-diffusion-webui/scripts/
bash Bash theme={null}
**Examples:**
Example 1 (unknown):
```unknown
## Advanced Features
### Custom Scripts
Place custom scripts in:
```
Example 2 (unknown):
```unknown
### Extensions Management
Popular extensions are pre-installed. Add more via Web UI:
* Extensions tab
* Install from URL
* Restart UI to apply
### API Usage
Enable API in settings:
```
---
## Reserved Instances
**URL:** llms-txt#reserved-instances
**Contents:**
- How Reserved Instances Work
- Creating a Reserved Instance
- Important Considerations
- Extending a Reserved Instance
- Refunds
- Preview Reserved Pricing Before Renting
- Common Questions
- Can I switch an existing on-demand instance to reserved?
- Can I extend a reserved instance?
- What happens if I cancel / delete a reserved instance early?
Source: https://docs.vast.ai/documentation/instances/choosing/reserved-instances
Save up to 50% on GPU costs by pre-paying for reserved instances. Learn how to convert on-demand instances to reserved pricing.
Reserved instances allow you to get significant discounts (up to 50%) by pre-paying for GPU time. You can convert any on-demand instance to a reserved instance at any time.
## How Reserved Instances Work
You can **convert an on-demand instance into a reserved instance** with a lower hourly rate by pre-paying.
* Convert any on-demand instance to reserved pricing
* Discounts up to 50% based on commitment length
* Pre-paid credits are locked to that specific instance
* Cannot migrate between hosts
## Creating a Reserved Instance
**Step 1 — Rent the Instance**
1. Go to [Search](https://cloud.vast.ai/create/) page.
2. Find a GPU that meets your requirements, click the **Rent** button.
3. This creates an **on-demand instance**.
**Step 2 — Convert to a Reserved Instance**
1. Go to the [**Instances**](https://cloud.vast.ai/instances/) page.
2. On your instance card, find the **green** **discount badge**.
### Example Workflow
1. A client initiates a request to the Serverless system by invoking the `https://run.vast.ai/route/` endpoint.
2. The Serverless system returns a suitable worker address. In the example above, this would be `ip_address_2` since that GPU instance is 'Ready'.
3. The client calls the GPU instance's specific API endpoint, passing the authentication info returned by `/route/` along with payload parameters.
4. The PyWorker on the GPU instance receives the payload and forwards it to the ML model. After model inference, the PyWorker receives the results.
5. The PyWorker sends the model results back to the client.
6. Independently and concurrently, each PyWorker in the Endpoint sends its operational metrics to the Serverless system, which it uses to make scaling decisions.
### Two-Step Routing Process
This 2-step routing process is used for security and flexibility. By having the client send payloads directly to the GPU instances, your payload information is never stored on Vast servers.
The `/route/` endpoint signs its messages with a public key available at `https://run.vast.ai/pubkey/`, allowing the GPU worker to validate requests and prevent unauthorized usage.
---
## Storage Types
**URL:** llms-txt#storage-types
**Contents:**
- Storage Overview
- Container Storage
- Key Characteristics
- Default Allocation
- Best Practices
- Volumes
- Key Features
- Volume Limitations
- Storage Costs
- Data Persistence Strategy
Source: https://docs.vast.ai/documentation/instances/storage/types
Understand the different storage options available on Vast.ai instances, including container storage and volumes.
Vast.ai provides two main types of storage for your instances:
1. **Container Storage** - Temporary storage within the Docker container
2. **Volumes** - Persistent local storage that can be attached to instances
Container storage is the default storage allocated to every instance when it's created.
### Key Characteristics
* **Size is fixed at creation**: You must specify the disk size when creating the instance
* **Cannot be resized**: Once created, the allocation cannot be changed
* **Persists while instance exists**: Data remains even when instance is stopped
* **Deleted with instance**: All data is permanently lost when instance is destroyed
* **Charged continuously**: Storage costs apply even when instance is stopped
### Default Allocation
* Minimum: 10GB (default)
* Maximum: Varies by host machine capacity
* Set via disk size slider during instance creation
Storage charges continue even when instances are stopped. To stop storage billing, you must destroy the instance completely.
1. **Estimate generously**: Better to have extra space than run out mid-task
2. **Monitor usage**: Check disk space regularly with `df -h`
3. **Clean up regularly**: Remove unnecessary files to free space
4. **Back up important data**: Container storage is lost when instance is destroyed
Volumes provide persistent storage that survives instance destruction and can be reattached to new instances.
* **Local only**: Tied to the physical machine where created
* **Persistent**: Survives instance destruction
* **Reattachable**: Can be mounted to new instances on same machine
* **Fixed size**: Cannot be resized after creation
* **Separate billing**: Charged independently from instances
### Volume Limitations
* Cannot migrate between different physical machines
* Can only attach to instances on the same host
* Must destroy attached instance before deleting volume
* Size must be specified at creation time
For detailed volume management, see [Volumes](/documentation/instances/storage/volumes).
Storage pricing varies by host and includes:
1. **Container storage**: Charged per GB while instance exists
2. **Volume storage**: Charged per GB while volume exists
3. **Different rates**: Stopped instances may have higher storage rates than running instances
## Data Persistence Strategy
Use container storage for:
* Temporary files
* Build artifacts
* Cache data
* Working datasets
Use volumes or cloud sync for:
* Trained models
* Datasets
* Code repositories
* Configuration files
1. **Volumes**: For same-machine persistence
2. **Cloud Sync**: For off-machine backup (Google Drive, S3, etc.)
3. **Instance-to-instance copy**: Transfer between instances
4. **SCP/SFTP**: Download to local machine
### Can I increase storage after instance creation?
No, container storage size is fixed at creation. You can:
* Create a new instance with more storage and [transfer your data](/documentation/instances/storage/data-movement)
* Attach a volume for additional space
* Use cloud storage for overflow
### What happens to my data when the instance stops?
* Container storage: Data persists, charges continue
* Volumes: Data persists, charges continue
* No data is lost when stopping instances
### How do I avoid storage charges?
* Destroy instances you're not using
* Delete unneeded volumes
* Transfer important data to local/cloud storage first
* [Volumes](/documentation/instances/storage/volumes) - Create and manage persistent volumes
* [Data Movement](/documentation/instances/storage/data-movement) - Transfer files between instances
* [Cloud Sync](/documentation/instances/storage/cloud-sync) - Connect to cloud storage providers
* [Cloud Backups](/documentation/instances/storage/cloud-backups) - Automate backup strategies
---
## Instances FAQ
**URL:** llms-txt#instances-faq
**Contents:**
- Instance Lifecycle
- What does "Lifetime" mean on my instance?
- How can I restart programs when my instance restarts?
Source: https://docs.vast.ai/documentation/reference/faq/instances
Questions about creating and managing instances
<script
type="application/ld+json"
dangerouslySetInnerHTML={{
__html: JSON.stringify({
"@context": "https://schema.org",
"@type": "FAQPage",
"mainEntity": [
{
"@type": "Question",
"name": "What does Lifetime mean on my instance?",
"acceptedAnswer": {
"@type": "Answer",
"text": "Every instance offer has a Max Duration. When you accept an offer and create an instance, this becomes the instance lifetime and begins counting down. When the lifetime expires, the instance is automatically stopped. The host can extend the contract (adding more lifetime), but this is at their discretion. Always assume your instance will be lost once the lifetime expires and copy out any important data before then."
}
},
{
"@type": "Question",
"name": "How can I restart programs when my instance restarts?",
"acceptedAnswer": {
"@type": "Answer",
"text": "For custom command instances: Your command runs automatically on startup. For SSH instances: Place startup commands in /root/onstart.sh. This script runs automatically on container startup."
}
},
{
"@type": "Question",
"name": "How do I set environment variables?",
"acceptedAnswer": {
"@type": "Answer",
"text": "Use the -e Docker syntax in the docker create/run options: -e TZ=UTC -e TASKID=TEST. To make variables visible in SSH/Jupyter sessions, export them to /etc/environment. You can also set global environment variables in your account Settings page."
}
},
{
"@type": "Question",
"name": "How do I get the instance ID from within the container?",
"acceptedAnswer": {
"@type": "Answer",
"text": "Use the VAST_CONTAINERLABEL environment variable: echo $VAST_CONTAINERLABEL. This will output something like C.38250."
}
},
{
"@type": "Question",
"name": "How can I find OPEN_BUTTON_TOKEN?",
"acceptedAnswer": {
"@type": "Answer",
"text": "SSH into your instance or open Jupyter terminal and run: echo $OPEN_BUTTON_TOKEN. Alternatively, check the instance logs."
}
},
{
"@type": "Question",
"name": "How do I stop an instance from within itself?",
"acceptedAnswer": {
"@type": "Answer",
"text": "A special instance API key is pre-installed. Install the CLI with pip install vastai, then use vastai stop instance $CONTAINER_ID to stop the instance. If $CONTAINER_ID is not defined, check your environment variables with env."
}
},
{
"@type": "Question",
"name": "Can I run Docker within my instance?",
"acceptedAnswer": {
"@type": "Answer",
"text": "No, Vast.ai does not support Docker-in-Docker due to security constraints. Each Docker container must run on a separate instance."
}
},
{
"@type": "Question",
"name": "Can I change disk size after creating an instance?",
"acceptedAnswer": {
"@type": "Answer",
"text": "No. Disk size is permanent and cannot be changed after instance creation. If you run out of space, you'll need to create a new instance with a larger disk. Always allocate more space than you think you need to avoid interruptions."
}
},
{
"@type": "Question",
"name": "What happens to my data when an instance stops?",
"acceptedAnswer": {
"@type": "Answer",
"text": "Stopped instances: Data persists, storage charges continue. Destroyed instances: All data is permanently deleted. Lifetime expired: Instance stops, data remains until destroyed. Always backup important data to external storage."
}
}
]
})
}}
/>
## Instance Lifecycle
### What does "Lifetime" mean on my instance?
Every instance offer has a **Max Duration**. When you accept an offer and create an instance, this becomes the instance lifetime and begins counting down. When the lifetime expires, the instance is automatically stopped.
The host can extend the contract (adding more lifetime), but this is at their discretion. **Important:** Always assume your instance will be lost once the lifetime expires and copy out any important data before then.
### How can I restart programs when my instance restarts?
**For custom command instances:** Your command runs automatically on startup.
**For SSH instances:** Place startup commands in `/root/onstart.sh`. This script runs automatically on container startup.
```bash theme={null}
---
## Blender Batch Rendering
**URL:** llms-txt#blender-batch-rendering
**Contents:**
- Step 1 - Open Vast's Blender Batch Renderer Template
- Step 2 - Check the Secure Cloud box if you want a secure machine from trusted datacenters (Optional)
- Step 3 - Filter for a GPU that you feel best suits your needs
- Step 4 - Choose a GPU by Clicking "RENT"
- Step 5 - Use Jupyter Direct HTTPS Launch Mode
- Step 6 - Click the Open Button or Jupyter Notebook button to open Jupyter Notebook
- Step 7 - To Render Animation For Each Blend File In Batch Of Blend Files
- Step 8 - To Render Animation For Xth Frame of Each Blend File In Batch Of Blend Files
Source: https://docs.vast.ai/blender-batch-rendering
Blender is a free, open source 3D creation suite. It can be used to create animated films, visual effects, art, 3D-printed models, motion graphics, interactive 3D applications, virtual reality, and video games. It supports the entirety of the 3D pipeline—modeling, rigging, animation, simulation, rendering, compositing and motion tracking, even video editing and game creation. You can find more information about Blender at [blender.org](https://www.blender.org/).
Animators, game developers, 3D modelers, visual effects artists, architects, and product designers are some people who use Blender.
GPUs can speed up rendering in Blender.
You can save time by automating away the rendering of animations for batch of blend files.
## Step 1 - Open Vast's Blender Batch Renderer Template
Click on this link [Blender Batch Renderer Template](https://cloud.vast.ai/?ref_id=142678\&template_id=7b570ea8454e5f2b4b026139709fa0e8) to select the vast/blender-batch-renderer template.
## Step 2 - Check the Secure Cloud box if you want a secure machine from trusted datacenters (Optional)
You can narrow your search results to only data center machines if you want insured security standards from our trusted datacenters.

## Step 3 - Filter for a GPU that you feel best suits your needs
If you have questions about which GPU to choose, there is some data around NVIDIA Geforce RTX 4090 giving the best render speed with Blender. You can find other GPUs that work well with Blender here [Blender GPU Benchmarks](https://opendata.blender.org/benchmarks/query/?group_by=device_name\&blender_version=3.6.0). You can also find other options by searching on Google or asking ChatGPT.
The version of Blender running within Vast while using the template linked above at the time of this writing is 3.6.2.
Go to the GPUs filter and check the box for RTX 4090 or another GPU instance.

## Step 4 - Choose a GPU by Clicking "RENT"
Choose a GPU that meets your budget, desired reliability %, and other constraints by clicking "RENT". GPUs are sorted by a complex proprietary algorithm that aims to give users the best machines for their value by default.
You can filter GPUs further per your requirements if desired.

## Step 5 - Use Jupyter Direct HTTPS Launch Mode
Follow the instructions related to adding a certificate to your browser if you need to when it asks you to "Setup Jupyter Direct HTTPS" and click "CONTINUE". Here's more information on the Jupyter direct HTTPS Launch Mode and Installing the TLS certificate: [Jupyter](/documentation/instances/jupyter).

## Step 6 - Click the Open Button or Jupyter Notebook button to open Jupyter Notebook

## Step 7 - To Render Animation For Each Blend File In Batch Of Blend Files
If you want to render a respective animation for each blend file in a batch of blend files, follow the following steps.
Go to /Desktop/render\_animation\_for\_each\_blend\_file\_in\_batch\_of\_blend\_files/ folder in Jupyter Notebook

Upload .blend files to /Desktop/render\_animation\_for\_each\_blend\_file\_in\_batch\_of\_blend\_files/ folder


Open render\_animation\_for\_each\_blend\_file\_in\_batch\_of\_blend\_files.ipynb

Click the Run tab and click Run All Cells


Now a corresponding animation will be rendered for each .blend file you have uploaded to this folder.
You can also close out your jupyter notebook tab in your browser and this notebook will keep running as long as your instance in Vast is running.
## Step 8 - To Render Animation For Xth Frame of Each Blend File In Batch Of Blend Files
If you want to render a respective animation for the Xth frame of each blend file in a batch of blend files, follow the following steps.
Go to /Desktop/render\_Xth\_frame\_of\_batch\_of\_blend\_files/ folder in Jupyter Notebook

Upload .blend files to /Desktop/render\_Xth\_frame\_of\_batch\_of\_blend\_files/ folder


Open render\_Xth\_frame\_of\_batch\_of\_blend\_files.ipynb

Set frame\_number equal to a particular frame number. For ex. frame\_number=2

Click the Run tab and click Run All Cells


Now a corresponding animation will be rendered for each Xth frame of each .blend file you have uploaded to this folder.
You can also close out your jupyter notebook tab in your browser and this notebook will keep running as long as your instance in Vast is running.
---
## Recommended settings for different GPU sizes
**URL:** llms-txt#recommended-settings-for-different-gpu-sizes
**Contents:**
- Advanced Features
- Custom Scripts
- Extensions Management
- API Usage
8GB GPU:
- max_batch_count: 4
- max_batch_size: 2
12GB GPU:
- max_batch_count: 6
- max_batch_size: 3
24GB+ GPU:
- max_batch_count: 10
- max_batch_size: 5
bash Bash theme={null}
/workspace/stable-diffusion-webui/scripts/
bash Bash theme={null}
**Examples:**
Example 1 (unknown):
```unknown
## Advanced Features
### Custom Scripts
Place custom scripts in:
```
Example 2 (unknown):
```unknown
### Extensions Management
Popular extensions are pre-installed. Add more via Web UI:
* Extensions tab
* Install from URL
* Restart UI to apply
### API Usage
Enable API in settings:
```
---
## Reserved Instances
**URL:** llms-txt#reserved-instances
**Contents:**
- How Reserved Instances Work
- Creating a Reserved Instance
- Important Considerations
- Extending a Reserved Instance
- Refunds
- Preview Reserved Pricing Before Renting
- Common Questions
- Can I switch an existing on-demand instance to reserved?
- Can I extend a reserved instance?
- What happens if I cancel / delete a reserved instance early?
Source: https://docs.vast.ai/documentation/instances/choosing/reserved-instances
Save up to 50% on GPU costs by pre-paying for reserved instances. Learn how to convert on-demand instances to reserved pricing.
Reserved instances allow you to get significant discounts (up to 50%) by pre-paying for GPU time. You can convert any on-demand instance to a reserved instance at any time.
## How Reserved Instances Work
You can **convert an on-demand instance into a reserved instance** with a lower hourly rate by pre-paying.
* Convert any on-demand instance to reserved pricing
* Discounts up to 50% based on commitment length
* Pre-paid credits are locked to that specific instance
* Cannot migrate between hosts
## Creating a Reserved Instance
**Step 1 — Rent the Instance**
1. Go to [Search](https://cloud.vast.ai/create/) page.
2. Find a GPU that meets your requirements, click the **Rent** button.
3. This creates an **on-demand instance**.
**Step 2 — Convert to a Reserved Instance**
1. Go to the [**Instances**](https://cloud.vast.ai/instances/) page.
2. On your instance card, find the **green** **discount badge**.
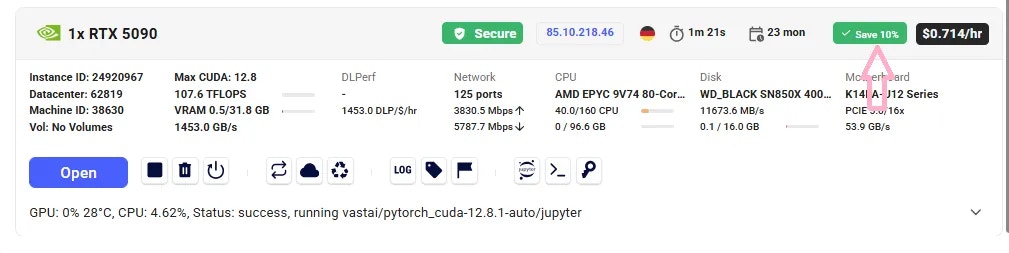 3. Click the badge — a new window will open with the **available pre-paid periods** (e.g., 1 month, 3 months, 6 months).
 4. Select your preferred period and confirm. The system calculates deposit and discount automatically.
Your instance is now reserved at the discounted rate. When an instance is converted to a reserved instance, you will see **Saved %** badge on the instance card to indicate the reserved discount is active.
4. Select your preferred period and confirm. The system calculates deposit and discount automatically.
Your instance is now reserved at the discounted rate. When an instance is converted to a reserved instance, you will see **Saved %** badge on the instance card to indicate the reserved discount is active.
 1. **Add credits** to your account (if needed).
2. Create an instance, get the instance id. CLI:`vastai show instances`
3. Run the following command, where: **ID** is the id of instance to prepay for **AMOUNT** is amount of instance credit prepayment (default discount func of 0.2 for 1 month, 0.3 for 3 months)
## Important Considerations
* If you later change your mind, you can withdrawal only any fraction of the funds that remain after paying the difference between the on demand and discounted price over the current duration.
* If the machine fails the implicit or explicit Service Level Agreement and is deverified the full balance can be withdrawn without penalty.
* Reserved instances cannot migrate between different hosts.
**Important:** Every time you add credits, your discount is recalculated. Avoid adding small amounts mid-term — you could end up with a worse rate. For example: If you have a 3-month reservation and add 2 weeks of credit with only 2 weeks left, your discount could drop.
## Extending a Reserved Instance
You can extend your reservation at any time:
Same flow as above - via **Save** badge on instance card.
More flexibility — deposit any amount you choose. For example:
You can cancel (destroy) a reserved / prepaid instance to get part of your deposit back. Refund = Remaining deposit **minus** total discount already received.
* On-demand: $1/hr → $720/month
* Reserved (1 month): \$576/month
* Cancel immediately → Refund = \$576
* Cancel after 15 days → Remaining = $288 → Refund = $216 (after discount penalty)
* Cancel at the end → Refund = \$0
You will see the refund on the Billing page -> Invoices table.
## Preview Reserved Pricing Before Renting
You can check the reserved price before committing:
1. Go to the **Search** page.
2. Switch the **On-demand** filter to the **Reserved** filter.
1. **Add credits** to your account (if needed).
2. Create an instance, get the instance id. CLI:`vastai show instances`
3. Run the following command, where: **ID** is the id of instance to prepay for **AMOUNT** is amount of instance credit prepayment (default discount func of 0.2 for 1 month, 0.3 for 3 months)
## Important Considerations
* If you later change your mind, you can withdrawal only any fraction of the funds that remain after paying the difference between the on demand and discounted price over the current duration.
* If the machine fails the implicit or explicit Service Level Agreement and is deverified the full balance can be withdrawn without penalty.
* Reserved instances cannot migrate between different hosts.
**Important:** Every time you add credits, your discount is recalculated. Avoid adding small amounts mid-term — you could end up with a worse rate. For example: If you have a 3-month reservation and add 2 weeks of credit with only 2 weeks left, your discount could drop.
## Extending a Reserved Instance
You can extend your reservation at any time:
Same flow as above - via **Save** badge on instance card.
More flexibility — deposit any amount you choose. For example:
You can cancel (destroy) a reserved / prepaid instance to get part of your deposit back. Refund = Remaining deposit **minus** total discount already received.
* On-demand: $1/hr → $720/month
* Reserved (1 month): \$576/month
* Cancel immediately → Refund = \$576
* Cancel after 15 days → Remaining = $288 → Refund = $216 (after discount penalty)
* Cancel at the end → Refund = \$0
You will see the refund on the Billing page -> Invoices table.
## Preview Reserved Pricing Before Renting
You can check the reserved price before committing:
1. Go to the **Search** page.
2. Switch the **On-demand** filter to the **Reserved** filter.
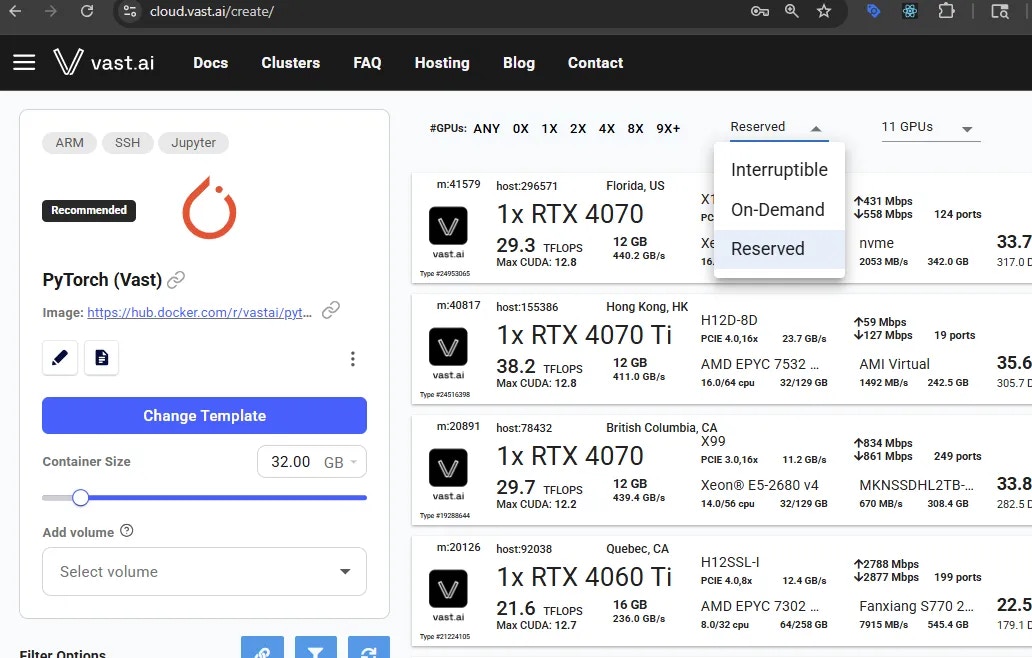 3. Set the **duration filter** (e.g., 1 month), if needed.
4. Hover over the **Rent** button — you'll see a breakdown, including a **Reserved cost** section.
3. Set the **duration filter** (e.g., 1 month), if needed.
4. Hover over the **Rent** button — you'll see a breakdown, including a **Reserved cost** section.
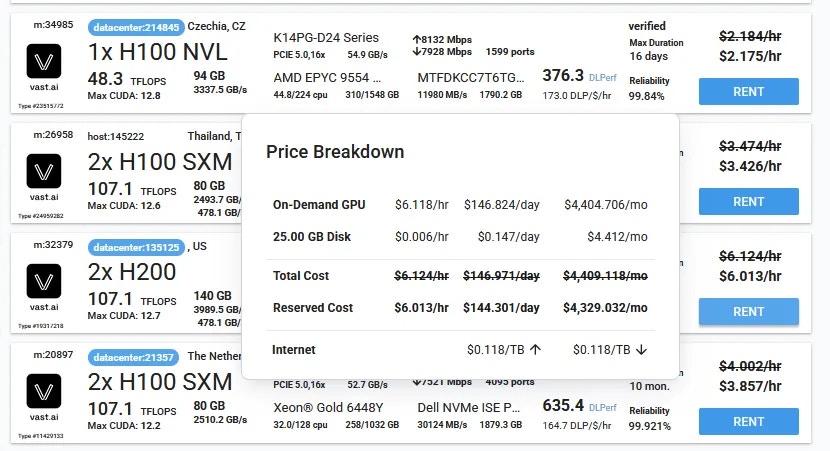 5. If you like the price, click **Rent** and follow the steps to convert it to a reserved instance.
### Can I switch an existing on-demand instance to reserved?
Yes, if there is an available discount. Go to the **Instances** page, click the **discount badge** on your instance card, choose a period, and confirm.
### Can I extend a reserved instance?
Yes — you can extend it anytime via the same discount badge in the Instances page, as long as the instance still has an active discount period. You can use the CLI for custom amounts.
### What happens if I cancel / delete a reserved instance early?
You'll receive a partial refund of your unused pre-paid balance, minus the total discount received so far. The refund amount will be displayed in the delete instance modal and will also appear on the Billing page after you delete the instance.
5. If you like the price, click **Rent** and follow the steps to convert it to a reserved instance.
### Can I switch an existing on-demand instance to reserved?
Yes, if there is an available discount. Go to the **Instances** page, click the **discount badge** on your instance card, choose a period, and confirm.
### Can I extend a reserved instance?
Yes — you can extend it anytime via the same discount badge in the Instances page, as long as the instance still has an active discount period. You can use the CLI for custom amounts.
### What happens if I cancel / delete a reserved instance early?
You'll receive a partial refund of your unused pre-paid balance, minus the total discount received so far. The refund amount will be displayed in the delete instance modal and will also appear on the Billing page after you delete the instance.
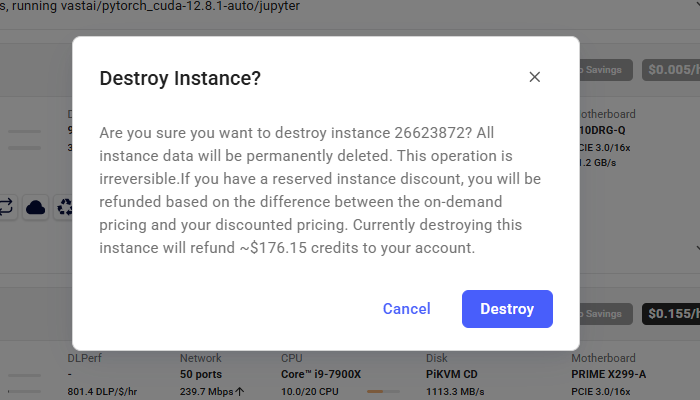 ### What happens if I stop a reserved instance?
If you stop the instance, the GPU will be released like any other instance and may be rented by another user.
* Learn about other [rental types](/documentation/instances/pricing#rental-types)
* Understand [billing basics](/documentation/reference/billing)
* View your [current instances](https://cloud.vast.ai/instances/)
**Examples:**
Example 1 (unknown):
```unknown
An example:
```
Example 2 (unknown):
```unknown
## Important Considerations
* If you later change your mind, you can withdrawal only any fraction of the funds that remain after paying the difference between the on demand and discounted price over the current duration.
* If the machine fails the implicit or explicit Service Level Agreement and is deverified the full balance can be withdrawn without penalty.
* Reserved instances cannot migrate between different hosts.
**Important:** Every time you add credits, your discount is recalculated. Avoid adding small amounts mid-term — you could end up with a worse rate. For example: If you have a 3-month reservation and add 2 weeks of credit with only 2 weeks left, your discount could drop.
## Extending a Reserved Instance
You can extend your reservation at any time:
Same flow as above - via **Save** badge on instance card.
More flexibility — deposit any amount you choose. For example:
```
---
## Creating New PyWorkers
**URL:** llms-txt#creating-new-pyworkers
**Contents:**
- Structure
- \_\_init\_\_.py
- data\_types.py
- server.py
Source: https://docs.vast.ai/documentation/serverless/creating-new-pyworkers
Learn how to create a new PyWorker for Vast.ai Serverless. Understand the structure of a PyWorker, the required files, and how to implement the server.py module.
This guide walks you through the structure of a PyWorker. By the end, you will know all of the pieces of a PyWorker and be able to create your own.
Vast has pre-made templates with PyWorkers already built-in. Search the [templates section](/documentation/templates/quickstart) first to see if a supported template works for your use case.
[This repo](https://github.com/vast-ai/pyworker/tree/main) contains all the components of a PyWorker. Simply for pedagogical purposes, the `workers/hello_world/` PyWorker is created for an LLM server with two API endpoints:
1. `/generate`: generates a LLM response and sends a JSON response
2. `/generate_stream`: streams a response one token at a time
Both of these endpoints take the same API JSON payload:
All PyWorkers have four files:
All of the classes follow strict type hinting. It is recommended that you type hint all of your functions. This will allow your IDE or VSCode with `pyright` plugin to find any type errors in your implementation. You can also install `pyright` with `npm install pyright` and run `pyright` in the root of the project to find any type errors.
The `__init__.py`file is left blank. This tells the Python interpreter to treat the hello\_world directory as a package. This allows us to import modules from within the directory.
This file defines how the PyWorker interacts with the ML model, and must adhere to the common framework laid out in `lib/data_types.py`. The file implements the specific request structure and payload handling that will be used in `server.py`.
Data handling classes must inherit from `lib.data_types.ApiPayload`. `ApiPayload` is an abstract class that needs several functions defined for it. Below is an example implementation from the hello\_world PyWorker that shows how to use the `ApiPayload` class.
Your specific use case could require additional classes or methods. Reference the TGI worker as another example.
For every ML model API endpoint you want to use, you must implement an `EndpointHandler`. This class handles incoming requests, processes them, sends them to the model API server, and finally returns an HTTP response with the model's results. `EndpointHandler` has several abstract functions that must be implemented. Here, we implement the `/generate` endpoint functionality for the PyWorker by creating the `GenerateHandler` class that inherits from `EndpointHandler`.
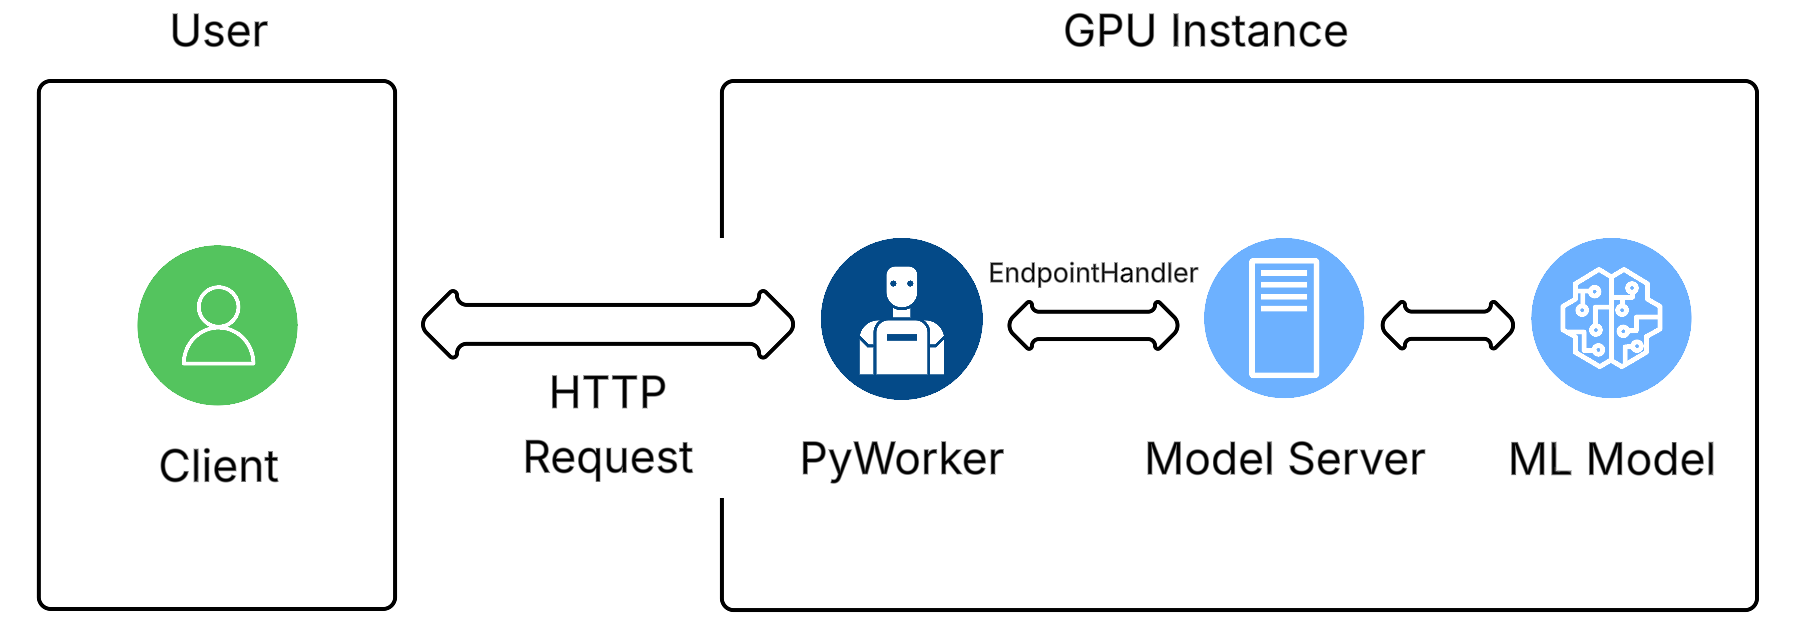
We also handle `GenerateStreamHandler` for streaming responses. It is identical to `GenerateHandler`, except that this implementation creates a web response:
You can now instantiate a Backend and use it to handle requests.
The full module is written in the `server.py` implementation of the hello\_world PyWorker, as shown here:
```python icon="python" Python theme={null}
"""
PyWorker works as a man-in-the-middle between the client and model API. It's function is:
1. receive request from client, update metrics such as workload of a request, number of pending requests, etc.
2a. transform the data and forward the transformed data to model API
2b. send updated metrics to autoscaler
3. transform response from model API(if needed) and forward the response to client
PyWorker forward requests to many model API endpoint. each endpoint must have an EndpointHandler. You can also
write function to just forward requests that don't generate anything with the model to model API without an
EndpointHandler. This is useful for endpoints such as healthchecks. See below for example
"""
import os
import logging
import dataclasses
from typing import Dict, Any, Union, Type
from aiohttp import web, ClientResponse
from lib.backend import Backend, LogAction
from lib.data_types import EndpointHandler
from lib.server import start_server
from .data_types import InputData
**Examples:**
Example 1 (unknown):
```unknown
***
## Structure
All PyWorkers have four files:
```
Example 2 (unknown):
```unknown
All of the classes follow strict type hinting. It is recommended that you type hint all of your functions. This will allow your IDE or VSCode with `pyright` plugin to find any type errors in your implementation. You can also install `pyright` with `npm install pyright` and run `pyright` in the root of the project to find any type errors.
### \_\_init\_\_.py
The `__init__.py`file is left blank. This tells the Python interpreter to treat the hello\_world directory as a package. This allows us to import modules from within the directory.
### data\_types.py
This file defines how the PyWorker interacts with the ML model, and must adhere to the common framework laid out in `lib/data_types.py`. The file implements the specific request structure and payload handling that will be used in `server.py`.
Data handling classes must inherit from `lib.data_types.ApiPayload`. `ApiPayload` is an abstract class that needs several functions defined for it. Below is an example implementation from the hello\_world PyWorker that shows how to use the `ApiPayload` class.
```
Example 3 (unknown):
```unknown
Your specific use case could require additional classes or methods. Reference the TGI worker as another example.
### server.py
For every ML model API endpoint you want to use, you must implement an `EndpointHandler`. This class handles incoming requests, processes them, sends them to the model API server, and finally returns an HTTP response with the model's results. `EndpointHandler` has several abstract functions that must be implemented. Here, we implement the `/generate` endpoint functionality for the PyWorker by creating the `GenerateHandler` class that inherits from `EndpointHandler`.

```
Example 4 (unknown):
```unknown
We also handle `GenerateStreamHandler` for streaming responses. It is identical to `GenerateHandler`, except that this implementation creates a web response:
```
---
## create team
**URL:** llms-txt#create-team
Source: https://docs.vast.ai/api-reference/team/create-team
api-reference/openapi.json post /api/v0/team/
Creates a new [team](https://docs.vast.ai/documentation/teams/teams-overview) with given name and following default roles:
- **Owner**: Full access to all team resources, settings, and member management. The team owner is the user who creates the team.
- **Manager**: All permissions of owner except team deletion.
- **Member**: Can view, create, and interact with instances, but cannot access billing, team management, autoscaler, or machines.
- The API key used to create the team becomes the team key and is used for all team operations (e.g., creating roles, deleting the team).
- You can optionally transfer credits from your personal account to the new team account using the `transfer_credit` field.
CLI Usage: `vastai create team --team_name [--transfer_credit ]`
---
## Set up any additional services
**URL:** llms-txt#set-up-any-additional-services
echo "my-supervisor-config" > /etc/supervisor/conf.d/my-application.conf
echo "my-supervisor-wrapper" > /opt/supervisor-scripts/my-application.sh
chmod +x /opt/supervisor-scripts/my-application.sh
---
## recycle instance
**URL:** llms-txt#recycle-instance
Source: https://docs.vast.ai/api-reference/instances/recycle-instance
api-reference/openapi.json put /api/v0/instances/recycle/{id}/
Destroys and recreates container in place (from newly pulled image) without losing GPU priority.
Updates container status to 'recycling' and executes docker stop/remove commands on the host machine.
CLI Usage: `vastai recycle instance `
---
## Teams Quickstart
**URL:** llms-txt#teams-quickstart
**Contents:**
- Introduction
- Creating the Team
- Managing Team Roles
- Inviting Team Members
- Using SSH Keys with Team Instances
- Conclusion
Source: https://docs.vast.ai/documentation/teams/teams-quickstart
<script
type="application/ld+json"
dangerouslySetInnerHTML={{
__html: JSON.stringify({
"@context": "https://schema.org",
"@type": "HowTo",
"name": "How to Get Started with Vast.ai Teams",
"description": "A quickstart guide to creating a team, inviting team members, assigning roles, and using SSH keys with team instances on Vast.ai.",
"step": [
{
"@type": "HowToStep",
"name": "Create Your Team",
"text": "There are two ways to create a team: Click on your profile name in the Context Switcher and click the Create Team button, or navigate to the Members section in the Sidebar and click Create Team. Enter your Team Name and optionally transfer some credit to your team during creation by selecting the 'Transfer my personal credits' checkbox. Click Create to finish."
},
{
"@type": "HowToStep",
"name": "Understand Default Team Roles",
"text": "Every team comes with two default roles: Manager (full access to team resources) and Member (limited read access to most resources while still being able to rent instances). You can view and manage these roles from the Members Page."
},
{
"@type": "HowToStep",
"name": "Create Custom Roles (Optional)",
"text": "To create a new role with custom permissions, navigate to the Roles tab of the Members Page. Name the role and choose the permission groups that the new role will have access to. Once satisfied, click Generate to create the new role."
},
{
"@type": "HowToStep",
"name": "Invite Team Members",
"text": "Go to the Members Page and click the Invite button. Enter the email and team role for the person you want to invite, then click Invite to send the invitation email. The invitee will receive an email with a link to join your team. Note: If the recipient does not have a Vast account, they will need to create one before being added to your team."
},
{
"@type": "HowToStep",
"name": "Set Up SSH Keys for Team Instances",
"text": "For VM Instances: Add your SSH key to your personal account before the VM is created. For Non-VM Instances: Either add your SSH key directly to the instance or add your key to your personal account, and it will be automatically applied to the team instance."
}
]
})
}}
/>
This quickstart guide will walk you through how to create a team, invite new team members and assign them to different roles.
There are two ways to create a team:
1. Click on your profile name (or email address) in the Context Switcher and then click the **Create Team** button
2. Or you can navigate to the **Members** section in the Sidebar and click **Create Team**
### What happens if I stop a reserved instance?
If you stop the instance, the GPU will be released like any other instance and may be rented by another user.
* Learn about other [rental types](/documentation/instances/pricing#rental-types)
* Understand [billing basics](/documentation/reference/billing)
* View your [current instances](https://cloud.vast.ai/instances/)
**Examples:**
Example 1 (unknown):
```unknown
An example:
```
Example 2 (unknown):
```unknown
## Important Considerations
* If you later change your mind, you can withdrawal only any fraction of the funds that remain after paying the difference between the on demand and discounted price over the current duration.
* If the machine fails the implicit or explicit Service Level Agreement and is deverified the full balance can be withdrawn without penalty.
* Reserved instances cannot migrate between different hosts.
**Important:** Every time you add credits, your discount is recalculated. Avoid adding small amounts mid-term — you could end up with a worse rate. For example: If you have a 3-month reservation and add 2 weeks of credit with only 2 weeks left, your discount could drop.
## Extending a Reserved Instance
You can extend your reservation at any time:
Same flow as above - via **Save** badge on instance card.
More flexibility — deposit any amount you choose. For example:
```
---
## Creating New PyWorkers
**URL:** llms-txt#creating-new-pyworkers
**Contents:**
- Structure
- \_\_init\_\_.py
- data\_types.py
- server.py
Source: https://docs.vast.ai/documentation/serverless/creating-new-pyworkers
Learn how to create a new PyWorker for Vast.ai Serverless. Understand the structure of a PyWorker, the required files, and how to implement the server.py module.
This guide walks you through the structure of a PyWorker. By the end, you will know all of the pieces of a PyWorker and be able to create your own.
Vast has pre-made templates with PyWorkers already built-in. Search the [templates section](/documentation/templates/quickstart) first to see if a supported template works for your use case.
[This repo](https://github.com/vast-ai/pyworker/tree/main) contains all the components of a PyWorker. Simply for pedagogical purposes, the `workers/hello_world/` PyWorker is created for an LLM server with two API endpoints:
1. `/generate`: generates a LLM response and sends a JSON response
2. `/generate_stream`: streams a response one token at a time
Both of these endpoints take the same API JSON payload:
All PyWorkers have four files:
All of the classes follow strict type hinting. It is recommended that you type hint all of your functions. This will allow your IDE or VSCode with `pyright` plugin to find any type errors in your implementation. You can also install `pyright` with `npm install pyright` and run `pyright` in the root of the project to find any type errors.
The `__init__.py`file is left blank. This tells the Python interpreter to treat the hello\_world directory as a package. This allows us to import modules from within the directory.
This file defines how the PyWorker interacts with the ML model, and must adhere to the common framework laid out in `lib/data_types.py`. The file implements the specific request structure and payload handling that will be used in `server.py`.
Data handling classes must inherit from `lib.data_types.ApiPayload`. `ApiPayload` is an abstract class that needs several functions defined for it. Below is an example implementation from the hello\_world PyWorker that shows how to use the `ApiPayload` class.
Your specific use case could require additional classes or methods. Reference the TGI worker as another example.
For every ML model API endpoint you want to use, you must implement an `EndpointHandler`. This class handles incoming requests, processes them, sends them to the model API server, and finally returns an HTTP response with the model's results. `EndpointHandler` has several abstract functions that must be implemented. Here, we implement the `/generate` endpoint functionality for the PyWorker by creating the `GenerateHandler` class that inherits from `EndpointHandler`.

We also handle `GenerateStreamHandler` for streaming responses. It is identical to `GenerateHandler`, except that this implementation creates a web response:
You can now instantiate a Backend and use it to handle requests.
The full module is written in the `server.py` implementation of the hello\_world PyWorker, as shown here:
```python icon="python" Python theme={null}
"""
PyWorker works as a man-in-the-middle between the client and model API. It's function is:
1. receive request from client, update metrics such as workload of a request, number of pending requests, etc.
2a. transform the data and forward the transformed data to model API
2b. send updated metrics to autoscaler
3. transform response from model API(if needed) and forward the response to client
PyWorker forward requests to many model API endpoint. each endpoint must have an EndpointHandler. You can also
write function to just forward requests that don't generate anything with the model to model API without an
EndpointHandler. This is useful for endpoints such as healthchecks. See below for example
"""
import os
import logging
import dataclasses
from typing import Dict, Any, Union, Type
from aiohttp import web, ClientResponse
from lib.backend import Backend, LogAction
from lib.data_types import EndpointHandler
from lib.server import start_server
from .data_types import InputData
**Examples:**
Example 1 (unknown):
```unknown
***
## Structure
All PyWorkers have four files:
```
Example 2 (unknown):
```unknown
All of the classes follow strict type hinting. It is recommended that you type hint all of your functions. This will allow your IDE or VSCode with `pyright` plugin to find any type errors in your implementation. You can also install `pyright` with `npm install pyright` and run `pyright` in the root of the project to find any type errors.
### \_\_init\_\_.py
The `__init__.py`file is left blank. This tells the Python interpreter to treat the hello\_world directory as a package. This allows us to import modules from within the directory.
### data\_types.py
This file defines how the PyWorker interacts with the ML model, and must adhere to the common framework laid out in `lib/data_types.py`. The file implements the specific request structure and payload handling that will be used in `server.py`.
Data handling classes must inherit from `lib.data_types.ApiPayload`. `ApiPayload` is an abstract class that needs several functions defined for it. Below is an example implementation from the hello\_world PyWorker that shows how to use the `ApiPayload` class.
```
Example 3 (unknown):
```unknown
Your specific use case could require additional classes or methods. Reference the TGI worker as another example.
### server.py
For every ML model API endpoint you want to use, you must implement an `EndpointHandler`. This class handles incoming requests, processes them, sends them to the model API server, and finally returns an HTTP response with the model's results. `EndpointHandler` has several abstract functions that must be implemented. Here, we implement the `/generate` endpoint functionality for the PyWorker by creating the `GenerateHandler` class that inherits from `EndpointHandler`.

```
Example 4 (unknown):
```unknown
We also handle `GenerateStreamHandler` for streaming responses. It is identical to `GenerateHandler`, except that this implementation creates a web response:
```
---
## create team
**URL:** llms-txt#create-team
Source: https://docs.vast.ai/api-reference/team/create-team
api-reference/openapi.json post /api/v0/team/
Creates a new [team](https://docs.vast.ai/documentation/teams/teams-overview) with given name and following default roles:
- **Owner**: Full access to all team resources, settings, and member management. The team owner is the user who creates the team.
- **Manager**: All permissions of owner except team deletion.
- **Member**: Can view, create, and interact with instances, but cannot access billing, team management, autoscaler, or machines.
- The API key used to create the team becomes the team key and is used for all team operations (e.g., creating roles, deleting the team).
- You can optionally transfer credits from your personal account to the new team account using the `transfer_credit` field.
CLI Usage: `vastai create team --team_name [--transfer_credit ]`
---
## Set up any additional services
**URL:** llms-txt#set-up-any-additional-services
echo "my-supervisor-config" > /etc/supervisor/conf.d/my-application.conf
echo "my-supervisor-wrapper" > /opt/supervisor-scripts/my-application.sh
chmod +x /opt/supervisor-scripts/my-application.sh
---
## recycle instance
**URL:** llms-txt#recycle-instance
Source: https://docs.vast.ai/api-reference/instances/recycle-instance
api-reference/openapi.json put /api/v0/instances/recycle/{id}/
Destroys and recreates container in place (from newly pulled image) without losing GPU priority.
Updates container status to 'recycling' and executes docker stop/remove commands on the host machine.
CLI Usage: `vastai recycle instance `
---
## Teams Quickstart
**URL:** llms-txt#teams-quickstart
**Contents:**
- Introduction
- Creating the Team
- Managing Team Roles
- Inviting Team Members
- Using SSH Keys with Team Instances
- Conclusion
Source: https://docs.vast.ai/documentation/teams/teams-quickstart
<script
type="application/ld+json"
dangerouslySetInnerHTML={{
__html: JSON.stringify({
"@context": "https://schema.org",
"@type": "HowTo",
"name": "How to Get Started with Vast.ai Teams",
"description": "A quickstart guide to creating a team, inviting team members, assigning roles, and using SSH keys with team instances on Vast.ai.",
"step": [
{
"@type": "HowToStep",
"name": "Create Your Team",
"text": "There are two ways to create a team: Click on your profile name in the Context Switcher and click the Create Team button, or navigate to the Members section in the Sidebar and click Create Team. Enter your Team Name and optionally transfer some credit to your team during creation by selecting the 'Transfer my personal credits' checkbox. Click Create to finish."
},
{
"@type": "HowToStep",
"name": "Understand Default Team Roles",
"text": "Every team comes with two default roles: Manager (full access to team resources) and Member (limited read access to most resources while still being able to rent instances). You can view and manage these roles from the Members Page."
},
{
"@type": "HowToStep",
"name": "Create Custom Roles (Optional)",
"text": "To create a new role with custom permissions, navigate to the Roles tab of the Members Page. Name the role and choose the permission groups that the new role will have access to. Once satisfied, click Generate to create the new role."
},
{
"@type": "HowToStep",
"name": "Invite Team Members",
"text": "Go to the Members Page and click the Invite button. Enter the email and team role for the person you want to invite, then click Invite to send the invitation email. The invitee will receive an email with a link to join your team. Note: If the recipient does not have a Vast account, they will need to create one before being added to your team."
},
{
"@type": "HowToStep",
"name": "Set Up SSH Keys for Team Instances",
"text": "For VM Instances: Add your SSH key to your personal account before the VM is created. For Non-VM Instances: Either add your SSH key directly to the instance or add your key to your personal account, and it will be automatically applied to the team instance."
}
]
})
}}
/>
This quickstart guide will walk you through how to create a team, invite new team members and assign them to different roles.
There are two ways to create a team:
1. Click on your profile name (or email address) in the Context Switcher and then click the **Create Team** button
2. Or you can navigate to the **Members** section in the Sidebar and click **Create Team**
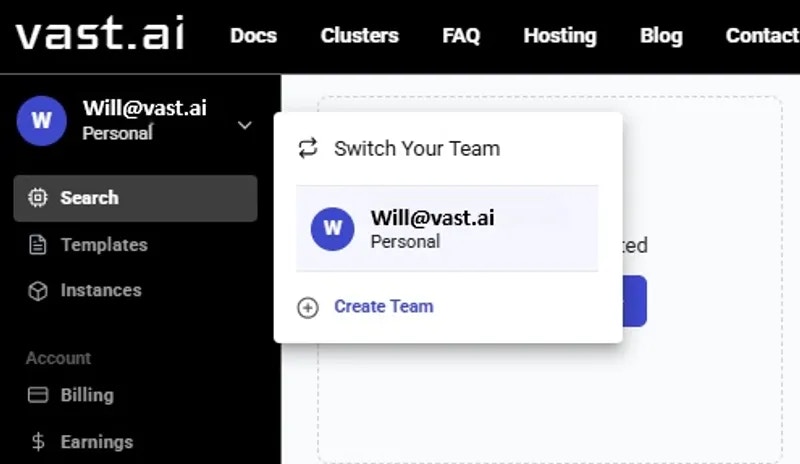
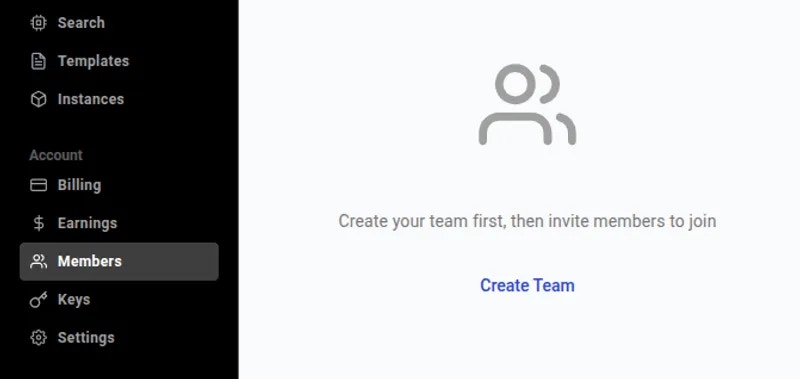 Once there, you can create your **Team Name** and transfer some credit to your team during creation. You can also skip the credit transfer step and do it later from the [**Billing Page**](/documentation/reference/billing#a6bsE).
To add credit during team creation, select **Transfer my personal credits** checkbox, enter an amount, and then click **Create**.
Once there, you can create your **Team Name** and transfer some credit to your team during creation. You can also skip the credit transfer step and do it later from the [**Billing Page**](/documentation/reference/billing#a6bsE).
To add credit during team creation, select **Transfer my personal credits** checkbox, enter an amount, and then click **Create**.
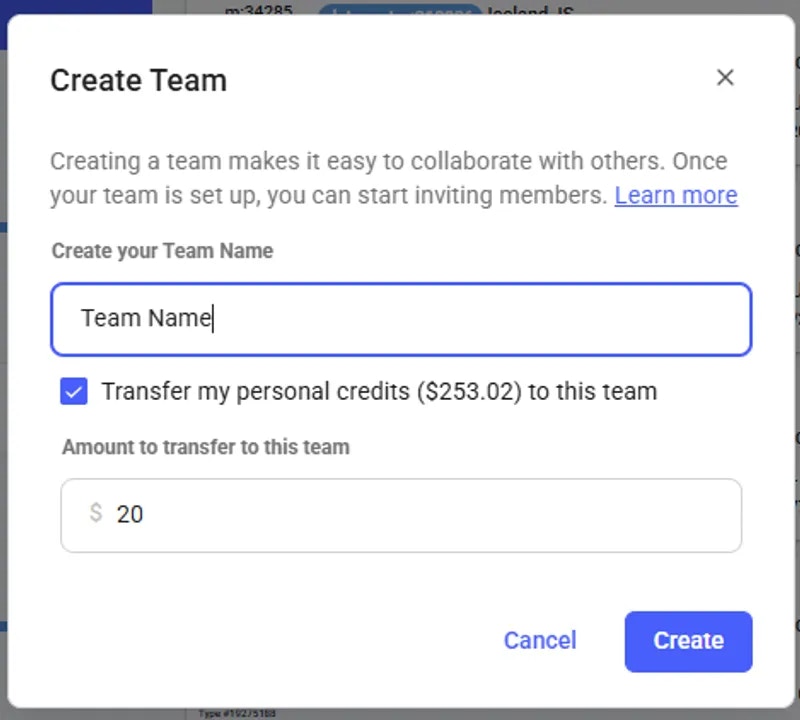 After successfully creating the team you should see your Team Name and role in the Context Switcher in the upper left corner and the Team Dashboard on the **Members** page.
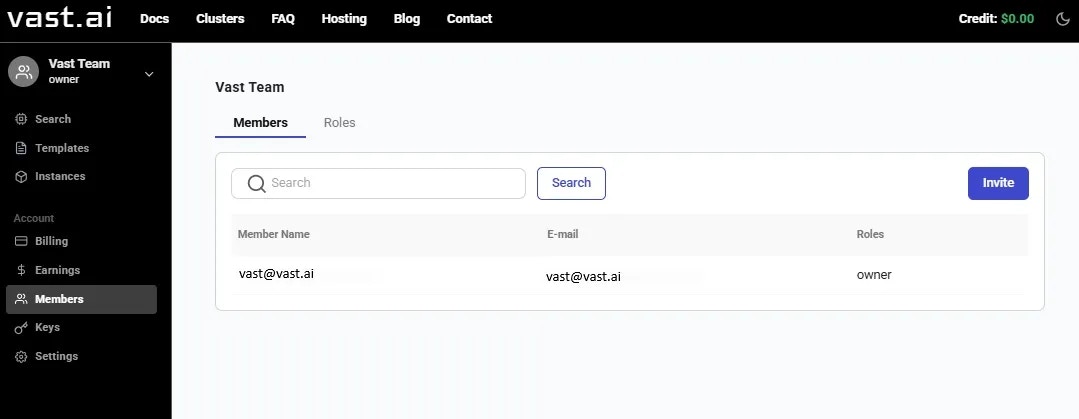 The **Members** section is the main way that team owners and managers can interact with the Teams ecosystem. From here you can invite team members, create/manage team roles, remove team members, etc.
## Managing Team Roles
Every team comes with two default roles: manager and member.
Managers have full access to team resources, while members have limited read access to most resources while still being able to rent instances. [Learn more.](/documentation/teams/teams-roles)
To create a new role with your desired permissions, navigate to the **Roles** tab of the **Members** **Page**. Then you can name the role and choose the permission groups that the new role will have access to. Once you are satisfied, click **Generate** to create the new role.
The **Members** section is the main way that team owners and managers can interact with the Teams ecosystem. From here you can invite team members, create/manage team roles, remove team members, etc.
## Managing Team Roles
Every team comes with two default roles: manager and member.
Managers have full access to team resources, while members have limited read access to most resources while still being able to rent instances. [Learn more.](/documentation/teams/teams-roles)
To create a new role with your desired permissions, navigate to the **Roles** tab of the **Members** **Page**. Then you can name the role and choose the permission groups that the new role will have access to. Once you are satisfied, click **Generate** to create the new role.
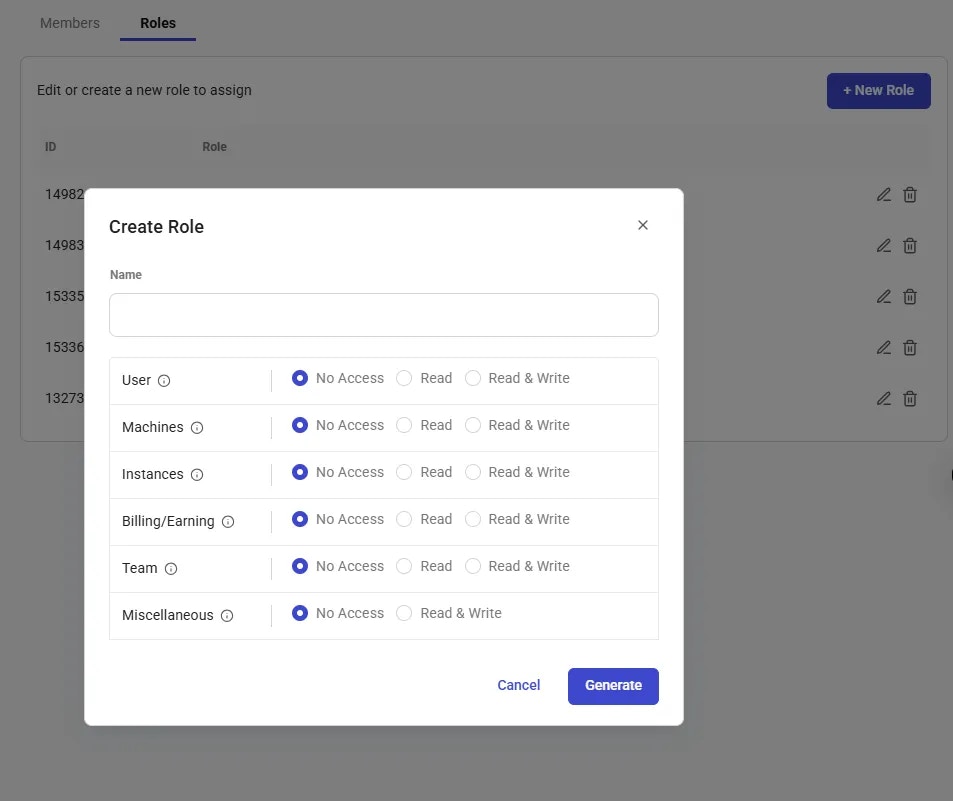 For more information on Permission Groups and what they allow access to, [click here](/cli/installation).
## Inviting Team Members
To invite a team member, go to the **Members Page** and click on the **Invite** button.
This will bring up a quick popup where you can enter the email and team role for the person you want to invite. Once complete, click **Invite** to send the invitation email.
For more information on Permission Groups and what they allow access to, [click here](/cli/installation).
## Inviting Team Members
To invite a team member, go to the **Members Page** and click on the **Invite** button.
This will bring up a quick popup where you can enter the email and team role for the person you want to invite. Once complete, click **Invite** to send the invitation email.
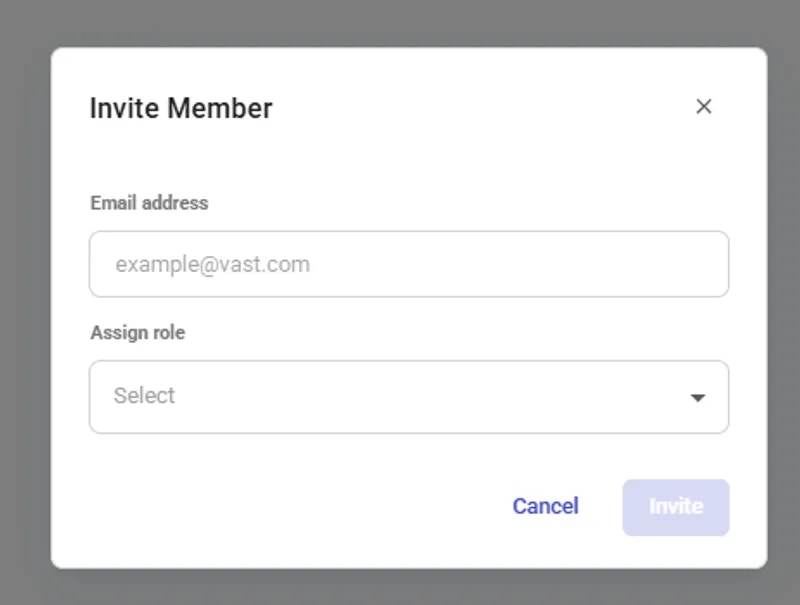 Once you send the invitation, the user should get an email asking them to join your team. Upon clicking the link in the email they will be added as a member of your team.
**Note:** if the recipient of the invitation does not have a Vast account, they will need to create one before being added to your Team.
Once the invitee has joined your team, you should see them listed in the **Members** section.
Once you send the invitation, the user should get an email asking them to join your team. Upon clicking the link in the email they will be added as a member of your team.
**Note:** if the recipient of the invitation does not have a Vast account, they will need to create one before being added to your Team.
Once the invitee has joined your team, you should see them listed in the **Members** section.
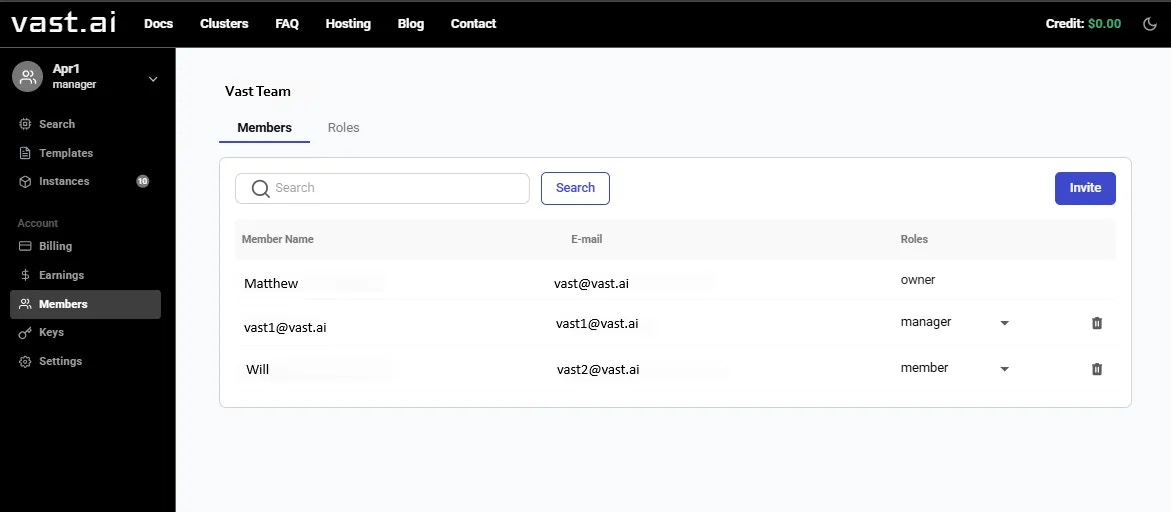 ## Using SSH Keys with Team Instances
If you are part of a **team** and want to connect to a **team’s instance** using SSH, simply add your key to your individual account keys. Here’s how it works depending on the type of instance:
* Your SSH key **must be added to your personal account before the VM is created**.
* When the VM is launched, all SSH keys in your account are automatically included for access a team instance.
* You can either:
* **Add your SSH key directly to the instance**, or
* **Add your key to your personal account**, in which case it will be automatically applied to the team instance as well.
## Using SSH Keys with Team Instances
If you are part of a **team** and want to connect to a **team’s instance** using SSH, simply add your key to your individual account keys. Here’s how it works depending on the type of instance:
* Your SSH key **must be added to your personal account before the VM is created**.
* When the VM is launched, all SSH keys in your account are automatically included for access a team instance.
* You can either:
* **Add your SSH key directly to the instance**, or
* **Add your key to your personal account**, in which case it will be automatically applied to the team instance as well.
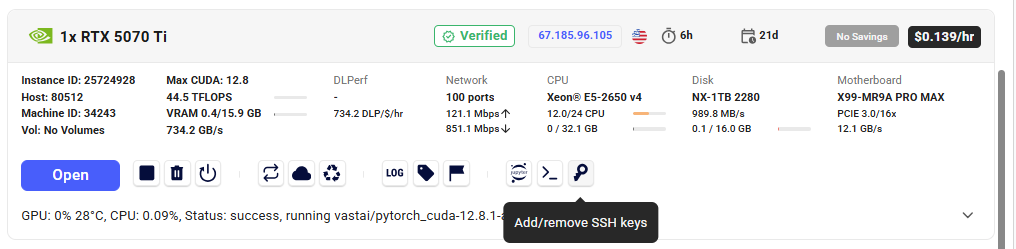 You have now successfully created a team!
From this point, you can add any Billing information the same way as a regular account and invite as many of your teammates as you like so you can collaborate together with ease.
---
## create team role
**URL:** llms-txt#create-team-role
Source: https://docs.vast.ai/api-reference/team/create-team-role
api-reference/openapi.json post /api/v0/team/roles/
Creates a new role within a team. Only team owners or managers with the appropriate permissions can perform this operation.
CLI Usage: `vastai create team role --name --permissions `
---
## set user
**URL:** llms-txt#set-user
Source: https://docs.vast.ai/api-reference/accounts/set-user
api-reference/openapi.json put /api/v0/users/
Updates the user data for the authenticated user.
CLI Usage: `vastai set user --file `
---
## create workergroup
**URL:** llms-txt#create-workergroup
Source: https://docs.vast.ai/api-reference/serverless/create-workergroup
api-reference/openapi.json post /api/v0/workergroups/
Creates a new workergroup configuration that manages worker instances for a serverless endpoint.
CLI Usage: `vastai create workergroup --template_hash --endpoint_name [options]`
---
## create api-key
**URL:** llms-txt#create-api-key
Source: https://docs.vast.ai/api-reference/accounts/create-api-key
api-reference/openapi.json post /api/v0/auth/apikeys/
Creates a new API key with specified permissions for the authenticated user.
CLI Usage: `vastai create api-key --name --permission_file [--key_params ]`
---
## Data Movement
**URL:** llms-txt#data-movement
**Contents:**
- Instance\<->Cloud copy (cloud sync)
- Using the GUI
- Using the CLI
- Instance \<-> Instance copy
- Using the GUI
- Using the CLI
- CLI Copy Command
- CLI Copy Command (VMs)
- Constraints
- Performance
Source: https://docs.vast.ai/documentation/instances/storage/data-movement
Learn how to move data on Vast.ai using cloud sync, instance-to-instance transfers, CLI copy, VM migration, scp, and other efficient methods.
Vast.ai currently supports several built-in mechanisms to copy data to/from instance storage (in addition to all of the standard linux/unix options available inside the instance):
For docker based instances:
1. Instance\<->Instance and Instance\<->Local copy using the `vastai copy` CLI command
2. Instance\<->Instance copy in the GUI instance control panel or `vastai copy` CLI command
3. Instance\<->Cloud copy using the GUI instance control panel or `vastai cloud copy` CLI command
1. Instance\<->Instance migration through the `vastai vm copy` CLI command or the GUI instance control panel
These are in addition to standard ssh based copy protocols such as scp or sftp which you can run over ssh, built in jupyter http copy, and any other linux tools you can run inside the instance yourself (rclone, rsync, bittorent, [insync](https://www.insynchq.com/headless-for-linux) etc).
The 3 built-in methods discussed here are unique in that they offer ways to copy data to/from a *stopped instance*, with some constraints. Copying data between instances accrues internet bandwidth usage charges (with prices varying across providers), unless the copy is between two instances on the same machine or local network, in which case there is no bandwidth charge.
## Instance\<->Cloud copy (cloud sync)
The cloud sync feature allows you to copy data to/from instance local storage and several cloud storage providers (S3, gdrive, backblaze, etc) - even when the instance is stopped.
Vast currently supports Dropbox, Amazon S3 and Backblaze cloud storage providers.
First you will need to connect to the cloud provider on the [account page](https://cloud.vast.ai/account/) and then use the cloud copy button on the instance to start the copy operation.

See [Cloud Sync](/documentation/instances/cloud-sync) for more details.
You can also access this feature using the `vastai cloud copy` [CLI command](/cli/commands#cloud-copy).
## Instance \<-> Instance copy
Instance to instance copy allows moving data directly between the local storage of two instances.
If the two instances are on the same machine or the same local network (same provider and location) then the copy can run at faster local network storage speeds and there is no internet transit cost.
You can use the copy buttons to copy data between two instances. Instances can be stopped/inactive. See complete [Constraints](./#constraints) below.
Click the copy button on the source instance and then on the destination instance to bring up the copy dialogue. For docker-based instances you will see the following folder dialogue.
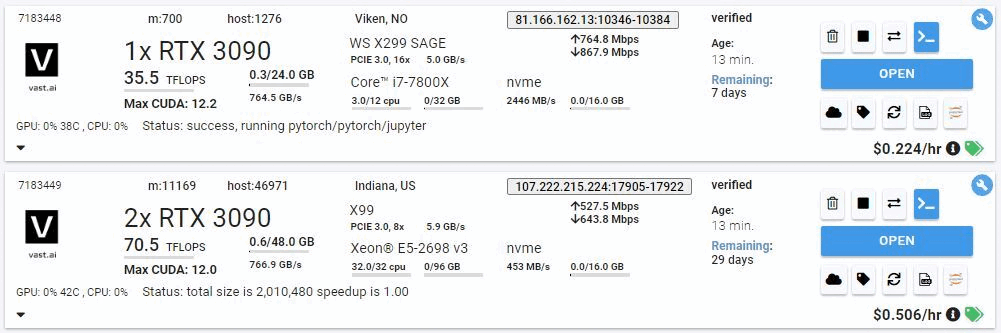
Pick the folders where you want to copy to/from. Leave a '/' at the end of the source directory to copy all the files inside into the target directory, vs nesting a copy of the source dir into the target dir.
**WARNING**\\
You should not copy to /root or / as a destination directory, as this can mess
up the permissions on your instance ssh folder, breaking future copy
operations (as they use ssh authentication).
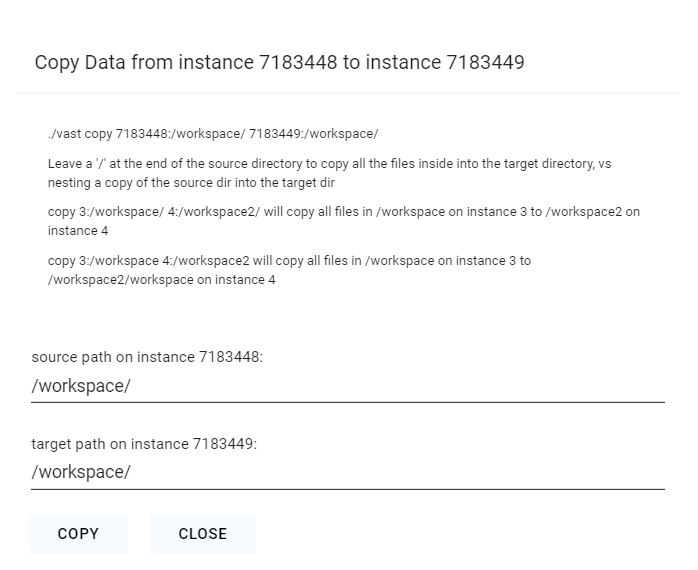
After clicking the copy button, give it 5-10 seconds to start. The status messages will display as the copy operation begins.
For VM based instances you will see a confirmation dialog instead; the copy will copy your entire source instance to the destination machine. The destination instance's disk will be replaced by the contents of the source instance.
You can also access this feature using the `vastai copy` [CLI command](/cli/commands#copy).
You can use the [CLI](/cli/get-started) copy command to copy from/to directories on a remote instance and your local machine, or to copy data between two remote instances.
The copy command uses rsync and is generally fast and efficient, subject to single link upload/download constraints.
The copy command supports multiple location formats:
* `[instance_id:]path` - Legacy format (still supported)
* `C.instance_id:path` - Container copy format
* `cloud_service:path` - Cloud service format
* `cloud_service.cloud_service_id:path` - Cloud service with ID
* `local:path` - Explicit local path
The first example copy syncs all files from the absolute directory '/workspace' on instance 6003036 to the directory '/workspace' on instance 6003038.
The second example copy syncs files from container 11824 to the local machine using structured syntax.
The third example copy syncs files from local to container 11824 using structured syntax.
The fourth example copy syncs files from Google Drive to an instance.
The fifth example copy syncs files from S3 bucket with id 101 to an instance.
## CLI Copy Command (VMs)
You can use the [CLI](/cli/get-started) vm copy command to copy your entire VM from one instance to another. The destination VM's disk will be replaced with the contents of the source machine.
This will transfer the contents of 1241241 to 1241245.
For VM-based instances, the destination instance must be stopped during the transfer.
**WARNING**\\
You should not copy to /root or / as a destination directory, as this can mess
up the permissions on your instance ssh folder, breaking future copy
operations (as they use ssh authentication).
If your data is already stored in the cloud (S3, gdrive, etc) then you should naturally use the appropriate linux CLI or commands to download and upload data directly, or you could use the [cloud sync](/documentation/instances/cloud-sync) feature.
This generally will be one the fastest methods for moving large quantities of data, as it can fully saturate a large number of download links.
If you are using multiple instances with significant data movement requirements you will want to use high bandwidth cloud storage to avoid any single machine bottlenecks.
If you launched a Jupyter notebook instance, you can use its upload feature, but this has a file size limit and can be slow.
You can also use standard Linux tools like scp, ftp, rclone, or rsync to move data.
For moving code and smaller files scp is fast enough and convenient.
However, be warned that the default ssh connection uses a proxy and can be slow for large transfers (direct ssh recommended).
Instance to instance copy is generally as fast as other methods, and can be much faster (and cheaper) for moving data between instances on the same datacenter.
If you launched an ssh instance, you can copy files using scp. The proxy ssh connection can be slow (in terms of latency and bandwidth).
Thus we recommend only using scp over the proxy ssh connection for smaller transfers (less than 1 GB).
For larger inbound transfers, using the direct ssh connection is recommended.
Downloading from a cloud data store using wget or curl can have much higher performance.
The relevant scp command syntax is:
The PORT and IPADDR fields must match those from the ssh command (note the use of -P for port instead of -p !). The "Connect" button on the instance will give you these fields in the form:
For example, if Connect gives you this:
You could use scp to upload a local file called "myfile.tar.gz" to a remote folder called "mydir" like so:
### How do you recommend I move data from an existing instance?
The [cloud sync feature](/documentation/instances/cloud-sync) will allow you to move data to and from instances easily.
The main benefit is that you can move data around while the machine is inactive.
Currently, we support Google Drive, S3, Dropbox, and Backblaze
### Help, I want to move my data but I forgot what directory it's in!
For moving your data, by either using our Cloud Sync or Instance Copy features, you will need to define the path from where the data you are transferring is coming from and where it is to be put. If you don't remember where the data is you are trying to transfer, you can use our [CLI execute command](/cli/commands#execute) to access your instance when your instance access is limited.
### What if I don't remember the file names on my inactive instance, but I want to copy certain files?
Use the vast CLI, run the `execute` command to display the file tree. This will help you browse the available files and identify the names or paths you need. More about the execute command you can find [here](https://cloud.vast.ai/cli/).
### How I can free up disk space on an inactive instance?
When an instance is inactive (stopped, exited, cannot be started), you can still manage its file system and remove unneeded data using vast CLI. This is useful if you want to free up disk space without starting the instance.
Delete unnecessary files:
**Examples:**
Example 1 (unknown):
```unknown
The first example copy syncs all files from the absolute directory '/workspace' on instance 6003036 to the directory '/workspace' on instance 6003038.
The second example copy syncs files from container 11824 to the local machine using structured syntax.
The third example copy syncs files from local to container 11824 using structured syntax.
The fourth example copy syncs files from Google Drive to an instance.
The fifth example copy syncs files from S3 bucket with id 101 to an instance.
## CLI Copy Command (VMs)
You can use the [CLI](/cli/get-started) vm copy command to copy your entire VM from one instance to another. The destination VM's disk will be replaced with the contents of the source machine.
Example:
```
Example 2 (unknown):
```unknown
This will transfer the contents of 1241241 to 1241245.
### Constraints
For VM-based instances, the destination instance must be stopped during the transfer.
**WARNING**\\
You should not copy to /root or / as a destination directory, as this can mess
up the permissions on your instance ssh folder, breaking future copy
operations (as they use ssh authentication).
### Performance
If your data is already stored in the cloud (S3, gdrive, etc) then you should naturally use the appropriate linux CLI or commands to download and upload data directly, or you could use the [cloud sync](/documentation/instances/cloud-sync) feature.
This generally will be one the fastest methods for moving large quantities of data, as it can fully saturate a large number of download links.
If you are using multiple instances with significant data movement requirements you will want to use high bandwidth cloud storage to avoid any single machine bottlenecks.
If you launched a Jupyter notebook instance, you can use its upload feature, but this has a file size limit and can be slow.
You can also use standard Linux tools like scp, ftp, rclone, or rsync to move data.
For moving code and smaller files scp is fast enough and convenient.
However, be warned that the default ssh connection uses a proxy and can be slow for large transfers (direct ssh recommended).
Instance to instance copy is generally as fast as other methods, and can be much faster (and cheaper) for moving data between instances on the same datacenter.
## SCP
If you launched an ssh instance, you can copy files using scp. The proxy ssh connection can be slow (in terms of latency and bandwidth).
Thus we recommend only using scp over the proxy ssh connection for smaller transfers (less than 1 GB).
For larger inbound transfers, using the direct ssh connection is recommended.
Downloading from a cloud data store using wget or curl can have much higher performance.
The relevant scp command syntax is:
```
Example 3 (unknown):
```unknown
The PORT and IPADDR fields must match those from the ssh command (note the use of -P for port instead of -p !). The "Connect" button on the instance will give you these fields in the form:
```
Example 4 (unknown):
```unknown
For example, if Connect gives you this:
```
---
## Running PyTorch on Vast.ai: A Complete Guide
**URL:** llms-txt#running-pytorch-on-vast.ai:-a-complete-guide
**Contents:**
- Introduction
- Prerequisites
- Setting Up Your Environment
- 1. Selecting PyTorch Template
- 2. Choosing an Instance
- 3. Connecting to Your Instance
- Setting Up Your PyTorch Environment
- 1. Basic Environment Check
- 2. Data Management
This guide walks you through setting up and running PyTorch workloads on Vast.ai, a marketplace for renting GPU compute power. Whether you're training large models or running inference, this guide will help you get started efficiently.
* A Vast.ai account
* Basic familiarity with PyTorch
* [Install TLS Certificate for Jupyter](/documentation/instances/jupyter)
* [(Optional) SSH client installed on your local machine and SSH public key added in Account tab at cloud.vast.ai](/documentation/instances/sshscp)
* [(Optional) Install and use vast-cli](/cli/get-started)
* [(Optional) Docker knowledge for custom environments](https://docs.docker.com/get-started/)
## Setting Up Your Environment
### 1. Selecting PyTorch Template
Navigate to the [Templates tab](https://cloud.vast.ai/templates/) to view available templates. Before choosing a specific instance, you'll need to select the appropriate PyTorch template for your needs:
* **Choose recommended** [**PyTorch**](https://cloud.vast.ai?ref_id=62897\&template_id=a33b72bd045341cfcd678ce7c932a614) **template:**
* A container is built on the Vast.ai base image, inheriting its core functionality
* It provides a flexible development environment with pre-configured libraries
* PyTorch is pre-installed at `/venv/main/` for immediate use
* Supports for both **AMD64** and **ARM64**(Grace) architectures, especially on CUDA 12.4+
* You can select specific PyTorch versions via the Version Tag selector
You have now successfully created a team!
From this point, you can add any Billing information the same way as a regular account and invite as many of your teammates as you like so you can collaborate together with ease.
---
## create team role
**URL:** llms-txt#create-team-role
Source: https://docs.vast.ai/api-reference/team/create-team-role
api-reference/openapi.json post /api/v0/team/roles/
Creates a new role within a team. Only team owners or managers with the appropriate permissions can perform this operation.
CLI Usage: `vastai create team role --name --permissions `
---
## set user
**URL:** llms-txt#set-user
Source: https://docs.vast.ai/api-reference/accounts/set-user
api-reference/openapi.json put /api/v0/users/
Updates the user data for the authenticated user.
CLI Usage: `vastai set user --file `
---
## create workergroup
**URL:** llms-txt#create-workergroup
Source: https://docs.vast.ai/api-reference/serverless/create-workergroup
api-reference/openapi.json post /api/v0/workergroups/
Creates a new workergroup configuration that manages worker instances for a serverless endpoint.
CLI Usage: `vastai create workergroup --template_hash --endpoint_name [options]`
---
## create api-key
**URL:** llms-txt#create-api-key
Source: https://docs.vast.ai/api-reference/accounts/create-api-key
api-reference/openapi.json post /api/v0/auth/apikeys/
Creates a new API key with specified permissions for the authenticated user.
CLI Usage: `vastai create api-key --name --permission_file [--key_params ]`
---
## Data Movement
**URL:** llms-txt#data-movement
**Contents:**
- Instance\<->Cloud copy (cloud sync)
- Using the GUI
- Using the CLI
- Instance \<-> Instance copy
- Using the GUI
- Using the CLI
- CLI Copy Command
- CLI Copy Command (VMs)
- Constraints
- Performance
Source: https://docs.vast.ai/documentation/instances/storage/data-movement
Learn how to move data on Vast.ai using cloud sync, instance-to-instance transfers, CLI copy, VM migration, scp, and other efficient methods.
Vast.ai currently supports several built-in mechanisms to copy data to/from instance storage (in addition to all of the standard linux/unix options available inside the instance):
For docker based instances:
1. Instance\<->Instance and Instance\<->Local copy using the `vastai copy` CLI command
2. Instance\<->Instance copy in the GUI instance control panel or `vastai copy` CLI command
3. Instance\<->Cloud copy using the GUI instance control panel or `vastai cloud copy` CLI command
1. Instance\<->Instance migration through the `vastai vm copy` CLI command or the GUI instance control panel
These are in addition to standard ssh based copy protocols such as scp or sftp which you can run over ssh, built in jupyter http copy, and any other linux tools you can run inside the instance yourself (rclone, rsync, bittorent, [insync](https://www.insynchq.com/headless-for-linux) etc).
The 3 built-in methods discussed here are unique in that they offer ways to copy data to/from a *stopped instance*, with some constraints. Copying data between instances accrues internet bandwidth usage charges (with prices varying across providers), unless the copy is between two instances on the same machine or local network, in which case there is no bandwidth charge.
## Instance\<->Cloud copy (cloud sync)
The cloud sync feature allows you to copy data to/from instance local storage and several cloud storage providers (S3, gdrive, backblaze, etc) - even when the instance is stopped.
Vast currently supports Dropbox, Amazon S3 and Backblaze cloud storage providers.
First you will need to connect to the cloud provider on the [account page](https://cloud.vast.ai/account/) and then use the cloud copy button on the instance to start the copy operation.

See [Cloud Sync](/documentation/instances/cloud-sync) for more details.
You can also access this feature using the `vastai cloud copy` [CLI command](/cli/commands#cloud-copy).
## Instance \<-> Instance copy
Instance to instance copy allows moving data directly between the local storage of two instances.
If the two instances are on the same machine or the same local network (same provider and location) then the copy can run at faster local network storage speeds and there is no internet transit cost.
You can use the copy buttons to copy data between two instances. Instances can be stopped/inactive. See complete [Constraints](./#constraints) below.
Click the copy button on the source instance and then on the destination instance to bring up the copy dialogue. For docker-based instances you will see the following folder dialogue.

Pick the folders where you want to copy to/from. Leave a '/' at the end of the source directory to copy all the files inside into the target directory, vs nesting a copy of the source dir into the target dir.
**WARNING**\\
You should not copy to /root or / as a destination directory, as this can mess
up the permissions on your instance ssh folder, breaking future copy
operations (as they use ssh authentication).

After clicking the copy button, give it 5-10 seconds to start. The status messages will display as the copy operation begins.
For VM based instances you will see a confirmation dialog instead; the copy will copy your entire source instance to the destination machine. The destination instance's disk will be replaced by the contents of the source instance.
You can also access this feature using the `vastai copy` [CLI command](/cli/commands#copy).
You can use the [CLI](/cli/get-started) copy command to copy from/to directories on a remote instance and your local machine, or to copy data between two remote instances.
The copy command uses rsync and is generally fast and efficient, subject to single link upload/download constraints.
The copy command supports multiple location formats:
* `[instance_id:]path` - Legacy format (still supported)
* `C.instance_id:path` - Container copy format
* `cloud_service:path` - Cloud service format
* `cloud_service.cloud_service_id:path` - Cloud service with ID
* `local:path` - Explicit local path
The first example copy syncs all files from the absolute directory '/workspace' on instance 6003036 to the directory '/workspace' on instance 6003038.
The second example copy syncs files from container 11824 to the local machine using structured syntax.
The third example copy syncs files from local to container 11824 using structured syntax.
The fourth example copy syncs files from Google Drive to an instance.
The fifth example copy syncs files from S3 bucket with id 101 to an instance.
## CLI Copy Command (VMs)
You can use the [CLI](/cli/get-started) vm copy command to copy your entire VM from one instance to another. The destination VM's disk will be replaced with the contents of the source machine.
This will transfer the contents of 1241241 to 1241245.
For VM-based instances, the destination instance must be stopped during the transfer.
**WARNING**\\
You should not copy to /root or / as a destination directory, as this can mess
up the permissions on your instance ssh folder, breaking future copy
operations (as they use ssh authentication).
If your data is already stored in the cloud (S3, gdrive, etc) then you should naturally use the appropriate linux CLI or commands to download and upload data directly, or you could use the [cloud sync](/documentation/instances/cloud-sync) feature.
This generally will be one the fastest methods for moving large quantities of data, as it can fully saturate a large number of download links.
If you are using multiple instances with significant data movement requirements you will want to use high bandwidth cloud storage to avoid any single machine bottlenecks.
If you launched a Jupyter notebook instance, you can use its upload feature, but this has a file size limit and can be slow.
You can also use standard Linux tools like scp, ftp, rclone, or rsync to move data.
For moving code and smaller files scp is fast enough and convenient.
However, be warned that the default ssh connection uses a proxy and can be slow for large transfers (direct ssh recommended).
Instance to instance copy is generally as fast as other methods, and can be much faster (and cheaper) for moving data between instances on the same datacenter.
If you launched an ssh instance, you can copy files using scp. The proxy ssh connection can be slow (in terms of latency and bandwidth).
Thus we recommend only using scp over the proxy ssh connection for smaller transfers (less than 1 GB).
For larger inbound transfers, using the direct ssh connection is recommended.
Downloading from a cloud data store using wget or curl can have much higher performance.
The relevant scp command syntax is:
The PORT and IPADDR fields must match those from the ssh command (note the use of -P for port instead of -p !). The "Connect" button on the instance will give you these fields in the form:
For example, if Connect gives you this:
You could use scp to upload a local file called "myfile.tar.gz" to a remote folder called "mydir" like so:
### How do you recommend I move data from an existing instance?
The [cloud sync feature](/documentation/instances/cloud-sync) will allow you to move data to and from instances easily.
The main benefit is that you can move data around while the machine is inactive.
Currently, we support Google Drive, S3, Dropbox, and Backblaze
### Help, I want to move my data but I forgot what directory it's in!
For moving your data, by either using our Cloud Sync or Instance Copy features, you will need to define the path from where the data you are transferring is coming from and where it is to be put. If you don't remember where the data is you are trying to transfer, you can use our [CLI execute command](/cli/commands#execute) to access your instance when your instance access is limited.
### What if I don't remember the file names on my inactive instance, but I want to copy certain files?
Use the vast CLI, run the `execute` command to display the file tree. This will help you browse the available files and identify the names or paths you need. More about the execute command you can find [here](https://cloud.vast.ai/cli/).
### How I can free up disk space on an inactive instance?
When an instance is inactive (stopped, exited, cannot be started), you can still manage its file system and remove unneeded data using vast CLI. This is useful if you want to free up disk space without starting the instance.
Delete unnecessary files:
**Examples:**
Example 1 (unknown):
```unknown
The first example copy syncs all files from the absolute directory '/workspace' on instance 6003036 to the directory '/workspace' on instance 6003038.
The second example copy syncs files from container 11824 to the local machine using structured syntax.
The third example copy syncs files from local to container 11824 using structured syntax.
The fourth example copy syncs files from Google Drive to an instance.
The fifth example copy syncs files from S3 bucket with id 101 to an instance.
## CLI Copy Command (VMs)
You can use the [CLI](/cli/get-started) vm copy command to copy your entire VM from one instance to another. The destination VM's disk will be replaced with the contents of the source machine.
Example:
```
Example 2 (unknown):
```unknown
This will transfer the contents of 1241241 to 1241245.
### Constraints
For VM-based instances, the destination instance must be stopped during the transfer.
**WARNING**\\
You should not copy to /root or / as a destination directory, as this can mess
up the permissions on your instance ssh folder, breaking future copy
operations (as they use ssh authentication).
### Performance
If your data is already stored in the cloud (S3, gdrive, etc) then you should naturally use the appropriate linux CLI or commands to download and upload data directly, or you could use the [cloud sync](/documentation/instances/cloud-sync) feature.
This generally will be one the fastest methods for moving large quantities of data, as it can fully saturate a large number of download links.
If you are using multiple instances with significant data movement requirements you will want to use high bandwidth cloud storage to avoid any single machine bottlenecks.
If you launched a Jupyter notebook instance, you can use its upload feature, but this has a file size limit and can be slow.
You can also use standard Linux tools like scp, ftp, rclone, or rsync to move data.
For moving code and smaller files scp is fast enough and convenient.
However, be warned that the default ssh connection uses a proxy and can be slow for large transfers (direct ssh recommended).
Instance to instance copy is generally as fast as other methods, and can be much faster (and cheaper) for moving data between instances on the same datacenter.
## SCP
If you launched an ssh instance, you can copy files using scp. The proxy ssh connection can be slow (in terms of latency and bandwidth).
Thus we recommend only using scp over the proxy ssh connection for smaller transfers (less than 1 GB).
For larger inbound transfers, using the direct ssh connection is recommended.
Downloading from a cloud data store using wget or curl can have much higher performance.
The relevant scp command syntax is:
```
Example 3 (unknown):
```unknown
The PORT and IPADDR fields must match those from the ssh command (note the use of -P for port instead of -p !). The "Connect" button on the instance will give you these fields in the form:
```
Example 4 (unknown):
```unknown
For example, if Connect gives you this:
```
---
## Running PyTorch on Vast.ai: A Complete Guide
**URL:** llms-txt#running-pytorch-on-vast.ai:-a-complete-guide
**Contents:**
- Introduction
- Prerequisites
- Setting Up Your Environment
- 1. Selecting PyTorch Template
- 2. Choosing an Instance
- 3. Connecting to Your Instance
- Setting Up Your PyTorch Environment
- 1. Basic Environment Check
- 2. Data Management
This guide walks you through setting up and running PyTorch workloads on Vast.ai, a marketplace for renting GPU compute power. Whether you're training large models or running inference, this guide will help you get started efficiently.
* A Vast.ai account
* Basic familiarity with PyTorch
* [Install TLS Certificate for Jupyter](/documentation/instances/jupyter)
* [(Optional) SSH client installed on your local machine and SSH public key added in Account tab at cloud.vast.ai](/documentation/instances/sshscp)
* [(Optional) Install and use vast-cli](/cli/get-started)
* [(Optional) Docker knowledge for custom environments](https://docs.docker.com/get-started/)
## Setting Up Your Environment
### 1. Selecting PyTorch Template
Navigate to the [Templates tab](https://cloud.vast.ai/templates/) to view available templates. Before choosing a specific instance, you'll need to select the appropriate PyTorch template for your needs:
* **Choose recommended** [**PyTorch**](https://cloud.vast.ai?ref_id=62897\&template_id=a33b72bd045341cfcd678ce7c932a614) **template:**
* A container is built on the Vast.ai base image, inheriting its core functionality
* It provides a flexible development environment with pre-configured libraries
* PyTorch is pre-installed at `/venv/main/` for immediate use
* Supports for both **AMD64** and **ARM64**(Grace) architectures, especially on CUDA 12.4+
* You can select specific PyTorch versions via the Version Tag selector
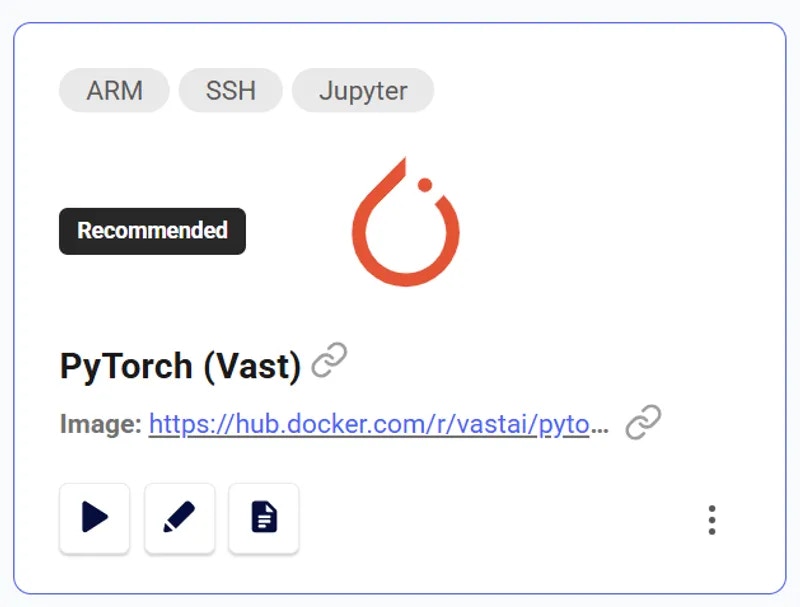 ### 2. Choosing an Instance
Click the play button to select the template and see GPUs you can rent. For PyTorch workloads, consider:
* GPU Memory: Minimum 8GB for most models
* CUDA Version: PyTorch 2.0+ works best with CUDA 11.7 or newer
* Disk Space: Minimum 50GB for datasets and checkpoints
* Internet Speed: Look for instances with >100 Mbps for dataset downloads
Rent the GPU of your choice.
### 3. Connecting to Your Instance
Click blue button on instance card in Instances tab when it says "Open" to access Jupyter.
## Setting Up Your PyTorch Environment
### 1. Basic Environment Check
Open Python's Interactive Shell in the jupyter terminal
### 2. Choosing an Instance
Click the play button to select the template and see GPUs you can rent. For PyTorch workloads, consider:
* GPU Memory: Minimum 8GB for most models
* CUDA Version: PyTorch 2.0+ works best with CUDA 11.7 or newer
* Disk Space: Minimum 50GB for datasets and checkpoints
* Internet Speed: Look for instances with >100 Mbps for dataset downloads
Rent the GPU of your choice.
### 3. Connecting to Your Instance
Click blue button on instance card in Instances tab when it says "Open" to access Jupyter.
## Setting Up Your PyTorch Environment
### 1. Basic Environment Check
Open Python's Interactive Shell in the jupyter terminal
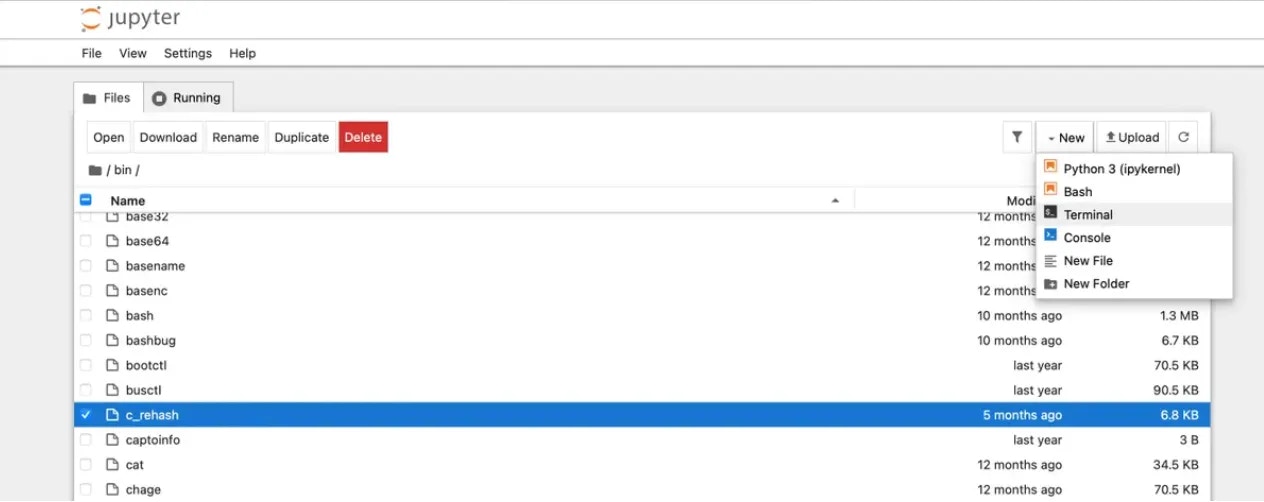
 Verify your setup by executing these commands in Python's Interactive Shell in a Jupyter terminal:
### 2. Data Management
For efficient data handling:
a) Fast local storage:
b) Dataset downloads:
```bash theme={null}
**Examples:**
Example 1 (unknown):
```unknown
### 2. Data Management
For efficient data handling:
a) Fast local storage:
```
Example 2 (unknown):
```unknown
b) Dataset downloads:
```
---
## Jupyter
**URL:** llms-txt#jupyter
**Contents:**
- Jupyter direct HTTPS launch mode
- Installing the TLS certificate
- Chrome on Windows
- Chrome on Linux
- Windows - General
- macOS
Source: https://docs.vast.ai/documentation/instances/connect/jupyter
Run Jupyter on Vast.ai with proxy or direct HTTPS. Learn setup, TLS certificate installation, and secure connections for smooth AI/ML development.
Jupyter is an interactive notebook interface that is very popular for AI/ML development using Python. Using Jupyter, you can connect to an interface in your browser and open any notebook that you can download as a .ipynb file.
We recommend this launch mode to start. We also recommend this launch mode over trying to run Google Colab with Vast. While Google Colab has a way to connect to a "local runtime", running Jupyter directly is more robust and less error prone if connections drop or the browser window is closed.
By default Jupyter instances use a proxy server. This is a simple setup that works on machines with or without open ports. The only downside is it can be slower to upload/download large files.
## Jupyter direct HTTPS launch mode
When selecting Jupyter there is a check box for "Jupyter direct HTTPS". This preferred option will establish a direct connection to the instance which is faster for uploading and downloading files from your local machine. Selecting this option will automatically filter out machines that do not have open ports, as they cannot establish a direct connection.
Jupyter uses a browser interface, so to get the direct HTTPS connection to work, you will need to install a certificate onto your operating system.
**WARNING**
Verify your setup by executing these commands in Python's Interactive Shell in a Jupyter terminal:
### 2. Data Management
For efficient data handling:
a) Fast local storage:
b) Dataset downloads:
```bash theme={null}
**Examples:**
Example 1 (unknown):
```unknown
### 2. Data Management
For efficient data handling:
a) Fast local storage:
```
Example 2 (unknown):
```unknown
b) Dataset downloads:
```
---
## Jupyter
**URL:** llms-txt#jupyter
**Contents:**
- Jupyter direct HTTPS launch mode
- Installing the TLS certificate
- Chrome on Windows
- Chrome on Linux
- Windows - General
- macOS
Source: https://docs.vast.ai/documentation/instances/connect/jupyter
Run Jupyter on Vast.ai with proxy or direct HTTPS. Learn setup, TLS certificate installation, and secure connections for smooth AI/ML development.
Jupyter is an interactive notebook interface that is very popular for AI/ML development using Python. Using Jupyter, you can connect to an interface in your browser and open any notebook that you can download as a .ipynb file.
We recommend this launch mode to start. We also recommend this launch mode over trying to run Google Colab with Vast. While Google Colab has a way to connect to a "local runtime", running Jupyter directly is more robust and less error prone if connections drop or the browser window is closed.
By default Jupyter instances use a proxy server. This is a simple setup that works on machines with or without open ports. The only downside is it can be slower to upload/download large files.
## Jupyter direct HTTPS launch mode
When selecting Jupyter there is a check box for "Jupyter direct HTTPS". This preferred option will establish a direct connection to the instance which is faster for uploading and downloading files from your local machine. Selecting this option will automatically filter out machines that do not have open ports, as they cannot establish a direct connection.
Jupyter uses a browser interface, so to get the direct HTTPS connection to work, you will need to install a certificate onto your operating system.
**WARNING**If you don't install the browser certificate, Windows and Linux will show a "Your connection is not private" Privacy error. It is annoying but you can click through by clicking "Advanced" and then proceed. If you don't install the certificate on macOS, the OS might not let you open the Jupyter webpage. ## Installing the TLS certificate Start by downloading the certificate [here](https://console.vast.ai/static/jvastai_root.cer). Then follow the directions for your operating system. In most operating systems, double clicking on the certificate will start an installation wizard. You can also access the correct settings by clicking on the appropriate security settings in your browser. ### Chrome on Windows 1. Open your Chrome security settings by clicking on the three dot menu in the upper right. Then click Settings. Then click Privacy and security on the left hand navigation. From that menu, select Security. 2. Click on "Manage device certificates" 3. Click Next and then click Import and find the downloaded [jvastai\_root.cer](https://console.vast.ai/static/jvastai_root.cer) file. 4. Click "Place all certificates in the following store" and then use the browse button. Click on the **Trusted Root Certification Authorities** folder. 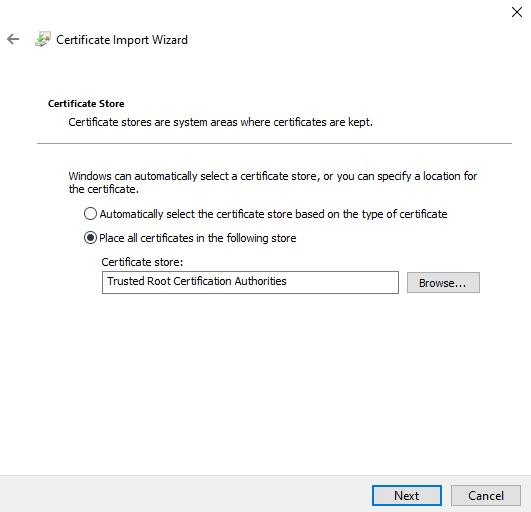 1. Click finish and agree to finalize the import. No reboot is necessary and all new instances created will then not have the warning pop-up. **Note that existing instances will still have the warning**. 1. Open your Chrome security settings by clicking on the three dot menu in the upper right. Then click Settings. Then click Privacy and security on the left hand navigation. From that menu, select Security (safe browsing). 2. Scroll down and select "Manage Certificates" on that page. 3. Select the 'Authorities' tab under 'Manage certificates'. 4. Press the import button and import the downloaded [jvastai\_root.cer](https://console.vast.ai/static/jvastai_root.cer) file. You may need to select show all file types. ### Windows - General 1. After downloading the [certificate](https://console.vast.ai/static/jvastai_root.cer), double click on it to open the installation wizard. 2. Click "Open". 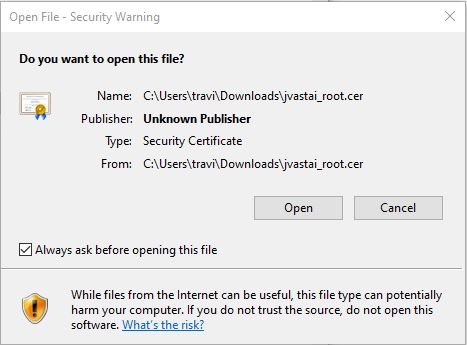 1. Click on the "Install Certificate" button. Select either the current user or local machine and hit next. 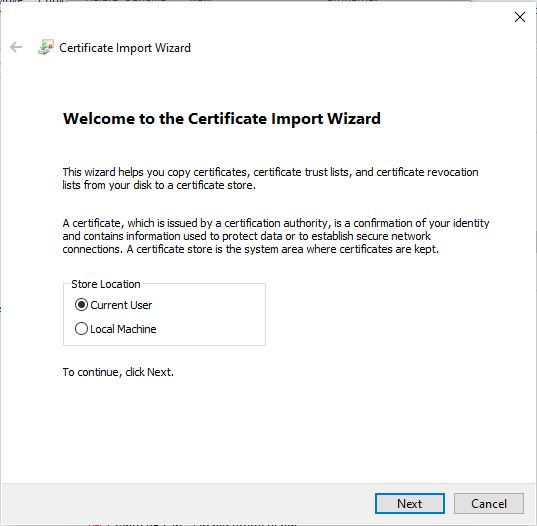 1. Click "Place all certificates in the following store". 2. Click Browse and select the folder "Trusted Root Certification Authorities". Click OK. Then click Next. Click "Finish" to install the certificate. 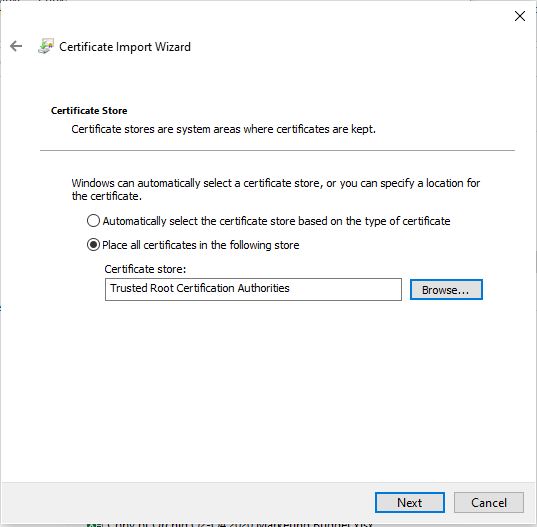 1. Reboot the machine so the change can take effect. 1. Double click the [certificate](https://console.vast.ai/static/jvastai_root.cer) after downloading it. It will then be added to your Keychain under the Login default keychain. Make sure that the Keychain Access application is opened and that there is an entry for Vast.ai Jupyter in the list of certificates. If it does not appear, then use the import button to manually import the certificate so that it appears in your list of certificates. 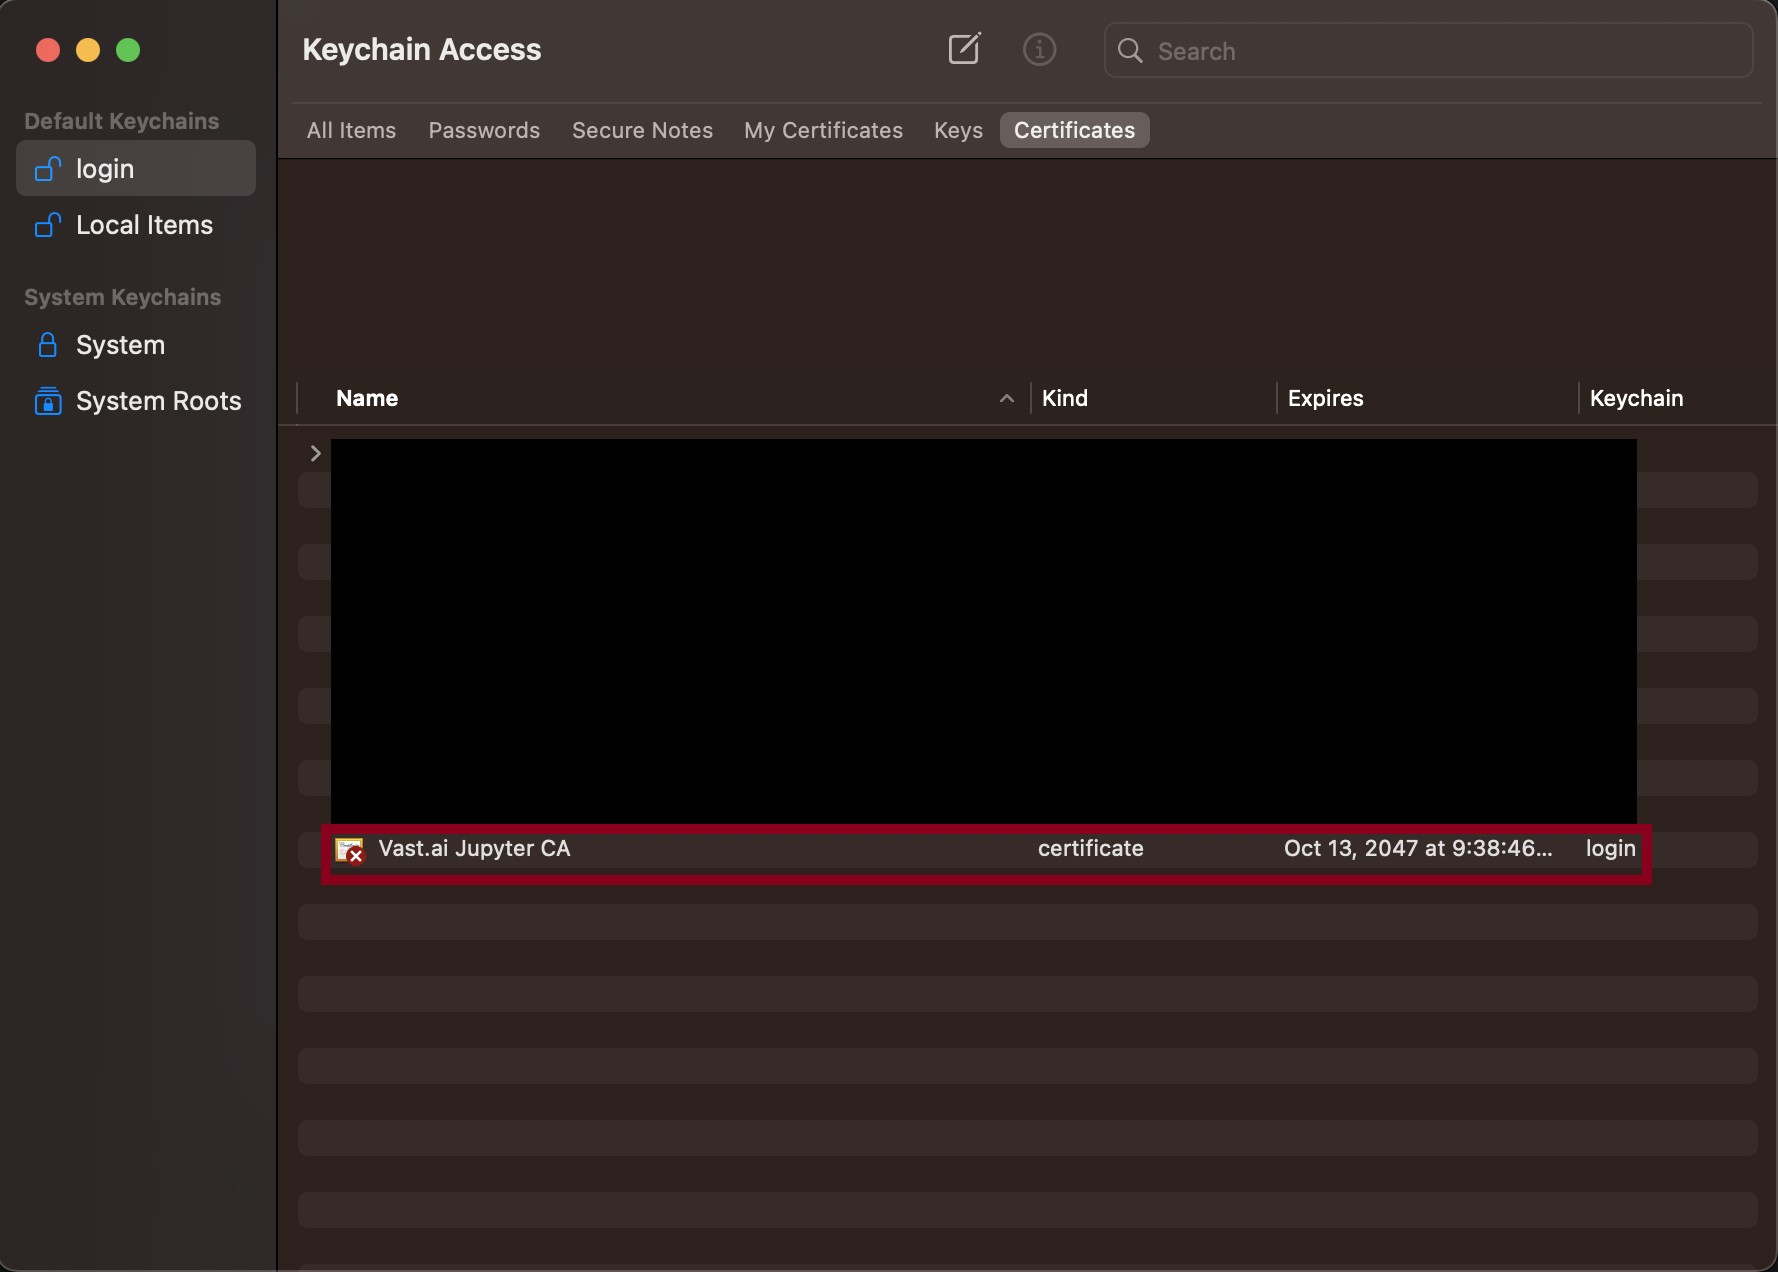 1. Double click the entry and then click on the "Trust" box. 2. Change the "When using this certificate" box to "Always Trust". 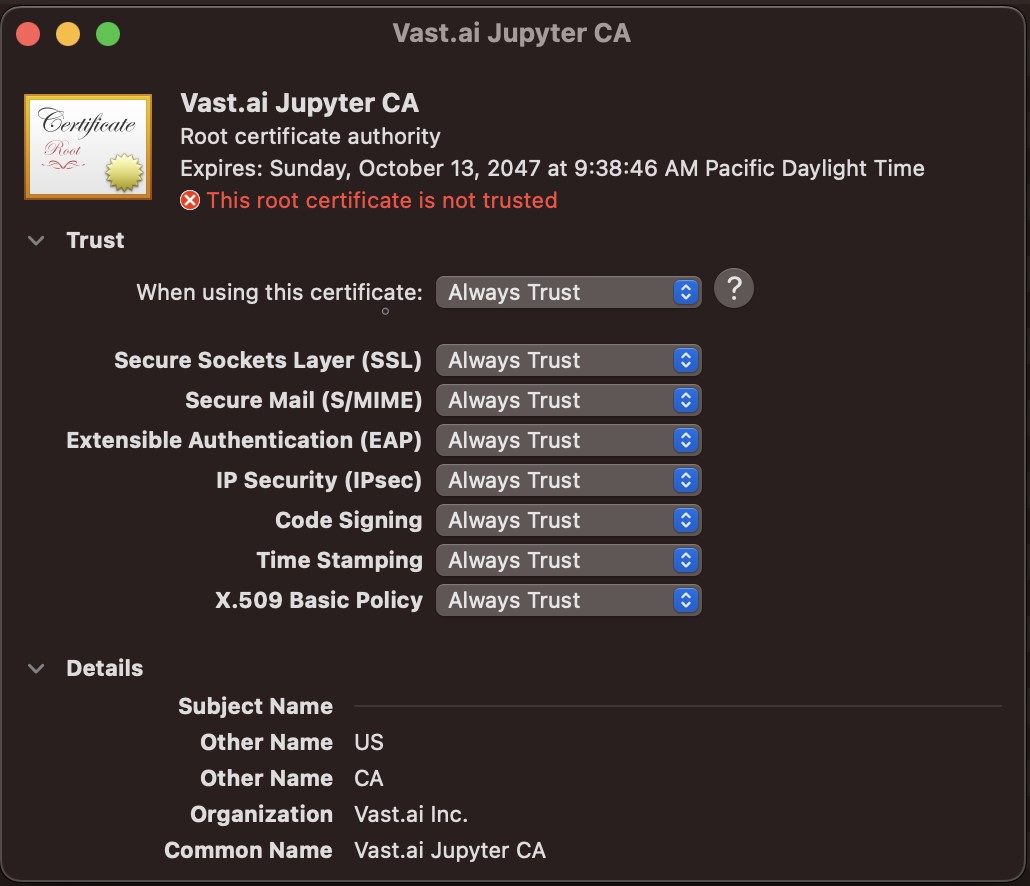 1. Close the window. The change should take effect immediately for all instances you have running and create in the future. --- ## POST [https://console.vast.ai/api/v0/endptjobs/](https://console.vast.ai/api/v0/endptjobs/) **URL:** llms-txt#post-[https://console.vast.ai/api/v0/endptjobs/](https://console.vast.ai/api/v0/endptjobs/) **Contents:** - Inputs - Outputs - On Successful Worker Return - On Failure to Find Ready Worker - Example: Creating an Endpoint with cURL - Example: Creating an Endpoint with the Vast CLI * `api_key`(string): The Vast API key associated with the account that controls the Endpoint. The key can also be placed in the header as an Authorization: Bearer. * `endpoint_name`(string): The name given to the endpoint that is created. * `min_load`(integer): A minimum baseline load (measured in tokens/second for LLMs) that the serverless engine will assume your Endpoint needs to handle, regardless of actual measured traffic. * `target_util` (float): A ratio that determines how much spare capacity (headroom) the serverless engine maintains. * `cold_mult`(float): A multiplier applied to your target capacity for longer-term planning (1+ hours). This parameter controls how much extra capacity the serverless engine will plan for in the future compared to immediate needs. * `cold_workers` (integer): The minimum number of workers that must be kept in a "ready quick" state before the serverless engine is allowed to destroy any workers. * `max_workers` (integer): A hard upper limit on the total number of worker instances (ready, stopped, loading, etc.) that your endpoint can have at any given time. ### On Successful Worker Return * `success`(bool): True on successful creation of Endpoint, False if otherwise. * `result`(int): The endpoint\_id of the newly created Endpoint. ### On Failure to Find Ready Worker * `success`(bool): True on successful creation of Endpoint, False if otherwise. * `error`(string): The type of error status. * `msg` (string): The error message related to the error. ## Example: Creating an Endpoint with cURL ## Example: Creating an Endpoint with the Vast CLI **Examples:** Example 1 (unknown): ```unknown ## Outputs ### On Successful Worker Return * `success`(bool): True on successful creation of Endpoint, False if otherwise. * `result`(int): The endpoint\_id of the newly created Endpoint. ``` Example 2 (unknown): ```unknown ### On Failure to Find Ready Worker * `success`(bool): True on successful creation of Endpoint, False if otherwise. * `error`(string): The type of error status. * `msg` (string): The error message related to the error. ``` Example 3 (unknown): ```unknown ## Example: Creating an Endpoint with cURL ``` Example 4 (unknown): ```unknown ## Example: Creating an Endpoint with the Vast CLI ``` --- ## Managing Templates **URL:** llms-txt#managing-templates **Contents:** - Updating a Template - Sharing a Template - Copy referral link - Copy template link - Troubleshooting Source: https://docs.vast.ai/documentation/templates/managing-templates ## Updating a Template If you want to make changes to a template you previously saved, simply navigate back to the templates page and select 'My Templates'. Here you'll be able to make your changes by clicking the pencil icon.
 ## Sharing a Template
It's really easy to share your template with other users. We have two special links you can use and both include your referral code so you can earn if new users sign up - Find more about that [here](/documentation/reference/referral-program).
To share, click the three dots icon in the bottom right of the template card.
## Sharing a Template
It's really easy to share your template with other users. We have two special links you can use and both include your referral code so you can earn if new users sign up - Find more about that [here](/documentation/reference/referral-program).
To share, click the three dots icon in the bottom right of the template card.
 ### Copy referral link
This will copy a link that contains your referral ID, creator ID and the template name. It will always point to the most recent template you created with this name - Really useful if you want people clicking the link to always get the most recent version.
### Copy template link
This will copy a link containing your referral ID and the template hash ID. It points to this specific template at this point in time.
Templates all have a unique hash after every save. This is useful as it allows you to find a previous version if you have tracked the hash ID, but for sharing you probably want the referral link above.
Remember to add a comprehensive Readme to your template if you're going to share it. This will help users to get started easily.
* If your image is built for a different CPU architecture than your Vast machine, then it won't work. You can try to find a machine with the required CPU architecture using our GUI or [CLI](/cli/get-started).
* If your image requires a higher CUDA version, then look for a machine with a higher Max CUDA version. The Max CUDA version can be found on the instance card.
* If your image is built to run jupyter, then try running it on a port different than 8080.
* If you are having issues using ssh launch mode, add your public key to \~/.authorized\_keys, install openssh, start openssh when the container starts, and forward the ssh server's port.
---
## Networking & Ports
**URL:** llms-txt#networking-&-ports
**Contents:**
- How Networking Works
- Opening Custom Ports
- Using Docker Options
- Using EXPOSE in Dockerfile
- Finding Your Mapped Ports
- Testing Your Ports
- Identity Ports
- Port Environment Variables
- Default Ports
- Custom Ports
Source: https://docs.vast.ai/documentation/instances/connect/networking
Understand how Vast.ai handles networking, port mapping, and environment variables for Docker instances.
## How Networking Works
Vast.ai docker instances have full internet access, but generally do not have unique IP addresses. Instances can have public open ports, but as IP addresses are shared across machines/instances the public external ports are partitioned somewhat randomly.
In essence each docker instance gets a fraction of a public IP address based on a subset of ports. Each open internal port (such as 22 or 8080 etc) is mapped to a *random* external port on the machine's (usually shared) public IP address.
Selecting the ssh launch mode will open and use port 22 internal by default, whereas jupyter will open and use port 8080 (in addition to 22 for ssh).
## Opening Custom Ports
There are several ways to open additional application ports:
There is currently a limit of 64 total open ports per container/instance.
### Using Docker Options
You can open custom ports for any docker image using -p arguments in the docker create/run options box in the image config editor pop-up menu.
To open ports 8081 (tcp) and 8082 udp, use something like this:
This will result in additional arguments to docker create/run to expose those internal ports, which will be mapped to random external ports.
Any ports exposed in these docker options are in addition to:
* Ports exposed through EXPOSE commands in the docker image
* Ports 22 or 8080 which may be opened automatically for SSH or Jupyter
### Using EXPOSE in Dockerfile
Any EXPOSE commands in your docker image will be automatically mapped to port requests.
## Finding Your Mapped Ports
After the instance has loaded, you can find the corresponding external public IP by opening the IP Port Info pop-up (button on top of the instance) and then looking for the external port which maps to your internal port.
It will have a format of PUBLIC\_IP -> INTERNAL\_PORT. For example:
In this case, the public IP 65.130.162.74:33526 can be used to access anything you run on port 8081 inside the instance.
## Testing Your Ports
We strongly recommend you test your port mapping. You can quickly test your port mapping with a simple command to start a minimal web server inside the instance:
Which you would then access in this example by loading 65.130.162.74:33526 in your web browser. This should open a file directory.
In some cases you may need an identity port map like 32001:32001 where external and internal ports are the same.
For this just use an out-of-range port above 70000:
These out of range requests will map to random external ports and matching internal ports.
You can then find the resulting mapped port with the appropriate env variables like: `$VAST_TCP_PORT_70000`
## Port Environment Variables
Our system predefines environment variables for port mappings that you can use:
* **VAST\_TCP\_PORT\_22**: The external public TCP port that maps to internal port 22 (ssh)
* **VAST\_TCP\_PORT\_8080**: The external public TCP port that maps to internal port 8080 (jupyter)
For each internal TCP port request:
* **VAST\_TCP\_PORT\_X**: The external public TCP port that maps to internal port X
For each internal UDP port request:
* **VAST\_UDP\_PORT\_X**: The external public UDP port that maps to internal port X
## Special Environment Variables for UI
You can use special environment variables to control the Vast.ai interface:
### OPEN\_BUTTON\_PORT
Set this to map the open button on the instance panel to a specific (external) port corresponding to the specified internal port.
This will map the open button to whatever external port maps to internal port 7860.
Use this to control the jupyter button. Set this to your internal jupyter port and the UI will map the jupyter button to open jupyter on the corresponding IP in a new tab.
This will map the jupyter button to whatever external port maps to internal port 8081.
Use this to control the jupyter button. Set this to your jupyter token and the UI will map the jupyter button to open jupyter using the corresponding JUPYTER\_TOKEN in a new tab.
This will use TOKEN as a value of your jupyter Token.
## Docker Create Options
You can currently set 3 types of docker create/run options in the GUI and CLI:
1. **Environment variables**: `-e JUPYTER_DIR=/ -e TEST=OK`
2. **Hostname**: `-h billybob`
3. **Ports**: `-p 8081:8081 -p 8082:8082/udp -p 70000:70000`
1. **Test your ports**: Always verify port mappings work after instance creation
2. **Use identity ports sparingly**: Only when absolutely necessary (ports above 70000)
3. **Document your port usage**: Keep track of which services use which ports
4. **Check the limit**: Remember the 64 port limit per instance
5. **Use environment variables**: Leverage predefined port variables in your scripts
**Examples:**
Example 1 (unknown):
```unknown
This will result in additional arguments to docker create/run to expose those internal ports, which will be mapped to random external ports.
Any ports exposed in these docker options are in addition to:
* Ports exposed through EXPOSE commands in the docker image
* Ports 22 or 8080 which may be opened automatically for SSH or Jupyter
### Using EXPOSE in Dockerfile
Any EXPOSE commands in your docker image will be automatically mapped to port requests.
## Finding Your Mapped Ports
After the instance has loaded, you can find the corresponding external public IP by opening the IP Port Info pop-up (button on top of the instance) and then looking for the external port which maps to your internal port.
It will have a format of PUBLIC\_IP -> INTERNAL\_PORT. For example:
```
Example 2 (unknown):
```unknown
In this case, the public IP 65.130.162.74:33526 can be used to access anything you run on port 8081 inside the instance.
## Testing Your Ports
We strongly recommend you test your port mapping. You can quickly test your port mapping with a simple command to start a minimal web server inside the instance:
```
Example 3 (unknown):
```unknown
Which you would then access in this example by loading 65.130.162.74:33526 in your web browser. This should open a file directory.
## Identity Ports
In some cases you may need an identity port map like 32001:32001 where external and internal ports are the same.
For this just use an out-of-range port above 70000:
```
Example 4 (unknown):
```unknown
These out of range requests will map to random external ports and matching internal ports.
You can then find the resulting mapped port with the appropriate env variables like: `$VAST_TCP_PORT_70000`
## Port Environment Variables
Our system predefines environment variables for port mappings that you can use:
### Default Ports
* **VAST\_TCP\_PORT\_22**: The external public TCP port that maps to internal port 22 (ssh)
* **VAST\_TCP\_PORT\_8080**: The external public TCP port that maps to internal port 8080 (jupyter)
### Custom Ports
For each internal TCP port request:
* **VAST\_TCP\_PORT\_X**: The external public TCP port that maps to internal port X
For each internal UDP port request:
* **VAST\_UDP\_PORT\_X**: The external public UDP port that maps to internal port X
## Special Environment Variables for UI
You can use special environment variables to control the Vast.ai interface:
### OPEN\_BUTTON\_PORT
Set this to map the open button on the instance panel to a specific (external) port corresponding to the specified internal port.
```
---
## Serverless/Autoscaler Guide
**URL:** llms-txt#serverless/autoscaler-guide
As you use TGI you may want to scale up to higher loads. We currently offer a serverless version of the Huggingface
TGI via a template built to run with the Autoscaler. See [Getting Started with Autoscaler](/documentation/serverless/getting-started-with-serverless)
---
## Whisper ASR Guide
**URL:** llms-txt#whisper-asr-guide
Source: https://docs.vast.ai/whisper-asr-guide
**Whisper** is a general-purpose speech recognition model trained on a large dataset of diverse audio. Go through the [Readme](https://cloud.vast.ai/template/readme/0c0c7d65cd4ebb2b340fbce39879703b) first before using.
**Connecting to the Instance**
1. Go to the templates tab and search for “*Whisper*” or click the provided link to the template [here](https://cloud.vast.ai/?ref_id=62897\&creator_id=62897\&name=Whisper%20ASR%20Webservice) .
2. After you select the template by pressing the triangle button the next step is to choose a gpu.
### Copy referral link
This will copy a link that contains your referral ID, creator ID and the template name. It will always point to the most recent template you created with this name - Really useful if you want people clicking the link to always get the most recent version.
### Copy template link
This will copy a link containing your referral ID and the template hash ID. It points to this specific template at this point in time.
Templates all have a unique hash after every save. This is useful as it allows you to find a previous version if you have tracked the hash ID, but for sharing you probably want the referral link above.
Remember to add a comprehensive Readme to your template if you're going to share it. This will help users to get started easily.
* If your image is built for a different CPU architecture than your Vast machine, then it won't work. You can try to find a machine with the required CPU architecture using our GUI or [CLI](/cli/get-started).
* If your image requires a higher CUDA version, then look for a machine with a higher Max CUDA version. The Max CUDA version can be found on the instance card.
* If your image is built to run jupyter, then try running it on a port different than 8080.
* If you are having issues using ssh launch mode, add your public key to \~/.authorized\_keys, install openssh, start openssh when the container starts, and forward the ssh server's port.
---
## Networking & Ports
**URL:** llms-txt#networking-&-ports
**Contents:**
- How Networking Works
- Opening Custom Ports
- Using Docker Options
- Using EXPOSE in Dockerfile
- Finding Your Mapped Ports
- Testing Your Ports
- Identity Ports
- Port Environment Variables
- Default Ports
- Custom Ports
Source: https://docs.vast.ai/documentation/instances/connect/networking
Understand how Vast.ai handles networking, port mapping, and environment variables for Docker instances.
## How Networking Works
Vast.ai docker instances have full internet access, but generally do not have unique IP addresses. Instances can have public open ports, but as IP addresses are shared across machines/instances the public external ports are partitioned somewhat randomly.
In essence each docker instance gets a fraction of a public IP address based on a subset of ports. Each open internal port (such as 22 or 8080 etc) is mapped to a *random* external port on the machine's (usually shared) public IP address.
Selecting the ssh launch mode will open and use port 22 internal by default, whereas jupyter will open and use port 8080 (in addition to 22 for ssh).
## Opening Custom Ports
There are several ways to open additional application ports:
There is currently a limit of 64 total open ports per container/instance.
### Using Docker Options
You can open custom ports for any docker image using -p arguments in the docker create/run options box in the image config editor pop-up menu.
To open ports 8081 (tcp) and 8082 udp, use something like this:
This will result in additional arguments to docker create/run to expose those internal ports, which will be mapped to random external ports.
Any ports exposed in these docker options are in addition to:
* Ports exposed through EXPOSE commands in the docker image
* Ports 22 or 8080 which may be opened automatically for SSH or Jupyter
### Using EXPOSE in Dockerfile
Any EXPOSE commands in your docker image will be automatically mapped to port requests.
## Finding Your Mapped Ports
After the instance has loaded, you can find the corresponding external public IP by opening the IP Port Info pop-up (button on top of the instance) and then looking for the external port which maps to your internal port.
It will have a format of PUBLIC\_IP -> INTERNAL\_PORT. For example:
In this case, the public IP 65.130.162.74:33526 can be used to access anything you run on port 8081 inside the instance.
## Testing Your Ports
We strongly recommend you test your port mapping. You can quickly test your port mapping with a simple command to start a minimal web server inside the instance:
Which you would then access in this example by loading 65.130.162.74:33526 in your web browser. This should open a file directory.
In some cases you may need an identity port map like 32001:32001 where external and internal ports are the same.
For this just use an out-of-range port above 70000:
These out of range requests will map to random external ports and matching internal ports.
You can then find the resulting mapped port with the appropriate env variables like: `$VAST_TCP_PORT_70000`
## Port Environment Variables
Our system predefines environment variables for port mappings that you can use:
* **VAST\_TCP\_PORT\_22**: The external public TCP port that maps to internal port 22 (ssh)
* **VAST\_TCP\_PORT\_8080**: The external public TCP port that maps to internal port 8080 (jupyter)
For each internal TCP port request:
* **VAST\_TCP\_PORT\_X**: The external public TCP port that maps to internal port X
For each internal UDP port request:
* **VAST\_UDP\_PORT\_X**: The external public UDP port that maps to internal port X
## Special Environment Variables for UI
You can use special environment variables to control the Vast.ai interface:
### OPEN\_BUTTON\_PORT
Set this to map the open button on the instance panel to a specific (external) port corresponding to the specified internal port.
This will map the open button to whatever external port maps to internal port 7860.
Use this to control the jupyter button. Set this to your internal jupyter port and the UI will map the jupyter button to open jupyter on the corresponding IP in a new tab.
This will map the jupyter button to whatever external port maps to internal port 8081.
Use this to control the jupyter button. Set this to your jupyter token and the UI will map the jupyter button to open jupyter using the corresponding JUPYTER\_TOKEN in a new tab.
This will use TOKEN as a value of your jupyter Token.
## Docker Create Options
You can currently set 3 types of docker create/run options in the GUI and CLI:
1. **Environment variables**: `-e JUPYTER_DIR=/ -e TEST=OK`
2. **Hostname**: `-h billybob`
3. **Ports**: `-p 8081:8081 -p 8082:8082/udp -p 70000:70000`
1. **Test your ports**: Always verify port mappings work after instance creation
2. **Use identity ports sparingly**: Only when absolutely necessary (ports above 70000)
3. **Document your port usage**: Keep track of which services use which ports
4. **Check the limit**: Remember the 64 port limit per instance
5. **Use environment variables**: Leverage predefined port variables in your scripts
**Examples:**
Example 1 (unknown):
```unknown
This will result in additional arguments to docker create/run to expose those internal ports, which will be mapped to random external ports.
Any ports exposed in these docker options are in addition to:
* Ports exposed through EXPOSE commands in the docker image
* Ports 22 or 8080 which may be opened automatically for SSH or Jupyter
### Using EXPOSE in Dockerfile
Any EXPOSE commands in your docker image will be automatically mapped to port requests.
## Finding Your Mapped Ports
After the instance has loaded, you can find the corresponding external public IP by opening the IP Port Info pop-up (button on top of the instance) and then looking for the external port which maps to your internal port.
It will have a format of PUBLIC\_IP -> INTERNAL\_PORT. For example:
```
Example 2 (unknown):
```unknown
In this case, the public IP 65.130.162.74:33526 can be used to access anything you run on port 8081 inside the instance.
## Testing Your Ports
We strongly recommend you test your port mapping. You can quickly test your port mapping with a simple command to start a minimal web server inside the instance:
```
Example 3 (unknown):
```unknown
Which you would then access in this example by loading 65.130.162.74:33526 in your web browser. This should open a file directory.
## Identity Ports
In some cases you may need an identity port map like 32001:32001 where external and internal ports are the same.
For this just use an out-of-range port above 70000:
```
Example 4 (unknown):
```unknown
These out of range requests will map to random external ports and matching internal ports.
You can then find the resulting mapped port with the appropriate env variables like: `$VAST_TCP_PORT_70000`
## Port Environment Variables
Our system predefines environment variables for port mappings that you can use:
### Default Ports
* **VAST\_TCP\_PORT\_22**: The external public TCP port that maps to internal port 22 (ssh)
* **VAST\_TCP\_PORT\_8080**: The external public TCP port that maps to internal port 8080 (jupyter)
### Custom Ports
For each internal TCP port request:
* **VAST\_TCP\_PORT\_X**: The external public TCP port that maps to internal port X
For each internal UDP port request:
* **VAST\_UDP\_PORT\_X**: The external public UDP port that maps to internal port X
## Special Environment Variables for UI
You can use special environment variables to control the Vast.ai interface:
### OPEN\_BUTTON\_PORT
Set this to map the open button on the instance panel to a specific (external) port corresponding to the specified internal port.
```
---
## Serverless/Autoscaler Guide
**URL:** llms-txt#serverless/autoscaler-guide
As you use TGI you may want to scale up to higher loads. We currently offer a serverless version of the Huggingface
TGI via a template built to run with the Autoscaler. See [Getting Started with Autoscaler](/documentation/serverless/getting-started-with-serverless)
---
## Whisper ASR Guide
**URL:** llms-txt#whisper-asr-guide
Source: https://docs.vast.ai/whisper-asr-guide
**Whisper** is a general-purpose speech recognition model trained on a large dataset of diverse audio. Go through the [Readme](https://cloud.vast.ai/template/readme/0c0c7d65cd4ebb2b340fbce39879703b) first before using.
**Connecting to the Instance**
1. Go to the templates tab and search for “*Whisper*” or click the provided link to the template [here](https://cloud.vast.ai/?ref_id=62897\&creator_id=62897\&name=Whisper%20ASR%20Webservice) .
2. After you select the template by pressing the triangle button the next step is to choose a gpu.
 3\. **Select a GPU Offering **
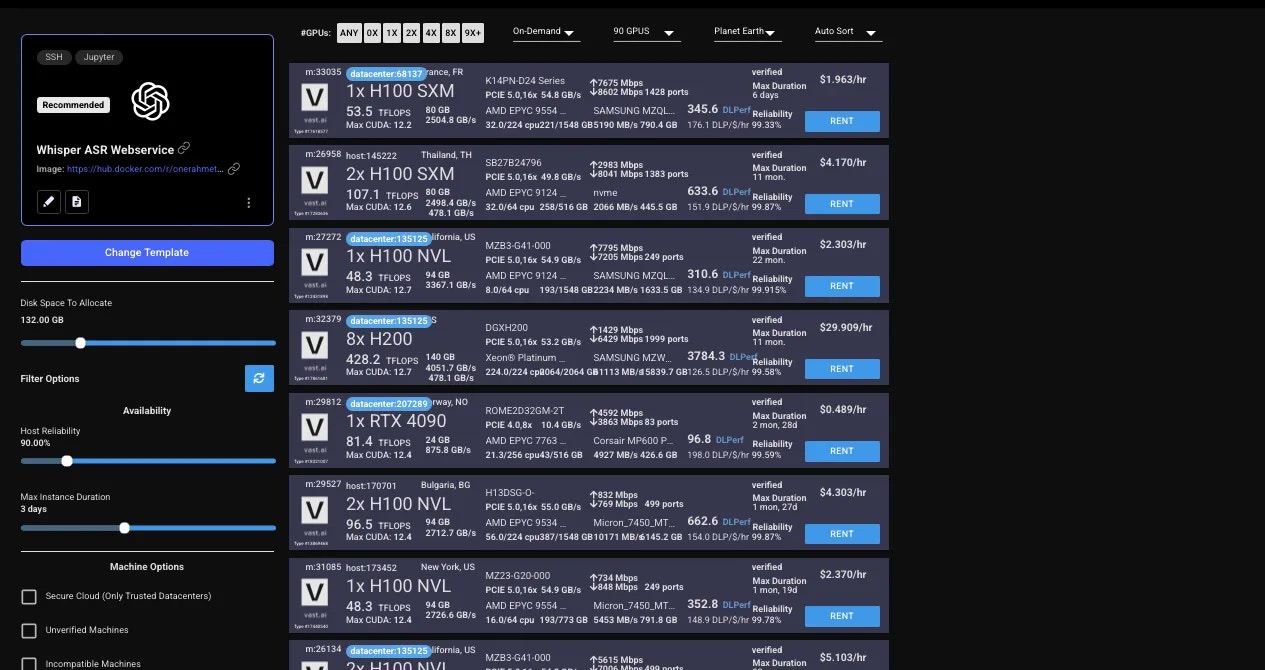 The template you selected will give your instance access to both Jupyter and SSH. Additionally the Open button will connect you to the instance portal web interface.
4\. HTTP and token-based auth are both enabled by default. To avoid certificate errors in your browser, please follow the instructions for installing the TLS certificate [here](/documentation/instances/jupyter#1SmCz) to allow secure HTTPS connections to your instance via its IP.
The template you selected will give your instance access to both Jupyter and SSH. Additionally the Open button will connect you to the instance portal web interface.
4\. HTTP and token-based auth are both enabled by default. To avoid certificate errors in your browser, please follow the instructions for installing the TLS certificate [here](/documentation/instances/jupyter#1SmCz) to allow secure HTTPS connections to your instance via its IP.
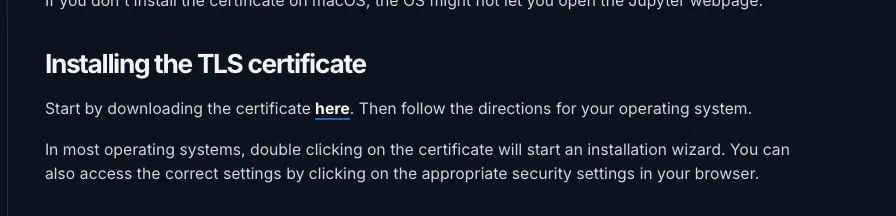 5\. Use the open button to open up the instance, if you are not using the open button the default username will be: vastai , and the password will be the value of the environment variable:* OPEN\_BUTTON\_TOKEN*. You can also find the token value by accessing the terminal and executing this command: *echo \$OPEN\_BUTTON\_TOKEN*
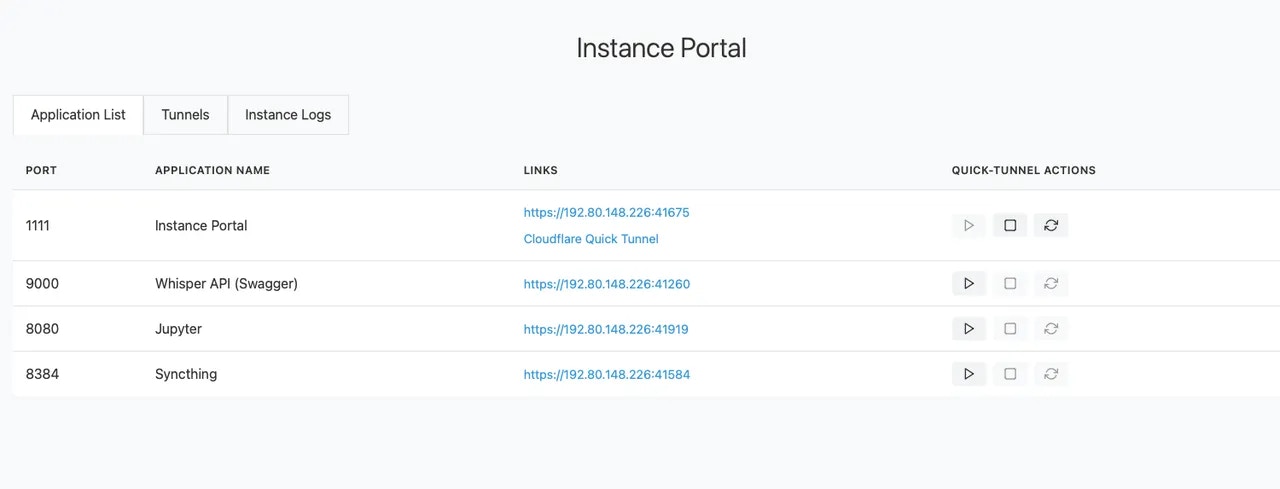 6\. After accessing the SwaggerUi by clicking the triangle button first then waiting for the page to load, then clicking into the link aligning with SwaggerUI you should see the page below. (note: usually loads fast but can take 5-10 minutes)
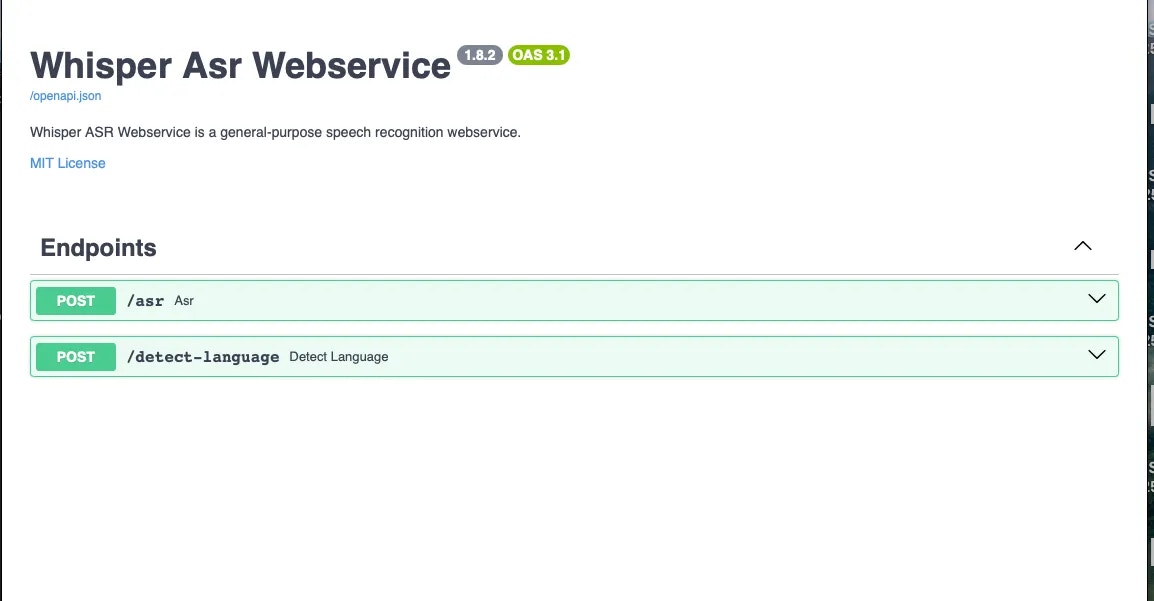 Two POST endpoints are exposed in this template:
Use this endpoint to automatically detect the spoken language in a given audio file.
Two POST endpoints are exposed in this template:
Use this endpoint to automatically detect the spoken language in a given audio file.
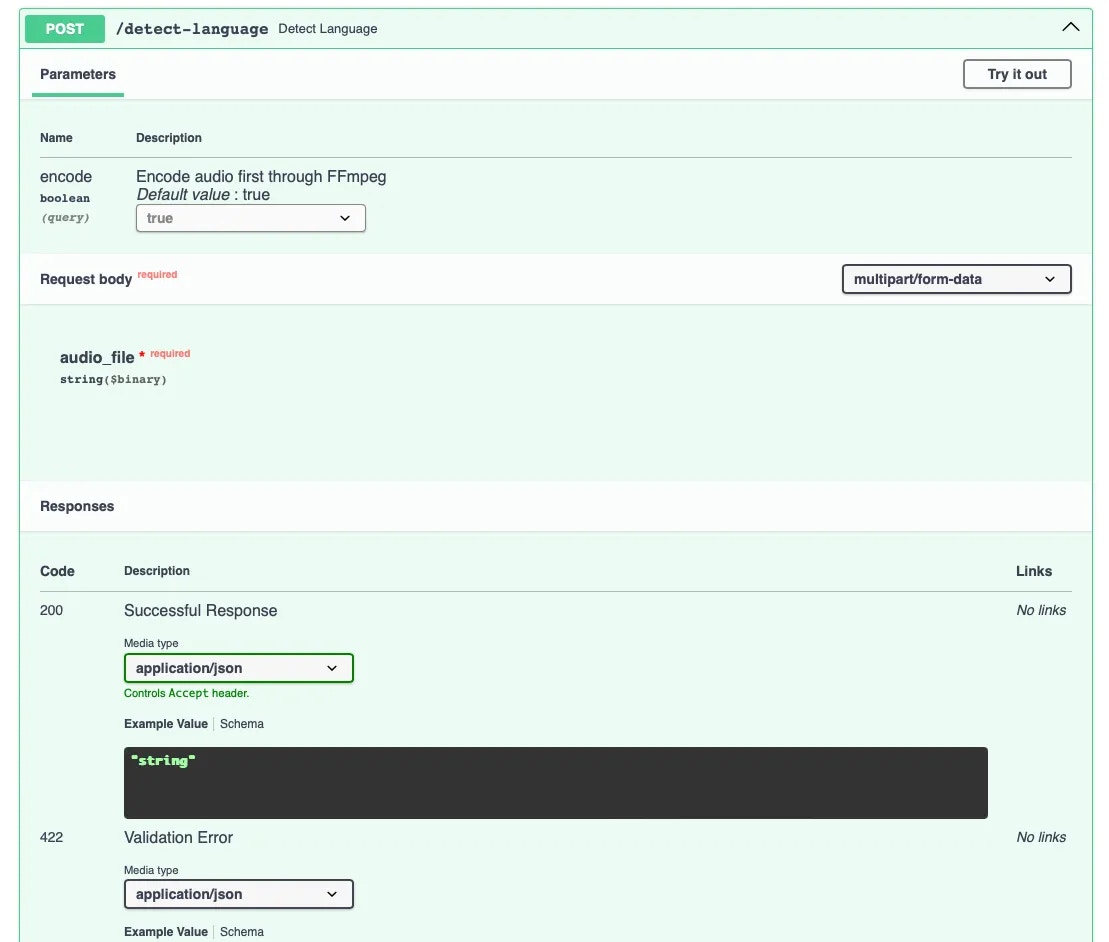 Use this endpoint for both transcription and translation of audio files.
*Both of these endpoints are documented using the OpenAPI standard and can be tested in a web browser. *
Use this endpoint for both transcription and translation of audio files.
*Both of these endpoints are documented using the OpenAPI standard and can be tested in a web browser. *
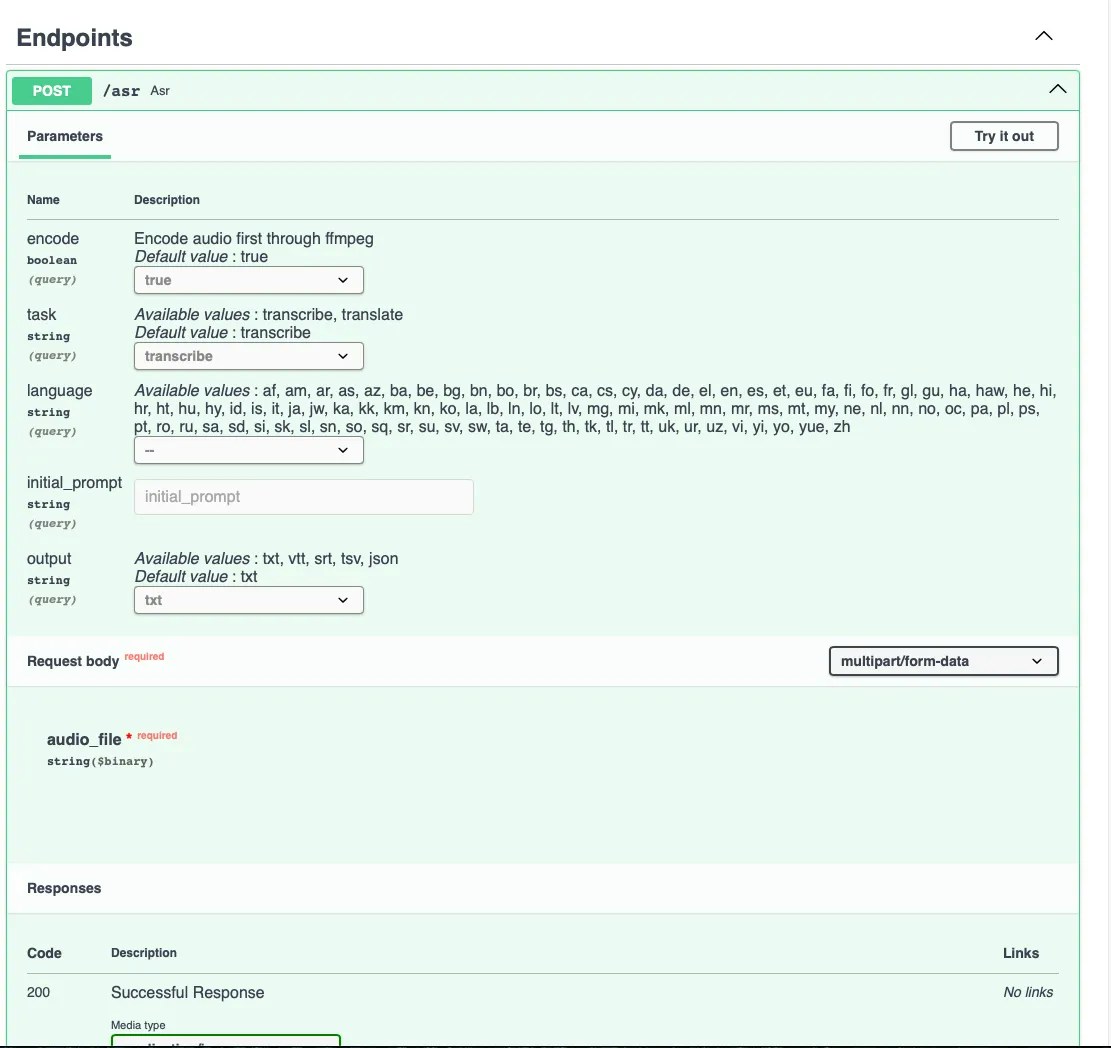 7\. *Select the detect language endpoint*
8\. *Then click try it out. *
7\. *Select the detect language endpoint*
8\. *Then click try it out. *
 9.* From here upload an audio clip*
10\. *Then press the execute button. *
9.* From here upload an audio clip*
10\. *Then press the execute button. *
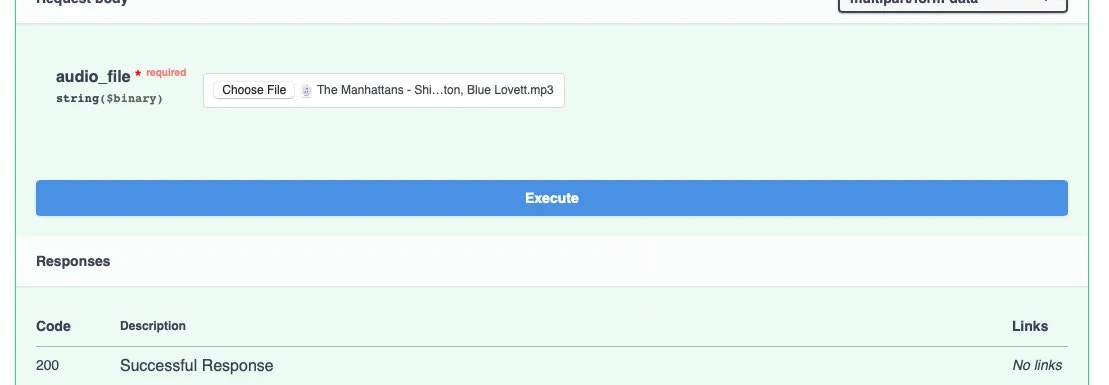 11.* If you look in the response body (see below) you can see it was able to detect the language was English.*
*Note: If you are getting an internal 500 error its most likely the file you selected to upload is to large. *
11.* If you look in the response body (see below) you can see it was able to detect the language was English.*
*Note: If you are getting an internal 500 error its most likely the file you selected to upload is to large. *
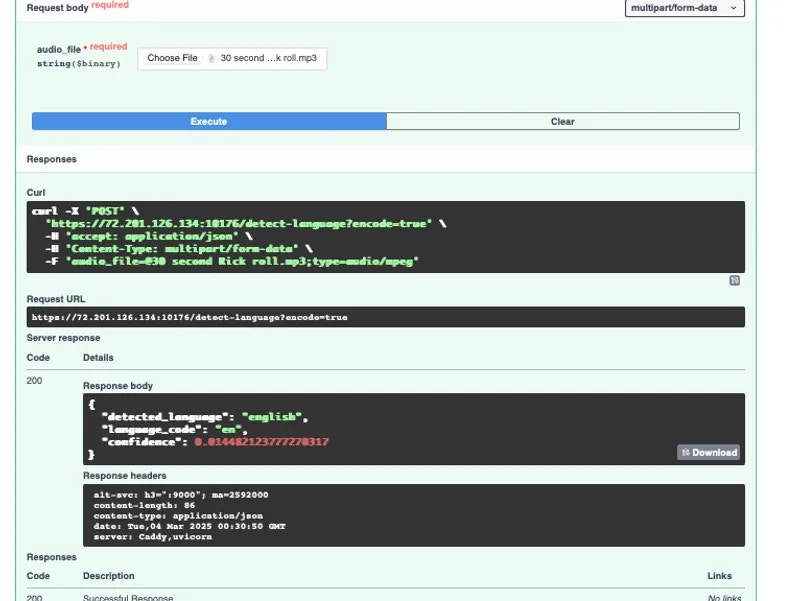 *For more information and specifics on things such as but not limited to Configuration, Additional Functionality, Instance Logs, Cloudflared, Api request, ssh tunnels and port reference mapping, and Caddy you can visit the*[ Readme linked here to learn more. ](https://cloud.vast.ai/template/readme/0c0c7d65cd4ebb2b340fbce39879703b)
* [GitHub Repository](https://github.com/ahmetoner/whisper-asr-webservice/)
* [Docker Image](https://hub.docker.com/r/onerahmet/openai-whisper-asr-webservice)
---
## CPU and memory
**URL:** llms-txt#cpu-and-memory
---
## Earning
**URL:** llms-txt#earning
**Contents:**
- Overview
Source: https://docs.vast.ai/documentation/host/earning
<script
type="application/ld+json"
dangerouslySetInnerHTML={{
__html: JSON.stringify({
"@context": "https://schema.org",
"@type": "FAQPage",
"mainEntity": [
{
"@type": "Question",
"name": "How can I have earnings as a Vast user?",
"acceptedAnswer": {
"@type": "Answer",
"text": "You can generate earnings by gaining Vast credit through template creation via our referral program. You can find more information about Vast's referral program in the documentation."
}
}
]
})
}}
/>
This page in the console allows customers to deal with their earnings from referrals. You can find more information about Vast's referral program [here](/documentation/reference/referral-program).
---
## Introduction
**URL:** llms-txt#introduction
**Contents:**
- VM Support Benefits/Drawbacks
- Benefits
- Drawbacks
- Summary
- Configuring VMs on your machine
- Checking VM enablement status.
- Disabling VMs.
- Configuring your machine to support VMs.
- Hardware prerequisites
- Configure BIOS
Vast now supports VM instances running on Kernel Virtual Machine (KVM) in addition to Docker container based instances.
VM support is currently an optional feature for hosts as it usually requires additional configuration steps on top of those needed to support Docker-based instances.
Host machines are not required to be VM compatible; the Vast hosting software will automatically test and enable the feature on machines on which VMs are supported.
On new machines the tests will be run on install; for machines configured before the VM-feature release, testing for VM-compatability will happen when the machine is unoccupied.
Machines that do not have VM support enabled will be hidden in the search page for clients who have VM-based templates selected.
## VM Support Benefits/Drawbacks
VM support will allow your machine to take advantage of demand for use cases that Docker cannot easily support, in addition to demand for conventional Docker-based instances.
VMs support the following features/use-cases that Docker-based instances do not:
*For more information and specifics on things such as but not limited to Configuration, Additional Functionality, Instance Logs, Cloudflared, Api request, ssh tunnels and port reference mapping, and Caddy you can visit the*[ Readme linked here to learn more. ](https://cloud.vast.ai/template/readme/0c0c7d65cd4ebb2b340fbce39879703b)
* [GitHub Repository](https://github.com/ahmetoner/whisper-asr-webservice/)
* [Docker Image](https://hub.docker.com/r/onerahmet/openai-whisper-asr-webservice)
---
## CPU and memory
**URL:** llms-txt#cpu-and-memory
---
## Earning
**URL:** llms-txt#earning
**Contents:**
- Overview
Source: https://docs.vast.ai/documentation/host/earning
<script
type="application/ld+json"
dangerouslySetInnerHTML={{
__html: JSON.stringify({
"@context": "https://schema.org",
"@type": "FAQPage",
"mainEntity": [
{
"@type": "Question",
"name": "How can I have earnings as a Vast user?",
"acceptedAnswer": {
"@type": "Answer",
"text": "You can generate earnings by gaining Vast credit through template creation via our referral program. You can find more information about Vast's referral program in the documentation."
}
}
]
})
}}
/>
This page in the console allows customers to deal with their earnings from referrals. You can find more information about Vast's referral program [here](/documentation/reference/referral-program).
---
## Introduction
**URL:** llms-txt#introduction
**Contents:**
- VM Support Benefits/Drawbacks
- Benefits
- Drawbacks
- Summary
- Configuring VMs on your machine
- Checking VM enablement status.
- Disabling VMs.
- Configuring your machine to support VMs.
- Hardware prerequisites
- Configure BIOS
Vast now supports VM instances running on Kernel Virtual Machine (KVM) in addition to Docker container based instances.
VM support is currently an optional feature for hosts as it usually requires additional configuration steps on top of those needed to support Docker-based instances.
Host machines are not required to be VM compatible; the Vast hosting software will automatically test and enable the feature on machines on which VMs are supported.
On new machines the tests will be run on install; for machines configured before the VM-feature release, testing for VM-compatability will happen when the machine is unoccupied.
Machines that do not have VM support enabled will be hidden in the search page for clients who have VM-based templates selected.
## VM Support Benefits/Drawbacks
VM support will allow your machine to take advantage of demand for use cases that Docker cannot easily support, in addition to demand for conventional Docker-based instances.
VMs support the following features/use-cases that Docker-based instances do not:
Feature
Use-case
Multi-Application Server Tooling and DevOps (e.g., Docker Compose, Kubernetes, Docker Build) Windows Graphics (e.g., for rendering or cloud gaming) Program analysis for CUDA-performance optimization (e.g., via Nvidia NSight) Currently no other peer-to-peer GPU rental marketplace offers full VMs; instead full VMs are only available from traditional providers at much higher costs. Thus we believe that hosts who have VMs enabled can expect to command a substantial preumium. * Due to greater user control over hardware, VM support requires IOMMU settings for securing PCIe communications that can degrade the performance of NCCL on non-RTX 40X0 multi-GPU machines that rely on PCI-based GPU peer-to-peer communication. * VMs require more disk space than Docker containers as they do not share components with the host OS. Hosts with VMs enabled may want to set higher disk and internet bandwidth prices. We recommend all hosts with single-GPU rigs to try to ensure VM support as the drawbacks for single-GPU machines are minimal. We also generally recommend multi-GPU Hosts with RTX 40X0 series GPUs try enabling VMs, especially if they have plentiful disk space and fast (500Mbps+) internet speed, as rendering/gaming users will benefit from those, as well as users who need multi-application orchestration tools. We do not recommend multi-GPU hosts with datacenter GPUs enable VMs until we can ensure better GPU P2P communication support in VMs, including support for NVLink. ## Configuring VMs on your machine ### Checking VM enablement status. Run `python3 /var/lib/vastai_kaalia/enable_vms.py check`. Possible results are: * `on`: VMs are enabled on your machine. * `off`: VMs are disabled on your machine. Either you disabled VMs or our previous tests failed. * `pending`: VMs are not disabled, but will try to enable once the machine is idle. To prevent VMs from being enabled on your machine, or to disable VMs after they have been enabled, run `python3 /var/lib/vastai_kaalia/enable_vms.py off`. Note that default configuration settings for most machines will not support VMs, and we can detect that, so most hosts who do not want VMs enabled do not need to take any action. ### Configuring your machine to support VMs. ### Hardware prerequisites You will require a CPU and a chipset that support Intel VT-d or AMD-Vi. Check that virtualization is enabled in your BIOS. On most machines, this should be enabled by default. ### Configure Kernel Commandline Arguments For further reference refer to [Preparing the IOMMU](https://ubuntu.com/server/docs/gpu-virtualization-with-qemu-kvm#preparing-the-input-output-memory-management-unit-iommu). We will need to ensure IOMMU, a technology that secures and isolates communication between PCIe devices, is set up, along with disabling all driver features that interfere with VMs. Open `/etc/default/grub` and add to the `GRUB_CMDLINE_LINUX=` the following: * `amd_iommu=on` or `intel_iommu=on` depending on whether you have an AMD or Intel CPU. * `nvidia_drm.modeset=0` Some hosts may also need to add the following settings: * `rd.driver.blacklist=nouveau` * `modprobe.blacklist=nouveau` Then run `sudo update-grub` and reboot. ### Disable display managers/background GPU processes. If you have a display manager (e.g., GDM) or display server (XOrg, Wayland, etc) running, you must disable them. You may not run any background GPU processes for VMs to work (`nvidia-persitenced` is OK, it is managed by our hosting software). We will check/test your configuration when your machine is idle and enable VMs by default if your machine is capable of supporting VMs, and you have not set VMs to `off`. If you have VMs set to off, and you'd like to retry enabling VMs, run `sudo python3 /var/lib/vastai_kaalia/enable_vms.py on -f` while your machine is idle. --- ## Technical FAQ **URL:** llms-txt#technical-faq **Contents:** - Docker Configuration - What Docker options can I use? Source: https://docs.vast.ai/documentation/reference/faq/technical Docker configuration, performance, and advanced topics <script type="application/ld+json" dangerouslySetInnerHTML={{ __html: JSON.stringify({ "@context": "https://schema.org", "@type": "FAQPage", "mainEntity": [ { "@type": "Question", "name": "What Docker options can I use?", "acceptedAnswer": { "@type": "Answer", "text": "Add Docker run arguments in the template configuration. For port mapping: -p 8080:8080 -p 8081:8081. For environment variables: -e TZ=UTC -e CUDA_VISIBLE_DEVICES=0. For shared memory (for PyTorch): --shm-size=32gb." } }, { "@type": "Question", "name": "Can I use my own Docker images?", "acceptedAnswer": { "@type": "Answer", "text": "Yes! When creating a template: Specify your Docker image URL, ensure it's publicly accessible or provide auth, use standard Docker Hub, GHCR, or other registries, and include all dependencies in the image." } }, { "@type": "Question", "name": "Why can't I run Docker inside my instance?", "acceptedAnswer": { "@type": "Answer", "text": "Docker-in-Docker is disabled for security. Alternatives: Use separate instances for different containers, build multi-service images, or use process managers like supervisord." } }, { "@type": "Question", "name": "How can I maximize GPU utilization?", "acceptedAnswer": { "@type": "Answer", "text": "1. Batch size optimization: Increase until GPU memory is nearly full, monitor with nvidia-smi. 2. Data pipeline: Pre-process data, use multiple data loader workers, cache datasets locally. 3. Mixed precision training using PyTorch autocast or similar frameworks." } }, { "@type": "Question", "name": "Why is my training slower than expected?", "acceptedAnswer": { "@type": "Answer", "text": "Common issues: CPU bottleneck - Check data loading. Network I/O - Download data to local storage first. Wrong GPU mode - Ensure CUDA is enabled. Thermal throttling - Some consumer GPUs throttle. PCIe bandwidth - Multi-GPU setups may be limited." } }, { "@type": "Question", "name": "What's the difference between instance storage and volumes?", "acceptedAnswer": { "@type": "Answer", "text": "Instance Storage: Included with every instance, deleted when instance is destroyed, size set at creation (cannot change), faster performance. Volumes: Persistent across instances, can be attached/detached, additional cost, good for datasets and checkpoints." } }, { "@type": "Question", "name": "How do I install additional packages?", "acceptedAnswer": { "@type": "Answer", "text": "In Jupyter terminal or SSH: For system packages: apt-get update && apt-get install -y package-name. For Python packages: pip install package-name. For Conda (if available): conda install package-name. Add to /root/onstart.sh for persistence across restarts." } }, { "@type": "Question", "name": "How do I use specific CUDA versions?", "acceptedAnswer": { "@type": "Answer", "text": "CUDA version depends on the Docker image. To check: nvcc --version or nvidia-smi. To use specific versions, choose appropriate templates or create custom images with your required CUDA version." } }, { "@type": "Question", "name": "My instance won't start - how do I debug?", "acceptedAnswer": { "@type": "Answer", "text": "1. Check instance logs for errors 2. Verify Docker image exists and is accessible 3. Check if ports are already in use 4. Ensure sufficient disk space requested 5. Try a different provider 6. Contact support with instance ID." } } ] }) }} /> ## Docker Configuration ### What Docker options can I use? Add Docker run arguments in the template configuration: ```bash theme={null} --- ## Finding & Renting Instances **URL:** llms-txt#finding-&-renting-instances Source: https://docs.vast.ai/documentation/instances/choosing/find-and-rent Find and rent GPU instances on Vast.ai. Learn how to search, filter, understand offer cards, and configure your instance. The search page is the main portal for finding good machines and creating instances on them. Before renting an instance, you'll need to select a template that defines your Docker image and connection method. If you haven't already, review [Choosing a Template](/documentation/instances/choosing/templates) to understand your options. --- ## Performance Testing **URL:** llms-txt#performance-testing **Contents:** - LLMs - Image Generation Source: https://docs.vast.ai/documentation/serverless/performance-testing Learn about the performance testing process in Vast.ai Serverless. Understand how the test measures LLM and image generation capabilities, how it translates pixel generation to tokens, and how it normalizes performance across different GPUs. When the serverless system recruits a GPU for a \{\{Worker\_Group}}, the PyWorker on the GPU instance starts by conducting a performance test to assess the GPU's maximum capabilities. For LLMs, this test measures the maximum tokens per second that can be generated across concurrent batches. For image generation, the model is generating pixels, which does not directly translate to tokens. To translate pixel generation to tokens, the test counts the number of 512x512 pixel grids required to cover the image resolution, considering each grid as equivalent to 175 tokens. This value is added on top of a constant overhead token value of 85. Based on the number of diffusion steps performed, the value is adjusted to accomodate for the request time. The value is then normalized so that a system running Flux on a 4090 GPU achieves a standardized performance rating of 200 tokens per second. These performance tests may take several minutes to complete, depending on the machine's specifications. Progress can be monitored through the instance logs. Once the test is completed, the results are saved. If the instance is rebooted, the saved results will be loaded, and the test will not run again. For more details on the full implementation, visit the [Vast PyWorker repository](https://github.com/vast-ai/pyworker/) and reference `backend.py` in the `lib/` folder of the PyWorker. --- ## System packages **URL:** llms-txt#system-packages apt-get update && apt-get install -y package-name --- ## detach ssh-key **URL:** llms-txt#detach-ssh-key Source: https://docs.vast.ai/api-reference/instances/detach-ssh-key api-reference/openapi.json delete /api/v0/instances/{id}/ssh/{key}/ Detaches an SSH key from a specified instance, removing SSH access for that key. CLI Usage: `vastai detach ` --- ## Stop the instance **URL:** llms-txt#stop-the-instance **Contents:** - Can I run Docker within my instance? - Data and Storage - Can I change disk size after creating an instance? - What happens to my data when an instance stops? vastai stop instance $CONTAINER_ID ``` If `$CONTAINER_ID` is not defined, check your environment variables with `env`. ### Can I run Docker within my instance? No, Vast.ai does not support Docker-in-Docker due to security constraints. Each Docker container must run on a separate instance. ### Can I change disk size after creating an instance? **No.** Disk size is permanent and cannot be changed after instance creation. If you run out of space, you'll need to create a new instance with a larger disk. **Tip:** Always allocate more space than you think you need to avoid interruptions. ### What happens to my data when an instance stops? * **Stopped instances:** Data persists, storage charges continue * **Destroyed instances:** All data is permanently deleted * **Lifetime expired:** Instance stops, data remains until destroyed Always backup important data to external storage. --- ## the url and port of model API **URL:** llms-txt#the-url-and-port-of-model-api MODEL_SERVER_URL = "http://0.0.0.0:5001" --- ## Clusters **URL:** llms-txt#clusters Source: https://docs.vast.ai/documentation/host/clusters <script type="application/ld+json" dangerouslySetInnerHTML={{ __html: JSON.stringify({ "@context": "https://schema.org", "@type": "HowTo", "name": "How to Register and Manage Clusters on Vast.ai", "description": "A guide to registering a set of machines sharing a LAN as a cluster to allow clients to access local network resources for multi-node training and network volumes.", "step": [ { "@type": "HowToStep", "name": "Update to the Newest CLI Version", "text": "Go to https://cloud.vast.ai/cli/ and copy and run the command starting with wget to update to the newest version of the CLI." }, { "@type": "HowToStep", "name": "Identify and Test the Subnet", "text": "On the manager node, run ip addr or ifconfig to identify which interface corresponds to your LAN (usually ethernet interface with format enp$BUSs$SLOT). Find the IPv4 subnet corresponding to that network interface (format IPv4ADDRESS/MASK). Test that other machines can reach the manager node on that subnet by running nc -l IPv4ADDRESS 2337 on the manager node and nc IPv4ADDRESS 2337 on each other node." }, { "@type": "HowToStep", "name": "Create the Cluster", "text": "Run ./vast.py create cluster IPv4SUBNET MACHINE_ID_OF_MANAGER_NODE to initialize a cluster containing the machine with the manager node ID and using the network interface corresponding to the subnet." }, { "@type": "HowToStep", "name": "Verify Cluster Creation", "text": "Run ./vast.py show clusters to check the ID of the cluster you just created and see its subnet, manager node machine_id, and list of member machines." }, { "@type": "HowToStep", "name": "Add Member Machines", "text": "Run ./vast.py join cluster CLUSTER_ID MACHINE_IDS where MACHINE_IDS is a space separated list of the remaining machines to add to your cluster." } ] }) }} /> --- ## delete ssh key **URL:** llms-txt#delete-ssh-key Source: https://docs.vast.ai/api-reference/accounts/delete-ssh-key api-reference/openapi.json delete /api/v0/ssh/{id}/ Removes an SSH key from the authenticated user's account CLI Usage: `vastai delete ssh-key ` --- ## Route **URL:** llms-txt#route Source: https://docs.vast.ai/documentation/serverless/route Learn how to use the /route/ endpoint to retrieve a GPU instance address within your Endpoint. Understand the inputs, outputs, and examples for using the endpoint. The `/route/` endpoint calls on the serverless engine to retrieve a GPU instance address within your Endpoint. --- ## delete env var **URL:** llms-txt#delete-env-var Source: https://docs.vast.ai/api-reference/accounts/delete-env-var api-reference/openapi.json delete /api/v0/secrets/ Deletes an environment variable associated with the authenticated user. The variable must exist and belong to the requesting user. CLI Usage: `vastai delete env-var ` --- ## update workergroup **URL:** llms-txt#update-workergroup Source: https://docs.vast.ai/api-reference/serverless/update-workergroup api-reference/openapi.json put /api/v0/workergroups/{id}/ Updates the properties of an existing workergroup based on the provided parameters. CLI Usage: `vastai update workergroup [options]` --- ## Ollama + Webui **URL:** llms-txt#ollama-+-webui Source: https://docs.vast.ai/ollama-webui --- ## Text Generation Inference (TGI) **URL:** llms-txt#text-generation-inference-(tgi) Source: https://docs.vast.ai/documentation/serverless/text-generation-inference-tgi Learn how to use Text Generation Inference (TGI) with Vast.ai Serverless for text generation models. The [Text Generation Inference serverless template](https://cloud.vast.ai?ref_id=140778\&template_id=e97e6c337efd5562ad419cdb392981a4) can be used to infer LLMs on Vast GPU instances. This page documents required environment variables and endpoints to get started. A full PyWorker and Client implementation can be found [here](https://github.com/vast-ai/pyworker/tree/main). --- ## Instance Types **URL:** llms-txt#instance-types **Contents:** - Overview - On-demand Instances - Key Considerations - Reserved Instances - Interruptible Instances - Working with Interruptible Instances - Choosing the Right Type - Quick Reference - Switching Between Types - Priority Levels Source: https://docs.vast.ai/documentation/instances/choosing/instance-types Understand Vast.ai instance types - On-demand, Reserved, and Interruptible. Learn how each type works, their differences, and when to use each. Vast.ai offers three instance types with different priority levels and pricing models to match your workload requirements and budget. **High Priority** Fixed pricing, guaranteed resources **High Priority** Discounted rates with pre-payment **Low Priority** Lowest cost, may be paused In the create interface, you'll see a selector for "on-demand" or "interruptible". Once an instance is rented, you cannot change its type. However, you can convert on-demand instances to reserved for discounts. ## On-demand Instances **Best for**: Production workloads, continuous training, time-sensitive tasks On-demand instances provide: * **Exclusive GPU control** with high priority * **Guaranteed resources** for the contract duration * **Fixed pricing** set by the host * **Maximum duration** shown on offer cards * **Data persistence** even when stopped ### Key Considerations * Check the maximum duration before renting (shown on offer cards) * For long-running jobs (days/weeks), verify host reliability scores * When contracts expire, hosts may renew or stop the instance * Data remains accessible when instances are stopped **Expired Instance Deletion**: Expired instances may be deleted 48 hours after expiration. Retrieve your data before then. Expired instances cannot restart while expired. ## Reserved Instances **Best for**: Long-term projects, predictable workloads, cost optimization Reserved instances are on-demand instances with pre-paid discounts: * **Up to 50% discount** based on commitment length * **Same high priority** as on-demand * **Convert anytime** from existing on-demand instances * **Credits locked** to the specific instance * **Partial refunds** available if cancelled early To create a reserved instance, first rent on-demand, then convert using the discount badge on your instance card. For detailed instructions on creating and managing reserved instances, see [Reserved Instances](/documentation/instances/choosing/reserved-instances). ## Interruptible Instances **Best for**: Batch processing, fault-tolerant workloads, development/testing Interruptible instances use a bidding system: * **Lowest cost** (often 50%+ cheaper than on-demand) * **Bidding priority** - higher bids get priority * **May be paused** if outbid or if on-demand requested * **Data preserved** when paused but instance not functional * **Resume automatically** when priority returns ### Working with Interruptible Instances When using interruptible instances: * **Save work frequently** to disk * **Use cloud storage** for important outputs * **Implement checkpointing** in your code * **Expect interruptions** and plan accordingly 1. On-demand instances always have highest priority 2. Among interruptible instances, highest bid wins 3. Paused instances resume when they regain priority ## Choosing the Right Type | Use Case | Recommended Type | Why | | --------------------- | ---------------- | -------------------------------------- | | Production inference | On-demand | Need guaranteed availability | | Multi-day training | Reserved | Long-term discount with reliability | | Hyperparameter search | Interruptible | Can handle interruptions, cost matters | | Data preprocessing | Interruptible | Can resume where left off | | Time-critical jobs | On-demand | Cannot afford interruptions | | Development/testing | Interruptible | Short sessions, cost-sensitive | | Steady workloads | Reserved | Predictable usage, want discounts | ### Switching Between Types * **On-demand → Reserved**: ✅ Yes, anytime via discount badge * **On-demand → Interruptible**: ❌ No, must create new instance * **Interruptible → On-demand**: ❌ No, must create new instance * **Reserved → On-demand**: ⚠️ Lose remaining discount 1. **On-demand/Reserved**: High priority, never interrupted 2. **Interruptible (high bid)**: Runs when resources available 3. **Interruptible (low bid)**: Paused until higher bids complete * **Compare costs**: Check current [Pricing](/documentation/instances/pricing) * **Get discounts**: Learn about [Reserved Instances](/documentation/instances/choosing/reserved-instances) * **Start renting**: [Finding & Renting](/documentation/instances/choosing/find-and-rent) --- ## Invoke: python3 nccl_speedtest.py NODE_0_IP:PORT SIZE[K|M|G] RANK(0|1) **URL:** llms-txt#invoke:-python3-nccl_speedtest.py-node_0_ip:port-size[k|m|g]-rank(0|1) if __name__ == "__main__": handshake_ip = sys.argv[1] size_s = sys.argv[2] split_idx = size_s.find(string.ascii_letters) sizes = { "K" : 1024, "M" : 1024**2, "G" : 1024 ** 3, "":1} size = int(size_s[0:split_idx]) * sizes[size_s[split_idx:]] rank = int(sys.argv[3]) if len(sys.argv) >= 5: device = int(sys.argv[4]) else: device = 0 print("Initializing tensors...") # number of fp32 to allocate is bytes >> 2 v1 = t.rand(size>>3, device=f'cuda:{device}') # for bidirectional test warmup1 = t.rand(size>>13, device=f'cuda:{device}') if rank: warmup = t.rand(size>>12, device=f'cuda:{device}') v = t.rand(size>>2, device=f'cuda:{device}') else: warmup = t.zeros(size>>12,device=f'cuda:{device}') v = t.zeros(size>>2, device=f'cuda:{device}') print("Executing NCCL TCP handshake...") dist.init_process_group(init_method = f"tcp://{handshake_ip}", rank = rank, world_size=2) print("NCCL TCP handshake done, warming up connection...") if rank: dist.send(warmup, 0) else: dist.recv(warmup,1) ignore = t.sum(warmup).to('cpu') # force sync print("Warmup done; starting uni-directional speedtest...") start = time.time() if rank: dist.send(v, 0) else: dist.recv(v,1) # Torch returns from dist.send/dist.recv as soon as the communication channels initialize; it does not block on the full tensor being received. # t.sum(v) will block on communication operations on v completing though, so we don't check end time until that is done. checksum = t.sum(v).to('cpu') end = time.time() print(f"Checksum: {checksum}") print(f"elapsed: {end-start}") print(f"unidirectional bandwidth: {size / (end-start) / sizes['M']} MiB/s") print("Warming up bidirection speedtest...") dist.all_gather_into_tensor(warmup,warmup1) print("Warmup done, starting bidirectional speedtest...") start = time.time() dist.all_gather_into_tensor(v, v1) checksum = t.sum(v).to('cpu') end = time.time() print(f"Checksum: {checksum}") print(f"elapsed: {end-start}") print(f"bidirectional bandwidth: {size / (end-start) / sizes['M']} MiB/s") print("Done, cleaning up!") dist.destroy_process_group() text Text theme={null} 1: lo: mtu 65536 qdisc noqueue state UNKNOWN group default qlen 1000 link/loopback 00:00:00:00:00:00 brd 00:00:00:00:00:00 inet 127.0.0.1/8 scope host lo valid_lft forever preferred_lft forever inet6 ::1/128 scope host noprefixroute valid_lft forever preferred_lft forever 2: eth0@if23: mtu 65536 qdisc noqueue state UNKNOWN group default qlen 1000 link/ether 62:82:b2:1b:38:a6 brd ff:ff:ff:ff:ff:ff link-netnsid 0 inet 10.0.0.1/24 scope global eth0 valid_lft forever preferred_lft forever 3: lo: mtu 1500 qdisc noqueue state UNKNOWN group default qlen 1000 link/ether 94:04:a2:fb:a1:66 brd ff:ff:ff:ff:ff:ff link-netnsid 0 inet 172.17.0.2/16 brd 172.17.255.255 scope global eth1 valid_lft forever preferred_lft forever From this we see that we will want to use `10.0.0.1` as our rendezvous address; we can choose any available port above 1000 (e.g. `5000`) for our rendezvous port. Then, run `NCCL_SOCKET_IFNAME=eth0 python3 nccl_speedtest.py 10.0.0.1:5000 10G 0` The script will start, then, once it reaches `init_process_group` it will wait for the worker process on the other node to reach the same point and complete the rendezvous before proceeding. On the second instance, we run `NCCL_SOCKET_IFNAME=eth0 python3 nccl_speedtest.py 10.0.0.1:5000 10G 1` Once we've done the script on the second instance reaches the TCP rendezvous, both processes will continue and start communicating over NCCL. **Examples:** Example 1 (unknown): ```unknown We will have rented two instances on the same overlay network already. On the first instance: Run `apt update; apt install iproute2` then run `ip a`: We should get output that looks like this ---- ``` --- ## Keys **URL:** llms-txt#keys **Contents:** - SSH Keys - API Keys - Session Keys Source: https://docs.vast.ai/documentation/reference/keys <script type="application/ld+json" dangerouslySetInnerHTML={{ __html: JSON.stringify({ "@context": "https://schema.org", "@type": "HowTo", "name": "How to Manage Keys on Vast.ai", "description": "A guide to managing SSH keys, API keys, and session keys for secure access to your Vast.ai account.", "step": [ { "@type": "HowToStep", "name": "Add SSH Keys", "text": "Click on the +New button in the SSH Keys section. Copy and paste your SSH public key into the input to attach it to your account. You can use this SSH key to log into instances remotely. Once saved, it will appear in the SSH Keys section and will be automatically added to your future instances." }, { "@type": "HowToStep", "name": "Create API Keys", "text": "Click on the +New button in the API Keys section. Select specific permissions and assign a name to the key (by default, all your account permissions are selected). You will need an API key to access the Command Line Interface and the REST API." }, { "@type": "HowToStep", "name": "Manage Session Keys", "text": "Review your session keys regularly for security. Session keys are temporary keys that allow access to your Vast.ai account and are automatically created when you log in. They expire in one week. You can view a list of all active session keys and see which devices are currently logged into your account. If you notice any session keys that you don't recognize, you can delete those keys to immediately remove access." } ] }) }} /> The Keys page helps you manage secure access to your Vast.ai account. Here, you'll find different types of keys used for authentication and connection. You can add, edit, or remove your ssh keys in the SSH Keys section of the Keys page of your console.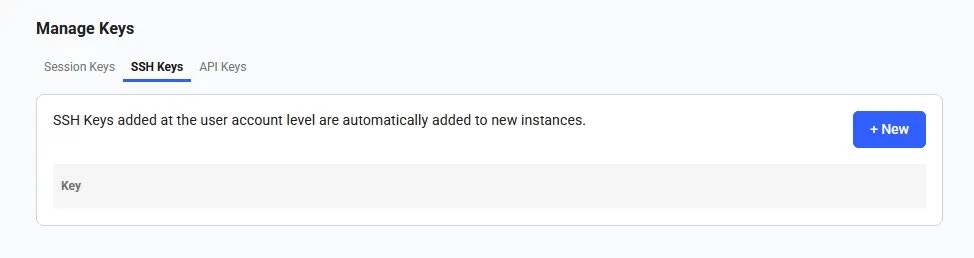 Add a new ssh key by clicking on the **+New** button. Copy and paste your key into the input in order for it to be attached to your account. You can use this ssh key to log into instances remotely. More [here](/documentation/instances/sshscp).
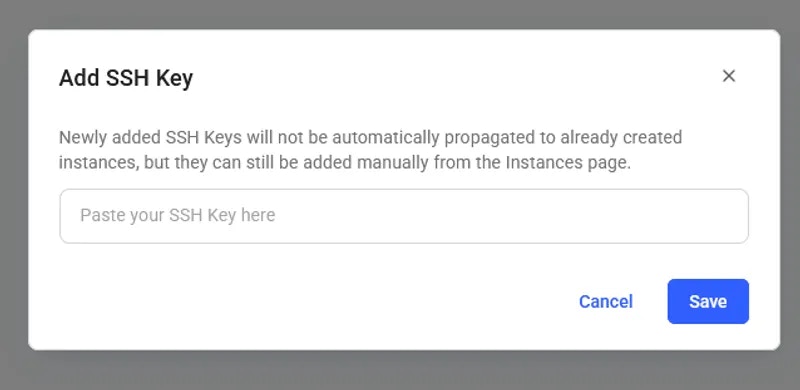 Once the SSH key is saved, it will appear in the SSH Keys section and will be automatically added to your future instances.
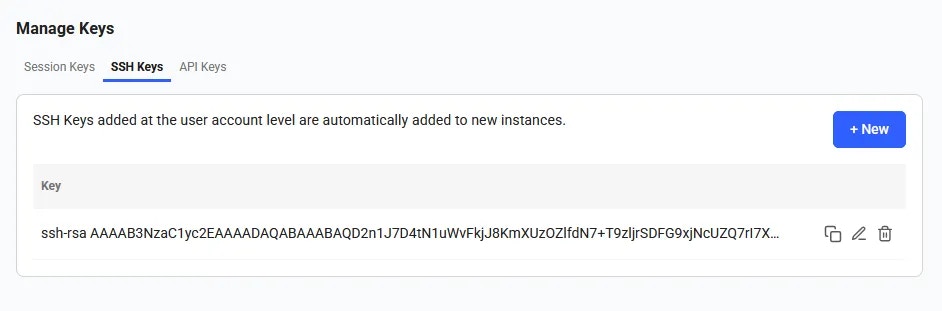 You can edit an existing ssh key by clicking on the **Edit** button and changing the text.
 Delete an existing ssh key by selecting the **Delete** button.
These ssh keys will be used primarily when accessing an instance. You must switch out your ssh keys on this page if you wish to connect easily via multiple machines.
You can view, copy, edit, and update your API keys in the Keys section of the console. You will need an API key to access the Command Line Interface and the REST API.
To create an API key click on the **+New** button. It will trigger API key creation pop-up.
Delete an existing ssh key by selecting the **Delete** button.
These ssh keys will be used primarily when accessing an instance. You must switch out your ssh keys on this page if you wish to connect easily via multiple machines.
You can view, copy, edit, and update your API keys in the Keys section of the console. You will need an API key to access the Command Line Interface and the REST API.
To create an API key click on the **+New** button. It will trigger API key creation pop-up.
 Here, you can select specific permissions and assign a name to the key (by default, all you account permissions are selected).
 You can reset an API key by clicking the **Reset** button. A new key will be automatically generated. To remove a key, simply click the **Delete** button.
A **session key** is a temporary key that allows access to your Vast.ai account. These keys are automatically created when you log in and will expire in one week.
However, for security reasons, it's important to review your session keys regularly. You can view a list of all active session keys and see which devices are currently logged into your account. If you notice any session keys that you don't recognize, or if a device is no longer in use, you can delete those keys to immediately remove access. This helps keep your account secure and ensures only your devices remain connected.
You can reset an API key by clicking the **Reset** button. A new key will be automatically generated. To remove a key, simply click the **Delete** button.
A **session key** is a temporary key that allows access to your Vast.ai account. These keys are automatically created when you log in and will expire in one week.
However, for security reasons, it's important to review your session keys regularly. You can view a list of all active session keys and see which devices are currently logged into your account. If you notice any session keys that you don't recognize, or if a device is no longer in use, you can delete those keys to immediately remove access. This helps keep your account secure and ensures only your devices remain connected.
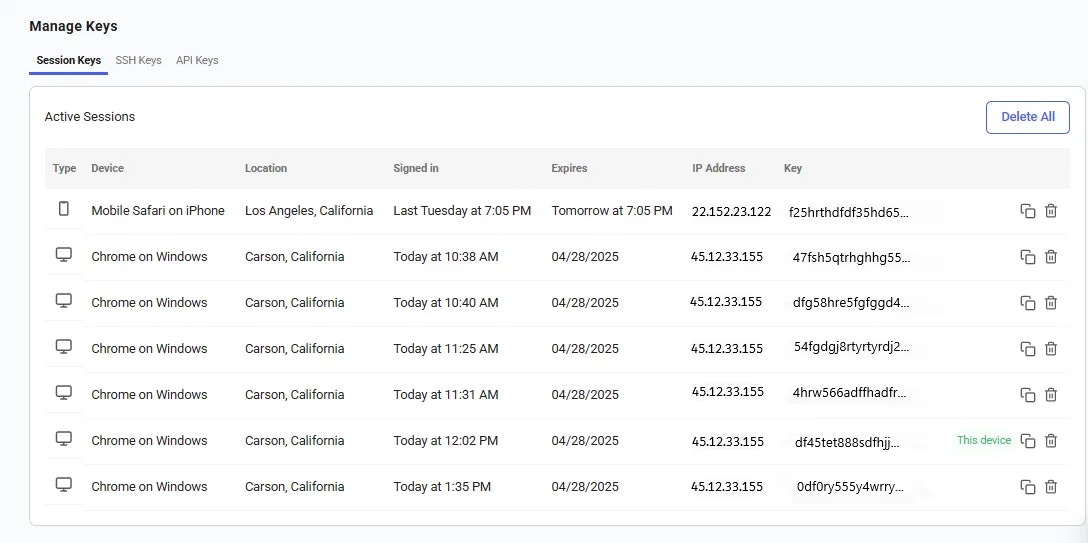 ---
## Langflow + Ollama
**URL:** llms-txt#langflow-+-ollama
**Contents:**
- Initial Setup
- Find the Template
- Custom configuration
- Starting the Instance
- Choose a GPU
- Rent an Instance
- Accessing the Instance
- Getting Started with Langflow
- Configuring the Workflow
- Run the Workflow
Source: https://docs.vast.ai/langflow-ollama
Langflow is a node-based agent builder you can use from your web browser. While it integrates with many frontier language models it also has a fantastic Ollama integration which makes it really easy to use with open weight models as well as custom fine-tunes.
We have two templates you can choose for this guide. The **Langflow template** provides both Ollama and Langflow installed within the instance. You can also use the [**Ollama standalone template**](https://cloud.vast.ai/?ref_id=62897\&creator_id=62897\&name=Ollama) to integrate with a local langflow installation via [ssh local port forwarding](/documentation/instances/sshscp#Yj5Wh). The choice is yours. For this guide we will use the Langflow bundled template.
Before moving on with the guide,** Setup your Vast account and add credit**. Review the [quickstart guide](/documentation/get-started/quickstart) to get familar with the service if you do not have an account with credits loaded.
Let's get started with the configuration - There is not much you need to change here but it's a good idea to create a customized version of the template so Ollama automatically downloads your preferred model.
### Find the Template
You can find the Langflow template in our [recommended templates](https://cloud.vast.ai/templates/) page. Before loading it up, click the pencil icon to open up the template editor
---
## Langflow + Ollama
**URL:** llms-txt#langflow-+-ollama
**Contents:**
- Initial Setup
- Find the Template
- Custom configuration
- Starting the Instance
- Choose a GPU
- Rent an Instance
- Accessing the Instance
- Getting Started with Langflow
- Configuring the Workflow
- Run the Workflow
Source: https://docs.vast.ai/langflow-ollama
Langflow is a node-based agent builder you can use from your web browser. While it integrates with many frontier language models it also has a fantastic Ollama integration which makes it really easy to use with open weight models as well as custom fine-tunes.
We have two templates you can choose for this guide. The **Langflow template** provides both Ollama and Langflow installed within the instance. You can also use the [**Ollama standalone template**](https://cloud.vast.ai/?ref_id=62897\&creator_id=62897\&name=Ollama) to integrate with a local langflow installation via [ssh local port forwarding](/documentation/instances/sshscp#Yj5Wh). The choice is yours. For this guide we will use the Langflow bundled template.
Before moving on with the guide,** Setup your Vast account and add credit**. Review the [quickstart guide](/documentation/get-started/quickstart) to get familar with the service if you do not have an account with credits loaded.
Let's get started with the configuration - There is not much you need to change here but it's a good idea to create a customized version of the template so Ollama automatically downloads your preferred model.
### Find the Template
You can find the Langflow template in our [recommended templates](https://cloud.vast.ai/templates/) page. Before loading it up, click the pencil icon to open up the template editor
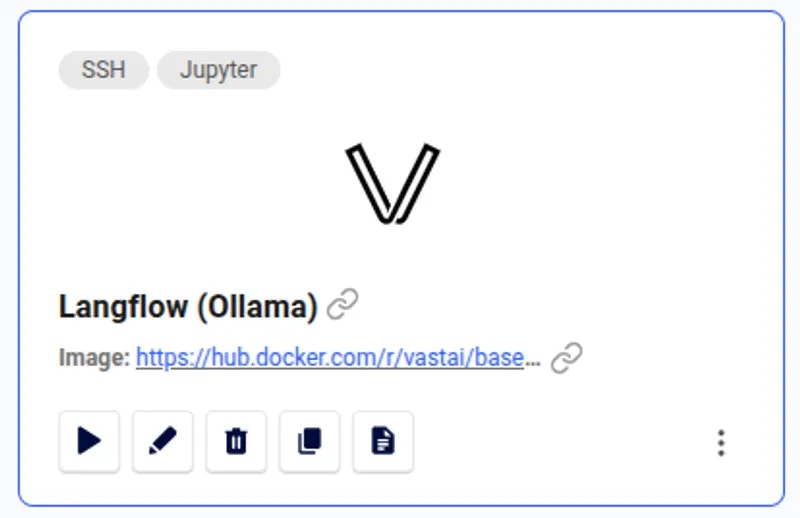 ### Custom configuration
In the template editor you'll find two really useful configuration variables.
* `OLLAMA_MODEL` is the most important variable. Here you can choose which model should be downloaded when the instance starts.
* `LANGFLOW_ARGS`allows you to pass alternative startup arguments to the langflow application. The defaults should be fine for this demo, but you are free to change these as you need.
### Custom configuration
In the template editor you'll find two really useful configuration variables.
* `OLLAMA_MODEL` is the most important variable. Here you can choose which model should be downloaded when the instance starts.
* `LANGFLOW_ARGS`allows you to pass alternative startup arguments to the langflow application. The defaults should be fine for this demo, but you are free to change these as you need.
 When you have finished entering your settings click the '**Create & Use**' button to save your copy of the template.
You'll be taken to the search interface where you can choose an appropriate GPU instance to run your model. You can access your custom template in future from the 'My Templates' section of the templates page.
## Starting the Instance
It's now time to use your template to start a GPU instance.
The most important consideration when picking an instance to run laguage models is the VRAM. For best performance, your model weights must fit into the GPU VRAM with room left over for the context window.
You do not have to use a single GPU when running LLMs - Sometimes a multi-GPU setup can be as effective of better than a single high VRAM instance.
When you have found a suitable instance it's time to click the '**Rent**' button. This will start the loading phase.
If you are not sure which instance to choose - Try one. There is no minimum rental period and if it is not suitable you are able to destroy that instance and start another, paying only for the time the instance was in the 'running' state
## Accessing the Instance
After a short time, your instance will be ready to access. Simply click the 'Open' button to get started.
When you have finished entering your settings click the '**Create & Use**' button to save your copy of the template.
You'll be taken to the search interface where you can choose an appropriate GPU instance to run your model. You can access your custom template in future from the 'My Templates' section of the templates page.
## Starting the Instance
It's now time to use your template to start a GPU instance.
The most important consideration when picking an instance to run laguage models is the VRAM. For best performance, your model weights must fit into the GPU VRAM with room left over for the context window.
You do not have to use a single GPU when running LLMs - Sometimes a multi-GPU setup can be as effective of better than a single high VRAM instance.
When you have found a suitable instance it's time to click the '**Rent**' button. This will start the loading phase.
If you are not sure which instance to choose - Try one. There is no minimum rental period and if it is not suitable you are able to destroy that instance and start another, paying only for the time the instance was in the 'running' state
## Accessing the Instance
After a short time, your instance will be ready to access. Simply click the 'Open' button to get started.
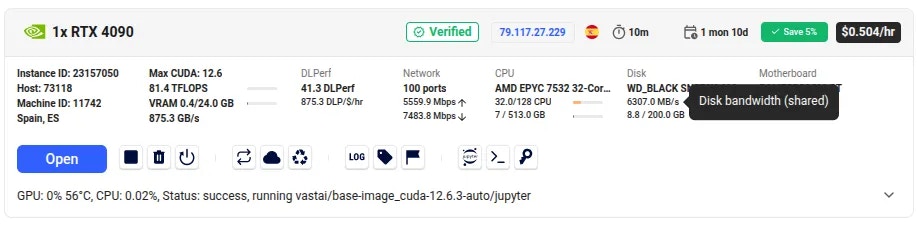 You will now find the Instance Portal has opened.
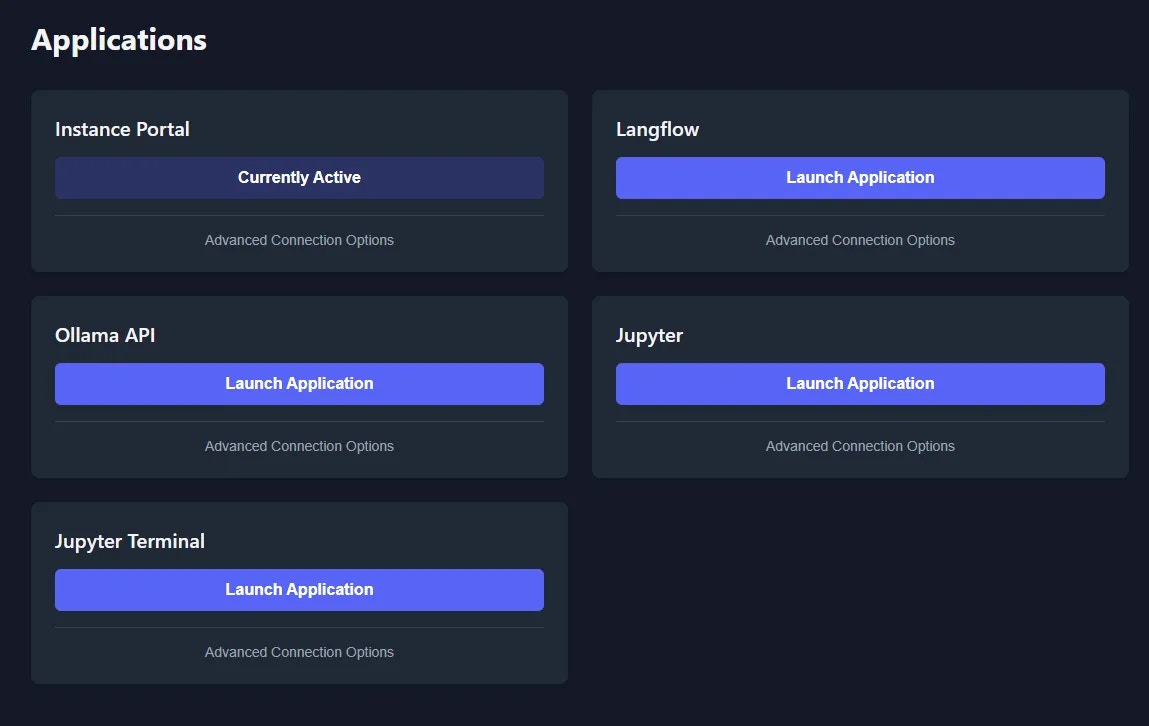 This page gives you easy access to both the Langflow application and the Ollama API. Click Langflow's 'Launch Application' button.
It will take some time for Langflow and Ollama to be installed and for the Ollama model to download. You can monitor the loading status in the Instance Portal 'Logs' tab
## Getting Started with Langflow
After opening Langflow, click the '**Create first flow**' button.
This page gives you easy access to both the Langflow application and the Ollama API. Click Langflow's 'Launch Application' button.
It will take some time for Langflow and Ollama to be installed and for the Ollama model to download. You can monitor the loading status in the Instance Portal 'Logs' tab
## Getting Started with Langflow
After opening Langflow, click the '**Create first flow**' button.
 While Langflow is extremely powerful, for this example we will create a simple blow post writer.
Select **Content Generation** -> **Blog Writer**
While Langflow is extremely powerful, for this example we will create a simple blow post writer.
Select **Content Generation** -> **Blog Writer**
 Initially, the flow will look like this
 We will need to replace the Language Model with the Ollama alternative to make use of the GPU and avoid having to make API calls to external services.
Click on the **Language Model** node and using the three dot icon, choose **Delete.**
We will need to replace the Language Model with the Ollama alternative to make use of the GPU and avoid having to make API calls to external services.
Click on the **Language Model** node and using the three dot icon, choose **Delete.**
 Next, from the left side menu, select the **Ollama** component and drag it to the space created by deleting the original language model component.
 Now that is in place it must be configured to communicate with the Ollama API. Enter `http://localhost:11434` in the Base URL field. You'll need to then select your Ollama model and re-connect the nodes as shown below.
 If the model field does not immediately show your available models, simply toggle the 'Tool Mode Enabled' switch.
### Configuring the Workflow
You could run this node immediately, but first let's make some minor modifications.
Change the **URL** in the **URL node** to `https://vast.ai`and set the **Depth** to `2`
Change the **Text** in the **Instructions node** to `Use the references above for style to write a new blog/tutorial about how Vast.ai can empower people who want to leverage affordable GPU resources`
Simply click the **Playground** button followed by the **Run flow** button and wait for the agent to learn about the subject matter and write a blog post. It'll only take a few seconds.
If the model field does not immediately show your available models, simply toggle the 'Tool Mode Enabled' switch.
### Configuring the Workflow
You could run this node immediately, but first let's make some minor modifications.
Change the **URL** in the **URL node** to `https://vast.ai`and set the **Depth** to `2`
Change the **Text** in the **Instructions node** to `Use the references above for style to write a new blog/tutorial about how Vast.ai can empower people who want to leverage affordable GPU resources`
Simply click the **Playground** button followed by the **Run flow** button and wait for the agent to learn about the subject matter and write a blog post. It'll only take a few seconds.
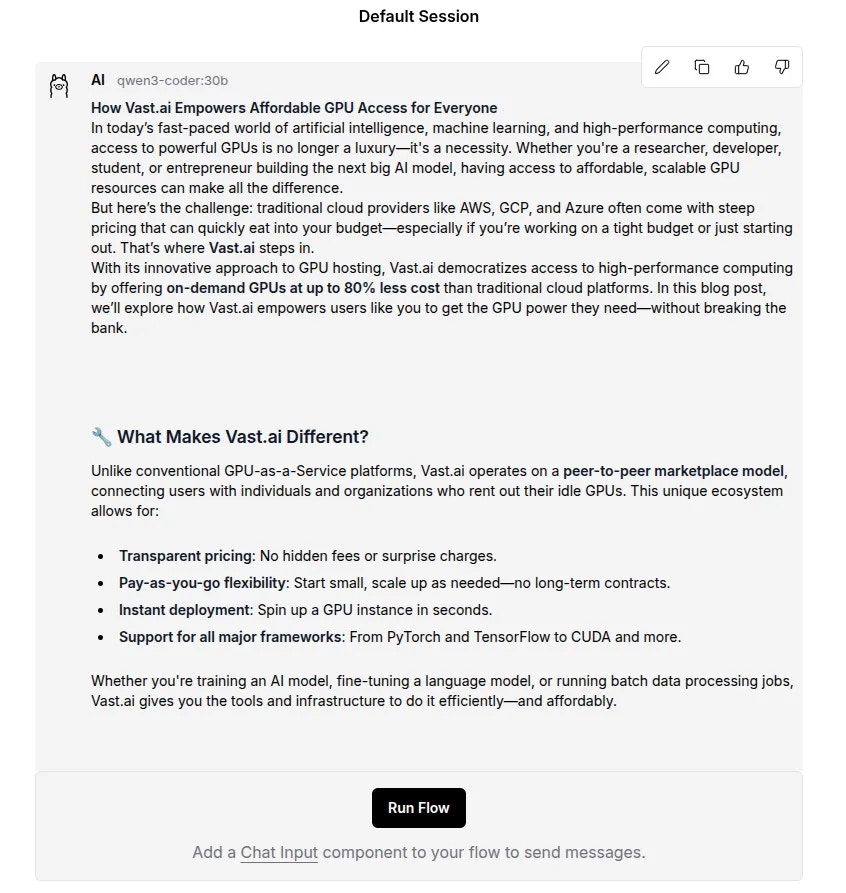 This short guide serves only as an introduction to Langflow, but it is extremely capabale and easy to use with some practice. We recommend that you check out the excellent [documentation](https://docs.langflow.org/about-langflow) to assist you in creating complex projects.
Remember, any *Language Model* component can be replaced with the *Ollama* component, and any *Agent* component can be configured to use *Ollama* as a custom provider.
---
## get endpoint logs
**URL:** llms-txt#get-endpoint-logs
Source: https://docs.vast.ai/api-reference/serverless/get-endpoint-logs
api-reference/openapi.json post /get_endpoint_logs/
Retrieves logs for a specific endpoint by name.
CLI Usage: `vastai get endpoint logs [--tail ]`
---
## Overview & quickstart
**URL:** llms-txt#overview-&-quickstart
**Contents:**
- PyPI Install
- Github
- Quickstart
- Usage
- Launching Instances
- Get Instance Info
- Starting Stopping
- Copy Data
- Destroy Instances
Source: https://docs.vast.ai/cli/get-started
<script
type="application/ld+json"
dangerouslySetInnerHTML={{
__html: JSON.stringify({
"@context": "https://schema.org",
"@type": "HowTo",
"name": "How to Get Started with Vast.ai CLI",
"description": "A quickstart guide to installing and using the Vast.ai Python CLI for managing GPU instances.",
"step": [
{
"@type": "HowToStep",
"name": "Install the CLI",
"text": "Install the latest stable PyPI release with: pip install vastai. Alternatively, get the very latest version directly from github with: wget https://raw.githubusercontent.com/vast-ai/vast-python/master/vast.py -O vast; chmod +x vast;"
},
{
"@type": "HowToStep",
"name": "Set Your API Key",
"text": "Login to the vast.ai website and get an api-key from https://cloud.vast.ai/cli/. Copy the command under the heading Login / Set API Key and run it. The command will be something like: vastai set api-key xxxxxxxxxxxxxxxxxxxxxxxxxxxxxxxxxxxxxxx. The set api-key command saves your api-key in a hidden file in your home directory. Do not share your api-keys with anyone."
},
{
"@type": "HowToStep",
"name": "Search for GPU Instances",
"text": "Use vastai search offers to find machines for rent. You can filter results with parameters like: vastai search offers 'compute_cap >= 800' or vastai search offers 'reliability > 0.99 num_gpus>=4' -o 'num_gpus-'. The search command supports all of the filters and sort options that the website GUI uses."
},
{
"@type": "HowToStep",
"name": "Create an Instance",
"text": "Create instances using the create instance command referencing an instance type ID returned from search offers. For example: vastai create instance 2459368 --image vastai/tensorflow --disk 32 --ssh --direct. Once created, the instance must first pull the image if not cached, then boots and transitions to the running state."
},
{
"@type": "HowToStep",
"name": "Manage Your Instances",
"text": "Use vastai show instances to view your instances. Use vastai start instance and vastai stop instance to control them. Stop an instance to avoid GPU charges while maintaining storage. Use vastai copy to move data between instances or cloud storage. When done, use vastai destroy instance to avoid ongoing storage charges."
}
]
})
}}
/>
We provide a python CLI (open-source) for a convenient interface to the rest API. You can use the --explain option with any CLI command and it will print out the underlying API calls.
You can install the latest stable PyPI release with:
Alternatively you can get the very latest version directly from github:
This repository contains the open source python command line interface for vast.ai.
This CLI has all of the functionality of the vast.ai website GUI and uses the same underlying REST API.
The CLI is self-contained in the single script file `vast.py`.
In order to authenticate most commands you will need to first login to the vast.ai website and get an api-key. Go to [https://cloud.vast.ai/cli/](https://cloud.vast.ai/cli/). Copy the command under the heading "Login / Set API Key" and run it. The command will be something like:
`vastai set api-key xxxxxxxxxxxxxxxxxxxxxxxxxxxxxxxxxxxxxxx`
where the `xxxx...` is a unique api-key (a long hexadecimal number).
Note that if the script is named "vast" in this command on the website and your installed script is named "vast.py" you will need to change the name of the script in the command you run.
The `set api-key` command saves your api-key in a hidden file in your home directory.
Do not share your api-keys with anyone as they authenticate commands from your account.
Your default main key allows full access to all commands without limitations, but you can use the CLI to create additional keys with [fine-grained access restrictions](/cli/installation).
For the most up to date help, use 'vast.py --help'. You can then get a list of the available commands. Each command also typically has help documentation:
To see how the API works you can use it to find machines for rent.
There are many parameters that can be used to filter the results. The search command supports all of the filters and sort options that the website GUI uses.
To find GPU instances with compute capability 8.0 or higher:
To find instances with a reliability score >= 0.99 and at least 4 gpus, ordering by num of gpus descending:
The output of this command at the time of this writing is
### Launching Instances
You create instances using the create instance command referencing an instance type ID returned from search offers.
So to create an ssh direct instance of type 2459368 (using the ID returned from the search above for 4x 3090 on machine 4637) with the vastai/tensorflow image and 32 GB of disk storage:
Once an instance is created, it then must first pull the image if it is not cached. After the image is loaded the instance boots and transititons to the running state.
You are charged for the resources you reserve. As storage is reserved at creation, storage charges begin when the instance is created and end only when it is destroyed.
GPU charges begin when the instance transitions to the running state, and end when it is stopped or destroyed.
### Get Instance Info
### Starting Stopping
You can stop an instance to avoid GPU charges, converting it into a storage unit - storage is usually very cheap compared to GPU.
Starting an existing instance takes only a second or less whereas creating a new instance can take much longer (to pull a large docker image), so maintaining a pool of stopped instances is useful for many applications.
You can [call stop/destroy instance from inside](/documentation/instances/docker-execution-environment) the instance using a special autogenerated instance apikey, to avoid exposing your main apikey.
You can copy data from a stopped instance to a running instance, to/from cloud storage, or to/from another machine.
### Destroy Instances
Once you are done with an instance make sure to destroy it to avoid ongoing storage charges.
**Examples:**
Example 1 (unknown):
```unknown
## Github
Alternatively you can get the very latest version directly from github:
```
Example 2 (unknown):
```unknown
This repository contains the open source python command line interface for vast.ai.
This CLI has all of the functionality of the vast.ai website GUI and uses the same underlying REST API.
The CLI is self-contained in the single script file `vast.py`.
## Quickstart
In order to authenticate most commands you will need to first login to the vast.ai website and get an api-key. Go to [https://cloud.vast.ai/cli/](https://cloud.vast.ai/cli/). Copy the command under the heading "Login / Set API Key" and run it. The command will be something like:
`vastai set api-key xxxxxxxxxxxxxxxxxxxxxxxxxxxxxxxxxxxxxxx`
where the `xxxx...` is a unique api-key (a long hexadecimal number).
Note that if the script is named "vast" in this command on the website and your installed script is named "vast.py" you will need to change the name of the script in the command you run.
The `set api-key` command saves your api-key in a hidden file in your home directory.
Do not share your api-keys with anyone as they authenticate commands from your account.
Your default main key allows full access to all commands without limitations, but you can use the CLI to create additional keys with [fine-grained access restrictions](/cli/installation).
## Usage
For the most up to date help, use 'vast.py --help'. You can then get a list of the available commands. Each command also typically has help documentation:
```
Example 3 (unknown):
```unknown
To see how the API works you can use it to find machines for rent.
```
Example 4 (unknown):
```unknown
There are many parameters that can be used to filter the results. The search command supports all of the filters and sort options that the website GUI uses.
To find GPU instances with compute capability 8.0 or higher:
```
---
## cancel copy
**URL:** llms-txt#cancel-copy
Source: https://docs.vast.ai/api-reference/instances/cancel-copy
api-reference/openapi.json delete /api/v0/commands/copy_direct/
Cancel a remote copy operation specified by the destination ID (dst_id).
CLI Usage: `vastai cancel copy --dst_id `
---
## Create Endpoints and Workergroups
**URL:** llms-txt#create-endpoints-and-workergroups
Source: https://docs.vast.ai/documentation/serverless/create-endpoints-and-workergroups
Learn how to create endpoints and workergroups in Vast.ai Serverless. Understand the inputs, outputs, and examples for creating endpoints and workergroups.
The `/endptjobs/` and `/workergroups/` endpoints calls on the webserver to create a new Endpoint and Workergroup.
---
## delete workergroup
**URL:** llms-txt#delete-workergroup
Source: https://docs.vast.ai/api-reference/serverless/delete-workergroup
api-reference/openapi.json delete /api/v0/workergroups/{id}/
Deletes an existing workergroup.
CLI Usage: `vastai delete workergroup `
---
## response, which itself is streaming, back to the client.
**URL:** llms-txt#response,-which-itself-is-streaming,-back-to-the-client.
---
## CLI Commands
**URL:** llms-txt#cli-commands
---
## Managing Instances
**URL:** llms-txt#managing-instances
**Contents:**
- Overview
- Instance Card Interface
- Main Status Button
- Instance Information
- Instance Operations
- Starting, Stopping, and Destroying
- Restart Behavior
- Additional Controls
- Data Management
- Connection Quick Reference
Source: https://docs.vast.ai/documentation/instances/manage-instances
Learn how to manage running instances - start, stop, destroy, monitor status, and handle common operational tasks.
The Instances page ([cloud.vast.ai/instances](https://cloud.vast.ai/instances)) is your central hub for managing rented instances. From here you can:
* View instance status and information
* Start, stop, and destroy instances
* Access connection details
* Monitor resource usage
* Transfer data between instances
## Instance Card Interface
This short guide serves only as an introduction to Langflow, but it is extremely capabale and easy to use with some practice. We recommend that you check out the excellent [documentation](https://docs.langflow.org/about-langflow) to assist you in creating complex projects.
Remember, any *Language Model* component can be replaced with the *Ollama* component, and any *Agent* component can be configured to use *Ollama* as a custom provider.
---
## get endpoint logs
**URL:** llms-txt#get-endpoint-logs
Source: https://docs.vast.ai/api-reference/serverless/get-endpoint-logs
api-reference/openapi.json post /get_endpoint_logs/
Retrieves logs for a specific endpoint by name.
CLI Usage: `vastai get endpoint logs [--tail ]`
---
## Overview & quickstart
**URL:** llms-txt#overview-&-quickstart
**Contents:**
- PyPI Install
- Github
- Quickstart
- Usage
- Launching Instances
- Get Instance Info
- Starting Stopping
- Copy Data
- Destroy Instances
Source: https://docs.vast.ai/cli/get-started
<script
type="application/ld+json"
dangerouslySetInnerHTML={{
__html: JSON.stringify({
"@context": "https://schema.org",
"@type": "HowTo",
"name": "How to Get Started with Vast.ai CLI",
"description": "A quickstart guide to installing and using the Vast.ai Python CLI for managing GPU instances.",
"step": [
{
"@type": "HowToStep",
"name": "Install the CLI",
"text": "Install the latest stable PyPI release with: pip install vastai. Alternatively, get the very latest version directly from github with: wget https://raw.githubusercontent.com/vast-ai/vast-python/master/vast.py -O vast; chmod +x vast;"
},
{
"@type": "HowToStep",
"name": "Set Your API Key",
"text": "Login to the vast.ai website and get an api-key from https://cloud.vast.ai/cli/. Copy the command under the heading Login / Set API Key and run it. The command will be something like: vastai set api-key xxxxxxxxxxxxxxxxxxxxxxxxxxxxxxxxxxxxxxx. The set api-key command saves your api-key in a hidden file in your home directory. Do not share your api-keys with anyone."
},
{
"@type": "HowToStep",
"name": "Search for GPU Instances",
"text": "Use vastai search offers to find machines for rent. You can filter results with parameters like: vastai search offers 'compute_cap >= 800' or vastai search offers 'reliability > 0.99 num_gpus>=4' -o 'num_gpus-'. The search command supports all of the filters and sort options that the website GUI uses."
},
{
"@type": "HowToStep",
"name": "Create an Instance",
"text": "Create instances using the create instance command referencing an instance type ID returned from search offers. For example: vastai create instance 2459368 --image vastai/tensorflow --disk 32 --ssh --direct. Once created, the instance must first pull the image if not cached, then boots and transitions to the running state."
},
{
"@type": "HowToStep",
"name": "Manage Your Instances",
"text": "Use vastai show instances to view your instances. Use vastai start instance and vastai stop instance to control them. Stop an instance to avoid GPU charges while maintaining storage. Use vastai copy to move data between instances or cloud storage. When done, use vastai destroy instance to avoid ongoing storage charges."
}
]
})
}}
/>
We provide a python CLI (open-source) for a convenient interface to the rest API. You can use the --explain option with any CLI command and it will print out the underlying API calls.
You can install the latest stable PyPI release with:
Alternatively you can get the very latest version directly from github:
This repository contains the open source python command line interface for vast.ai.
This CLI has all of the functionality of the vast.ai website GUI and uses the same underlying REST API.
The CLI is self-contained in the single script file `vast.py`.
In order to authenticate most commands you will need to first login to the vast.ai website and get an api-key. Go to [https://cloud.vast.ai/cli/](https://cloud.vast.ai/cli/). Copy the command under the heading "Login / Set API Key" and run it. The command will be something like:
`vastai set api-key xxxxxxxxxxxxxxxxxxxxxxxxxxxxxxxxxxxxxxx`
where the `xxxx...` is a unique api-key (a long hexadecimal number).
Note that if the script is named "vast" in this command on the website and your installed script is named "vast.py" you will need to change the name of the script in the command you run.
The `set api-key` command saves your api-key in a hidden file in your home directory.
Do not share your api-keys with anyone as they authenticate commands from your account.
Your default main key allows full access to all commands without limitations, but you can use the CLI to create additional keys with [fine-grained access restrictions](/cli/installation).
For the most up to date help, use 'vast.py --help'. You can then get a list of the available commands. Each command also typically has help documentation:
To see how the API works you can use it to find machines for rent.
There are many parameters that can be used to filter the results. The search command supports all of the filters and sort options that the website GUI uses.
To find GPU instances with compute capability 8.0 or higher:
To find instances with a reliability score >= 0.99 and at least 4 gpus, ordering by num of gpus descending:
The output of this command at the time of this writing is
### Launching Instances
You create instances using the create instance command referencing an instance type ID returned from search offers.
So to create an ssh direct instance of type 2459368 (using the ID returned from the search above for 4x 3090 on machine 4637) with the vastai/tensorflow image and 32 GB of disk storage:
Once an instance is created, it then must first pull the image if it is not cached. After the image is loaded the instance boots and transititons to the running state.
You are charged for the resources you reserve. As storage is reserved at creation, storage charges begin when the instance is created and end only when it is destroyed.
GPU charges begin when the instance transitions to the running state, and end when it is stopped or destroyed.
### Get Instance Info
### Starting Stopping
You can stop an instance to avoid GPU charges, converting it into a storage unit - storage is usually very cheap compared to GPU.
Starting an existing instance takes only a second or less whereas creating a new instance can take much longer (to pull a large docker image), so maintaining a pool of stopped instances is useful for many applications.
You can [call stop/destroy instance from inside](/documentation/instances/docker-execution-environment) the instance using a special autogenerated instance apikey, to avoid exposing your main apikey.
You can copy data from a stopped instance to a running instance, to/from cloud storage, or to/from another machine.
### Destroy Instances
Once you are done with an instance make sure to destroy it to avoid ongoing storage charges.
**Examples:**
Example 1 (unknown):
```unknown
## Github
Alternatively you can get the very latest version directly from github:
```
Example 2 (unknown):
```unknown
This repository contains the open source python command line interface for vast.ai.
This CLI has all of the functionality of the vast.ai website GUI and uses the same underlying REST API.
The CLI is self-contained in the single script file `vast.py`.
## Quickstart
In order to authenticate most commands you will need to first login to the vast.ai website and get an api-key. Go to [https://cloud.vast.ai/cli/](https://cloud.vast.ai/cli/). Copy the command under the heading "Login / Set API Key" and run it. The command will be something like:
`vastai set api-key xxxxxxxxxxxxxxxxxxxxxxxxxxxxxxxxxxxxxxx`
where the `xxxx...` is a unique api-key (a long hexadecimal number).
Note that if the script is named "vast" in this command on the website and your installed script is named "vast.py" you will need to change the name of the script in the command you run.
The `set api-key` command saves your api-key in a hidden file in your home directory.
Do not share your api-keys with anyone as they authenticate commands from your account.
Your default main key allows full access to all commands without limitations, but you can use the CLI to create additional keys with [fine-grained access restrictions](/cli/installation).
## Usage
For the most up to date help, use 'vast.py --help'. You can then get a list of the available commands. Each command also typically has help documentation:
```
Example 3 (unknown):
```unknown
To see how the API works you can use it to find machines for rent.
```
Example 4 (unknown):
```unknown
There are many parameters that can be used to filter the results. The search command supports all of the filters and sort options that the website GUI uses.
To find GPU instances with compute capability 8.0 or higher:
```
---
## cancel copy
**URL:** llms-txt#cancel-copy
Source: https://docs.vast.ai/api-reference/instances/cancel-copy
api-reference/openapi.json delete /api/v0/commands/copy_direct/
Cancel a remote copy operation specified by the destination ID (dst_id).
CLI Usage: `vastai cancel copy --dst_id `
---
## Create Endpoints and Workergroups
**URL:** llms-txt#create-endpoints-and-workergroups
Source: https://docs.vast.ai/documentation/serverless/create-endpoints-and-workergroups
Learn how to create endpoints and workergroups in Vast.ai Serverless. Understand the inputs, outputs, and examples for creating endpoints and workergroups.
The `/endptjobs/` and `/workergroups/` endpoints calls on the webserver to create a new Endpoint and Workergroup.
---
## delete workergroup
**URL:** llms-txt#delete-workergroup
Source: https://docs.vast.ai/api-reference/serverless/delete-workergroup
api-reference/openapi.json delete /api/v0/workergroups/{id}/
Deletes an existing workergroup.
CLI Usage: `vastai delete workergroup `
---
## response, which itself is streaming, back to the client.
**URL:** llms-txt#response,-which-itself-is-streaming,-back-to-the-client.
---
## CLI Commands
**URL:** llms-txt#cli-commands
---
## Managing Instances
**URL:** llms-txt#managing-instances
**Contents:**
- Overview
- Instance Card Interface
- Main Status Button
- Instance Information
- Instance Operations
- Starting, Stopping, and Destroying
- Restart Behavior
- Additional Controls
- Data Management
- Connection Quick Reference
Source: https://docs.vast.ai/documentation/instances/manage-instances
Learn how to manage running instances - start, stop, destroy, monitor status, and handle common operational tasks.
The Instances page ([cloud.vast.ai/instances](https://cloud.vast.ai/instances)) is your central hub for managing rented instances. From here you can:
* View instance status and information
* Start, stop, and destroy instances
* Access connection details
* Monitor resource usage
* Transfer data between instances
## Instance Card Interface
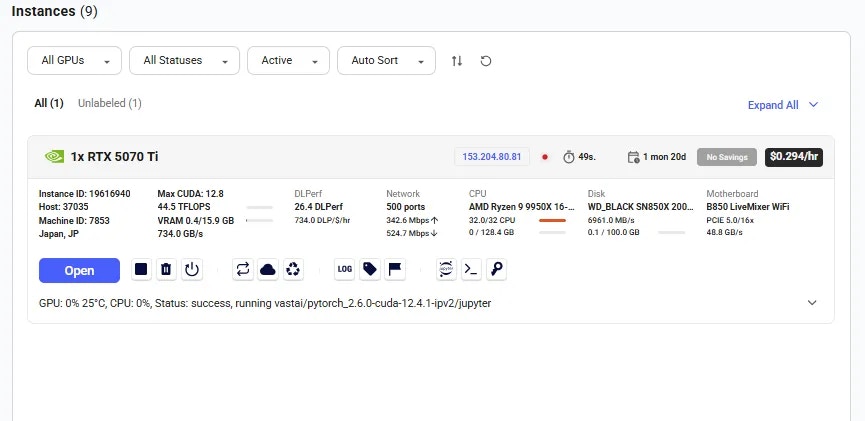 Each instance card displays comprehensive information about your rental:
### Main Status Button
Each instance card displays comprehensive information about your rental:
### Main Status Button
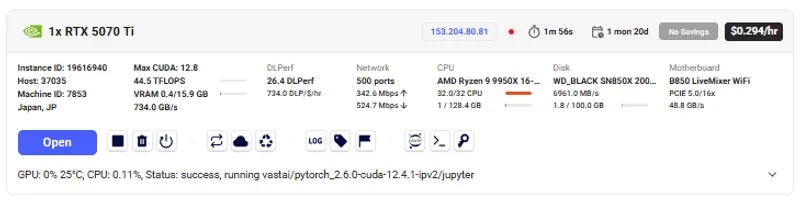 The main button (left side of card) shows instance status and provides quick access:
**Status Indicators:**
* **Open**: Instance loaded, click to access via browser
* **Connect**: Instance loaded, click for SSH info
* **Inactive**: Stopped but data preserved (can restart if GPU available)
* **Offline**: Machine disconnected from Vast servers
* **Scheduling**: Attempting to restart (waiting for GPU availability)
* **Creating**: Vast initiating instance creation
* **Loading**: Downloading Docker image
* **Connecting**: Docker running but connection not verified
### Instance Information
The main button (left side of card) shows instance status and provides quick access:
**Status Indicators:**
* **Open**: Instance loaded, click to access via browser
* **Connect**: Instance loaded, click for SSH info
* **Inactive**: Stopped but data preserved (can restart if GPU available)
* **Offline**: Machine disconnected from Vast servers
* **Scheduling**: Attempting to restart (waiting for GPU availability)
* **Creating**: Vast initiating instance creation
* **Loading**: Downloading Docker image
* **Connecting**: Docker running but connection not verified
### Instance Information
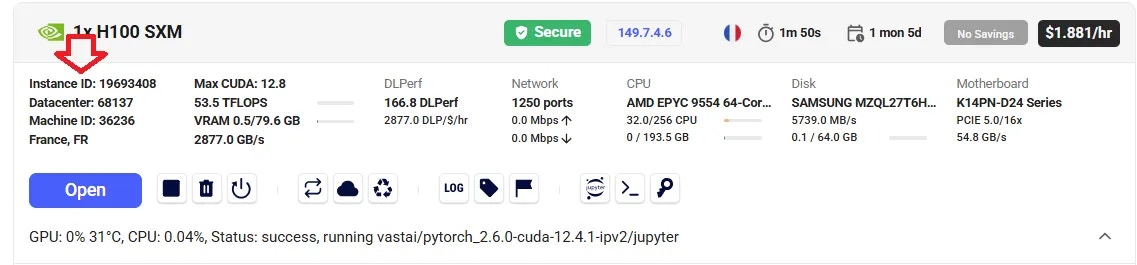 * Instance ID - Unique identifier for your instance
* Host/Datacenter ID - Provider identification
* Machine ID - Physical machine identifier
**Hardware Details:**
* Instance ID - Unique identifier for your instance
* Host/Datacenter ID - Provider identification
* Machine ID - Physical machine identifier
**Hardware Details:**
 * GPU model and count
* CPU and RAM allocation
* Storage capacity
* Network configuration
**Contract Info:**
* GPU model and count
* CPU and RAM allocation
* Storage capacity
* Network configuration
**Contract Info:**
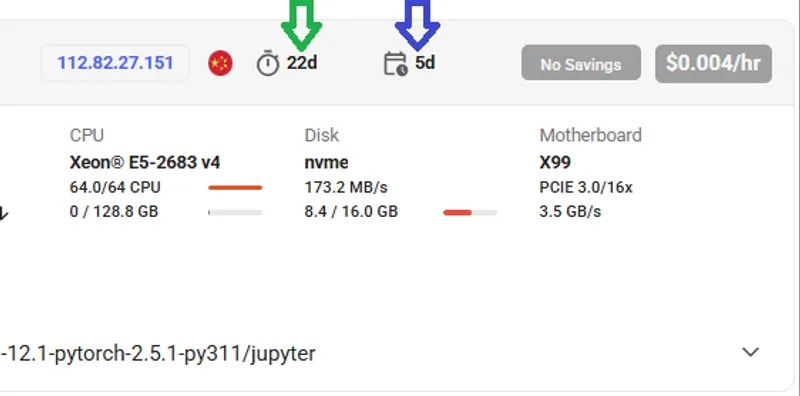 * Instance age (time since creation)
* Expiry date (contract end time)
* Remaining duration
## Instance Operations
### Starting, Stopping, and Destroying
* Instance age (time since creation)
* Expiry date (contract end time)
* Remaining duration
## Instance Operations
### Starting, Stopping, and Destroying
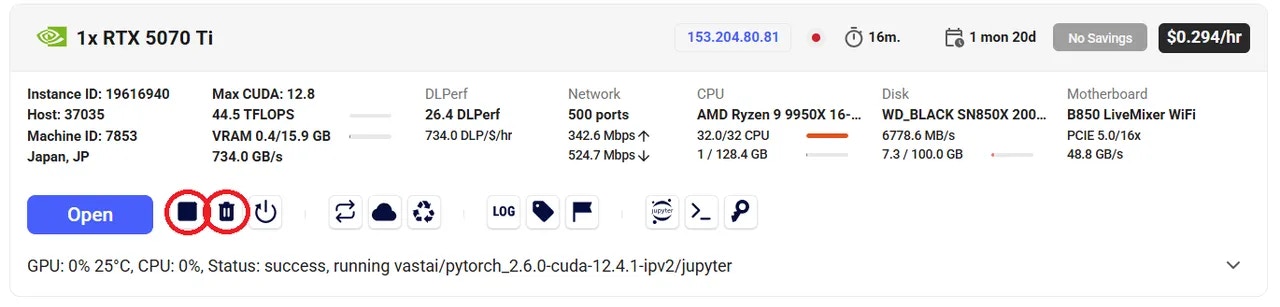 * **Stop Button** (square icon): Pauses instance, preserves data, continues storage charges
* **Destroy Button** (trash icon): Permanently deletes instance and all data
* **Restart Button** (play icon): Appears when stopped, attempts to reclaim GPU
**Important:** Stopped instances continue incurring storage charges. Destroy instances when no longer needed to avoid ongoing costs.
* **Stop Button** (square icon): Pauses instance, preserves data, continues storage charges
* **Destroy Button** (trash icon): Permanently deletes instance and all data
* **Restart Button** (play icon): Appears when stopped, attempts to reclaim GPU
**Important:** Stopped instances continue incurring storage charges. Destroy instances when no longer needed to avoid ongoing costs.
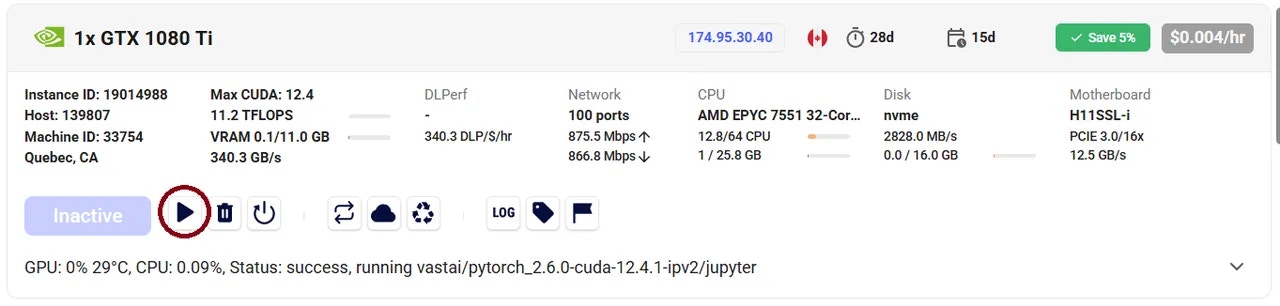 When restarting a stopped instance:
1. Instance enters `SCHEDULING` status
2. Waits for GPU availability
3. If stuck >30 seconds, GPU likely rented by another user
4. Cancel scheduling by clicking stop again
5. Consider creating new instance if GPU unavailable
### Additional Controls
When restarting a stopped instance:
1. Instance enters `SCHEDULING` status
2. Waits for GPU availability
3. If stuck >30 seconds, GPU likely rented by another user
4. Cancel scheduling by clicking stop again
5. Consider creating new instance if GPU unavailable
### Additional Controls
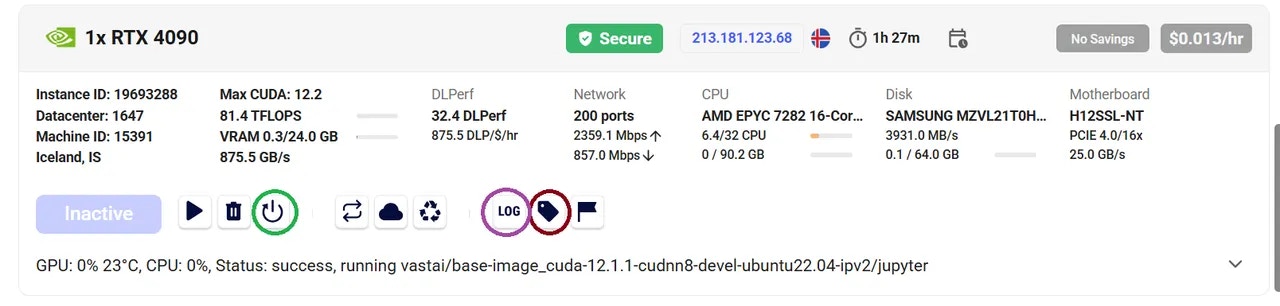 * **Label Instance** - Add custom name for identification
* **Reboot Instance** - Restart without data loss
* **View Logs** - Access Docker container logs
* **Label Instance** - Add custom name for identification
* **Reboot Instance** - Restart without data loss
* **View Logs** - Access Docker container logs
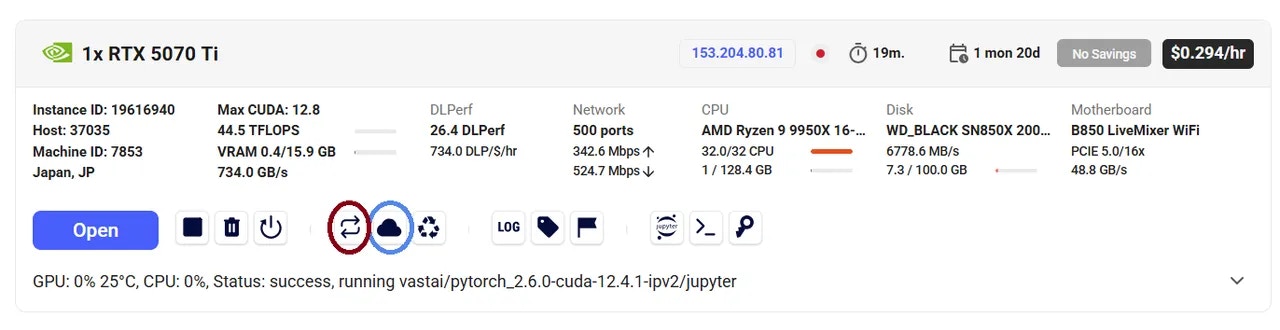 * **Copy Data** - Transfer between your instances (see [Data Movement](/documentation/instances/storage/data-movement))
* **Cloud Sync** - Sync with cloud providers (see [Cloud Sync](/documentation/instances/storage/cloud-sync))
Use Cloud Sync only on trusted datacenters (indicated by **Secure** icon).
## Connection Quick Reference
For detailed connection instructions, see [Connect to Instances](/documentation/instances/connect/overview):
* **SSH button** - Shows SSH command
* **Open button** - Launches web UI
* **IP/Ports button** - Network information
## Troubleshooting Instance States
### Instance Stuck on "Loading"
* Normal for 30 seconds with cached images
* Can take hours with slow internet/large images
* Not charged during loading
* Try machines with faster internet
### Instance Stuck on "Scheduling"
When stopped instances try to restart:
* GPU may be reassigned to other users
* High-priority jobs block restart
* May wait indefinitely for GPU availability
* Consider copying data to new instance
### Instance Stuck on "Connecting"
* Port configuration may be broken
* Report the machine
* Try different machine
### Machine Shows "Offline"
* Lost connection to Vast servers
* Often internet/power issues
* Host notified automatically
* May be maintenance or unforeseen problems
## Important Considerations
* **Stopped instances**: Data preserved, storage charges continue
* **Destroyed instances**: All data permanently deleted
* **Before destroying**: Copy important data or sync to cloud
### Contract Expiration
Expired instances may be deleted 48 hours after expiration. Expired instances cannot restart. Retrieve your data promptly.
* Hosts can technically access files on their machines
* For sensitive data, use verified datacenters
* Implement encryption for critical data
Some instances have dynamic IPs that may change. Check IP type via the IP button on instance card. For static IPs, filter by "Static IP Address" when searching.
### Can I run Docker inside my instance?
No, instances are already Docker containers. Docker-in-Docker is not supported.
### Do I pay for "Loading" instances?
No, you're not charged while instances show "Loading" status.
### Can I view past instances?
No, destroyed instances cannot be viewed. Recent template history is preserved for configuration reference.
### Why is my machine location showing only ", US"?
This means geolocation couldn't determine the state. It's not an indication of reliability.
### Can I run VMs or bare metal?
Currently only Docker containers are supported. VM and bare-metal options planned for future.
## Related Documentation
* [Instance Types](/documentation/instances/instance-types) - On-demand vs Reserved vs Interruptible
* [Storage Options](/documentation/instances/storage/types) - Managing disk space
* [Connection Methods](/documentation/instances/connect/overview) - SSH, Jupyter, and more
* [Templates](/documentation/instances/templates) - Instance configuration
---
## reboot instance
**URL:** llms-txt#reboot-instance
Source: https://docs.vast.ai/api-reference/instances/reboot-instance
api-reference/openapi.json put /api/v0/instances/reboot/{id}/
Stops and starts a container without losing GPU priority. Updates container status to 'rebooting' and executes docker stop/start commands on the host machine.
CLI Usage: `vastai reboot instance `
---
## Billing
**URL:** llms-txt#billing
**Contents:**
- Overview
- Negative Balances
- Auto Debit (credit card only)
- Update Frequency
- Credit Card Security
- Refunds
- Pricing
- Payment Integrations
Source: https://docs.vast.ai/documentation/reference/billing
<script
type="application/ld+json"
dangerouslySetInnerHTML={{
__html: JSON.stringify({
"@context": "https://schema.org",
"@type": "HowTo",
"name": "How to Manage Billing on Vast.ai",
"description": "A comprehensive guide to managing your Vast.ai billing, credits, payments, and understanding pricing.",
"step": [
{
"@type": "HowToStep",
"name": "Add Credits to Your Account",
"text": "Vast requires pre-payment of credits for GPU rentals. Accept credit card payments through Stripe and crypto payments through Crypto.com and Coinbase. Use the add credit button to purchase credits one-time. Before buying credit with Stripe you must add a card first."
},
{
"@type": "HowToStep",
"name": "Set Up Auto Debit (Optional)",
"text": "Set a balance threshold to configure auto debits, which will attempt to maintain your balance above the threshold by charging your card periodically. We recommend setting a threshold around your daily or weekly spend, and then setting a balance email notification threshold around 75% of that value."
},
{
"@type": "HowToStep",
"name": "Understand Pricing",
"text": "There are separate prices for Active rental (GPU), Storage costs, and Bandwidth costs. You are charged per second for active instances and storage. Stopping an instance does not avoid storage costs. Bandwidth is charged per byte. Hover over the price on instance cards to see pricing details. You are only charged for actual usage time - if you delete after 10 minutes, you only pay for 10 minutes."
},
{
"@type": "HowToStep",
"name": "Monitor Your Balance",
"text": "When balance reaches zero or below, instances are stopped automatically but not destroyed. Your credit card will be automatically charged periodically to cover any negative balance. If you do not have a payment method saved, instances and stored data will be deleted to prevent indefinite unpaid usage."
},
{
"@type": "HowToStep",
"name": "Manage Invoices and Refunds",
"text": "Set invoice information in the Invoice Info section. Generate billing history from the Billing page. For refunds: If you pay with credit card you can get a refund on unspent Vast credits. We do not refund Vast credits bought with crypto."
},
{
"@type": "HowToStep",
"name": "Transfer Credits",
"text": "Transfer your personal credits to a different account or team. To transfer to another user, you will need their email address (this action is irreversible). To transfer to a team, you should be a part of the team. To transfer from a team back to personal account, you must be the team owner."
}
]
})
}}
/>
<script
type="application/ld+json"
dangerouslySetInnerHTML={{
__html: JSON.stringify({
"@context": "https://schema.org",
"@type": "FAQPage",
"mainEntity": [
{
"@type": "Question",
"name": "If I rent a server and delete if after 10 minutes will I pay for 1 hour of usage or 10 minutes?",
"acceptedAnswer": {
"@type": "Answer",
"text": "You will only be charged for the 10 minutes of usage."
}
},
{
"@type": "Question",
"name": "Can I get a refund?",
"acceptedAnswer": {
"@type": "Answer",
"text": "If you pay with credit card you can get a refund on unspent Vast credits. We do not refund Vast credits bought with crypto."
}
},
{
"@type": "Question",
"name": "Why has the prices changed?",
"acceptedAnswer": {
"@type": "Answer",
"text": "Pricing is fixed by the host, and is specific to each machine and contract. You can refine your search and look for a machine that suits your needs."
}
},
{
"@type": "Question",
"name": "Why am I getting the error 'No such payment method id None.' when I try to add credit?",
"acceptedAnswer": {
"@type": "Answer",
"text": "Before buying credit with Stripe you must add a card!"
}
},
{
"@type": "Question",
"name": "Am I charged for 'Loading' instances?",
"acceptedAnswer": {
"@type": "Answer",
"text": "No, you are not charged when it says 'Loading'."
}
},
{
"@type": "Question",
"name": "What happens if my Vast balance is negative?",
"acceptedAnswer": {
"@type": "Answer",
"text": "If your account has a negative credit balance, your instances are stopped and can resume once you pay the balance owed."
}
},
{
"@type": "Question",
"name": "Why am I getting charge more per hour than expected?",
"acceptedAnswer": {
"@type": "Answer",
"text": "You may see your Vast credit decline at a greater rate than expected due to upload and downloads costs, which is not shown in your cost/hr or cost/day pricing breakdowns as it is charged on a usage basis and not a constant rate. You can find these rates for bandwidth usage in the Internet: section of the pricing details, which you can see when you hover over the price in the bottom right-hand corner of instance cards within the Instance console page. You can also see pricing detail before instance creation from hovering over the prices on the Search page. You can also get a detailed document of your billing history by Generate Billing History within the Billing page of the console."
}
}
]
})
}}
/>
Vast requires pre-payment of credits for GPU rentals. Once credits are purchased, they appear in your account balance.
We accept credit card payments through Stripe and crypto payments through Crypto.com and Coinbase. Use the add credit button to purchase credits one-time. Use the auto-debt feature to have the system automatically top up your account using a saved credit card when it runs low.
### Negative Balances
Vast does **not** immediately delete your instances or data when your account balance reaches zero.
* **When balance reaches zero (or below):**
* Your instances are **stopped automatically** but **not destroyed**.
* This ensures your data remains available so you can copy it off.
* However, since the data is still stored on the machine, you will continue to be billed for **storage on stopped instances** — even if your balance is negative.
* **If you have a payment method saved:**
* Your credit card will be automatically charged periodically to cover any negative balance.
* This allows you to restart and continue using your instances without losing data.
* **If you do not have a payment method saved:**
* The system cannot charge your account.
* Your instances and stored data will be **deleted** to prevent indefinite unpaid usage.
Important: Instances showing in your account are **never free**, even if your balance is negative or zero.
### Auto Debit (credit card only)
You can set a balance threshold to configure auto debits, which will attempt to maintain your balance above the threshold by charging your card periodically.
We recommend setting a threshold around your daily or weekly spend, and then setting an balance email notification threshold around 75% of that value, so that you get notified if the auto billing fails but long before your balance depletes to zero.
There is also an optional debit-mode feature which can be enabled by request for older accounts.
When debit-mode is enabled, your account balance is allowed to go negative (without immediately stopping your instances).
**WARNING**
Your card is charged automatically regardless of whether or not you have
debit-mode enabled. Instances are never free - even stopped instances have
storage charges. Make sure you delete instances when you are done with them -
otherwise, your card will continue to be periodically charged indefinitely.
Balances are updated about once every few seconds.
### Credit Card Security
Vast.ai does not see, store or process your credit card numbers, they are passed directly to Stripe (which you can verify in the javascript).
After spending credits, there are absolutely no refunds.
For unspent credits, contact us on the website chat to request a refund. In most cases we can refund unspent credits. Unfortunately Coinbase Commerce does not support refunds, so there are no refunds possible for credits purchased via Coinbase Commerce.
There are separate prices and charges for:
* Active rental (GPU) (in \$/hr)
* Storage costs (in $/GB/month or total $/hr)
* Bandwidth costs (in \$/TB)
You are charged the base active rental cost for every second your instance is in the active/connected state.
You are charged the storage cost (which depends on the size of your storage allocation) for every single second your instance exists and is online (for all states other than offline).
Stopping an instance does not avoid storage costs.
You are charged bandwidth prices for every byte sent or received to or from the instance, regardless of what state it is in.
The prices for base rental, storage, and bandwidth vary considerably from machine to machine, so make sure to check them.
You are not charged active rental or storage costs for instances that are currently offline.
To see a pricing breakdown on your current instances within your Instance page in the console or from offers on the Search page you can hover over the price to see pricing details.
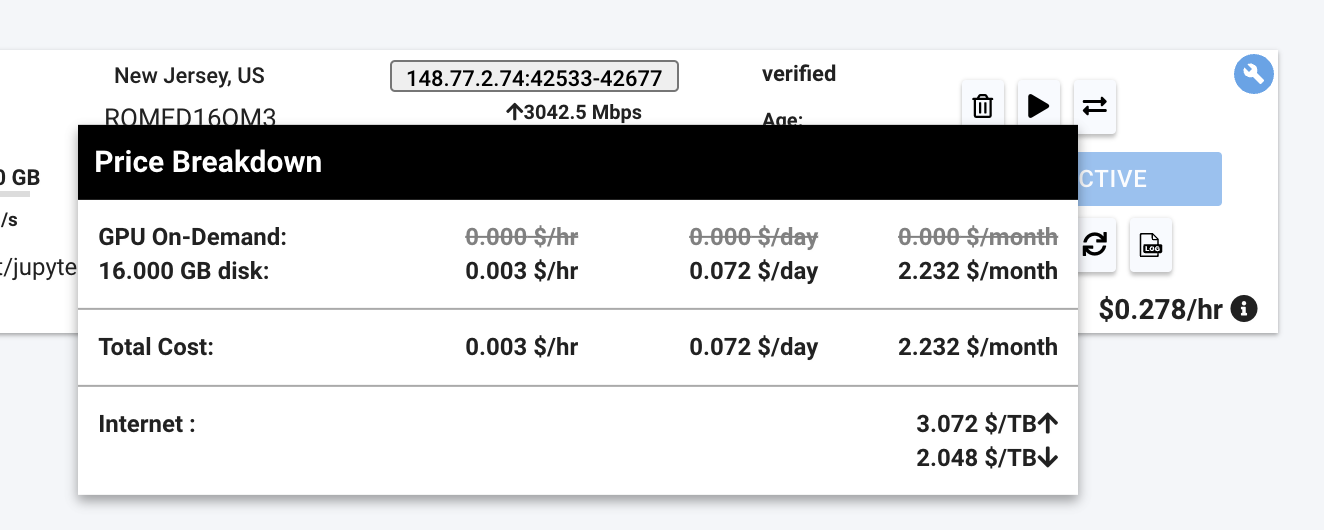
## Payment Integrations
We currently support major credit cards through stripe and crypto payments through Coinbase and crypto.com.
---
## API Introduction
**URL:** llms-txt#api-introduction
Source: https://docs.vast.ai/api-reference/introduction
Welcome to Vast.ai 's API documentation. Our API allows you to programmatically manage GPU instances, handle machine operations, and automate your AI/ML workflow. Whether you're running individual GPU instances or managing a fleet of machines, our API provides comprehensive control over all Vast.ai platform features.
View the Postman collection
---
## FAQ Overview
**URL:** llms-txt#faq-overview
Source: https://docs.vast.ai/documentation/reference/faq/index
Find answers to common questions about Vast.ai
<script
type="application/ld+json"
dangerouslySetInnerHTML={{
__html: JSON.stringify({
"@context": "https://schema.org",
"@type": "WebPage",
"name": "Vast.ai FAQ",
"description": "Frequently asked questions about Vast.ai",
"author": {
"@type": "Person",
"name": "Vast.ai Team"
},
"datePublished": "2025-10-10",
"dateModified": "2025-10-10"
})
}}
/>
Browse our frequently asked questions organized by topic.
Platform basics, advantages, and how Vast.ai works
Creating, managing, and configuring GPU instances
On-demand vs interruptible instances and pricing
Connecting to instances via Jupyter and SSH
Data protection and platform security
DLPerf scores, Docker, and advanced topics
---
## Serverless Parameters
**URL:** llms-txt#serverless-parameters
Source: https://docs.vast.ai/documentation/serverless/serverless-parameters
Learn about the parameters that can be configured for Vast.ai Serverless endpoints and worker groups.
The Vast.ai Serverless system has parameters that allow control over the scaling behavior.
---
## Templates
**URL:** llms-txt#templates
**Contents:**
- What is a Template?
- Recommended Templates
- Vast.ai Base Images
- Instance Portal
- Virtual Machine Templates
- Customizing Recommended Templates
- Next Steps
Source: https://docs.vast.ai/documentation/templates/introduction
## What is a Template?
A template is how Vast helps you launch an instance, setting up your rented machine with whatever software and formatting you need. Templates are generally used for launching instances through the web interface, but they can also be used in the CLI or through the API. In this document, we will focus on the web interface, but we will link to other relevant documentation throughout.
In the simplest technical terms, you can consider a template to be a wrapper around `docker run`. The template contains all of the information you want to pass to our systems to configure the environment.
You can browse the template section of the web interface at [cloud.vast.ai/templates](https://cloud.vast.ai/templates/)
## Recommended Templates
We provide several recommended templates to help you get started. These are pre-configured environments that you can use as-is, or you can tweak them to your own requirements.
It's a great idea to look at how these templates have been configured to guide you in creating your own.
### Vast.ai Base Images
Our recommended templates are built on Vast.ai base images like `vastai/base-image` and `vastai/pytorch`. You can find the source code on [`GitHub`](https://github.com/vast-ai/base-image/).
These are large Docker images that contain CUDA development libraries, node + npm, OpenCL and other useful libraries. Despite their large size you'll find they generally start quickly because they have been cached on many of the host machines.
**Why use Vast.ai base images?**
* **Faster cold boots** due to frequent caching on host machines
* **Built-in security features** through Caddy proxy
* **Automatic TLS encryption** for web services
* **Authentication token protection** for all services
* **Proper isolation** between external and internal services
* **Instance Portal** integration (explained below)
* **PROVISIONING\_SCRIPT** support for easy customization
When you click the Open button on an instance running one of our recommended templates, you'll see the Instance Portal:
* **Copy Data** - Transfer between your instances (see [Data Movement](/documentation/instances/storage/data-movement))
* **Cloud Sync** - Sync with cloud providers (see [Cloud Sync](/documentation/instances/storage/cloud-sync))
Use Cloud Sync only on trusted datacenters (indicated by **Secure** icon).
## Connection Quick Reference
For detailed connection instructions, see [Connect to Instances](/documentation/instances/connect/overview):
* **SSH button** - Shows SSH command
* **Open button** - Launches web UI
* **IP/Ports button** - Network information
## Troubleshooting Instance States
### Instance Stuck on "Loading"
* Normal for 30 seconds with cached images
* Can take hours with slow internet/large images
* Not charged during loading
* Try machines with faster internet
### Instance Stuck on "Scheduling"
When stopped instances try to restart:
* GPU may be reassigned to other users
* High-priority jobs block restart
* May wait indefinitely for GPU availability
* Consider copying data to new instance
### Instance Stuck on "Connecting"
* Port configuration may be broken
* Report the machine
* Try different machine
### Machine Shows "Offline"
* Lost connection to Vast servers
* Often internet/power issues
* Host notified automatically
* May be maintenance or unforeseen problems
## Important Considerations
* **Stopped instances**: Data preserved, storage charges continue
* **Destroyed instances**: All data permanently deleted
* **Before destroying**: Copy important data or sync to cloud
### Contract Expiration
Expired instances may be deleted 48 hours after expiration. Expired instances cannot restart. Retrieve your data promptly.
* Hosts can technically access files on their machines
* For sensitive data, use verified datacenters
* Implement encryption for critical data
Some instances have dynamic IPs that may change. Check IP type via the IP button on instance card. For static IPs, filter by "Static IP Address" when searching.
### Can I run Docker inside my instance?
No, instances are already Docker containers. Docker-in-Docker is not supported.
### Do I pay for "Loading" instances?
No, you're not charged while instances show "Loading" status.
### Can I view past instances?
No, destroyed instances cannot be viewed. Recent template history is preserved for configuration reference.
### Why is my machine location showing only ", US"?
This means geolocation couldn't determine the state. It's not an indication of reliability.
### Can I run VMs or bare metal?
Currently only Docker containers are supported. VM and bare-metal options planned for future.
## Related Documentation
* [Instance Types](/documentation/instances/instance-types) - On-demand vs Reserved vs Interruptible
* [Storage Options](/documentation/instances/storage/types) - Managing disk space
* [Connection Methods](/documentation/instances/connect/overview) - SSH, Jupyter, and more
* [Templates](/documentation/instances/templates) - Instance configuration
---
## reboot instance
**URL:** llms-txt#reboot-instance
Source: https://docs.vast.ai/api-reference/instances/reboot-instance
api-reference/openapi.json put /api/v0/instances/reboot/{id}/
Stops and starts a container without losing GPU priority. Updates container status to 'rebooting' and executes docker stop/start commands on the host machine.
CLI Usage: `vastai reboot instance `
---
## Billing
**URL:** llms-txt#billing
**Contents:**
- Overview
- Negative Balances
- Auto Debit (credit card only)
- Update Frequency
- Credit Card Security
- Refunds
- Pricing
- Payment Integrations
Source: https://docs.vast.ai/documentation/reference/billing
<script
type="application/ld+json"
dangerouslySetInnerHTML={{
__html: JSON.stringify({
"@context": "https://schema.org",
"@type": "HowTo",
"name": "How to Manage Billing on Vast.ai",
"description": "A comprehensive guide to managing your Vast.ai billing, credits, payments, and understanding pricing.",
"step": [
{
"@type": "HowToStep",
"name": "Add Credits to Your Account",
"text": "Vast requires pre-payment of credits for GPU rentals. Accept credit card payments through Stripe and crypto payments through Crypto.com and Coinbase. Use the add credit button to purchase credits one-time. Before buying credit with Stripe you must add a card first."
},
{
"@type": "HowToStep",
"name": "Set Up Auto Debit (Optional)",
"text": "Set a balance threshold to configure auto debits, which will attempt to maintain your balance above the threshold by charging your card periodically. We recommend setting a threshold around your daily or weekly spend, and then setting a balance email notification threshold around 75% of that value."
},
{
"@type": "HowToStep",
"name": "Understand Pricing",
"text": "There are separate prices for Active rental (GPU), Storage costs, and Bandwidth costs. You are charged per second for active instances and storage. Stopping an instance does not avoid storage costs. Bandwidth is charged per byte. Hover over the price on instance cards to see pricing details. You are only charged for actual usage time - if you delete after 10 minutes, you only pay for 10 minutes."
},
{
"@type": "HowToStep",
"name": "Monitor Your Balance",
"text": "When balance reaches zero or below, instances are stopped automatically but not destroyed. Your credit card will be automatically charged periodically to cover any negative balance. If you do not have a payment method saved, instances and stored data will be deleted to prevent indefinite unpaid usage."
},
{
"@type": "HowToStep",
"name": "Manage Invoices and Refunds",
"text": "Set invoice information in the Invoice Info section. Generate billing history from the Billing page. For refunds: If you pay with credit card you can get a refund on unspent Vast credits. We do not refund Vast credits bought with crypto."
},
{
"@type": "HowToStep",
"name": "Transfer Credits",
"text": "Transfer your personal credits to a different account or team. To transfer to another user, you will need their email address (this action is irreversible). To transfer to a team, you should be a part of the team. To transfer from a team back to personal account, you must be the team owner."
}
]
})
}}
/>
<script
type="application/ld+json"
dangerouslySetInnerHTML={{
__html: JSON.stringify({
"@context": "https://schema.org",
"@type": "FAQPage",
"mainEntity": [
{
"@type": "Question",
"name": "If I rent a server and delete if after 10 minutes will I pay for 1 hour of usage or 10 minutes?",
"acceptedAnswer": {
"@type": "Answer",
"text": "You will only be charged for the 10 minutes of usage."
}
},
{
"@type": "Question",
"name": "Can I get a refund?",
"acceptedAnswer": {
"@type": "Answer",
"text": "If you pay with credit card you can get a refund on unspent Vast credits. We do not refund Vast credits bought with crypto."
}
},
{
"@type": "Question",
"name": "Why has the prices changed?",
"acceptedAnswer": {
"@type": "Answer",
"text": "Pricing is fixed by the host, and is specific to each machine and contract. You can refine your search and look for a machine that suits your needs."
}
},
{
"@type": "Question",
"name": "Why am I getting the error 'No such payment method id None.' when I try to add credit?",
"acceptedAnswer": {
"@type": "Answer",
"text": "Before buying credit with Stripe you must add a card!"
}
},
{
"@type": "Question",
"name": "Am I charged for 'Loading' instances?",
"acceptedAnswer": {
"@type": "Answer",
"text": "No, you are not charged when it says 'Loading'."
}
},
{
"@type": "Question",
"name": "What happens if my Vast balance is negative?",
"acceptedAnswer": {
"@type": "Answer",
"text": "If your account has a negative credit balance, your instances are stopped and can resume once you pay the balance owed."
}
},
{
"@type": "Question",
"name": "Why am I getting charge more per hour than expected?",
"acceptedAnswer": {
"@type": "Answer",
"text": "You may see your Vast credit decline at a greater rate than expected due to upload and downloads costs, which is not shown in your cost/hr or cost/day pricing breakdowns as it is charged on a usage basis and not a constant rate. You can find these rates for bandwidth usage in the Internet: section of the pricing details, which you can see when you hover over the price in the bottom right-hand corner of instance cards within the Instance console page. You can also see pricing detail before instance creation from hovering over the prices on the Search page. You can also get a detailed document of your billing history by Generate Billing History within the Billing page of the console."
}
}
]
})
}}
/>
Vast requires pre-payment of credits for GPU rentals. Once credits are purchased, they appear in your account balance.
We accept credit card payments through Stripe and crypto payments through Crypto.com and Coinbase. Use the add credit button to purchase credits one-time. Use the auto-debt feature to have the system automatically top up your account using a saved credit card when it runs low.
### Negative Balances
Vast does **not** immediately delete your instances or data when your account balance reaches zero.
* **When balance reaches zero (or below):**
* Your instances are **stopped automatically** but **not destroyed**.
* This ensures your data remains available so you can copy it off.
* However, since the data is still stored on the machine, you will continue to be billed for **storage on stopped instances** — even if your balance is negative.
* **If you have a payment method saved:**
* Your credit card will be automatically charged periodically to cover any negative balance.
* This allows you to restart and continue using your instances without losing data.
* **If you do not have a payment method saved:**
* The system cannot charge your account.
* Your instances and stored data will be **deleted** to prevent indefinite unpaid usage.
Important: Instances showing in your account are **never free**, even if your balance is negative or zero.
### Auto Debit (credit card only)
You can set a balance threshold to configure auto debits, which will attempt to maintain your balance above the threshold by charging your card periodically.
We recommend setting a threshold around your daily or weekly spend, and then setting an balance email notification threshold around 75% of that value, so that you get notified if the auto billing fails but long before your balance depletes to zero.
There is also an optional debit-mode feature which can be enabled by request for older accounts.
When debit-mode is enabled, your account balance is allowed to go negative (without immediately stopping your instances).
**WARNING**
Your card is charged automatically regardless of whether or not you have
debit-mode enabled. Instances are never free - even stopped instances have
storage charges. Make sure you delete instances when you are done with them -
otherwise, your card will continue to be periodically charged indefinitely.
Balances are updated about once every few seconds.
### Credit Card Security
Vast.ai does not see, store or process your credit card numbers, they are passed directly to Stripe (which you can verify in the javascript).
After spending credits, there are absolutely no refunds.
For unspent credits, contact us on the website chat to request a refund. In most cases we can refund unspent credits. Unfortunately Coinbase Commerce does not support refunds, so there are no refunds possible for credits purchased via Coinbase Commerce.
There are separate prices and charges for:
* Active rental (GPU) (in \$/hr)
* Storage costs (in $/GB/month or total $/hr)
* Bandwidth costs (in \$/TB)
You are charged the base active rental cost for every second your instance is in the active/connected state.
You are charged the storage cost (which depends on the size of your storage allocation) for every single second your instance exists and is online (for all states other than offline).
Stopping an instance does not avoid storage costs.
You are charged bandwidth prices for every byte sent or received to or from the instance, regardless of what state it is in.
The prices for base rental, storage, and bandwidth vary considerably from machine to machine, so make sure to check them.
You are not charged active rental or storage costs for instances that are currently offline.
To see a pricing breakdown on your current instances within your Instance page in the console or from offers on the Search page you can hover over the price to see pricing details.

## Payment Integrations
We currently support major credit cards through stripe and crypto payments through Coinbase and crypto.com.
---
## API Introduction
**URL:** llms-txt#api-introduction
Source: https://docs.vast.ai/api-reference/introduction
Welcome to Vast.ai 's API documentation. Our API allows you to programmatically manage GPU instances, handle machine operations, and automate your AI/ML workflow. Whether you're running individual GPU instances or managing a fleet of machines, our API provides comprehensive control over all Vast.ai platform features.
View the Postman collection
---
## FAQ Overview
**URL:** llms-txt#faq-overview
Source: https://docs.vast.ai/documentation/reference/faq/index
Find answers to common questions about Vast.ai
<script
type="application/ld+json"
dangerouslySetInnerHTML={{
__html: JSON.stringify({
"@context": "https://schema.org",
"@type": "WebPage",
"name": "Vast.ai FAQ",
"description": "Frequently asked questions about Vast.ai",
"author": {
"@type": "Person",
"name": "Vast.ai Team"
},
"datePublished": "2025-10-10",
"dateModified": "2025-10-10"
})
}}
/>
Browse our frequently asked questions organized by topic.
Platform basics, advantages, and how Vast.ai works
Creating, managing, and configuring GPU instances
On-demand vs interruptible instances and pricing
Connecting to instances via Jupyter and SSH
Data protection and platform security
DLPerf scores, Docker, and advanced topics
---
## Serverless Parameters
**URL:** llms-txt#serverless-parameters
Source: https://docs.vast.ai/documentation/serverless/serverless-parameters
Learn about the parameters that can be configured for Vast.ai Serverless endpoints and worker groups.
The Vast.ai Serverless system has parameters that allow control over the scaling behavior.
---
## Templates
**URL:** llms-txt#templates
**Contents:**
- What is a Template?
- Recommended Templates
- Vast.ai Base Images
- Instance Portal
- Virtual Machine Templates
- Customizing Recommended Templates
- Next Steps
Source: https://docs.vast.ai/documentation/templates/introduction
## What is a Template?
A template is how Vast helps you launch an instance, setting up your rented machine with whatever software and formatting you need. Templates are generally used for launching instances through the web interface, but they can also be used in the CLI or through the API. In this document, we will focus on the web interface, but we will link to other relevant documentation throughout.
In the simplest technical terms, you can consider a template to be a wrapper around `docker run`. The template contains all of the information you want to pass to our systems to configure the environment.
You can browse the template section of the web interface at [cloud.vast.ai/templates](https://cloud.vast.ai/templates/)
## Recommended Templates
We provide several recommended templates to help you get started. These are pre-configured environments that you can use as-is, or you can tweak them to your own requirements.
It's a great idea to look at how these templates have been configured to guide you in creating your own.
### Vast.ai Base Images
Our recommended templates are built on Vast.ai base images like `vastai/base-image` and `vastai/pytorch`. You can find the source code on [`GitHub`](https://github.com/vast-ai/base-image/).
These are large Docker images that contain CUDA development libraries, node + npm, OpenCL and other useful libraries. Despite their large size you'll find they generally start quickly because they have been cached on many of the host machines.
**Why use Vast.ai base images?**
* **Faster cold boots** due to frequent caching on host machines
* **Built-in security features** through Caddy proxy
* **Automatic TLS encryption** for web services
* **Authentication token protection** for all services
* **Proper isolation** between external and internal services
* **Instance Portal** integration (explained below)
* **PROVISIONING\_SCRIPT** support for easy customization
When you click the Open button on an instance running one of our recommended templates, you'll see the Instance Portal:
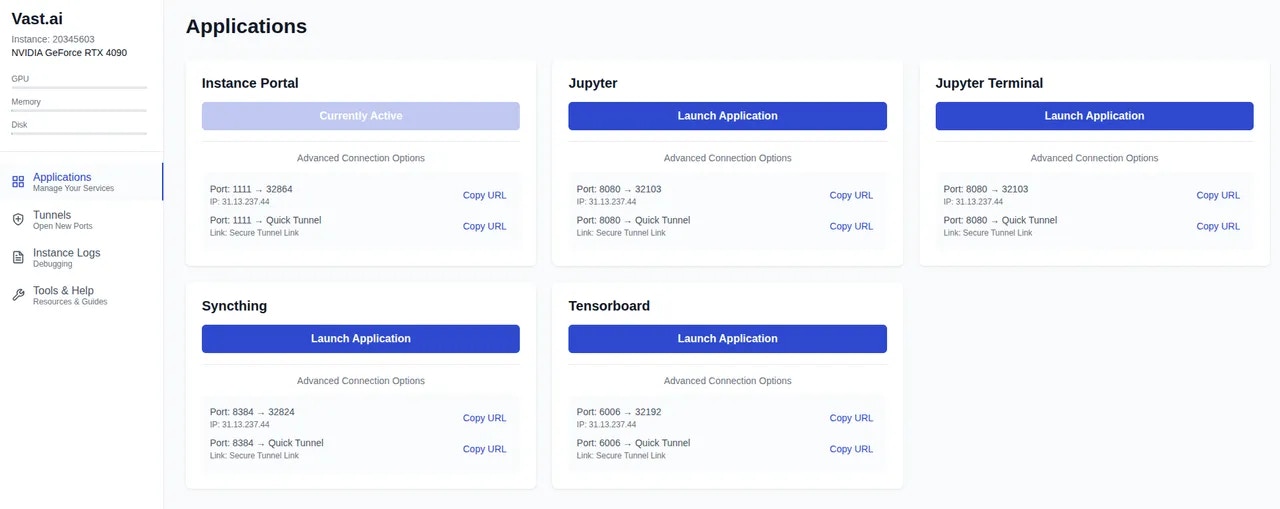 The **Instance Portal** provides easy access links to services running in your instance. It places an authentication layer in front of these services to prevent access by anyone who does not have the correct authentication token. You can also create tunnels to your services without exposing ports.
Full documentation for the Instance Portal is available in our [Instance Portal guide](/documentation/instances/instance-portal).
### Virtual Machine Templates
In addition to standard Docker container templates, we also offer Virtual Machine (VM) templates. These launch a full virtual machine environment rather than a docker container.
**When to use VM templates:**
* Run applications that require namespace support
* Run more than one Docker container in an instance
* Load kernel modules or run profiling jobs
* Mount remote drives with rclone or similar
You can edit VM templates just like regular templates, but you should not change the docker image field. Only the images we distribute from `docker.io/vastai/kvm` will work.
### Customizing Recommended Templates
To learn how to customize our recommended templates with provisioning scripts or build your own custom Docker images, see our [Advanced Setup](/documentation/templates/advanced-setup) guide.
Ready to start using templates? Here's what you can do:
* **Try it now** - Follow our [Quick Start](/documentation/templates/quickstart) guide to run your first template in minutes
* **Create your own** - See [Creating Templates](/documentation/templates/creating-templates) to build a custom template
* **Learn more** - Explore [Advanced Setup](/documentation/templates/advanced-setup) for provisioning scripts and custom Docker images
---
## add network-disk
**URL:** llms-txt#add-network-disk
Source: https://docs.vast.ai/api-reference/network-volumes/add-network-disk
api-reference/openapi.json post /api/v0/network_disk/
Adds a network disk to be used to create network volume offers, or adds machines to an existing network disk.
CLI Usage: `vastai add network_disk ... [options]`
---
## CUDA Programming on Vast.ai
**URL:** llms-txt#cuda-programming-on-vast.ai
**Contents:**
- Introduction
- Prerequisites
- Setup
- 1. Selecting the Right Template
- 2. Edit the Template and Select Template
- 2. Create Your Instance
- 3. Connecting to Your Instance
- Installation
- Setting Up Your Development Environment
- Configuring Your Workspace
This guide walks you through setting up and running CUDA applications on Vast.ai's cloud platform. You'll learn how to set up a CUDA development environment, connect to your instance, and develop CUDA applications efficiently using NVIDIA's development tools.
* A Vast.ai account
* Basic familiarity with CUDA programming concepts
* Basic knowledge of Linux command line
* [(Optional) Install TLS Certificate for Jupyter](/documentation/instances/jupyter)
* [(Optional) SSH client installed on your local machine and SSH public key added the Keys section at cloud.vast.ai](/documentation/instances/sshscp)
* [(Optional) Vast-cli installed on your local machine for command-line management](/cli/get-started)
* [(Optional) Docker knowledge for customizing development environments](https://docs.docker.com/get-started/)
### 1. Selecting the Right Template
Navigate to the [Templates tab](https://cloud.vast.ai/templates/) to view recommended templates.
Search for [NVIDIA CUDA](https://cloud.vast.ai?ref_id=62897\&template_id=61e14a0dd1f97aa0aa6719d20bc9b02e) template if:
* You need a standard CUDA development environment
* You want pre-configured security features (TLS, authentication)
* You require Jupyter notebook integration
* You need additional development tools like Tensorboard
[Make a custom CUDA template](/documentation/templates/creating-templates) if:
* You need a specific CUDA or Python version
* You have special library requirements
* You want to minimize image size for faster instance startup
### 2. Edit the Template and Select Template
You can edit the template to use Jupyter launch mode if:
* You're behind a corporate firewall that blocks SSH
* You prefer browser-based development
* You want persistent terminal sessions that survive browser disconnects
* You need quick access without SSH client setup
* You want to combine CUDA development with notebook documentation
* You plan to switch between multiple terminal sessions in the browser
You can edit the template to use SSH launch mode if:
* You're using [VSCode Remote-SSH](https://code.visualstudio.com/docs/remote/ssh) or other IDE integrations
* You need lowest possible terminal latency
* You prefer using your local terminal emulator
* You want to use advanced terminal features like tmux
* You're doing extensive command-line development
* You need to transfer files frequently using scp or rsync
### 2. Create Your Instance
Select your desired GPU configuration based on your computational needs from the [Search tab](https://cloud.vast.ai/create/). For CUDA development, consider:
* System Requirements:
* RAM: Minimum 16GB for development tools
* Storage: 10GB is usually sufficient
* CUDA Toolkit core: \~2GB
* Development files and builds: \~3-4GB
* Room for source code and dependencies: \~4GB
* CPU: 4+ cores recommended for compilation
* Network: 100+ Mbps for remote development
Rent the GPU of your choice.
### 3. Connecting to Your Instance
Go to [Instances tab](https://cloud.vast.ai/instances/) to see your instance being created. There are multiple ways to connect to your instance:
* If Jupyter launch mode is selected in your template:
* Click the "OPEN" button or "Jupyter" button on your instance card
* Access a full development environment with notebook support
* If you selected SSH launch mode:
* Click Open Terminal Access button
* Copy Direct ssh connect string contents that looks like this "ssh -p 12345 root\@123.456.789.10 -L 8080:localhost:8080"
* You take the ssh command and execute in your terminal in your [Mac or Linux-based computer or in Powershell](/documentation/instances/sshscp)
* You can use [Powershell or Windows Putty tools](/documentation/instances/sshscp) if you have a Windows computer
### Setting Up Your Development Environment
1. The base environment includes:
* CUDA toolkit and development tools
* Python with common ML libraries
* Development utilities (gcc, make, etc.)
2. Install additional CUDA dependencies:
### Configuring Your Workspace
1. Navigate to your workspace:
1. Set up CUDA environment variables:
### Common Issues and Solutions
* Check if GPU is detectable: `nvidia-smi`
If output like "No devices were found" shows up, report the machine after clicking on the wrench icon and rent a different machine.
### Development Workflow
* Code Organization
* Keep source files in `${WORKSPACE}`
* Use version control for code management
* Maintain separate directories for builds and source
* Performance Optimization
* Use proper CUDA stream management
* Optimize memory transfers
* Profile code using NVIDIA tools
### Custom Environment Setup
Create a provisioning script for custom environment setup:
### Remote Development Setup
Configure VS Code or other IDEs for [remote development](https://code.visualstudio.com/docs/remote/ssh):
* Use SSH port forwarding for secure connections
* Configure development tools to use remote CUDA compiler
* Set up source synchronization using Syncthing
You now have a fully configured CUDA development environment on Vast.ai. This setup provides the flexibility of cloud GPU resources with the convenience of local development.
## Additional Resources
* [NVIDIA CUDA Documentation](https://docs.nvidia.com/cuda/)
* [Vast.ai Documentation](https://vast.ai/docs/)
* [CUDA Sample Projects](https://github.com/NVIDIA/cuda-samples)
**Examples:**
Example 1 (unknown):
```unknown
### Configuring Your Workspace
1. Navigate to your workspace:
```
Example 2 (unknown):
```unknown
1. Set up CUDA environment variables:
```
Example 3 (unknown):
```unknown
## Troubleshooting
### Common Issues and Solutions
CUDA not found:
* Check if GPU is detectable: `nvidia-smi`
```
Example 4 (unknown):
```unknown
If output like "No devices were found" shows up, report the machine after clicking on the wrench icon and rent a different machine.
## Best Practices
### Development Workflow
* Code Organization
* Keep source files in `${WORKSPACE}`
* Use version control for code management
* Maintain separate directories for builds and source
* Performance Optimization
* Use proper CUDA stream management
* Optimize memory transfers
* Profile code using NVIDIA tools
## Advanced Topics
### Custom Environment Setup
Create a provisioning script for custom environment setup:
```
---
## Port mapping
**URL:** llms-txt#port-mapping
-p 8080:8080 -p 8081:8081
---
## Install your applications into /opt/workspace-internal/
**URL:** llms-txt#install-your-applications-into-/opt/workspace-internal/
---
## show api keys
**URL:** llms-txt#show-api-keys
Source: https://docs.vast.ai/api-reference/accounts/show-api-keys
api-reference/openapi.json get /api/v0/auth/apikeys/
Retrieves all API keys associated with the authenticated user.
CLI Usage: `vastai show api-keys`
---
## show ipaddrs
**URL:** llms-txt#show-ipaddrs
Source: https://docs.vast.ai/api-reference/accounts/show-ipaddrs
api-reference/openapi.json get /api/v0/users/{user_id}/ipaddrs/
This endpoint retrieves the history of IP address accesses for the authenticated user.
CLI Usage: `vastai show ipaddrs`
---
## create instance
**URL:** llms-txt#create-instance
Source: https://docs.vast.ai/api-reference/instances/create-instance
api-reference/openapi.json put /api/v0/asks/{id}/
Creates a new instance by accepting an "ask" contract from a provider.
This is the main endpoint for launching new instances on Vast.ai.
CLI Usage: `vastai create instance [options]`
---
## Install additional dependencies
**URL:** llms-txt#install-additional-dependencies
RUN pip install wandb tensorboard
---
## show subaccounts
**URL:** llms-txt#show-subaccounts
Source: https://docs.vast.ai/api-reference/accounts/show-subaccounts
api-reference/openapi.json get /api/v0/subaccounts/
Retrieve a list of subaccounts associated with the authenticated user's account.
CLI Usage: `vastai show subaccounts`
---
## list volumes
**URL:** llms-txt#list-volumes
Source: https://docs.vast.ai/api-reference/volumes/list-volumes
api-reference/openapi.json get /api/v0/volumes/
Retrieve information about all volumes rented by you.
CLI Usage: `vastai show volumes`
---
## [https://run.vast.ai/get\_endpoint\_workers/](https://run.vast.ai/get_endpoint_workers/)
**URL:** llms-txt#[https://run.vast.ai/get\_endpoint\_workers/](https://run.vast.ai/get_endpoint_workers/)
**Contents:**
- Inputs
- Outputs
- Example
* `id` (int): The id value of the Endpoint.
* `api_key` (string): The Vast API key associated with the account that controls the Endpoint.
The `api_key` could alternatively be provided in the request header as a bearer token.
For each GPU instance in the Endpoint, the following will be returned:
* `cur_load`(float): Current load (as defined by the PyWorker) the GPU instance is receiving per second.
* `cur_load_rolling_avg`(float): Rolling average of `cur_load`.
* `cur_perf`(float): The most recent or current operational performance level of the instance (as defined by the PyWorker). For example, a text generation model has the units of tokens generated per second.
* `disk_usage`(float): Storage used by instance (in Gb).
* `dlperf`(float): Measured DLPerf of the instance. DLPerf is explained [here.](/documentation/reference/faq/index)
* `id`(int): Instance ID.
* `loaded_at`(float): Unix epoch time the instance finished loading.
* `measured_perf`(float): Benchmarked performances (tokens/s). Set to DLPerf if instance is not benchmarked.
* `perf`(float): `measured_perf` \* `reliability`.
* `reliability`(float): Uptime of the instance, ranges 0-1.
* `reqs_working`(int): Number of active requests currently being processed by the instance.
* `status`(string): Current status of the worker.
Run the following Bash command in a terminal to receive Endpoint workers.
**Examples:**
Example 1 (unknown):
```unknown
## Outputs
For each GPU instance in the Endpoint, the following will be returned:
* `cur_load`(float): Current load (as defined by the PyWorker) the GPU instance is receiving per second.
* `cur_load_rolling_avg`(float): Rolling average of `cur_load`.
* `cur_perf`(float): The most recent or current operational performance level of the instance (as defined by the PyWorker). For example, a text generation model has the units of tokens generated per second.
* `disk_usage`(float): Storage used by instance (in Gb).
* `dlperf`(float): Measured DLPerf of the instance. DLPerf is explained [here.](/documentation/reference/faq/index)
* `id`(int): Instance ID.
* `loaded_at`(float): Unix epoch time the instance finished loading.
* `measured_perf`(float): Benchmarked performances (tokens/s). Set to DLPerf if instance is not benchmarked.
* `perf`(float): `measured_perf` \* `reliability`.
* `reliability`(float): Uptime of the instance, ranges 0-1.
* `reqs_working`(int): Number of active requests currently being processed by the instance.
* `status`(string): Current status of the worker.
```
Example 2 (unknown):
```unknown
## Example
Run the following Bash command in a terminal to receive Endpoint workers.
```
---
## VMs
**URL:** llms-txt#vms
Source: https://docs.vast.ai/vms
**WARNING:**
VMs interface much more directly with hardware than Docker containers.
Proper VM support is very sensitive to hardware setup.
This guide covers the configuration steps needed to enable support for Vast VMs on most setups, but is not and cannot be exhausitve.
---
## show earnings
**URL:** llms-txt#show-earnings
Source: https://docs.vast.ai/api-reference/billing/show-earnings
api-reference/openapi.json get /api/v0/users/{user_id}/machine-earnings/
Retrieves the earnings history for a specified time range and optionally per machine.
CLI Usage: `vastai show earnings [options]`
---
## create network-volume
**URL:** llms-txt#create-network-volume
Source: https://docs.vast.ai/api-reference/network-volumes/create-network-volume
api-reference/openapi.json put /api/v0/network_volume/
Creates a network volume from an offer.
CLI Usage: `vastai create network-volume [--name ]`
---
## Security FAQ
**URL:** llms-txt#security-faq
**Contents:**
- Data Protection
- How is my data protected from other clients?
- How is my data protected from providers?
- What is Secure Cloud?
- Account Security
- How do I secure my account?
- What if my API key is compromised?
- Network Security
- Are connections encrypted?
- Can I restrict network access to my instances?
Source: https://docs.vast.ai/documentation/reference/faq/security
Data protection and platform security
<script
type="application/ld+json"
dangerouslySetInnerHTML={{
__html: JSON.stringify({
"@context": "https://schema.org",
"@type": "FAQPage",
"mainEntity": [
{
"@type": "Question",
"name": "How is my data protected from other clients?",
"acceptedAnswer": {
"@type": "Answer",
"text": "Clients are isolated in unprivileged Docker containers and only have access to their own data. Each container is completely separate from others on the same host machine with separate namespaces and cgroups, network isolation, file system isolation, and process isolation."
}
},
{
"@type": "Question",
"name": "How is my data protected from providers?",
"acceptedAnswer": {
"@type": "Answer",
"text": "Provider security varies significantly. Tier 4 datacenters have extensive physical and operational security while individual hosts may have less formal security measures. For maximum security: Use Secure Cloud certified providers only, encrypt sensitive data at rest, don't store credentials in instances, and use external key management."
}
},
{
"@type": "Question",
"name": "What is Secure Cloud?",
"acceptedAnswer": {
"@type": "Answer",
"text": "Secure Cloud providers are vetted datacenters with ISO 27001 certification, Tier 3/4 datacenter standards, verified physical security, and professional operations. Enable the Secure Cloud filter when searching for instances to see only these providers."
}
},
{
"@type": "Question",
"name": "How do I secure my account?",
"acceptedAnswer": {
"@type": "Answer",
"text": "Best practices: Use a strong, unique password, regularly rotate API keys, monitor account activity, use separate API keys for different applications, and review billing regularly for unusual activity."
}
},
{
"@type": "Question",
"name": "What if my API key is compromised?",
"acceptedAnswer": {
"@type": "Answer",
"text": "Immediately: Delete the compromised key in Settings, generate a new key, update all applications, check billing for unauthorized usage, and contact support if you see suspicious activity."
}
},
{
"@type": "Question",
"name": "Are connections encrypted?",
"acceptedAnswer": {
"@type": "Answer",
"text": "Yes, all connections use encryption: Web interface uses HTTPS with TLS, SSH is encrypted by default, Jupyter uses HTTPS with self-signed certificates, and API requires HTTPS."
}
},
{
"@type": "Question",
"name": "Can I restrict network access to my instances?",
"acceptedAnswer": {
"@type": "Answer",
"text": "Network restrictions depend on the host configuration. Some options: Use SSH key authentication (no passwords), configure firewall rules in your container, and select providers with static IPs for IP whitelisting."
}
}
]
})
}}
/>
### How is my data protected from other clients?
Clients are isolated in unprivileged Docker containers and only have access to their own data. Each container is completely separate from others on the same host machine with:
* Separate namespaces and cgroups
* Network isolation
* File system isolation
* Process isolation
### How is my data protected from providers?
Provider security varies significantly:
* **Tier 4 datacenters** have extensive physical and operational security
* **Individual hosts** may have less formal security measures
For maximum security:
* Use **Secure Cloud** certified providers only
* Encrypt sensitive data at rest
* Don't store credentials in instances
* Use external key management
### What is Secure Cloud?
Secure Cloud providers are vetted datacenters with:
* [ISO 27001](https://www.iso.org/standard/27001) certification
* [Tier 3/4](https://uptimeinstitute.com/tiers) datacenter standards
* Verified physical security
* Professional operations
Enable the "Secure Cloud" filter when searching for instances to see only these providers.
### How do I secure my account?
1. Use a strong, unique password
2. Regularly rotate API keys
3. Monitor account activity
4. Use separate API keys for different applications
5. Review billing regularly for unusual activity
### What if my API key is compromised?
1. Delete the compromised key in Settings
2. Generate a new key
3. Update all applications
4. Check billing for unauthorized usage
5. Contact support if you see suspicious activity
### Are connections encrypted?
Yes, all connections use encryption:
* **Web interface:** HTTPS with TLS
* **SSH:** Encrypted by default
* **Jupyter:** HTTPS with self-signed certificates
* **API:** HTTPS required
### Can I restrict network access to my instances?
Network restrictions depend on the host configuration. Some options:
* Use SSH key authentication (no passwords)
* Configure firewall rules in your container
* Select providers with static IPs for IP whitelisting
### Security checklist for sensitive workloads
* [ ] Use Secure Cloud providers only
* [ ] Encrypt data before uploading
* [ ] Use strong SSH keys
* [ ] Don't store credentials in instances
* [ ] Destroy instances immediately when done
* [ ] Monitor account activity regularly
* [ ] Use separate accounts for different projects
* [ ] Implement application-level encryption
* [ ] Keep software updated
---
## Output: C.38250
**URL:** llms-txt#output:-c.38250
**Contents:**
- How can I find OPEN\_BUTTON\_TOKEN?
- Controlling Instances
- How do I stop an instance from within itself?
bash theme={null}
echo $OPEN_BUTTON_TOKEN
bash theme={null}
**Examples:**
Example 1 (unknown):
```unknown
### How can I find OPEN\_BUTTON\_TOKEN?
SSH into your instance or open Jupyter terminal and run:
```
Example 2 (unknown):
```unknown
Alternatively, check the instance logs.
## Controlling Instances
### How do I stop an instance from within itself?
A special instance API key is pre-installed. Install the CLI and use it:
```
---
## RTX 5 Series
**URL:** llms-txt#rtx-5-series
**Contents:**
- Renting RTX 5 Series GPUs (5090/5080/5070/5060)
- Steps to Rent an RTX 5000 Series GPU on Vast.ai
- Tips and Troubleshooting
Source: https://docs.vast.ai/rtx-5-series
Optimize your GPU experience with our comprehensive guide on RTX 5 Series GPUs (5090/5080/5070) and CUDA 12.8 compatibility. Learn how to rent an RTX 5090 on Vast.ai, select the right templates, and customize your storage while ensuring optimal performance.
## Renting RTX 5 Series GPUs (5090/5080/5070/5060)
Many of our recommended templates now support Blackwell series Nvidia GPU's including the RTX 5 series.
Blackwell GPUs do not have the same backwards compatibility as seen in some previous generation Nvidia GPU's so it is important that the template and Docker image has been configured to use CUDA 12.8 and PyTorch 2.7 or greater.
Any template that is known to be compatible with this GPU type will automatically show these GPUs in the offer listing. Those without support will exclude the unsupported cards when searching for an instance.
Templates configured with the `[Automatic]` tag will pull the most recent & supported docker image. This enables wider support across the range of GPUs you can find at Vast.ai
## Steps to Rent an RTX 5000 Series GPU on Vast.ai
1. **Create / Log in to your Vast.ai account**
Go to [cloud.vast.ai](https://cloud.vast.ai) and either create a new account or log in.
2. **Select a Recommended template with "\[Automatic]" set as the Version Tag (this is the default option).**
To check this, click the 'pencil' icon on the template card to open the template editor, you can view the image tag.
The **Instance Portal** provides easy access links to services running in your instance. It places an authentication layer in front of these services to prevent access by anyone who does not have the correct authentication token. You can also create tunnels to your services without exposing ports.
Full documentation for the Instance Portal is available in our [Instance Portal guide](/documentation/instances/instance-portal).
### Virtual Machine Templates
In addition to standard Docker container templates, we also offer Virtual Machine (VM) templates. These launch a full virtual machine environment rather than a docker container.
**When to use VM templates:**
* Run applications that require namespace support
* Run more than one Docker container in an instance
* Load kernel modules or run profiling jobs
* Mount remote drives with rclone or similar
You can edit VM templates just like regular templates, but you should not change the docker image field. Only the images we distribute from `docker.io/vastai/kvm` will work.
### Customizing Recommended Templates
To learn how to customize our recommended templates with provisioning scripts or build your own custom Docker images, see our [Advanced Setup](/documentation/templates/advanced-setup) guide.
Ready to start using templates? Here's what you can do:
* **Try it now** - Follow our [Quick Start](/documentation/templates/quickstart) guide to run your first template in minutes
* **Create your own** - See [Creating Templates](/documentation/templates/creating-templates) to build a custom template
* **Learn more** - Explore [Advanced Setup](/documentation/templates/advanced-setup) for provisioning scripts and custom Docker images
---
## add network-disk
**URL:** llms-txt#add-network-disk
Source: https://docs.vast.ai/api-reference/network-volumes/add-network-disk
api-reference/openapi.json post /api/v0/network_disk/
Adds a network disk to be used to create network volume offers, or adds machines to an existing network disk.
CLI Usage: `vastai add network_disk ... [options]`
---
## CUDA Programming on Vast.ai
**URL:** llms-txt#cuda-programming-on-vast.ai
**Contents:**
- Introduction
- Prerequisites
- Setup
- 1. Selecting the Right Template
- 2. Edit the Template and Select Template
- 2. Create Your Instance
- 3. Connecting to Your Instance
- Installation
- Setting Up Your Development Environment
- Configuring Your Workspace
This guide walks you through setting up and running CUDA applications on Vast.ai's cloud platform. You'll learn how to set up a CUDA development environment, connect to your instance, and develop CUDA applications efficiently using NVIDIA's development tools.
* A Vast.ai account
* Basic familiarity with CUDA programming concepts
* Basic knowledge of Linux command line
* [(Optional) Install TLS Certificate for Jupyter](/documentation/instances/jupyter)
* [(Optional) SSH client installed on your local machine and SSH public key added the Keys section at cloud.vast.ai](/documentation/instances/sshscp)
* [(Optional) Vast-cli installed on your local machine for command-line management](/cli/get-started)
* [(Optional) Docker knowledge for customizing development environments](https://docs.docker.com/get-started/)
### 1. Selecting the Right Template
Navigate to the [Templates tab](https://cloud.vast.ai/templates/) to view recommended templates.
Search for [NVIDIA CUDA](https://cloud.vast.ai?ref_id=62897\&template_id=61e14a0dd1f97aa0aa6719d20bc9b02e) template if:
* You need a standard CUDA development environment
* You want pre-configured security features (TLS, authentication)
* You require Jupyter notebook integration
* You need additional development tools like Tensorboard
[Make a custom CUDA template](/documentation/templates/creating-templates) if:
* You need a specific CUDA or Python version
* You have special library requirements
* You want to minimize image size for faster instance startup
### 2. Edit the Template and Select Template
You can edit the template to use Jupyter launch mode if:
* You're behind a corporate firewall that blocks SSH
* You prefer browser-based development
* You want persistent terminal sessions that survive browser disconnects
* You need quick access without SSH client setup
* You want to combine CUDA development with notebook documentation
* You plan to switch between multiple terminal sessions in the browser
You can edit the template to use SSH launch mode if:
* You're using [VSCode Remote-SSH](https://code.visualstudio.com/docs/remote/ssh) or other IDE integrations
* You need lowest possible terminal latency
* You prefer using your local terminal emulator
* You want to use advanced terminal features like tmux
* You're doing extensive command-line development
* You need to transfer files frequently using scp or rsync
### 2. Create Your Instance
Select your desired GPU configuration based on your computational needs from the [Search tab](https://cloud.vast.ai/create/). For CUDA development, consider:
* System Requirements:
* RAM: Minimum 16GB for development tools
* Storage: 10GB is usually sufficient
* CUDA Toolkit core: \~2GB
* Development files and builds: \~3-4GB
* Room for source code and dependencies: \~4GB
* CPU: 4+ cores recommended for compilation
* Network: 100+ Mbps for remote development
Rent the GPU of your choice.
### 3. Connecting to Your Instance
Go to [Instances tab](https://cloud.vast.ai/instances/) to see your instance being created. There are multiple ways to connect to your instance:
* If Jupyter launch mode is selected in your template:
* Click the "OPEN" button or "Jupyter" button on your instance card
* Access a full development environment with notebook support
* If you selected SSH launch mode:
* Click Open Terminal Access button
* Copy Direct ssh connect string contents that looks like this "ssh -p 12345 root\@123.456.789.10 -L 8080:localhost:8080"
* You take the ssh command and execute in your terminal in your [Mac or Linux-based computer or in Powershell](/documentation/instances/sshscp)
* You can use [Powershell or Windows Putty tools](/documentation/instances/sshscp) if you have a Windows computer
### Setting Up Your Development Environment
1. The base environment includes:
* CUDA toolkit and development tools
* Python with common ML libraries
* Development utilities (gcc, make, etc.)
2. Install additional CUDA dependencies:
### Configuring Your Workspace
1. Navigate to your workspace:
1. Set up CUDA environment variables:
### Common Issues and Solutions
* Check if GPU is detectable: `nvidia-smi`
If output like "No devices were found" shows up, report the machine after clicking on the wrench icon and rent a different machine.
### Development Workflow
* Code Organization
* Keep source files in `${WORKSPACE}`
* Use version control for code management
* Maintain separate directories for builds and source
* Performance Optimization
* Use proper CUDA stream management
* Optimize memory transfers
* Profile code using NVIDIA tools
### Custom Environment Setup
Create a provisioning script for custom environment setup:
### Remote Development Setup
Configure VS Code or other IDEs for [remote development](https://code.visualstudio.com/docs/remote/ssh):
* Use SSH port forwarding for secure connections
* Configure development tools to use remote CUDA compiler
* Set up source synchronization using Syncthing
You now have a fully configured CUDA development environment on Vast.ai. This setup provides the flexibility of cloud GPU resources with the convenience of local development.
## Additional Resources
* [NVIDIA CUDA Documentation](https://docs.nvidia.com/cuda/)
* [Vast.ai Documentation](https://vast.ai/docs/)
* [CUDA Sample Projects](https://github.com/NVIDIA/cuda-samples)
**Examples:**
Example 1 (unknown):
```unknown
### Configuring Your Workspace
1. Navigate to your workspace:
```
Example 2 (unknown):
```unknown
1. Set up CUDA environment variables:
```
Example 3 (unknown):
```unknown
## Troubleshooting
### Common Issues and Solutions
CUDA not found:
* Check if GPU is detectable: `nvidia-smi`
```
Example 4 (unknown):
```unknown
If output like "No devices were found" shows up, report the machine after clicking on the wrench icon and rent a different machine.
## Best Practices
### Development Workflow
* Code Organization
* Keep source files in `${WORKSPACE}`
* Use version control for code management
* Maintain separate directories for builds and source
* Performance Optimization
* Use proper CUDA stream management
* Optimize memory transfers
* Profile code using NVIDIA tools
## Advanced Topics
### Custom Environment Setup
Create a provisioning script for custom environment setup:
```
---
## Port mapping
**URL:** llms-txt#port-mapping
-p 8080:8080 -p 8081:8081
---
## Install your applications into /opt/workspace-internal/
**URL:** llms-txt#install-your-applications-into-/opt/workspace-internal/
---
## show api keys
**URL:** llms-txt#show-api-keys
Source: https://docs.vast.ai/api-reference/accounts/show-api-keys
api-reference/openapi.json get /api/v0/auth/apikeys/
Retrieves all API keys associated with the authenticated user.
CLI Usage: `vastai show api-keys`
---
## show ipaddrs
**URL:** llms-txt#show-ipaddrs
Source: https://docs.vast.ai/api-reference/accounts/show-ipaddrs
api-reference/openapi.json get /api/v0/users/{user_id}/ipaddrs/
This endpoint retrieves the history of IP address accesses for the authenticated user.
CLI Usage: `vastai show ipaddrs`
---
## create instance
**URL:** llms-txt#create-instance
Source: https://docs.vast.ai/api-reference/instances/create-instance
api-reference/openapi.json put /api/v0/asks/{id}/
Creates a new instance by accepting an "ask" contract from a provider.
This is the main endpoint for launching new instances on Vast.ai.
CLI Usage: `vastai create instance [options]`
---
## Install additional dependencies
**URL:** llms-txt#install-additional-dependencies
RUN pip install wandb tensorboard
---
## show subaccounts
**URL:** llms-txt#show-subaccounts
Source: https://docs.vast.ai/api-reference/accounts/show-subaccounts
api-reference/openapi.json get /api/v0/subaccounts/
Retrieve a list of subaccounts associated with the authenticated user's account.
CLI Usage: `vastai show subaccounts`
---
## list volumes
**URL:** llms-txt#list-volumes
Source: https://docs.vast.ai/api-reference/volumes/list-volumes
api-reference/openapi.json get /api/v0/volumes/
Retrieve information about all volumes rented by you.
CLI Usage: `vastai show volumes`
---
## [https://run.vast.ai/get\_endpoint\_workers/](https://run.vast.ai/get_endpoint_workers/)
**URL:** llms-txt#[https://run.vast.ai/get\_endpoint\_workers/](https://run.vast.ai/get_endpoint_workers/)
**Contents:**
- Inputs
- Outputs
- Example
* `id` (int): The id value of the Endpoint.
* `api_key` (string): The Vast API key associated with the account that controls the Endpoint.
The `api_key` could alternatively be provided in the request header as a bearer token.
For each GPU instance in the Endpoint, the following will be returned:
* `cur_load`(float): Current load (as defined by the PyWorker) the GPU instance is receiving per second.
* `cur_load_rolling_avg`(float): Rolling average of `cur_load`.
* `cur_perf`(float): The most recent or current operational performance level of the instance (as defined by the PyWorker). For example, a text generation model has the units of tokens generated per second.
* `disk_usage`(float): Storage used by instance (in Gb).
* `dlperf`(float): Measured DLPerf of the instance. DLPerf is explained [here.](/documentation/reference/faq/index)
* `id`(int): Instance ID.
* `loaded_at`(float): Unix epoch time the instance finished loading.
* `measured_perf`(float): Benchmarked performances (tokens/s). Set to DLPerf if instance is not benchmarked.
* `perf`(float): `measured_perf` \* `reliability`.
* `reliability`(float): Uptime of the instance, ranges 0-1.
* `reqs_working`(int): Number of active requests currently being processed by the instance.
* `status`(string): Current status of the worker.
Run the following Bash command in a terminal to receive Endpoint workers.
**Examples:**
Example 1 (unknown):
```unknown
## Outputs
For each GPU instance in the Endpoint, the following will be returned:
* `cur_load`(float): Current load (as defined by the PyWorker) the GPU instance is receiving per second.
* `cur_load_rolling_avg`(float): Rolling average of `cur_load`.
* `cur_perf`(float): The most recent or current operational performance level of the instance (as defined by the PyWorker). For example, a text generation model has the units of tokens generated per second.
* `disk_usage`(float): Storage used by instance (in Gb).
* `dlperf`(float): Measured DLPerf of the instance. DLPerf is explained [here.](/documentation/reference/faq/index)
* `id`(int): Instance ID.
* `loaded_at`(float): Unix epoch time the instance finished loading.
* `measured_perf`(float): Benchmarked performances (tokens/s). Set to DLPerf if instance is not benchmarked.
* `perf`(float): `measured_perf` \* `reliability`.
* `reliability`(float): Uptime of the instance, ranges 0-1.
* `reqs_working`(int): Number of active requests currently being processed by the instance.
* `status`(string): Current status of the worker.
```
Example 2 (unknown):
```unknown
## Example
Run the following Bash command in a terminal to receive Endpoint workers.
```
---
## VMs
**URL:** llms-txt#vms
Source: https://docs.vast.ai/vms
**WARNING:**
VMs interface much more directly with hardware than Docker containers.
Proper VM support is very sensitive to hardware setup.
This guide covers the configuration steps needed to enable support for Vast VMs on most setups, but is not and cannot be exhausitve.
---
## show earnings
**URL:** llms-txt#show-earnings
Source: https://docs.vast.ai/api-reference/billing/show-earnings
api-reference/openapi.json get /api/v0/users/{user_id}/machine-earnings/
Retrieves the earnings history for a specified time range and optionally per machine.
CLI Usage: `vastai show earnings [options]`
---
## create network-volume
**URL:** llms-txt#create-network-volume
Source: https://docs.vast.ai/api-reference/network-volumes/create-network-volume
api-reference/openapi.json put /api/v0/network_volume/
Creates a network volume from an offer.
CLI Usage: `vastai create network-volume [--name ]`
---
## Security FAQ
**URL:** llms-txt#security-faq
**Contents:**
- Data Protection
- How is my data protected from other clients?
- How is my data protected from providers?
- What is Secure Cloud?
- Account Security
- How do I secure my account?
- What if my API key is compromised?
- Network Security
- Are connections encrypted?
- Can I restrict network access to my instances?
Source: https://docs.vast.ai/documentation/reference/faq/security
Data protection and platform security
<script
type="application/ld+json"
dangerouslySetInnerHTML={{
__html: JSON.stringify({
"@context": "https://schema.org",
"@type": "FAQPage",
"mainEntity": [
{
"@type": "Question",
"name": "How is my data protected from other clients?",
"acceptedAnswer": {
"@type": "Answer",
"text": "Clients are isolated in unprivileged Docker containers and only have access to their own data. Each container is completely separate from others on the same host machine with separate namespaces and cgroups, network isolation, file system isolation, and process isolation."
}
},
{
"@type": "Question",
"name": "How is my data protected from providers?",
"acceptedAnswer": {
"@type": "Answer",
"text": "Provider security varies significantly. Tier 4 datacenters have extensive physical and operational security while individual hosts may have less formal security measures. For maximum security: Use Secure Cloud certified providers only, encrypt sensitive data at rest, don't store credentials in instances, and use external key management."
}
},
{
"@type": "Question",
"name": "What is Secure Cloud?",
"acceptedAnswer": {
"@type": "Answer",
"text": "Secure Cloud providers are vetted datacenters with ISO 27001 certification, Tier 3/4 datacenter standards, verified physical security, and professional operations. Enable the Secure Cloud filter when searching for instances to see only these providers."
}
},
{
"@type": "Question",
"name": "How do I secure my account?",
"acceptedAnswer": {
"@type": "Answer",
"text": "Best practices: Use a strong, unique password, regularly rotate API keys, monitor account activity, use separate API keys for different applications, and review billing regularly for unusual activity."
}
},
{
"@type": "Question",
"name": "What if my API key is compromised?",
"acceptedAnswer": {
"@type": "Answer",
"text": "Immediately: Delete the compromised key in Settings, generate a new key, update all applications, check billing for unauthorized usage, and contact support if you see suspicious activity."
}
},
{
"@type": "Question",
"name": "Are connections encrypted?",
"acceptedAnswer": {
"@type": "Answer",
"text": "Yes, all connections use encryption: Web interface uses HTTPS with TLS, SSH is encrypted by default, Jupyter uses HTTPS with self-signed certificates, and API requires HTTPS."
}
},
{
"@type": "Question",
"name": "Can I restrict network access to my instances?",
"acceptedAnswer": {
"@type": "Answer",
"text": "Network restrictions depend on the host configuration. Some options: Use SSH key authentication (no passwords), configure firewall rules in your container, and select providers with static IPs for IP whitelisting."
}
}
]
})
}}
/>
### How is my data protected from other clients?
Clients are isolated in unprivileged Docker containers and only have access to their own data. Each container is completely separate from others on the same host machine with:
* Separate namespaces and cgroups
* Network isolation
* File system isolation
* Process isolation
### How is my data protected from providers?
Provider security varies significantly:
* **Tier 4 datacenters** have extensive physical and operational security
* **Individual hosts** may have less formal security measures
For maximum security:
* Use **Secure Cloud** certified providers only
* Encrypt sensitive data at rest
* Don't store credentials in instances
* Use external key management
### What is Secure Cloud?
Secure Cloud providers are vetted datacenters with:
* [ISO 27001](https://www.iso.org/standard/27001) certification
* [Tier 3/4](https://uptimeinstitute.com/tiers) datacenter standards
* Verified physical security
* Professional operations
Enable the "Secure Cloud" filter when searching for instances to see only these providers.
### How do I secure my account?
1. Use a strong, unique password
2. Regularly rotate API keys
3. Monitor account activity
4. Use separate API keys for different applications
5. Review billing regularly for unusual activity
### What if my API key is compromised?
1. Delete the compromised key in Settings
2. Generate a new key
3. Update all applications
4. Check billing for unauthorized usage
5. Contact support if you see suspicious activity
### Are connections encrypted?
Yes, all connections use encryption:
* **Web interface:** HTTPS with TLS
* **SSH:** Encrypted by default
* **Jupyter:** HTTPS with self-signed certificates
* **API:** HTTPS required
### Can I restrict network access to my instances?
Network restrictions depend on the host configuration. Some options:
* Use SSH key authentication (no passwords)
* Configure firewall rules in your container
* Select providers with static IPs for IP whitelisting
### Security checklist for sensitive workloads
* [ ] Use Secure Cloud providers only
* [ ] Encrypt data before uploading
* [ ] Use strong SSH keys
* [ ] Don't store credentials in instances
* [ ] Destroy instances immediately when done
* [ ] Monitor account activity regularly
* [ ] Use separate accounts for different projects
* [ ] Implement application-level encryption
* [ ] Keep software updated
---
## Output: C.38250
**URL:** llms-txt#output:-c.38250
**Contents:**
- How can I find OPEN\_BUTTON\_TOKEN?
- Controlling Instances
- How do I stop an instance from within itself?
bash theme={null}
echo $OPEN_BUTTON_TOKEN
bash theme={null}
**Examples:**
Example 1 (unknown):
```unknown
### How can I find OPEN\_BUTTON\_TOKEN?
SSH into your instance or open Jupyter terminal and run:
```
Example 2 (unknown):
```unknown
Alternatively, check the instance logs.
## Controlling Instances
### How do I stop an instance from within itself?
A special instance API key is pre-installed. Install the CLI and use it:
```
---
## RTX 5 Series
**URL:** llms-txt#rtx-5-series
**Contents:**
- Renting RTX 5 Series GPUs (5090/5080/5070/5060)
- Steps to Rent an RTX 5000 Series GPU on Vast.ai
- Tips and Troubleshooting
Source: https://docs.vast.ai/rtx-5-series
Optimize your GPU experience with our comprehensive guide on RTX 5 Series GPUs (5090/5080/5070) and CUDA 12.8 compatibility. Learn how to rent an RTX 5090 on Vast.ai, select the right templates, and customize your storage while ensuring optimal performance.
## Renting RTX 5 Series GPUs (5090/5080/5070/5060)
Many of our recommended templates now support Blackwell series Nvidia GPU's including the RTX 5 series.
Blackwell GPUs do not have the same backwards compatibility as seen in some previous generation Nvidia GPU's so it is important that the template and Docker image has been configured to use CUDA 12.8 and PyTorch 2.7 or greater.
Any template that is known to be compatible with this GPU type will automatically show these GPUs in the offer listing. Those without support will exclude the unsupported cards when searching for an instance.
Templates configured with the `[Automatic]` tag will pull the most recent & supported docker image. This enables wider support across the range of GPUs you can find at Vast.ai
## Steps to Rent an RTX 5000 Series GPU on Vast.ai
1. **Create / Log in to your Vast.ai account**
Go to [cloud.vast.ai](https://cloud.vast.ai) and either create a new account or log in.
2. **Select a Recommended template with "\[Automatic]" set as the Version Tag (this is the default option).**
To check this, click the 'pencil' icon on the template card to open the template editor, you can view the image tag.
 3. **Select the 5 series GPU from search filters**
In the GPU drop down menu select the specific 5 series card you want to rent or select the whole category.
3. **Select the 5 series GPU from search filters**
In the GPU drop down menu select the specific 5 series card you want to rent or select the whole category.
 4. **Review and customize**
Set your storage and further refine your search filters (e.g., secure cloud, location, system RAM, CPU, etc.). ⚠️ Do **not** change the Docker image because you need to maintain CUDA 12.8 and the dev version of PyTorch. If you switch to an incompatible Docker image, you may lose 5 series compatibility.
5. **Select and rent**
Click “Rent” next to your preferred server. You can now launch Jupyter notebooks, SSH into the instance, or start your own training jobs using the pre-installed CUDA 12.8 / PyTorch dev environment.
## Tips and Troubleshooting
* **Check CUDA version**: If you manually change the Docker image, ensure it’s compiled for CUDA 12.8 or else you may lose compatibility with these GPUs.
* **Stay up to date**: New PyTorch releases (especially nightlies / dev builds) often update their CUDA support. If you need a stable release, confirm that the Docker image tags match a stable version with CUDA 12.8.
* **Use custom Docker**: If you have your own Docker image, you must ensure it is built with CUDA 12.8 (and ideally tested on a GPU supporting that version).
---
## Managing Your Team
**URL:** llms-txt#managing-your-team
**Contents:**
- The Members Page
- Inviting Team Members
- Accepting Team Invitations
- Best Practices for Invitations
- Managing Member Roles
- Editing Team Settings
- Change Team Name
- Transferring Team Ownership
- Removing Team Members
- Deleting a Team
Source: https://docs.vast.ai/documentation/teams/managing-teams
<script
type="application/ld+json"
dangerouslySetInnerHTML={{
__html: JSON.stringify({
"@context": "https://schema.org",
"@type": "HowTo",
"name": "How to Manage Your Vast.ai Team",
"description": "A comprehensive guide covering all operations needed to manage your team including inviting members, managing roles, editing settings, transferring ownership, and deleting teams.",
"step": [
{
"@type": "HowToStep",
"name": "Navigate to the Members Page",
"text": "The Members page is the main hub for managing your team. From this page, you can view all team members and their assigned roles, change member roles, remove team members, invite new members, and access team settings through the three-dot menu."
},
{
"@type": "HowToStep",
"name": "Invite Team Members",
"text": "Go to the Members Page and click the Invite button. Enter the email and team role for the person you want to invite, then click Invite to send the invitation email. Anyone with team_write permissions can send invitations. Invitees will receive an email with a unique team invitation link. Note that team invitations expire after 4 hours."
},
{
"@type": "HowToStep",
"name": "Manage Member Roles",
"text": "Change a member's role by clicking on the directional arrow next to their name and selecting a new role. Every team comes with two default roles: Manager (full access to team resources) and Member (limited read access while still being able to rent instances). You can also create custom roles with specific permissions."
},
{
"@type": "HowToStep",
"name": "Edit Team Settings",
"text": "To change the team name, switch to Team Context, select the team you want to manage, open the Members Page, and click the three-dot menu to select 'Edit Team Name'. You must be a team owner or team manager to update the team name."
},
{
"@type": "HowToStep",
"name": "Transfer Team Ownership (Optional)",
"text": "Navigate to the Members page and click the three-dot menu. Select Transfer Team Ownership, choose a new owner (who must already be a member of the team), and confirm the transfer. Once confirmed, ownership will be reassigned and your role will be changed to a manager."
},
{
"@type": "HowToStep",
"name": "Remove Team Members or Delete Team",
"text": "To remove a team member, click Delete next to their name and confirm. To delete a team (owner only), open the three-dot menu on the Members page and select 'Delete team'. Make sure you have deleted all instances and machines before proceeding. Warning: This action is permanent and cannot be undone."
}
]
})
}}
/>
This guide covers all the operations you'll need to manage your team after creation, including inviting members, managing roles, editing settings, and more.
The Members page is the main hub for managing your team. Here you can view team members, assign roles, invite new members, and access team settings.
Here's an example of what a Members page looks like in the console:
4. **Review and customize**
Set your storage and further refine your search filters (e.g., secure cloud, location, system RAM, CPU, etc.). ⚠️ Do **not** change the Docker image because you need to maintain CUDA 12.8 and the dev version of PyTorch. If you switch to an incompatible Docker image, you may lose 5 series compatibility.
5. **Select and rent**
Click “Rent” next to your preferred server. You can now launch Jupyter notebooks, SSH into the instance, or start your own training jobs using the pre-installed CUDA 12.8 / PyTorch dev environment.
## Tips and Troubleshooting
* **Check CUDA version**: If you manually change the Docker image, ensure it’s compiled for CUDA 12.8 or else you may lose compatibility with these GPUs.
* **Stay up to date**: New PyTorch releases (especially nightlies / dev builds) often update their CUDA support. If you need a stable release, confirm that the Docker image tags match a stable version with CUDA 12.8.
* **Use custom Docker**: If you have your own Docker image, you must ensure it is built with CUDA 12.8 (and ideally tested on a GPU supporting that version).
---
## Managing Your Team
**URL:** llms-txt#managing-your-team
**Contents:**
- The Members Page
- Inviting Team Members
- Accepting Team Invitations
- Best Practices for Invitations
- Managing Member Roles
- Editing Team Settings
- Change Team Name
- Transferring Team Ownership
- Removing Team Members
- Deleting a Team
Source: https://docs.vast.ai/documentation/teams/managing-teams
<script
type="application/ld+json"
dangerouslySetInnerHTML={{
__html: JSON.stringify({
"@context": "https://schema.org",
"@type": "HowTo",
"name": "How to Manage Your Vast.ai Team",
"description": "A comprehensive guide covering all operations needed to manage your team including inviting members, managing roles, editing settings, transferring ownership, and deleting teams.",
"step": [
{
"@type": "HowToStep",
"name": "Navigate to the Members Page",
"text": "The Members page is the main hub for managing your team. From this page, you can view all team members and their assigned roles, change member roles, remove team members, invite new members, and access team settings through the three-dot menu."
},
{
"@type": "HowToStep",
"name": "Invite Team Members",
"text": "Go to the Members Page and click the Invite button. Enter the email and team role for the person you want to invite, then click Invite to send the invitation email. Anyone with team_write permissions can send invitations. Invitees will receive an email with a unique team invitation link. Note that team invitations expire after 4 hours."
},
{
"@type": "HowToStep",
"name": "Manage Member Roles",
"text": "Change a member's role by clicking on the directional arrow next to their name and selecting a new role. Every team comes with two default roles: Manager (full access to team resources) and Member (limited read access while still being able to rent instances). You can also create custom roles with specific permissions."
},
{
"@type": "HowToStep",
"name": "Edit Team Settings",
"text": "To change the team name, switch to Team Context, select the team you want to manage, open the Members Page, and click the three-dot menu to select 'Edit Team Name'. You must be a team owner or team manager to update the team name."
},
{
"@type": "HowToStep",
"name": "Transfer Team Ownership (Optional)",
"text": "Navigate to the Members page and click the three-dot menu. Select Transfer Team Ownership, choose a new owner (who must already be a member of the team), and confirm the transfer. Once confirmed, ownership will be reassigned and your role will be changed to a manager."
},
{
"@type": "HowToStep",
"name": "Remove Team Members or Delete Team",
"text": "To remove a team member, click Delete next to their name and confirm. To delete a team (owner only), open the three-dot menu on the Members page and select 'Delete team'. Make sure you have deleted all instances and machines before proceeding. Warning: This action is permanent and cannot be undone."
}
]
})
}}
/>
This guide covers all the operations you'll need to manage your team after creation, including inviting members, managing roles, editing settings, and more.
The Members page is the main hub for managing your team. Here you can view team members, assign roles, invite new members, and access team settings.
Here's an example of what a Members page looks like in the console:
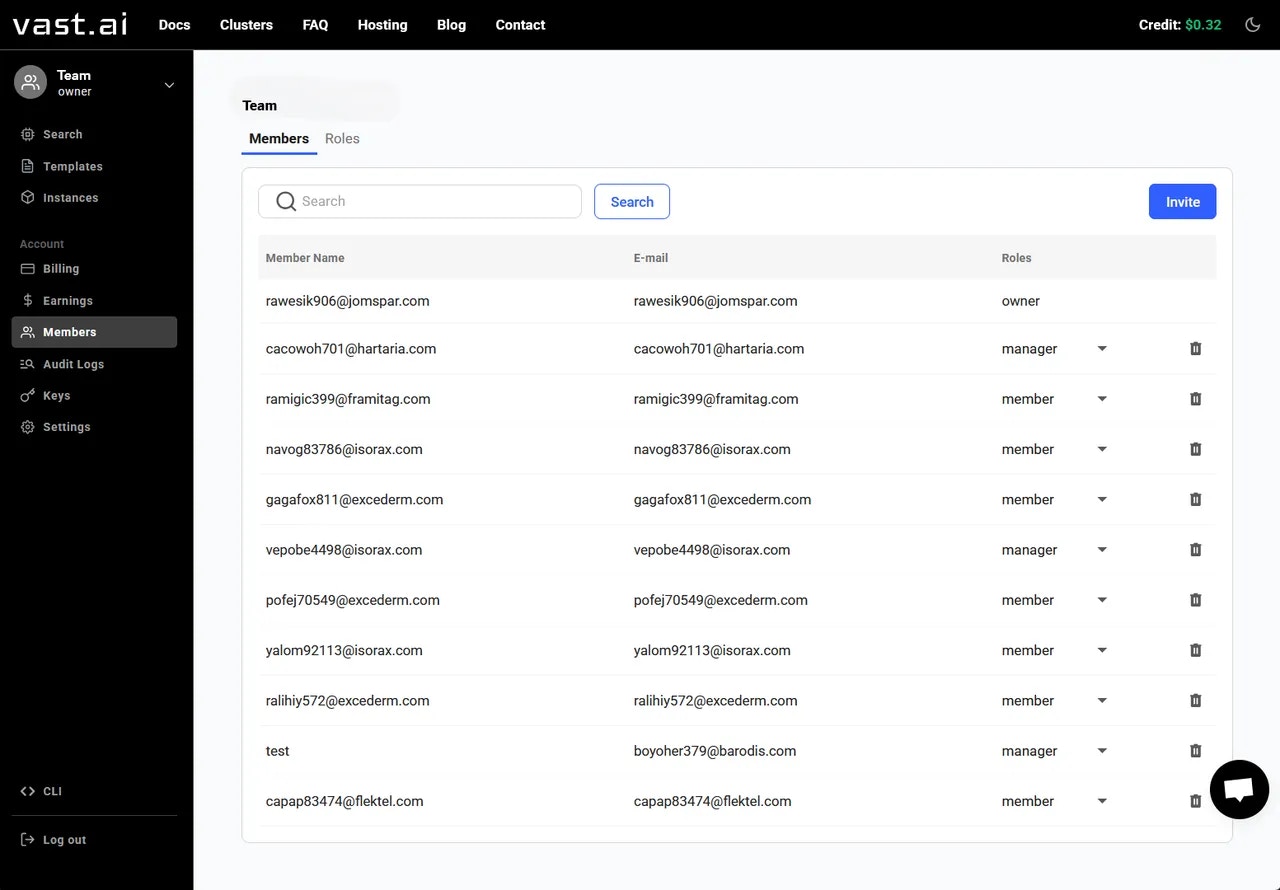 From this page, you can:
* View all team members and their assigned roles
* Change member roles by clicking the directional arrow
* Remove team members
* Invite new members
* Access team settings (three-dot menu)
## Inviting Team Members
To invite a team member, go to the **Members Page** and click on the **Invite** button.
This will bring up a popup where you can enter the email and team role for the person you want to invite. Once complete, click **Invite** to send the invitation email.
Anyone with the proper permissions (currently **team\_write**) can send invitations to invite team members at any role level.
### Accepting Team Invitations
1. **Receiving the Invitation Email**: Invitees will receive an email containing a unique team invitation link.
2. **Completing the Joining Process**: Clicking the link will initiate a set of operations to add the invitee to the team. This may involve signing into the Vast.ai platform or creating an account if necessary.
3. **Confirmation of Membership**: Once the process is complete, the new member will be officially added to the team and will have access based on their role.
**Note:** If the recipient of the invitation does not have a Vast account, they will need to create one before being added to your Team.
### Best Practices for Invitations
* **Ensure Accurate Email Address**: Double-check the email address before sending invitations to avoid any miscommunication.
* **Communicate with Invitees**: Inform potential team members that they will be receiving an invitation and what steps they need to follow.
* **Follow-up on Pending Invitations**: Keep track of sent invitations and follow up with invitees who haven't joined yet. **Note:** Team Invitations will expire after **4 hours.**
## Managing Member Roles
You can change a member's role by clicking on the directional arrow next to their name and selecting a new role.
From this page, you can:
* View all team members and their assigned roles
* Change member roles by clicking the directional arrow
* Remove team members
* Invite new members
* Access team settings (three-dot menu)
## Inviting Team Members
To invite a team member, go to the **Members Page** and click on the **Invite** button.
This will bring up a popup where you can enter the email and team role for the person you want to invite. Once complete, click **Invite** to send the invitation email.
Anyone with the proper permissions (currently **team\_write**) can send invitations to invite team members at any role level.
### Accepting Team Invitations
1. **Receiving the Invitation Email**: Invitees will receive an email containing a unique team invitation link.
2. **Completing the Joining Process**: Clicking the link will initiate a set of operations to add the invitee to the team. This may involve signing into the Vast.ai platform or creating an account if necessary.
3. **Confirmation of Membership**: Once the process is complete, the new member will be officially added to the team and will have access based on their role.
**Note:** If the recipient of the invitation does not have a Vast account, they will need to create one before being added to your Team.
### Best Practices for Invitations
* **Ensure Accurate Email Address**: Double-check the email address before sending invitations to avoid any miscommunication.
* **Communicate with Invitees**: Inform potential team members that they will be receiving an invitation and what steps they need to follow.
* **Follow-up on Pending Invitations**: Keep track of sent invitations and follow up with invitees who haven't joined yet. **Note:** Team Invitations will expire after **4 hours.**
## Managing Member Roles
You can change a member's role by clicking on the directional arrow next to their name and selecting a new role.
 Every team comes with two default roles:
* **Manager**: Full access to team resources
* **Member**: Limited read access to most resources while still being able to rent instances
For detailed information about creating custom roles with specific permissions, see the [Teams Roles](/documentation/teams/teams-roles) documentation.
## Editing Team Settings
You must be a team owner or team manager to update the team name. Here is how to do it:
1. Switch to Team Context by clicking your profile in the top-left corner
2. Select the team you want to manage
3. Open the Members Page
4. Click the three-dot menu and select 'Edit Team Name'
Every team comes with two default roles:
* **Manager**: Full access to team resources
* **Member**: Limited read access to most resources while still being able to rent instances
For detailed information about creating custom roles with specific permissions, see the [Teams Roles](/documentation/teams/teams-roles) documentation.
## Editing Team Settings
You must be a team owner or team manager to update the team name. Here is how to do it:
1. Switch to Team Context by clicking your profile in the top-left corner
2. Select the team you want to manage
3. Open the Members Page
4. Click the three-dot menu and select 'Edit Team Name'
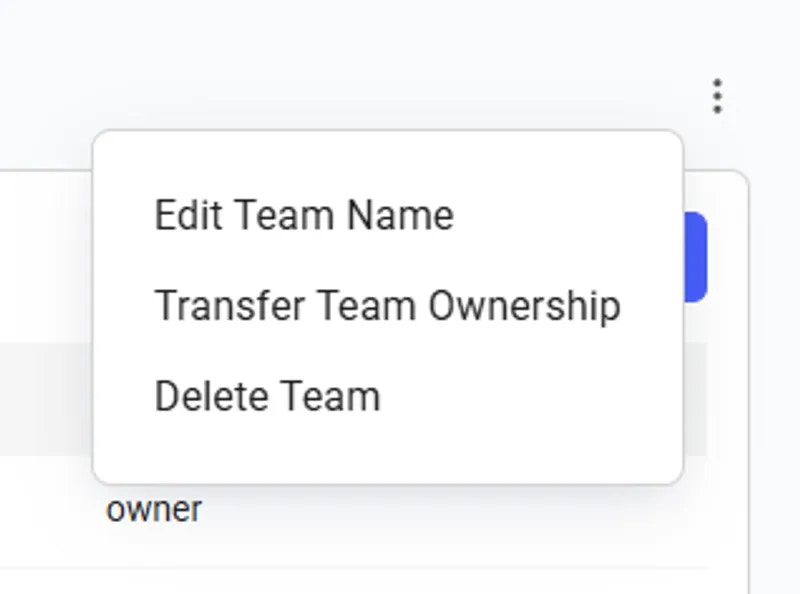 The 'Edit team name' option opens a pop-up that allows you to enter and save a new team name.
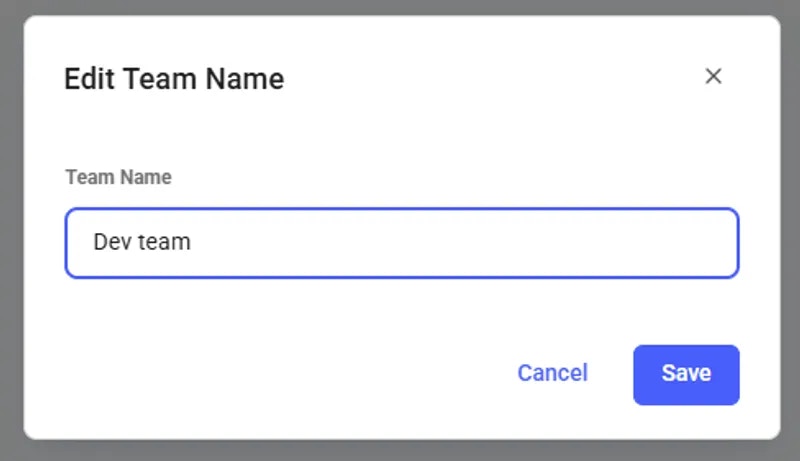 ## Transferring Team Ownership
The Transfer Team Ownership feature allows an owner to seamlessly reassign the team to another member within it. To do so, navigate to the **Members** page and click the three-dot menu in the upper right corner.
## Transferring Team Ownership
The Transfer Team Ownership feature allows an owner to seamlessly reassign the team to another member within it. To do so, navigate to the **Members** page and click the three-dot menu in the upper right corner.
 Only the Team Owner can delete a team.
To delete a team, open the three-dot menu on the Members page and select 'Delete team'. Make sure you have deleted all instances from the Instances page, or all machines from the Machines page (if you are a host), before proceeding.
⚠ **Warning**: This action is permanent and cannot be undone. All team members will be removed and any remaining credits will be returned to your personal account.
---
## Or export all variables
**URL:** llms-txt#or-export-all-variables
**Contents:**
- How do I get the instance ID from within the container?
env >> /etc/environment
bash theme={null}
echo $VAST_CONTAINERLABEL
**Examples:**
Example 1 (unknown):
```unknown
You can also set global environment variables in your account Settings page.
### How do I get the instance ID from within the container?
Use the `VAST_CONTAINERLABEL` environment variable:
```
---
## Troubleshooting
**URL:** llms-txt#troubleshooting
**Contents:**
- I stopped my instance, and now when I try to restart it the status is stuck on "scheduling". What is wrong?
- All my instances keep stopping, switching to inactive status, even though I didn't press the stop button. What's going on?
- I keep getting this error: spend\_rate\_limit. What's going on?
- I tried to connect with ssh and it asked for a password. What is the password?
Source: https://docs.vast.ai/documentation/reference/troubleshooting
<script
type="application/ld+json"
dangerouslySetInnerHTML={{
__html: JSON.stringify({
"@context": "https://schema.org",
"@type": "HowTo",
"name": "How to Troubleshoot Common Vast.ai Issues",
"description": "Solutions for common problems with Vast.ai instances, SSH connections, and account limits.",
"step": [
{
"@type": "HowToStep",
"name": "Fix Instance Stuck on Scheduling",
"text": "When you stop an instance, the GPU(s) it was using may get reassigned. When you try to restart, it tries to get those GPU(s) back - that is the scheduling phase. If another high priority job is using any of the same GPU(s), your instance will be stuck until the conflicting jobs are done. We recommend not stopping an instance unless you are ok with the risk of waiting to restart it."
},
{
"@type": "HowToStep",
"name": "Resolve Instances Stopping Automatically",
"text": "Check your credit balance. If it hits zero or below, your instances will be stopped automatically. Add more credits to your account to keep instances running."
},
{
"@type": "HowToStep",
"name": "Fix spend_rate_limit Error",
"text": "There is a spend rate limit for new accounts. The limit is extremely small for unverified accounts, so make sure to verify your email first. The limit increases over time automatically. Try a cheaper instance type or wait a few hours. If still having trouble, use the online support chat in the lower right."
},
{
"@type": "HowToStep",
"name": "Fix SSH Password Prompt",
"text": "There is no SSH password - we use SSH key authentication. If SSH asks for a password, there is something wrong with your SSH key or client configuration. On Ubuntu or Mac: 1) Generate keypair with ssh-keygen -t rsa 2) Load the key with ssh-add; ssh-add -l 3) Get public key with cat ~/.ssh/id_rsa.pub 4) Copy the entire output (including ssh-rsa prefix and user@host suffix) and paste into your Keys section."
}
]
})
}}
/>
### I stopped my instance, and now when I try to restart it the status is stuck on "scheduling". What is wrong?
When you stop an instance, the gpu(s) it was using may get reassigned. When you later then try to restart the instance, it tries to get those gpu(s) back - that is the "scheduling" phase. If another high priority job is currently using any of the same gpu(s), your instance will be stuck in "scheduling" phase until the conflicting jobs are done. We know this is not ideal, and we are working on ways to migrate containers across gpus and machines, but until then we recommend not stopping an instance unless you are ok with the risk of waiting a while to restart it."
### All my instances keep stopping, switching to inactive status, even though I didn't press the stop button. What's going on?
Check your credit balance. If it hits zero or below, your instances will be stopped automatically.
### I keep getting this error: spend\_rate\_limit. What's going on?
There is a spend rate limit for new accounts. The limit is extremely small for unverified accounts, so make sure to verify your email. The limit increases over time, so try a cheaper instance type or wait a few hours. If you are still having trouble, use the online support chat in the lower right.
### I tried to connect with ssh and it asked for a password. What is the password?
There is no ssh password, we use ssh key authentication. If ssh asks for a password, typically this means there is something wrong with the ssh key that you entered or your ssh client is misconfigured.
On Ubuntu or Mac, first you need to generate an rsa ssh public/private keypair using the command:
Next you may need to force the daemon to load the new private key, and confirm it's loaded:
Then get the contents of the public key with:
Copy the entire output to your clipboard, then paste that into a new SSH Key in your [Keys section](https://cloud.vast.ai/manage-keys/). The key text *includes* the opening "ssh-rsa" part and the ending "user\@something" part. If you don't copy the entire thing, it won't work.
Example SSH key text:
**Examples:**
Example 1 (unknown):
```unknown
Next you may need to force the daemon to load the new private key, and confirm it's loaded:
```
Example 2 (unknown):
```unknown
Then get the contents of the public key with:
```
Example 3 (unknown):
```unknown
Copy the entire output to your clipboard, then paste that into a new SSH Key in your [Keys section](https://cloud.vast.ai/manage-keys/). The key text *includes* the opening "ssh-rsa" part and the ending "user\@something" part. If you don't copy the entire thing, it won't work.
Example SSH key text:
```
---
## Tax Guide for Hosts
**URL:** llms-txt#tax-guide-for-hosts
Source: https://docs.vast.ai/documentation/host/guide-to-taxes
<script
type="application/ld+json"
dangerouslySetInnerHTML={{
__html: JSON.stringify({
"@context": "https://schema.org",
"@type": "FAQPage",
"mainEntity": [
{
"@type": "Question",
"name": "What is Stripe Express, and how do I access it?",
"acceptedAnswer": {
"@type": "Answer",
"text": "Stripe Express allows you to update your tax information, manage tax forms, and track your earnings. If you're working with Vast.ai and earned $600 or more (within the calendar year in the US), Stripe will send an email inviting you to create an account and log in to Stripe Express."
}
},
{
"@type": "Question",
"name": "When will I receive my 1099?",
"acceptedAnswer": {
"@type": "Answer",
"text": "Your 1099 tax form will be sent to you by January 31st. Starting November 1st, Stripe will email you instructions on how to set up e-delivery and create a Stripe Express account. Before mid January, confirm your tax information is correct via Stripe Express. By January 31st, your 1099 will be available to download through Stripe Express or mailed to you if you don't consent to e-delivery."
}
},
{
"@type": "Question",
"name": "I earned enough to need a 1099 form. Why haven't I received an email from Stripe?",
"acceptedAnswer": {
"@type": "Answer",
"text": "If you earned enough to need a 1099 form, you should have received an email from Stripe. Check your spam/junk mail folder for an email titled 'Get your Vast.ai 2023 tax forms faster by enabling e-delivery'. Vast.ai may not have your most current email address on file, or the email address associated with your account may be incorrect, missing, or unable to receive mail."
}
},
{
"@type": "Question",
"name": "Will I receive a 1099 form?",
"acceptedAnswer": {
"@type": "Answer",
"text": "If you earned less than $600 over the course of the year, you may not receive a 1099 form unless you meet a threshold in your state. If your state has a filing threshold lower than $600, you might receive a 1099 form. You can check your state's requirements for 1099 state requirements."
}
},
{
"@type": "Question",
"name": "Is VAT deducted for European businesses?",
"acceptedAnswer": {
"@type": "Answer",
"text": "Vast is located in California. We do not do anything with/about VAT currently."
}
},
{
"@type": "Question",
"name": "Is VAT specified on the invoice?",
"acceptedAnswer": {
"@type": "Answer",
"text": "Vast is located in California. We do not do anything with/about VAT currently."
}
}
]
})
}}
/>
Disclaimer: As an independent contractor, you are responsible for keeping track of your earnings and accurately reporting them in tax filings. If you have any questions about what to report on your taxes, you should consult with a tax professional. Vast.ai cannot provide you with tax advice nor can we verify the accuracy of any publicly available tax guidance online.
Keep in mind: Vast.ai does not automatically withhold taxes. We calculate the subtotal of your earnings based on the date the earnings were deposited.
---
## Cluster Management Commands Reference
**URL:** llms-txt#cluster-management-commands-reference
* `./vast create cluster SUBNET MANAGER_ID`
* Initializes a cluster containing the machine with ID `MANAGER_ID` as its manager node and using the network interface corresponding to `SUBNET`
* `./vast show clusters`
* Shows clusters, for each cluster showing its `CLUSTER_ID`, associated `SUBNET`, manager node machine\_id, and list of member machines.
* `./vast join cluster CLUSTER_ID MACHINE_IDS`
* Takes `MACHINE_IDS` as a space seperated list, and adds them to the cluster specified by `CLUSTER_ID`
* `./vast remove-machine-from-cluster CLUSTER_ID MACHINE_ID [NEW_MANAGER_ID]`
* Removes machine `MACHINE_ID` from cluster `CLUSTER_ID`. If the machine is the only manager, another machine in the cluster `NEW_MANAGER_ID` must be specified so that the cluster still has a manager.
* `./vast delete cluster CLUSTER_ID`
* Deletes cluster `CLUSTER_ID`. Fails if cluster resources are currently in use by client instances.
---
## Advanced Setup
**URL:** llms-txt#advanced-setup
**Contents:**
- Overview
- Customization Options
- PROVISIONING\_SCRIPT
- How to use
- Example PROVISIONING\_SCRIPT
Source: https://docs.vast.ai/documentation/templates/advanced-setup
This guide covers advanced customization techniques available on the Vast.ai platform. These features allow you to extend and enhance your templates beyond basic configuration.
For a complete reference of all template settings, see [Template Settings](/documentation/templates/template-settings).
For a step-by-step tutorial on creating your first template, see [Creating Templates](/documentation/templates/creating-templates).
## Customization Options
There are two main ways to customize templates on Vast.ai:
1. **Runtime customization with PROVISIONING\_SCRIPT** - Add a setup script that runs when the instance starts
* Works with any Docker image
* Simplest approach - no Docker build needed
* Perfect for installing packages, downloading models, configuring services
2. **Build custom Docker images** - Create your own Dockerfile with everything pre-installed
* Can start FROM Vast base images for built-in security features
* Or FROM any other base image
* Full control, faster instance startup
* Best for complex setups or frequently reused configurations
## PROVISIONING\_SCRIPT
Vast.ai templates support running a remote script on start to help configure the instance and download models and extensions that may not already be available in the Docker image.
This is the simplest way to customize a template - you start with one of our recommended templates (like `vastai/base-image` or `vastai/pytorch`) and add custom setup via a provisioning script.
1. Go to the [Templates tab](https://cloud.vast.ai/templates/) in Vast.ai interface
2. Search for "base-image" or "Pytorch" depending on your needs:
* `vastai/base-image` is a general purpose image
* `vastai/pytorch` is a base image for working with PyTorch-based applications on Vast
3. Click "Edit" on your chosen template
4. Add the PROVISIONING\_SCRIPT environment variable:
* In the Environment Variables section, add a new variable named "PROVISIONING\_SCRIPT"
* The value should be a URL pointing to a shell script (from GitHub, Gist, etc.)
5. Make sure to click "+" to add the environment variable
6. Click Create and Use
Only the Team Owner can delete a team.
To delete a team, open the three-dot menu on the Members page and select 'Delete team'. Make sure you have deleted all instances from the Instances page, or all machines from the Machines page (if you are a host), before proceeding.
⚠ **Warning**: This action is permanent and cannot be undone. All team members will be removed and any remaining credits will be returned to your personal account.
---
## Or export all variables
**URL:** llms-txt#or-export-all-variables
**Contents:**
- How do I get the instance ID from within the container?
env >> /etc/environment
bash theme={null}
echo $VAST_CONTAINERLABEL
**Examples:**
Example 1 (unknown):
```unknown
You can also set global environment variables in your account Settings page.
### How do I get the instance ID from within the container?
Use the `VAST_CONTAINERLABEL` environment variable:
```
---
## Troubleshooting
**URL:** llms-txt#troubleshooting
**Contents:**
- I stopped my instance, and now when I try to restart it the status is stuck on "scheduling". What is wrong?
- All my instances keep stopping, switching to inactive status, even though I didn't press the stop button. What's going on?
- I keep getting this error: spend\_rate\_limit. What's going on?
- I tried to connect with ssh and it asked for a password. What is the password?
Source: https://docs.vast.ai/documentation/reference/troubleshooting
<script
type="application/ld+json"
dangerouslySetInnerHTML={{
__html: JSON.stringify({
"@context": "https://schema.org",
"@type": "HowTo",
"name": "How to Troubleshoot Common Vast.ai Issues",
"description": "Solutions for common problems with Vast.ai instances, SSH connections, and account limits.",
"step": [
{
"@type": "HowToStep",
"name": "Fix Instance Stuck on Scheduling",
"text": "When you stop an instance, the GPU(s) it was using may get reassigned. When you try to restart, it tries to get those GPU(s) back - that is the scheduling phase. If another high priority job is using any of the same GPU(s), your instance will be stuck until the conflicting jobs are done. We recommend not stopping an instance unless you are ok with the risk of waiting to restart it."
},
{
"@type": "HowToStep",
"name": "Resolve Instances Stopping Automatically",
"text": "Check your credit balance. If it hits zero or below, your instances will be stopped automatically. Add more credits to your account to keep instances running."
},
{
"@type": "HowToStep",
"name": "Fix spend_rate_limit Error",
"text": "There is a spend rate limit for new accounts. The limit is extremely small for unverified accounts, so make sure to verify your email first. The limit increases over time automatically. Try a cheaper instance type or wait a few hours. If still having trouble, use the online support chat in the lower right."
},
{
"@type": "HowToStep",
"name": "Fix SSH Password Prompt",
"text": "There is no SSH password - we use SSH key authentication. If SSH asks for a password, there is something wrong with your SSH key or client configuration. On Ubuntu or Mac: 1) Generate keypair with ssh-keygen -t rsa 2) Load the key with ssh-add; ssh-add -l 3) Get public key with cat ~/.ssh/id_rsa.pub 4) Copy the entire output (including ssh-rsa prefix and user@host suffix) and paste into your Keys section."
}
]
})
}}
/>
### I stopped my instance, and now when I try to restart it the status is stuck on "scheduling". What is wrong?
When you stop an instance, the gpu(s) it was using may get reassigned. When you later then try to restart the instance, it tries to get those gpu(s) back - that is the "scheduling" phase. If another high priority job is currently using any of the same gpu(s), your instance will be stuck in "scheduling" phase until the conflicting jobs are done. We know this is not ideal, and we are working on ways to migrate containers across gpus and machines, but until then we recommend not stopping an instance unless you are ok with the risk of waiting a while to restart it."
### All my instances keep stopping, switching to inactive status, even though I didn't press the stop button. What's going on?
Check your credit balance. If it hits zero or below, your instances will be stopped automatically.
### I keep getting this error: spend\_rate\_limit. What's going on?
There is a spend rate limit for new accounts. The limit is extremely small for unverified accounts, so make sure to verify your email. The limit increases over time, so try a cheaper instance type or wait a few hours. If you are still having trouble, use the online support chat in the lower right.
### I tried to connect with ssh and it asked for a password. What is the password?
There is no ssh password, we use ssh key authentication. If ssh asks for a password, typically this means there is something wrong with the ssh key that you entered or your ssh client is misconfigured.
On Ubuntu or Mac, first you need to generate an rsa ssh public/private keypair using the command:
Next you may need to force the daemon to load the new private key, and confirm it's loaded:
Then get the contents of the public key with:
Copy the entire output to your clipboard, then paste that into a new SSH Key in your [Keys section](https://cloud.vast.ai/manage-keys/). The key text *includes* the opening "ssh-rsa" part and the ending "user\@something" part. If you don't copy the entire thing, it won't work.
Example SSH key text:
**Examples:**
Example 1 (unknown):
```unknown
Next you may need to force the daemon to load the new private key, and confirm it's loaded:
```
Example 2 (unknown):
```unknown
Then get the contents of the public key with:
```
Example 3 (unknown):
```unknown
Copy the entire output to your clipboard, then paste that into a new SSH Key in your [Keys section](https://cloud.vast.ai/manage-keys/). The key text *includes* the opening "ssh-rsa" part and the ending "user\@something" part. If you don't copy the entire thing, it won't work.
Example SSH key text:
```
---
## Tax Guide for Hosts
**URL:** llms-txt#tax-guide-for-hosts
Source: https://docs.vast.ai/documentation/host/guide-to-taxes
<script
type="application/ld+json"
dangerouslySetInnerHTML={{
__html: JSON.stringify({
"@context": "https://schema.org",
"@type": "FAQPage",
"mainEntity": [
{
"@type": "Question",
"name": "What is Stripe Express, and how do I access it?",
"acceptedAnswer": {
"@type": "Answer",
"text": "Stripe Express allows you to update your tax information, manage tax forms, and track your earnings. If you're working with Vast.ai and earned $600 or more (within the calendar year in the US), Stripe will send an email inviting you to create an account and log in to Stripe Express."
}
},
{
"@type": "Question",
"name": "When will I receive my 1099?",
"acceptedAnswer": {
"@type": "Answer",
"text": "Your 1099 tax form will be sent to you by January 31st. Starting November 1st, Stripe will email you instructions on how to set up e-delivery and create a Stripe Express account. Before mid January, confirm your tax information is correct via Stripe Express. By January 31st, your 1099 will be available to download through Stripe Express or mailed to you if you don't consent to e-delivery."
}
},
{
"@type": "Question",
"name": "I earned enough to need a 1099 form. Why haven't I received an email from Stripe?",
"acceptedAnswer": {
"@type": "Answer",
"text": "If you earned enough to need a 1099 form, you should have received an email from Stripe. Check your spam/junk mail folder for an email titled 'Get your Vast.ai 2023 tax forms faster by enabling e-delivery'. Vast.ai may not have your most current email address on file, or the email address associated with your account may be incorrect, missing, or unable to receive mail."
}
},
{
"@type": "Question",
"name": "Will I receive a 1099 form?",
"acceptedAnswer": {
"@type": "Answer",
"text": "If you earned less than $600 over the course of the year, you may not receive a 1099 form unless you meet a threshold in your state. If your state has a filing threshold lower than $600, you might receive a 1099 form. You can check your state's requirements for 1099 state requirements."
}
},
{
"@type": "Question",
"name": "Is VAT deducted for European businesses?",
"acceptedAnswer": {
"@type": "Answer",
"text": "Vast is located in California. We do not do anything with/about VAT currently."
}
},
{
"@type": "Question",
"name": "Is VAT specified on the invoice?",
"acceptedAnswer": {
"@type": "Answer",
"text": "Vast is located in California. We do not do anything with/about VAT currently."
}
}
]
})
}}
/>
Disclaimer: As an independent contractor, you are responsible for keeping track of your earnings and accurately reporting them in tax filings. If you have any questions about what to report on your taxes, you should consult with a tax professional. Vast.ai cannot provide you with tax advice nor can we verify the accuracy of any publicly available tax guidance online.
Keep in mind: Vast.ai does not automatically withhold taxes. We calculate the subtotal of your earnings based on the date the earnings were deposited.
---
## Cluster Management Commands Reference
**URL:** llms-txt#cluster-management-commands-reference
* `./vast create cluster SUBNET MANAGER_ID`
* Initializes a cluster containing the machine with ID `MANAGER_ID` as its manager node and using the network interface corresponding to `SUBNET`
* `./vast show clusters`
* Shows clusters, for each cluster showing its `CLUSTER_ID`, associated `SUBNET`, manager node machine\_id, and list of member machines.
* `./vast join cluster CLUSTER_ID MACHINE_IDS`
* Takes `MACHINE_IDS` as a space seperated list, and adds them to the cluster specified by `CLUSTER_ID`
* `./vast remove-machine-from-cluster CLUSTER_ID MACHINE_ID [NEW_MANAGER_ID]`
* Removes machine `MACHINE_ID` from cluster `CLUSTER_ID`. If the machine is the only manager, another machine in the cluster `NEW_MANAGER_ID` must be specified so that the cluster still has a manager.
* `./vast delete cluster CLUSTER_ID`
* Deletes cluster `CLUSTER_ID`. Fails if cluster resources are currently in use by client instances.
---
## Advanced Setup
**URL:** llms-txt#advanced-setup
**Contents:**
- Overview
- Customization Options
- PROVISIONING\_SCRIPT
- How to use
- Example PROVISIONING\_SCRIPT
Source: https://docs.vast.ai/documentation/templates/advanced-setup
This guide covers advanced customization techniques available on the Vast.ai platform. These features allow you to extend and enhance your templates beyond basic configuration.
For a complete reference of all template settings, see [Template Settings](/documentation/templates/template-settings).
For a step-by-step tutorial on creating your first template, see [Creating Templates](/documentation/templates/creating-templates).
## Customization Options
There are two main ways to customize templates on Vast.ai:
1. **Runtime customization with PROVISIONING\_SCRIPT** - Add a setup script that runs when the instance starts
* Works with any Docker image
* Simplest approach - no Docker build needed
* Perfect for installing packages, downloading models, configuring services
2. **Build custom Docker images** - Create your own Dockerfile with everything pre-installed
* Can start FROM Vast base images for built-in security features
* Or FROM any other base image
* Full control, faster instance startup
* Best for complex setups or frequently reused configurations
## PROVISIONING\_SCRIPT
Vast.ai templates support running a remote script on start to help configure the instance and download models and extensions that may not already be available in the Docker image.
This is the simplest way to customize a template - you start with one of our recommended templates (like `vastai/base-image` or `vastai/pytorch`) and add custom setup via a provisioning script.
1. Go to the [Templates tab](https://cloud.vast.ai/templates/) in Vast.ai interface
2. Search for "base-image" or "Pytorch" depending on your needs:
* `vastai/base-image` is a general purpose image
* `vastai/pytorch` is a base image for working with PyTorch-based applications on Vast
3. Click "Edit" on your chosen template
4. Add the PROVISIONING\_SCRIPT environment variable:
* In the Environment Variables section, add a new variable named "PROVISIONING\_SCRIPT"
* The value should be a URL pointing to a shell script (from GitHub, Gist, etc.)
5. Make sure to click "+" to add the environment variable
6. Click Create and Use
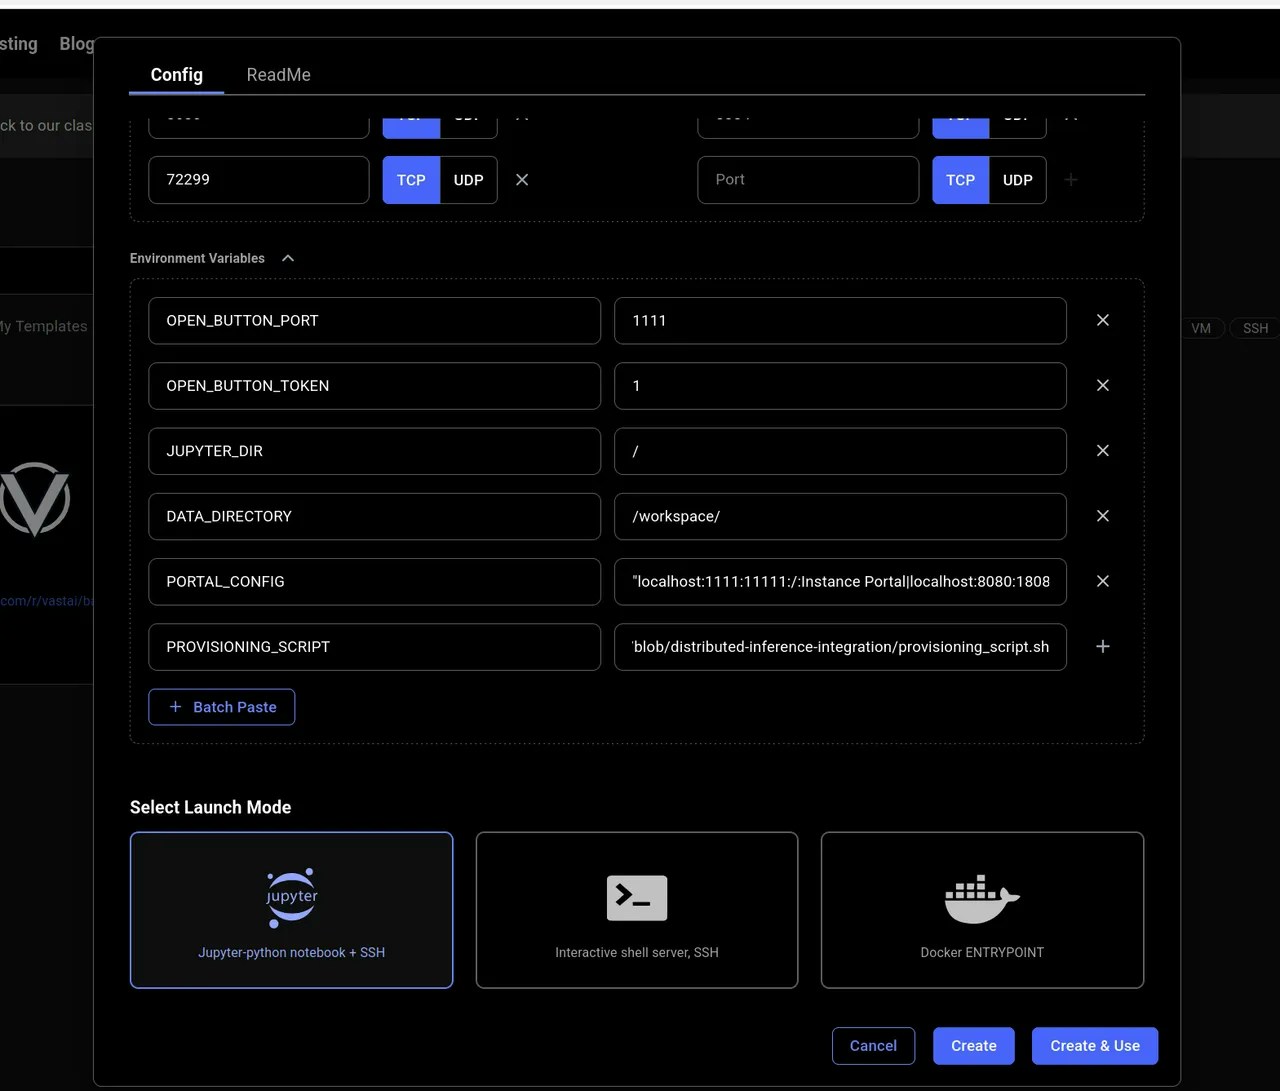 ### Example PROVISIONING\_SCRIPT
```bash Bash theme={null}
#!/bin/bash
**Examples:**
Example 1 (unknown):
```unknown
5. Make sure to click "+" to add the environment variable
6. Click Create and Use
### Example PROVISIONING\_SCRIPT
```
---
## incoming requests
**URL:** llms-txt#incoming-requests
backend = Backend(
model_server_url=MODEL_SERVER_URL,
model_log_file=os.environ["MODEL_LOG"],
allow_parallel_requests=True,
# give the backend a handler instance that is used for benchmarking
# number of benchmark run and number of words for a random benchmark run are given
benchmark_handler=GenerateHandler(benchmark_runs=3, benchmark_words=256),
# defines how to handle specific log messages. See docstring of LogAction for details
log_actions=[
(LogAction.ModelLoaded, MODEL_SERVER_START_LOG_MSG),
(LogAction.Info, '"message":"Download'),
*[
(LogAction.ModelError, error_msg)
for error_msg in MODEL_SERVER_ERROR_LOG_MSGS
],
],
)
---
## [https://run.vast.ai/get\_autogroup\_workers/](https://run.vast.ai/get_autogroup_workers/)
**URL:** llms-txt#[https://run.vast.ai/get\_autogroup\_workers/](https://run.vast.ai/get_autogroup_workers/)
**Contents:**
- Inputs
- Outputs
- Example
* `id` (int): The id value of the Worker Group.
* `api_key` (string): The Vast API key associated with the account that controls the Endpoint.
The `api_key` could alternatively be provided in the request header as a bearer token.
For each GPU instance in the Worker Group, the following will be returned:
* `cur_load`(float): Current load (as defined by the PyWorker) the GPU instance is receiving per second.
* `cur_load_rolling_avg`(float): Rolling average of `cur_load`.
* `cur_perf`(float): The most recent or current operational performance level of the instance (as defined by the PyWorker). For example, a text generation model has the units of tokens generated per second.
* `disk_usage`(float): Storage used by instance (in Gb).
* `dlperf`(float): Measured DLPerf of the instance. DLPerf is explained [here.](/documentation/reference/faq/index)
* `id`(int): Instance ID.
* `loaded_at`(float): Unix epoch time the instance finished loading.
* `measured_perf`(float): Benchmarked performances (tokens/s). Set to DLPerf if instance is not benchmarked.
* `perf`(float): `measured_perf` \* `reliability`.
* `reliability`(float): Uptime of the instance, ranges 0-1.
* `reqs_working`(int): Number of active requests currently being processed by the instance.
* `status`(string): Current status of the worker.
Run the following Bash command in a terminal to receive Worker Group workers.
**Examples:**
Example 1 (unknown):
```unknown
## Outputs
For each GPU instance in the Worker Group, the following will be returned:
* `cur_load`(float): Current load (as defined by the PyWorker) the GPU instance is receiving per second.
* `cur_load_rolling_avg`(float): Rolling average of `cur_load`.
* `cur_perf`(float): The most recent or current operational performance level of the instance (as defined by the PyWorker). For example, a text generation model has the units of tokens generated per second.
* `disk_usage`(float): Storage used by instance (in Gb).
* `dlperf`(float): Measured DLPerf of the instance. DLPerf is explained [here.](/documentation/reference/faq/index)
* `id`(int): Instance ID.
* `loaded_at`(float): Unix epoch time the instance finished loading.
* `measured_perf`(float): Benchmarked performances (tokens/s). Set to DLPerf if instance is not benchmarked.
* `perf`(float): `measured_perf` \* `reliability`.
* `reliability`(float): Uptime of the instance, ranges 0-1.
* `reqs_working`(int): Number of active requests currently being processed by the instance.
* `status`(string): Current status of the worker.
```
Example 2 (unknown):
```unknown
## Example
Run the following Bash command in a terminal to receive Worker Group workers.
```
---
## Guide: Linux Virtual Desktop on Vast.ai
**URL:** llms-txt#guide:-linux-virtual-desktop-on-vast.ai
**Contents:**
- Prerequisites
- Initial Setup
- Creating Your Instance
- Accessing Your Instance
- First-Time Setup
- Features and Capabilities
- Pre-installed Software
- Remote Desktop Options
- Selkies WebRTC (Recommended)
- NoVNC
This guide will help you set up and use a Linux Virtual Desktop environment on Vast.ai using the Ubuntu Desktop (VM) template.
* A Vast.ai account
* [(Optional) Install TLS Certificate for Jupyter](/documentation/instances/jupyter)
* [(Optional) SSH client installed on your local machine and SSH public key added the Keys section at cloud.vast.ai](/documentation/instances/sshscp)
### Creating Your Instance
1. Navigate to the [Templates tab](https://cloud.vast.ai/templates/)
2. In the search bar at the top, type "Ubuntu Desktop (VM)" to find the template. Make sure you're searching across all templates and not only recommended templates.
3. Select the template by clicking the play button
4. Choose your preferred GPU from the search results. Try to find a GPU close to you if possible
5. Click "Rent" to create your instance
6. Go to Instances tab and wait for the blue button on the instance card to say "Open". It can take a good amount of time to load if the docker image isn't cached on the machine.
### Accessing Your Instance
After launching your instance, you have several ways to connect:
* **Browser Access** (Recommended)
* Click the 'Open' button on your instance card to launch the Instance Portal
* Choose between two browser-based viewers:
* Selkies WebRTC: More responsive, better performance
* NoVNC: Alternative option if WebRTC isn't working well
* **VNC Client**
* Connect using any VNC client
* Address: instance\_ip:5900
* Password: Your OPEN\_BUTTON\_TOKEN
* **SSH Access**
* Connect via SSH using the command provided in the Vast.ai console
* For non-root access:
* Change the default password by executing the following command in Linux terminal and go along with rest of the prompts:
* Configure TLS (Optional):
* [Install the 'Jupyter' certificate](/documentation/instances/jupyter) following the instance setup guide
* This eliminates certificate warnings in your browser
## Features and Capabilities
### Pre-installed Software
The environment comes with several applications ready to use:
* **Web Browsers**
* Firefox
* Chrome
* **Development Tools**
* Docker (pre-configured for non-root use)
* Terminal emulator
* Common development utilities
* **Creative Software**
* Blender (3D creation suite)
* Wine (Windows application compatibility layer)
* **Gaming Support**
* Steam (with Proton compatibility for Windows games)
* Sunshine streaming server
### Remote Desktop Options
### Selkies WebRTC (Recommended)
* Access via port 6100
* Best performance for most users
* Hardware-accelerated graphics
* Audio support
* Access via port 6200
* Backup option if WebRTC isn't working
* More compatible with different browsers
* Traditional VNC connection
* Use your preferred VNC client
* Port: 5900
### Advanced Features
### Tailscale Integration
1. [Install Tailscale](https://tailscale.com/kb/1347/installation) on your local device. Password is "password" if you haven't changed it.
2. On the instance, run:
Follow rest of the prompts to connect to your tailnet.
### Game Streaming with Moonlight
1. Set up Tailscale (required)
2. Configure the pre-installed Sunshine server
3. Connect using the Moonlight client on your local device
### Cloudflare Tunnels
* Create [secure tunnels](https://developers.cloudflare.com/cloudflare-one/connections/connect-networks/get-started/) without exposing ports and having to create a new instance
* Manage via the Instance Portal
* Perfect for temporary application sharing
## Security Considerations
The following ports are exposed by default:
* 22: SSH
* 1111: Instance Portal
* 3478: TURN Server
* 5900: VNC Server
* 6100: Selkies WebRTC
* 6200: NoVNC
* 741641: Tailscale
* Using Tailscale for secure access
* Creating Cloudflare tunnels for HTTP access
* Closing unnecessary ports
* Instance Portal
* username: vastai
* password: Your OPEN\_BUTTON\_TOKEN
* Change the default user password immediately
* Use SSH keys for remote access
* **Connection Issues**
* Try different connection methods (WebRTC, NoVNC, VNC)
* Check if ports are accessible
* Verify your authentication credentials
* **Performance Problems**
* Ensure you're using hardware acceleration
* Try WebRTC for better performance
* Check your internet connection quality
* **Application Problems**
* Check system logs: `/var/log/portal/`
* Restart Caddy if needed: `systemctl restart caddy`
* Verify application configurations in `/etc/portal.yaml`
* **Security**
* Change default passwords immediately
* Use Tailscale or Cloudflare tunnels when possible
* Keep unnecessary ports closed
* **Performance**
* Use WebRTC for best desktop performance
* Enable hardware acceleration when available
* Close unused applications
* **Data Management**
* Keep important data backed up
* Use version control for development
* Monitor instance storage usage
## Additional Resources
* [Vast.ai Documentation](https://docs.vast.ai)
* [Tailscale Documentation](https://tailscale.com/kb/)
* [Cloudflare Tunnels](https://developers.cloudflare.com/cloudflare-one/connections/connect-apps/)
**Examples:**
Example 1 (unknown):
```unknown
### First-Time Setup
* Change the default password by executing the following command in Linux terminal and go along with rest of the prompts:
```
Example 2 (unknown):
```unknown
* Configure TLS (Optional):
* [Install the 'Jupyter' certificate](/documentation/instances/jupyter) following the instance setup guide
* This eliminates certificate warnings in your browser
## Features and Capabilities
### Pre-installed Software
The environment comes with several applications ready to use:
* **Web Browsers**
* Firefox
* Chrome
* **Development Tools**
* Docker (pre-configured for non-root use)
* Terminal emulator
* Common development utilities
* **Creative Software**
* Blender (3D creation suite)
* Wine (Windows application compatibility layer)
* **Gaming Support**
* Steam (with Proton compatibility for Windows games)
* Sunshine streaming server
### Remote Desktop Options
### Selkies WebRTC (Recommended)
* Access via port 6100
* Best performance for most users
* Hardware-accelerated graphics
* Audio support
### NoVNC
* Access via port 6200
* Backup option if WebRTC isn't working
* More compatible with different browsers
### VNC Client
* Traditional VNC connection
* Use your preferred VNC client
* Port: 5900
### Advanced Features
### Tailscale Integration
1. [Install Tailscale](https://tailscale.com/kb/1347/installation) on your local device. Password is "password" if you haven't changed it.
2. On the instance, run:
```
---
## Modify OpenAI's API key and API base to use vLLM's's API server.
**URL:** llms-txt#modify-openai's-api-key-and-api-base-to-use-vllm's's-api-server.
**Contents:**
- Advanced Usage: Rerankers, Classifiers, and Multiple Models at the same time
openai_api_key = "EMPTY"
openai_api_base = "http://:/v1"
client = OpenAI(
api_key=openai_api_key,
base_url=openai_api_base,
)
model = "michaelfeil/bge-small-en-v1.5"
embeddings = client.embeddings.create(model=model, input="What is Deep Learning?").data[0].embedding
print("Embeddings:")
print(embeddings)
bash Bash theme={null}
vastai create instance --image michaelf34/infinity:latest --env '-p 8000:8000' --disk 40 --args v2 --model-id mixedbread-ai/mxbai-rerank-xsmall-v1 --model-id SamLowe/roberta-base-go_emotions --port 8000
python icon="python" Python theme={null}
import requests
base_url = "http://:"
python icon="python" Python theme={null}
rerank_url = base_url + "/rerank"
model1 = "mixedbread-ai/mxbai-rerank-xsmall-v1"
input_json = {"query": "Where is Munich?","documents": ["Munich is in Germany.", "The sky is blue."],"return_documents": "false","model": "mixedbread-ai/mxbai-rerank-xsmall-v1"}
headers = {
"accept": "application/json",
"Content-Type": "application/json"
}
payload = {
"query": input_json["query"],
"documents": input_json["documents"],
"return_documents": input_json["return_documents"],
"model": model1
}
response = requests.post(rerank_url, json=payload, headers=headers)
if response.status_code == 200:
resp_json = response.json()
print(resp_json)
else:
print(response.status_code)
print(response.text)
python icon="python" Python theme={null}
classify_url = base_url + "/classify"
model2 = "SamLowe/roberta-base-go_emotions"
headers = {
"accept": "application/json",
"Content-Type": "application/json"
}
payload = {
"input": ["I am feeling really happy today"],
"model": model2
}
response = requests.post(classify_url, json=payload, headers=headers)
if response.status_code == 200:
resp_json = response.json()
print(resp_json)
else:
print(response.status_code)
print(response.text)
```
We can see from this that the most likely emotion from this model's choices was "joy".
So there you have it, now you can see how with Vast and Infinity, you can serve embedding, reranking, and classifier models all from just one GPU on the most affordable compute on the market.
**Examples:**
Example 1 (unknown):
```unknown
In this, we can see that the embeddings from our model. Feel free to delete this instance as we'll redeploy a different configuration now.
### Advanced Usage: Rerankers, Classifiers, and Multiple Models at the same time
The following steps will show you how to use Rerankers, Classifiers, and deploy them at the same time. First, we'll deploy two models on the same GPU and container, the first is a reranker and the second is a classifier. Note that all we've done is change the value for `--model-id`, and added a new `--model-id` with its own value. These represent the two different models that we're running.
```
Example 2 (unknown):
```unknown
Now, we'll call these models with the requests library and follow `Infinity`'s API spec. Add your new IP address and Port here:
```
Example 3 (unknown):
```unknown
```
Example 4 (unknown):
```unknown
We can see from the output of the cell that it gives us a list of jsons for each score, in order of highest relevance. Therefore in this case, the first entry in the list had a relevancy of .74, meaning that it "won" the ranking of samples for this query.
And we'll now query the classification model:
```
---
## Core Configuration
**URL:** llms-txt#core-configuration
AUTO_UPDATE=false # Auto-update to latest release
FORGE_REF=latest # Git reference for updates
FORGE_ARGS="" # Launch arguments
---
## Disk usage
**URL:** llms-txt#disk-usage
---
## Core Settings
**URL:** llms-txt#core-settings
COMFYUI_ARGS="--disable-auto-launch --port 18188 --enable-cors-header" # ComfyUI launch arguments
---
## update team role
**URL:** llms-txt#update-team-role
Source: https://docs.vast.ai/api-reference/team/update-team-role
api-reference/openapi.json put /api/v0/team/roles/{id}/
Update an existing team role with new name and permissions.
CLI Usage: `vastai update team-role --name --permissions `
---
## schedule maint
**URL:** llms-txt#schedule-maint
Source: https://docs.vast.ai/api-reference/machines/schedule-maint
api-reference/openapi.json put /api/v0/machines/{machine_id}/dnotify
Schedules a maintenance window for a specified machine and notifies clients.
CLI Usage: `vastai schedule maint --sdate --duration `
---
## PyTorch
**URL:** llms-txt#pytorch
Source: https://docs.vast.ai/pytorch
<script
type="application/ld+json"
dangerouslySetInnerHTML={{
__html: JSON.stringify({
"@context": "https://schema.org",
"@type": "HowTo",
"name": "Running PyTorch on Vast.ai: A Complete Guide",
"description": "Step-by-step guide to setting up and running PyTorch workloads on Vast.ai GPU cloud computing platform",
"image": "https://docs.vast.ai/images/pytorch-logo.webp",
"totalTime": "PT30M",
"supply": [
{
"@type": "HowToSupply",
"name": "Vast.ai Account"
},
{
"@type": "HowToSupply",
"name": "GPU Instance"
},
{
"@type": "HowToSupply",
"name": "PyTorch Framework"
}
],
"tool": [
{
"@type": "HowToTool",
"name": "SSH Client"
},
{
"@type": "HowToTool",
"name": "Jupyter Notebook"
}
],
"step": [
{
"@type": "HowToStep",
"name": "Set up Prerequisites",
"text": "Create a Vast.ai account and install necessary tools like SSH client",
"url": "https://docs.vast.ai/pytorch#prerequisites"
},
{
"@type": "HowToStep",
"name": "Launch GPU Instance",
"text": "Create a GPU instance with PyTorch template on Vast.ai",
"url": "https://docs.vast.ai/pytorch#launch-instance"
},
{
"@type": "HowToStep",
"name": "Configure Environment",
"text": "Set up PyTorch environment and install dependencies",
"url": "https://docs.vast.ai/pytorch#configure"
}
],
"author": {
"@type": "Organization",
"name": "Vast.ai Team"
},
"datePublished": "2025-01-13",
"dateModified": "2025-05-12"
})
}}
/>
---
## list network-volume
**URL:** llms-txt#list-network-volume
Source: https://docs.vast.ai/api-reference/network-volumes/list-network-volume
api-reference/openapi.json post /api/v0/network_volume/
Lists a network disk for rent as network volumes, or updates an existing listing with a new price/size/end date/discount.
CLI Usage: `vastai list network-volume [options]`
---
## Cluster registration guide
**URL:** llms-txt#cluster-registration-guide
* Update to the newest version of the CLI: go to ([https://cloud.vast.ai/cli/)\[https://cloud.vast.ai/cli/](https://cloud.vast.ai/cli/\)\[https://cloud.vast.ai/cli/)] and copy+run the command starting with `wget`.
* Identify and test the subnet to register:
* On the manager node ---
* Run `ip addr` or `ifconfig` (the `ip` utility is part of the `iproute2` package).
* Identify which interface correspond's to their LAN. For most hosts this will be an ethernet interface, which have the naming format `enp$BUSs$SLOT[f$FUNCTION]]` in modern Ubuntu.
* Hosts using Mellanox devices for their main ethernet connection may instead see their interface show up as `bond0`
* Find the IPv4 subnet corresponding to that network interface --
* In `ip addr` output, the third line for each interface usually starts with `inet IPv4SUBNET` where `IPv4SUBNET` has the format `IPv4ADDRESS/MASK` where `MASK` is a non-negative integer \< 32.
* Test that the other machines to be added to the cluster can reach the manager node on that subnet/address.
* On the manager node:
* run `nc -l IPv4ADDRESS 2337` where `IPv4ADDRESS` is the IPv4 address component of the chosen subnet.
* On each other node:
* run `nc IPv4ADDRESS 2337`
* Type in some test text (i.e., "hello") and press enter
* Check that `nc` received and outputed the test text on the manager node.
* Run `./vast.py create cluster IPv4SUBNET MACHINE_ID_OF_MANAGER_NODE`
* Run `./vast.py show clusters` to check the ID of the cluster you just created.
* Run `./vast.py join cluster MACHINE_IDS` where `MACHINE_IDS` is a space seperated list of the remaining machines to add to your cluster.
---
## Download new models (example)
**URL:** llms-txt#download-new-models-(example)
**Contents:**
- Model Organization
- Optimization Tips
- Performance Settings
- Batch Processing
- Memory Management
wget https://civitai.com/api/download/models/[MODEL_ID]
text Text theme={null}
/workspace/stable-diffusion-webui/models/
├── Stable-diffusion/ # Main models
├── Lora/ # LoRA models
├── VAE/ # VAE files
└── embeddings/ # Textual inversions
python icon="python" Python theme={null}
**Examples:**
Example 1 (unknown):
```unknown
### Model Organization
Keep your models organized:
```
Example 2 (unknown):
```unknown
You can access jupyter clicking on the jupyter button on the instance card to easily upload and download files.
## Optimization Tips
### Performance Settings
Access Settings > Performance in Web UI:
* Enable xformers memory efficient attention
* Use float16 precision when possible
* Optimize VRAM usage based on your GPU
### Batch Processing
For multiple images:
* Use batch count for variations
* Use batch size for parallel processing
* Monitor GPU memory usage
### Memory Management
```
---
## remove team role
**URL:** llms-txt#remove-team-role
Source: https://docs.vast.ai/api-reference/team/remove-team-role
api-reference/openapi.json delete /api/v0/team/roles/{id}
Removes a role from the team. Cannot remove the team owner role.
CLI Usage: `vastai remove team-role `
---
## attach ssh-key
**URL:** llms-txt#attach-ssh-key
Source: https://docs.vast.ai/api-reference/instances/attach-ssh-key
api-reference/openapi.json post /api/v0/instances/{id}/ssh/
Attaches an SSH key to the specified instance, allowing SSH access using the provided key.
CLI Usage: `vastai attach ssh `
---
## Scheduled Cloud Backups
**URL:** llms-txt#scheduled-cloud-backups
**Contents:**
- Introduction
- Prerequisites
- Setup
- 1. Setting Up Cloud Storage Connections
- 2. Understanding Backup Options
- Backup Methods
- 1. Using CLI for Scheduled Backups
- 2. Using Cron on Your Personal Linux Computer
- Viewing Scheduled Backup Jobs
- Deleting Scheduled Backup Jobs
Source: https://docs.vast.ai/documentation/instances/storage/cloud-backups
Learn how to set up and schedule automated Vast.ai cloud backups using CLI or cron. Keep your data safe with best practices and easy management.
This guide walks you through setting up and running automated backups for your Vast.ai container instances to cloud storage. Cloud backups can you help preserve your work when using Vast's Docker-based instances. With proper backup strategies, you can ensure your valuable data remains safe and accessible even if your instance goes offline.
* A Vast.ai account
* Access to a Vast.ai Docker-based instance
* [Cloud storage connection set up in Vast.ai](/documentation/instances/cloud-sync)
* [(Optional) Install and use vast-cli](/cli/get-started)
* [(Optional) Understanding of how to use cron in computers with Unix-like OS](https://cronitor.io/guides/cron-jobs)
### 1. Setting Up Cloud Storage Connections
Before creating backup jobs, you need to ensure you have a cloud storage connection set up in your Vast.ai account. You can view your existing connections using the vast-cli:
If you don't have a connection yet, you'll need to set one up in [Vast.ai's Settings page ](/documentation/instances/cloud-sync)before proceeding with backup operations.
### 2. Understanding Backup Options
Vast.ai provides multiple approaches to schedule data backups:
* **Using Vast's job scheduling system via CLI** - Create hourly, daily, or weekly automated backup jobs
* **Using cron on your personal computer** - Schedule backups with custom timing from your local machine
Both approaches have their advantages depending on your workflow and requirements.
### 1. Using CLI for Scheduled Backups
The vast-cli tool allows you to create scheduled backup jobs with several timing options. The basic structure of a scheduled backup command includes these parameters:
You can run this command to see more details about these parameters:
Let's explore the different scheduling options:
To create a weekly backup job that runs every Saturday at 9 PM UTC:
* \--src /workspace specifies the source directory on your instance
* \--dst /backups/19015821\_backups/ is the destination folder in your cloud storage
* \--instance 19015821 is your instance's ID
* \--connection 19447 is your cloud storage connection ID
* \--day 6 represents Saturday (0=Sunday, 1=Monday, etc.)
* \--hour 21 represents 9 PM UTC (0=12am UTC, 1=1am UTC, etc.)
For daily backups at a specific hour (e.g., 9 PM UTC every day):
The --day "\*" parameter indicates that the job should run every day.
For hourly backups that run every hour of every day:
Setting both --day "\*" and --hour "\*" along with --schedule HOURLY makes the job run every hour.
To update your backup schedule, simply run the same command with the new schedule. The system will prompt you for confirmation, and upon acceptance, it will update the schedule accordingly.
### 2. Using Cron on Your Personal Linux Computer
If you prefer more granular control over your backup schedule, you can use cron on your local Linux or Mac computer. This approach allows for customized schedules beyond the hourly/daily/weekly options.
First, open your crontab file for editing:
Then, add a line that specifies your backup schedule. For example, to run a backup every 4 hours:
In this cron schedule:
* 0 represents the minute (0th minute of the hour)
* \*/4 means "every 4 hours"
* The three asterisks \* \* \* represent day of month, month, and day of week, indicating "every day"
## Viewing Scheduled Backup Jobs
To see all your currently scheduled backup jobs:
Understanding the Output
### Example PROVISIONING\_SCRIPT
```bash Bash theme={null}
#!/bin/bash
**Examples:**
Example 1 (unknown):
```unknown
5. Make sure to click "+" to add the environment variable
6. Click Create and Use
### Example PROVISIONING\_SCRIPT
```
---
## incoming requests
**URL:** llms-txt#incoming-requests
backend = Backend(
model_server_url=MODEL_SERVER_URL,
model_log_file=os.environ["MODEL_LOG"],
allow_parallel_requests=True,
# give the backend a handler instance that is used for benchmarking
# number of benchmark run and number of words for a random benchmark run are given
benchmark_handler=GenerateHandler(benchmark_runs=3, benchmark_words=256),
# defines how to handle specific log messages. See docstring of LogAction for details
log_actions=[
(LogAction.ModelLoaded, MODEL_SERVER_START_LOG_MSG),
(LogAction.Info, '"message":"Download'),
*[
(LogAction.ModelError, error_msg)
for error_msg in MODEL_SERVER_ERROR_LOG_MSGS
],
],
)
---
## [https://run.vast.ai/get\_autogroup\_workers/](https://run.vast.ai/get_autogroup_workers/)
**URL:** llms-txt#[https://run.vast.ai/get\_autogroup\_workers/](https://run.vast.ai/get_autogroup_workers/)
**Contents:**
- Inputs
- Outputs
- Example
* `id` (int): The id value of the Worker Group.
* `api_key` (string): The Vast API key associated with the account that controls the Endpoint.
The `api_key` could alternatively be provided in the request header as a bearer token.
For each GPU instance in the Worker Group, the following will be returned:
* `cur_load`(float): Current load (as defined by the PyWorker) the GPU instance is receiving per second.
* `cur_load_rolling_avg`(float): Rolling average of `cur_load`.
* `cur_perf`(float): The most recent or current operational performance level of the instance (as defined by the PyWorker). For example, a text generation model has the units of tokens generated per second.
* `disk_usage`(float): Storage used by instance (in Gb).
* `dlperf`(float): Measured DLPerf of the instance. DLPerf is explained [here.](/documentation/reference/faq/index)
* `id`(int): Instance ID.
* `loaded_at`(float): Unix epoch time the instance finished loading.
* `measured_perf`(float): Benchmarked performances (tokens/s). Set to DLPerf if instance is not benchmarked.
* `perf`(float): `measured_perf` \* `reliability`.
* `reliability`(float): Uptime of the instance, ranges 0-1.
* `reqs_working`(int): Number of active requests currently being processed by the instance.
* `status`(string): Current status of the worker.
Run the following Bash command in a terminal to receive Worker Group workers.
**Examples:**
Example 1 (unknown):
```unknown
## Outputs
For each GPU instance in the Worker Group, the following will be returned:
* `cur_load`(float): Current load (as defined by the PyWorker) the GPU instance is receiving per second.
* `cur_load_rolling_avg`(float): Rolling average of `cur_load`.
* `cur_perf`(float): The most recent or current operational performance level of the instance (as defined by the PyWorker). For example, a text generation model has the units of tokens generated per second.
* `disk_usage`(float): Storage used by instance (in Gb).
* `dlperf`(float): Measured DLPerf of the instance. DLPerf is explained [here.](/documentation/reference/faq/index)
* `id`(int): Instance ID.
* `loaded_at`(float): Unix epoch time the instance finished loading.
* `measured_perf`(float): Benchmarked performances (tokens/s). Set to DLPerf if instance is not benchmarked.
* `perf`(float): `measured_perf` \* `reliability`.
* `reliability`(float): Uptime of the instance, ranges 0-1.
* `reqs_working`(int): Number of active requests currently being processed by the instance.
* `status`(string): Current status of the worker.
```
Example 2 (unknown):
```unknown
## Example
Run the following Bash command in a terminal to receive Worker Group workers.
```
---
## Guide: Linux Virtual Desktop on Vast.ai
**URL:** llms-txt#guide:-linux-virtual-desktop-on-vast.ai
**Contents:**
- Prerequisites
- Initial Setup
- Creating Your Instance
- Accessing Your Instance
- First-Time Setup
- Features and Capabilities
- Pre-installed Software
- Remote Desktop Options
- Selkies WebRTC (Recommended)
- NoVNC
This guide will help you set up and use a Linux Virtual Desktop environment on Vast.ai using the Ubuntu Desktop (VM) template.
* A Vast.ai account
* [(Optional) Install TLS Certificate for Jupyter](/documentation/instances/jupyter)
* [(Optional) SSH client installed on your local machine and SSH public key added the Keys section at cloud.vast.ai](/documentation/instances/sshscp)
### Creating Your Instance
1. Navigate to the [Templates tab](https://cloud.vast.ai/templates/)
2. In the search bar at the top, type "Ubuntu Desktop (VM)" to find the template. Make sure you're searching across all templates and not only recommended templates.
3. Select the template by clicking the play button
4. Choose your preferred GPU from the search results. Try to find a GPU close to you if possible
5. Click "Rent" to create your instance
6. Go to Instances tab and wait for the blue button on the instance card to say "Open". It can take a good amount of time to load if the docker image isn't cached on the machine.
### Accessing Your Instance
After launching your instance, you have several ways to connect:
* **Browser Access** (Recommended)
* Click the 'Open' button on your instance card to launch the Instance Portal
* Choose between two browser-based viewers:
* Selkies WebRTC: More responsive, better performance
* NoVNC: Alternative option if WebRTC isn't working well
* **VNC Client**
* Connect using any VNC client
* Address: instance\_ip:5900
* Password: Your OPEN\_BUTTON\_TOKEN
* **SSH Access**
* Connect via SSH using the command provided in the Vast.ai console
* For non-root access:
* Change the default password by executing the following command in Linux terminal and go along with rest of the prompts:
* Configure TLS (Optional):
* [Install the 'Jupyter' certificate](/documentation/instances/jupyter) following the instance setup guide
* This eliminates certificate warnings in your browser
## Features and Capabilities
### Pre-installed Software
The environment comes with several applications ready to use:
* **Web Browsers**
* Firefox
* Chrome
* **Development Tools**
* Docker (pre-configured for non-root use)
* Terminal emulator
* Common development utilities
* **Creative Software**
* Blender (3D creation suite)
* Wine (Windows application compatibility layer)
* **Gaming Support**
* Steam (with Proton compatibility for Windows games)
* Sunshine streaming server
### Remote Desktop Options
### Selkies WebRTC (Recommended)
* Access via port 6100
* Best performance for most users
* Hardware-accelerated graphics
* Audio support
* Access via port 6200
* Backup option if WebRTC isn't working
* More compatible with different browsers
* Traditional VNC connection
* Use your preferred VNC client
* Port: 5900
### Advanced Features
### Tailscale Integration
1. [Install Tailscale](https://tailscale.com/kb/1347/installation) on your local device. Password is "password" if you haven't changed it.
2. On the instance, run:
Follow rest of the prompts to connect to your tailnet.
### Game Streaming with Moonlight
1. Set up Tailscale (required)
2. Configure the pre-installed Sunshine server
3. Connect using the Moonlight client on your local device
### Cloudflare Tunnels
* Create [secure tunnels](https://developers.cloudflare.com/cloudflare-one/connections/connect-networks/get-started/) without exposing ports and having to create a new instance
* Manage via the Instance Portal
* Perfect for temporary application sharing
## Security Considerations
The following ports are exposed by default:
* 22: SSH
* 1111: Instance Portal
* 3478: TURN Server
* 5900: VNC Server
* 6100: Selkies WebRTC
* 6200: NoVNC
* 741641: Tailscale
* Using Tailscale for secure access
* Creating Cloudflare tunnels for HTTP access
* Closing unnecessary ports
* Instance Portal
* username: vastai
* password: Your OPEN\_BUTTON\_TOKEN
* Change the default user password immediately
* Use SSH keys for remote access
* **Connection Issues**
* Try different connection methods (WebRTC, NoVNC, VNC)
* Check if ports are accessible
* Verify your authentication credentials
* **Performance Problems**
* Ensure you're using hardware acceleration
* Try WebRTC for better performance
* Check your internet connection quality
* **Application Problems**
* Check system logs: `/var/log/portal/`
* Restart Caddy if needed: `systemctl restart caddy`
* Verify application configurations in `/etc/portal.yaml`
* **Security**
* Change default passwords immediately
* Use Tailscale or Cloudflare tunnels when possible
* Keep unnecessary ports closed
* **Performance**
* Use WebRTC for best desktop performance
* Enable hardware acceleration when available
* Close unused applications
* **Data Management**
* Keep important data backed up
* Use version control for development
* Monitor instance storage usage
## Additional Resources
* [Vast.ai Documentation](https://docs.vast.ai)
* [Tailscale Documentation](https://tailscale.com/kb/)
* [Cloudflare Tunnels](https://developers.cloudflare.com/cloudflare-one/connections/connect-apps/)
**Examples:**
Example 1 (unknown):
```unknown
### First-Time Setup
* Change the default password by executing the following command in Linux terminal and go along with rest of the prompts:
```
Example 2 (unknown):
```unknown
* Configure TLS (Optional):
* [Install the 'Jupyter' certificate](/documentation/instances/jupyter) following the instance setup guide
* This eliminates certificate warnings in your browser
## Features and Capabilities
### Pre-installed Software
The environment comes with several applications ready to use:
* **Web Browsers**
* Firefox
* Chrome
* **Development Tools**
* Docker (pre-configured for non-root use)
* Terminal emulator
* Common development utilities
* **Creative Software**
* Blender (3D creation suite)
* Wine (Windows application compatibility layer)
* **Gaming Support**
* Steam (with Proton compatibility for Windows games)
* Sunshine streaming server
### Remote Desktop Options
### Selkies WebRTC (Recommended)
* Access via port 6100
* Best performance for most users
* Hardware-accelerated graphics
* Audio support
### NoVNC
* Access via port 6200
* Backup option if WebRTC isn't working
* More compatible with different browsers
### VNC Client
* Traditional VNC connection
* Use your preferred VNC client
* Port: 5900
### Advanced Features
### Tailscale Integration
1. [Install Tailscale](https://tailscale.com/kb/1347/installation) on your local device. Password is "password" if you haven't changed it.
2. On the instance, run:
```
---
## Modify OpenAI's API key and API base to use vLLM's's API server.
**URL:** llms-txt#modify-openai's-api-key-and-api-base-to-use-vllm's's-api-server.
**Contents:**
- Advanced Usage: Rerankers, Classifiers, and Multiple Models at the same time
openai_api_key = "EMPTY"
openai_api_base = "http://:/v1"
client = OpenAI(
api_key=openai_api_key,
base_url=openai_api_base,
)
model = "michaelfeil/bge-small-en-v1.5"
embeddings = client.embeddings.create(model=model, input="What is Deep Learning?").data[0].embedding
print("Embeddings:")
print(embeddings)
bash Bash theme={null}
vastai create instance --image michaelf34/infinity:latest --env '-p 8000:8000' --disk 40 --args v2 --model-id mixedbread-ai/mxbai-rerank-xsmall-v1 --model-id SamLowe/roberta-base-go_emotions --port 8000
python icon="python" Python theme={null}
import requests
base_url = "http://:"
python icon="python" Python theme={null}
rerank_url = base_url + "/rerank"
model1 = "mixedbread-ai/mxbai-rerank-xsmall-v1"
input_json = {"query": "Where is Munich?","documents": ["Munich is in Germany.", "The sky is blue."],"return_documents": "false","model": "mixedbread-ai/mxbai-rerank-xsmall-v1"}
headers = {
"accept": "application/json",
"Content-Type": "application/json"
}
payload = {
"query": input_json["query"],
"documents": input_json["documents"],
"return_documents": input_json["return_documents"],
"model": model1
}
response = requests.post(rerank_url, json=payload, headers=headers)
if response.status_code == 200:
resp_json = response.json()
print(resp_json)
else:
print(response.status_code)
print(response.text)
python icon="python" Python theme={null}
classify_url = base_url + "/classify"
model2 = "SamLowe/roberta-base-go_emotions"
headers = {
"accept": "application/json",
"Content-Type": "application/json"
}
payload = {
"input": ["I am feeling really happy today"],
"model": model2
}
response = requests.post(classify_url, json=payload, headers=headers)
if response.status_code == 200:
resp_json = response.json()
print(resp_json)
else:
print(response.status_code)
print(response.text)
```
We can see from this that the most likely emotion from this model's choices was "joy".
So there you have it, now you can see how with Vast and Infinity, you can serve embedding, reranking, and classifier models all from just one GPU on the most affordable compute on the market.
**Examples:**
Example 1 (unknown):
```unknown
In this, we can see that the embeddings from our model. Feel free to delete this instance as we'll redeploy a different configuration now.
### Advanced Usage: Rerankers, Classifiers, and Multiple Models at the same time
The following steps will show you how to use Rerankers, Classifiers, and deploy them at the same time. First, we'll deploy two models on the same GPU and container, the first is a reranker and the second is a classifier. Note that all we've done is change the value for `--model-id`, and added a new `--model-id` with its own value. These represent the two different models that we're running.
```
Example 2 (unknown):
```unknown
Now, we'll call these models with the requests library and follow `Infinity`'s API spec. Add your new IP address and Port here:
```
Example 3 (unknown):
```unknown
```
Example 4 (unknown):
```unknown
We can see from the output of the cell that it gives us a list of jsons for each score, in order of highest relevance. Therefore in this case, the first entry in the list had a relevancy of .74, meaning that it "won" the ranking of samples for this query.
And we'll now query the classification model:
```
---
## Core Configuration
**URL:** llms-txt#core-configuration
AUTO_UPDATE=false # Auto-update to latest release
FORGE_REF=latest # Git reference for updates
FORGE_ARGS="" # Launch arguments
---
## Disk usage
**URL:** llms-txt#disk-usage
---
## Core Settings
**URL:** llms-txt#core-settings
COMFYUI_ARGS="--disable-auto-launch --port 18188 --enable-cors-header" # ComfyUI launch arguments
---
## update team role
**URL:** llms-txt#update-team-role
Source: https://docs.vast.ai/api-reference/team/update-team-role
api-reference/openapi.json put /api/v0/team/roles/{id}/
Update an existing team role with new name and permissions.
CLI Usage: `vastai update team-role --name --permissions `
---
## schedule maint
**URL:** llms-txt#schedule-maint
Source: https://docs.vast.ai/api-reference/machines/schedule-maint
api-reference/openapi.json put /api/v0/machines/{machine_id}/dnotify
Schedules a maintenance window for a specified machine and notifies clients.
CLI Usage: `vastai schedule maint --sdate --duration `
---
## PyTorch
**URL:** llms-txt#pytorch
Source: https://docs.vast.ai/pytorch
<script
type="application/ld+json"
dangerouslySetInnerHTML={{
__html: JSON.stringify({
"@context": "https://schema.org",
"@type": "HowTo",
"name": "Running PyTorch on Vast.ai: A Complete Guide",
"description": "Step-by-step guide to setting up and running PyTorch workloads on Vast.ai GPU cloud computing platform",
"image": "https://docs.vast.ai/images/pytorch-logo.webp",
"totalTime": "PT30M",
"supply": [
{
"@type": "HowToSupply",
"name": "Vast.ai Account"
},
{
"@type": "HowToSupply",
"name": "GPU Instance"
},
{
"@type": "HowToSupply",
"name": "PyTorch Framework"
}
],
"tool": [
{
"@type": "HowToTool",
"name": "SSH Client"
},
{
"@type": "HowToTool",
"name": "Jupyter Notebook"
}
],
"step": [
{
"@type": "HowToStep",
"name": "Set up Prerequisites",
"text": "Create a Vast.ai account and install necessary tools like SSH client",
"url": "https://docs.vast.ai/pytorch#prerequisites"
},
{
"@type": "HowToStep",
"name": "Launch GPU Instance",
"text": "Create a GPU instance with PyTorch template on Vast.ai",
"url": "https://docs.vast.ai/pytorch#launch-instance"
},
{
"@type": "HowToStep",
"name": "Configure Environment",
"text": "Set up PyTorch environment and install dependencies",
"url": "https://docs.vast.ai/pytorch#configure"
}
],
"author": {
"@type": "Organization",
"name": "Vast.ai Team"
},
"datePublished": "2025-01-13",
"dateModified": "2025-05-12"
})
}}
/>
---
## list network-volume
**URL:** llms-txt#list-network-volume
Source: https://docs.vast.ai/api-reference/network-volumes/list-network-volume
api-reference/openapi.json post /api/v0/network_volume/
Lists a network disk for rent as network volumes, or updates an existing listing with a new price/size/end date/discount.
CLI Usage: `vastai list network-volume [options]`
---
## Cluster registration guide
**URL:** llms-txt#cluster-registration-guide
* Update to the newest version of the CLI: go to ([https://cloud.vast.ai/cli/)\[https://cloud.vast.ai/cli/](https://cloud.vast.ai/cli/\)\[https://cloud.vast.ai/cli/)] and copy+run the command starting with `wget`.
* Identify and test the subnet to register:
* On the manager node ---
* Run `ip addr` or `ifconfig` (the `ip` utility is part of the `iproute2` package).
* Identify which interface correspond's to their LAN. For most hosts this will be an ethernet interface, which have the naming format `enp$BUSs$SLOT[f$FUNCTION]]` in modern Ubuntu.
* Hosts using Mellanox devices for their main ethernet connection may instead see their interface show up as `bond0`
* Find the IPv4 subnet corresponding to that network interface --
* In `ip addr` output, the third line for each interface usually starts with `inet IPv4SUBNET` where `IPv4SUBNET` has the format `IPv4ADDRESS/MASK` where `MASK` is a non-negative integer \< 32.
* Test that the other machines to be added to the cluster can reach the manager node on that subnet/address.
* On the manager node:
* run `nc -l IPv4ADDRESS 2337` where `IPv4ADDRESS` is the IPv4 address component of the chosen subnet.
* On each other node:
* run `nc IPv4ADDRESS 2337`
* Type in some test text (i.e., "hello") and press enter
* Check that `nc` received and outputed the test text on the manager node.
* Run `./vast.py create cluster IPv4SUBNET MACHINE_ID_OF_MANAGER_NODE`
* Run `./vast.py show clusters` to check the ID of the cluster you just created.
* Run `./vast.py join cluster MACHINE_IDS` where `MACHINE_IDS` is a space seperated list of the remaining machines to add to your cluster.
---
## Download new models (example)
**URL:** llms-txt#download-new-models-(example)
**Contents:**
- Model Organization
- Optimization Tips
- Performance Settings
- Batch Processing
- Memory Management
wget https://civitai.com/api/download/models/[MODEL_ID]
text Text theme={null}
/workspace/stable-diffusion-webui/models/
├── Stable-diffusion/ # Main models
├── Lora/ # LoRA models
├── VAE/ # VAE files
└── embeddings/ # Textual inversions
python icon="python" Python theme={null}
**Examples:**
Example 1 (unknown):
```unknown
### Model Organization
Keep your models organized:
```
Example 2 (unknown):
```unknown
You can access jupyter clicking on the jupyter button on the instance card to easily upload and download files.
## Optimization Tips
### Performance Settings
Access Settings > Performance in Web UI:
* Enable xformers memory efficient attention
* Use float16 precision when possible
* Optimize VRAM usage based on your GPU
### Batch Processing
For multiple images:
* Use batch count for variations
* Use batch size for parallel processing
* Monitor GPU memory usage
### Memory Management
```
---
## remove team role
**URL:** llms-txt#remove-team-role
Source: https://docs.vast.ai/api-reference/team/remove-team-role
api-reference/openapi.json delete /api/v0/team/roles/{id}
Removes a role from the team. Cannot remove the team owner role.
CLI Usage: `vastai remove team-role `
---
## attach ssh-key
**URL:** llms-txt#attach-ssh-key
Source: https://docs.vast.ai/api-reference/instances/attach-ssh-key
api-reference/openapi.json post /api/v0/instances/{id}/ssh/
Attaches an SSH key to the specified instance, allowing SSH access using the provided key.
CLI Usage: `vastai attach ssh `
---
## Scheduled Cloud Backups
**URL:** llms-txt#scheduled-cloud-backups
**Contents:**
- Introduction
- Prerequisites
- Setup
- 1. Setting Up Cloud Storage Connections
- 2. Understanding Backup Options
- Backup Methods
- 1. Using CLI for Scheduled Backups
- 2. Using Cron on Your Personal Linux Computer
- Viewing Scheduled Backup Jobs
- Deleting Scheduled Backup Jobs
Source: https://docs.vast.ai/documentation/instances/storage/cloud-backups
Learn how to set up and schedule automated Vast.ai cloud backups using CLI or cron. Keep your data safe with best practices and easy management.
This guide walks you through setting up and running automated backups for your Vast.ai container instances to cloud storage. Cloud backups can you help preserve your work when using Vast's Docker-based instances. With proper backup strategies, you can ensure your valuable data remains safe and accessible even if your instance goes offline.
* A Vast.ai account
* Access to a Vast.ai Docker-based instance
* [Cloud storage connection set up in Vast.ai](/documentation/instances/cloud-sync)
* [(Optional) Install and use vast-cli](/cli/get-started)
* [(Optional) Understanding of how to use cron in computers with Unix-like OS](https://cronitor.io/guides/cron-jobs)
### 1. Setting Up Cloud Storage Connections
Before creating backup jobs, you need to ensure you have a cloud storage connection set up in your Vast.ai account. You can view your existing connections using the vast-cli:
If you don't have a connection yet, you'll need to set one up in [Vast.ai's Settings page ](/documentation/instances/cloud-sync)before proceeding with backup operations.
### 2. Understanding Backup Options
Vast.ai provides multiple approaches to schedule data backups:
* **Using Vast's job scheduling system via CLI** - Create hourly, daily, or weekly automated backup jobs
* **Using cron on your personal computer** - Schedule backups with custom timing from your local machine
Both approaches have their advantages depending on your workflow and requirements.
### 1. Using CLI for Scheduled Backups
The vast-cli tool allows you to create scheduled backup jobs with several timing options. The basic structure of a scheduled backup command includes these parameters:
You can run this command to see more details about these parameters:
Let's explore the different scheduling options:
To create a weekly backup job that runs every Saturday at 9 PM UTC:
* \--src /workspace specifies the source directory on your instance
* \--dst /backups/19015821\_backups/ is the destination folder in your cloud storage
* \--instance 19015821 is your instance's ID
* \--connection 19447 is your cloud storage connection ID
* \--day 6 represents Saturday (0=Sunday, 1=Monday, etc.)
* \--hour 21 represents 9 PM UTC (0=12am UTC, 1=1am UTC, etc.)
For daily backups at a specific hour (e.g., 9 PM UTC every day):
The --day "\*" parameter indicates that the job should run every day.
For hourly backups that run every hour of every day:
Setting both --day "\*" and --hour "\*" along with --schedule HOURLY makes the job run every hour.
To update your backup schedule, simply run the same command with the new schedule. The system will prompt you for confirmation, and upon acceptance, it will update the schedule accordingly.
### 2. Using Cron on Your Personal Linux Computer
If you prefer more granular control over your backup schedule, you can use cron on your local Linux or Mac computer. This approach allows for customized schedules beyond the hourly/daily/weekly options.
First, open your crontab file for editing:
Then, add a line that specifies your backup schedule. For example, to run a backup every 4 hours:
In this cron schedule:
* 0 represents the minute (0th minute of the hour)
* \*/4 means "every 4 hours"
* The three asterisks \* \* \* represent day of month, month, and day of week, indicating "every day"
## Viewing Scheduled Backup Jobs
To see all your currently scheduled backup jobs:
Understanding the Output
|
Field |
Description |
|
Scheduled Job ID |
Unique identifier for your job (needed for deletion) |
|
Instance ID |
The instance this job is associated with |
|
API Endpoint |
The endpoint being called (rclone is used for backups to cloud storage) |
|
Start (Date/Time) |
Start date/time of period when this scheduled job will be executed (in UTC) |
|
End (Date/Time) |
End date/time of period when this scheduled job will be executed (in UTC). Default is the end of the contract. |
|
Day of the Week |
Which day the job runs (can be specific day like "Wednesday", "Saturday", or "Everyday") |
|
Hour of the Day |
At what hour the job runs (formatted as 1\_PM, 11\_PM, 8\_PM in UTC, etc.) |
|
Minute of the Hour |
At what minute of the specified hour the job runs (00, 33, 10, etc.) |
|
Frequency |
How often the job runs (HOURLY, DAILY, WEEKLY) |
Cloud Sync is only supported on Docker-based instances. Cloud Sync is not currently supported on VM-based instances (instances created using a vastai/kvm repository template) Cloud Sync Integrations allow you to move data freely to and from instances on Vast. In order to move data from cloud providers to Vast instances you must provide certain credentials which will be temporarily moved onto your instance which is stored on a host machine. For this reason you should only use cloud integration options when using verified hosts that are datacenters. You can filters for these hosts using the command line interface or on the website instance creation page using the 'Secure Cloud' checkbox. **WARNING**
Note that Vast will connect at the account level. Therefore it is recommended for users to have a dedicated Google Drive for Vast use cases rather than using their personal account. Prerequisites: Have an active Google Drive account 1. Navigate to your [account](https://cloud.vast.ai/account) page 2. On the bottom you should see a button that says Connect to Google Drive 3. Enter a name for your integration with Google Drive. 4. Submit the name, after which a new tab should open up asking if you would like to give Vast access to your Google Drive. 5. Once the verification prompt has been accepted, you will be redirected back to vast with your Google Drive fully integrated.  You have now connected your Google Drive with Vast. This will allow you to move data to and from instances even while inactive. Prerequisites: An active Amazon Web Services (AWS) account. **WARNING**
We do not recommend using an existing IAM user on Vast. Vast connects on a user level rather than an account level, so it's best to create a new IAM user with the intended authorization for the data you want to store on vast.ai servers. 1. Create a S3 Bucket in AWS 2. Create an IAM User and Grant Access to the S3 Bucket, we recommend you create a user with access to your specific bucket for this process rather than full access.  1. Once the user is created, click the user and go Security credentials. 2. Click Create access key, and enable for Command Line interface 3. Once the access key is created, you will be prompted with an Access Key, and a Secret access Key. This will be the information required to use your AWS user permissions on Vast. 4. Navigate to your [account](https://cloud.vast.ai/account) page 5. On the bottom you should see a button that says Connect to Amazon S3 6. Enter your credentials in the given fields, as well as a name for your integration with Amazon. You have now connected an Amazon Web Services user with Vast. This will allow you to move files from services like Amazon S3 to and from instances on Vast. **WARNING**
Note that Vast connects to cloud providers at the account level. Any bucket your application key has access to will be accessible with Vast. This can cause security concerns with some use cases that should be dealt with by creating a new application key used specifically for data you want to store on vast.ai servers. 1. Create a bucket in Backblaze. It should not matter if the bucket is private or public. 2. Go to Application Keys 3. Select Add a New Application Key 4. Grant access for Read and Write operations on the bucket of your choice 5. Note the keyId and the applicationKey that are returned to you. This is the data required for Vast. 6. Navigate to your [account](https://cloud.vast.ai/account) page 7. On the bottom you should see a button that says Connect to Backblaze 8. Enter your credentials in the given fields, as well as a name for your integration with Backblaze. You have now connected your Backblaze account with Vast. This will allow you to move data to and from Instances easily. **WARNING**
Note that Vast will connect at the account level. Therefore it is recommended for users to have dedicated dropbox accounts for Vast use cases rather than using their personal account. 1. Navigate to your [account](https://cloud.vast.ai/account) page 2. On the bottom you should see a button that says Connect to Dropbox 3. Enter a name for your integration with Dropbox. 4. Submit the name, after which a new tab should open up asking if you would like to give Vast access to your Dropbox. 5. Once the verification prompt has been accepted, you will be redirected back to vast with dropbox fully integrated. You have now connected your Dropbox account with Vast. This will allow you to move data to and from Instances seamlessly. --- ## or **URL:** llms-txt#or FROM vastai/pytorch:2.6.0-cuda-12.6.3-py312 --- ## create ssh-key **URL:** llms-txt#create-ssh-key Source: https://docs.vast.ai/api-reference/accounts/create-ssh-key api-reference/openapi.json post /api/v0/ssh/ Creates a new SSH key and associates it with your account. The key will be automatically added to all your current instances. CLI Usage: `vastai create ssh-key ` --- ## create env-var **URL:** llms-txt#create-env-var Source: https://docs.vast.ai/api-reference/accounts/create-env-var api-reference/openapi.json post /api/v0/secrets/ Creates a new encrypted environment variable for the authenticated user. Keys are automatically converted to uppercase. Values are encrypted before storage. There is a limit on the total number of environment variables per user. CLI Usage: `vastai create env-var ` --- ## rent volume **URL:** llms-txt#rent-volume Source: https://docs.vast.ai/api-reference/volumes/rent-volume api-reference/openapi.json put /api/v0/volumes/ Rent/create a new volume with specified parameters. CLI Usage: `vastai create volume --size ` --- ## remove team member **URL:** llms-txt#remove-team-member Source: https://docs.vast.ai/api-reference/team/remove-team-member api-reference/openapi.json delete /api/v0/team/members/{id} Removes a member from the team by revoking their team-related API keys and updating membership status. Cannot remove the team owner. CLI Usage: `vastai remove team-member ` --- ## cloud copy **URL:** llms-txt#cloud-copy Source: https://docs.vast.ai/api-reference/instances/cloud-copy api-reference/openapi.json post /api/v0/commands/rclone/ Starts a cloud copy operation by sending a command to the remote server. The operation can transfer data between an instance and a cloud service. CLI Usage: `vastai cloud copy [options]` --- ## create subaccount **URL:** llms-txt#create-subaccount Source: https://docs.vast.ai/api-reference/accounts/create-subaccount api-reference/openapi.json post /api/v0/users/ Creates either a standalone user account or a subaccount under a parent account. Subaccounts can be restricted to host-only functionality. CLI Usage: `vastai create subaccount --email --username --password [--type host]` --- ## Add your custom requirements **URL:** llms-txt#add-your-custom-requirements **Contents:** - Conclusion - Additional Resources COPY requirements.txt . RUN pip install -r requirements.txt ``` Running PyTorch on Vast.ai provides a cost-effective way to rent cheap GPUs and accelerate deep learning workloads. By following this guide and best practices, you can efficiently set up and manage your PyTorch workloads while optimizing costs and performance. ## Additional Resources * [PyTorch Documentation](https://pytorch.org/docs/stable/index.html) * [Vast.ai Documentation](/documentation/get-started/index) * [PyTorch Performance Tuning Guide](https://pytorch.org/tutorials/recipes/recipes/tuning_guide.html) --- ## General FAQ **URL:** llms-txt#general-faq **Contents:** - What is Vast.ai? - How does Vast.ai work? - What are Vast's advantages? - What is the Secure Cloud filter? - What operating systems are provided? - What interfaces are available? Source: https://docs.vast.ai/documentation/reference/faq/general Basic questions about the Vast.ai platform <script type="application/ld+json" dangerouslySetInnerHTML={{ __html: JSON.stringify({ "@context": "https://schema.org", "@type": "FAQPage", "mainEntity": [ { "@type": "Question", "name": "What is Vast.ai?", "acceptedAnswer": { "@type": "Answer", "text": "Vast.ai is a cloud computing, matchmaking, and aggregation service focused on lowering the price of compute-intensive workloads. Our software allows anyone to easily become a host by renting out their hardware." } }, { "@type": "Question", "name": "How does Vast.ai work?", "acceptedAnswer": { "@type": "Answer", "text": "Hosts download and run our management software, list their machines, configure prices, and set any default jobs. Clients then find suitable machines using our flexible search interface, rent their desired machines, and finally run commands or start SSH sessions with a few clicks." } }, { "@type": "Question", "name": "What are Vast's advantages?", "acceptedAnswer": { "@type": "Answer", "text": "Vast.ai provides a simple interface to rent powerful machines at the best possible prices, reducing GPU cloud computing costs by ~3x to 5x. Consumer computers and consumer GPUs are considerably more cost-effective than equivalent enterprise hardware." } }, { "@type": "Question", "name": "What is the Secure Cloud filter?", "acceptedAnswer": { "@type": "Answer", "text": "Vast.ai partners with vetted datacenter providers all over the globe. These partners have their equipment in certified locations that are current with ISO 27001 and/or Tier 3/4 standards. For sensitive or production workloads, we recommend checking the 'secure cloud' filter." } } ] }) }} /> Vast.ai is a cloud computing, matchmaking, and aggregation service focused on lowering the price of compute-intensive workloads. Our software allows anyone to easily become a host by renting out their hardware. Our web search interface allows users to quickly find the best deals for compute according to their specific requirements. ## How does Vast.ai work? Hosts download and run our management software, list their machines, configure prices, and set any default jobs. Clients then find suitable machines using our flexible search interface, rent their desired machines, and finally run commands or start SSH sessions with a few clicks. ## What are Vast's advantages? Vast.ai provides a simple interface to rent powerful machines at the best possible prices, reducing GPU cloud computing costs by \~3x to 5x. Consumer computers and consumer GPUs, in particular, are considerably more cost-effective than equivalent enterprise hardware. We are helping the millions of underutilized consumer GPUs around the world enter the cloud computing market for the first time. ## What is the Secure Cloud filter? The "Secure Cloud (Only Trusted Datacenters)" filter shows only vetted datacenter providers. These partners have their equipment in certified locations that are current with [ISO 27001](https://www.iso.org/standard/27001) and/or [Tier 3/4](https://uptimeinstitute.com/tiers) standards. Vast.ai has verified that this equipment is in these facilities and that their certifications are up to date. For sensitive or production workloads, we recommend checking the "secure cloud" filter. Look for the blue datacenter label. ## What operating systems are provided? Vast currently provides **Linux Docker instances only**, mostly Ubuntu-based. We do not support Windows. ## What interfaces are available? Currently, Vast.ai provides: * **SSH access** for terminal/command line control * **Jupyter** for notebook interfaces with GUI * **Command-only** instance mode for automated workloads * **Instance Portal** for web-based access We do not provide remote desktop interfaces. --- ## Reload Supervisor **URL:** llms-txt#reload-supervisor **Contents:** - Configuring Application Access with PORTAL\_CONFIG - Building Custom Docker Images - Building FROM Vast Base Images supervisorctl reload bash PORTAL_CONFIG structure theme={null} hostname:external_port:local_port:url_path:Application Name|hostname:external_port:local_port:url_path:Application Name bash Bash theme={null} "localhost:8002:18002:/hello:MyApp|localhost:1111:11111:/:Instance Portal|localhost:8080:18080:/:Jupyter|localhost:8080:8080:/terminals/1:Jupyter Terminal|localhost:8384:18384:/:Syncthing|localhost:6006:16006:/:Tensorboard" dockerfile Dockerfile theme={null} #For example FROM vastai/base-image:cuda-12.6.3-cudnn-devel-ubuntu22.04-py313 **Examples:** Example 1 (unknown): ```unknown This script will run on first boot to set up your environment. All installations should go to /workspace/ for proper persistence. ### Configuring Application Access with PORTAL\_CONFIG The base-image template includes PORTAL\_CONFIG for secure application access management. This environment variable controls how applications are exposed and accessed. ``` Example 2 (unknown): ```unknown The structure of this variable is: * Each application is separated by the `|` character * Each application parameter is separated by the `:` character * Each application must specify `hostname:external_port:local_port:url_path:Application Name` Example: ``` Example 3 (unknown): ```unknown The hostname in Docker instances will always be `localhost` Where the internal port and local port are not equal then Caddy will be configured to listen on `0.0.0.0:external_port` acting as a reverse proxy for `hostname:local_port` If the `external_port` and `local_port` are equal then Caddy will not act as a proxy but the Instance Portal UI will still create links. This is useful because it allows us to create links to Jupyter which is not controlled by Supervisor in Jupyter Launch mode. `url_path` will be appended to the instance address and is generally set to `/` but can be used to create application deep links. The `caddy_manager` script will write an equivalent config file at `/etc/portal.yaml` on boot if it does not already exist. This file can be edited in a running instance. Important: When defining multiple links to a single application, only the first should have non equal ports - We cannot proxy one application multiple times. Note: Instance Portal UI is **not** required and its own config declaration can be removed from `PORTAL_CONFIG`. This will not affect the authentication system. ## Building Custom Docker Images If you want to create your own custom Docker image, you can optionally start FROM one of our [Vast.ai base images](https://hub.docker.com/r/vastai/base-image/tags) to get built-in security features and Instance Portal integration. See the [Introduction](/documentation/templates/introduction#vastai-base-images) for more details on why you might want to use Vast base images. ### Building FROM Vast Base Images Start with a [Vast.ai base image](https://hub.docker.com/r/vastai/base-image/tags) or [Vast.ai Pytorch base image](https://hub.docker.com/r/vastai/pytorch/tags) in your Dockerfile: ``` --- ## Volumes **URL:** llms-txt#volumes **Contents:** - Creating a Volume in GUI - **How to create a volume via Add volume dropdown menu on the Search page?** - **How to create a volume using a template?** - **How to view volume pricing?** - Deleting volume - How to create an instance with existing volume? - Creating a Volume in CLI - How can I create an instance with a volume? - Can I use my volume on a different machine? - How can I delete my volume? Source: https://docs.vast.ai/documentation/instances/storage/volumes The [**Storage**](https://cloud.vast.ai/storage/) page allows you to easily access and manage your **volumes -** storage that can be attached to your instances for data storage. We currently provide **local volumes only**, meaning: * A volume is physically tied to the machine it was created on. * It can only be attached to instances running on the same physical machine. * It cannot be moved or attached to instances on other machines. Volume size cannot be changed after creation, so be sure to choose the size carefully based on your expected storage needs. ## Creating a Volume in GUI This guide will walk you through the process of creating a volume using a template in the GUI. You can create the volume during instance creation by using a template with volume settings enabled, or you can create a volume by using dropdown menu on the Search page. ### **How to create a volume via Add volume dropdown menu on the Search page?** 1. Select a template then click on **Add volume** dropdown. You will see an option labeled **Local volume** with a + (plus) button next to it.
 2. Click + button. This will allow you to adjust the volume size using the slider. Once enabled, offes will display the available volume size.
 3. Click **Rent **button to launch your instance along with the volume. Once the instance is running, your volume will be automatically mounted and available inside the container at the /data directory.
 4. You can find your volume information on **Storage **page.
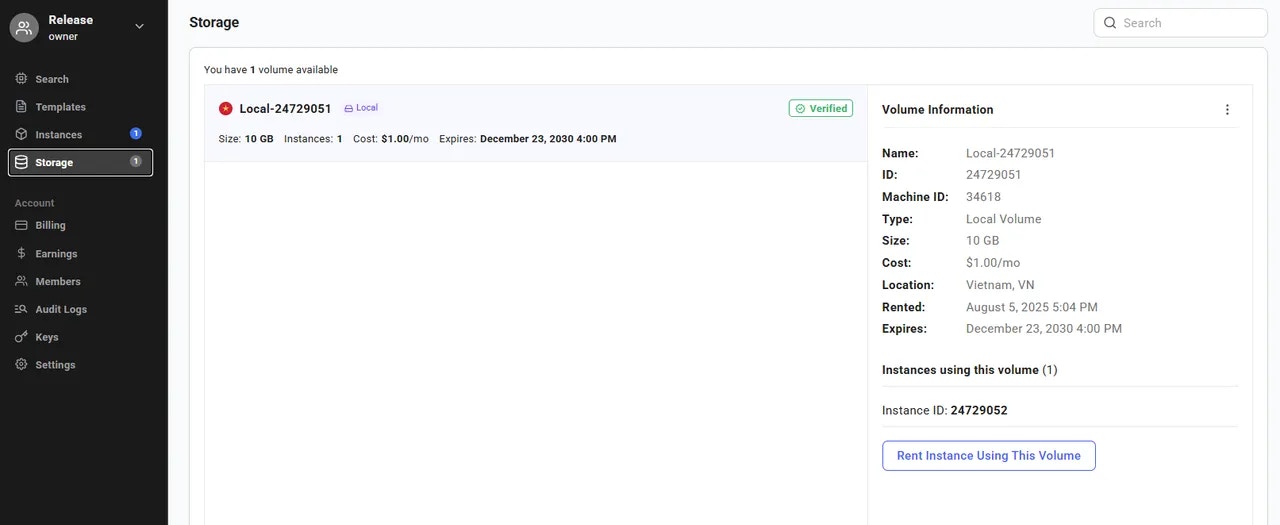 ### **How to create a volume using a template?**
1. Choose a Template. You can either choose an existing template from the [**Recommended**](https://cloud.vast.ai/templates/) list or create your own [custom template](/documentation/templates/creating-templates).
2. Open Template Editor (Click on pencil icon on a template card). Scroll down until you see the **Disk Space (Container + Volume) **section.
### **How to create a volume using a template?**
1. Choose a Template. You can either choose an existing template from the [**Recommended**](https://cloud.vast.ai/templates/) list or create your own [custom template](/documentation/templates/creating-templates).
2. Open Template Editor (Click on pencil icon on a template card). Scroll down until you see the **Disk Space (Container + Volume) **section.
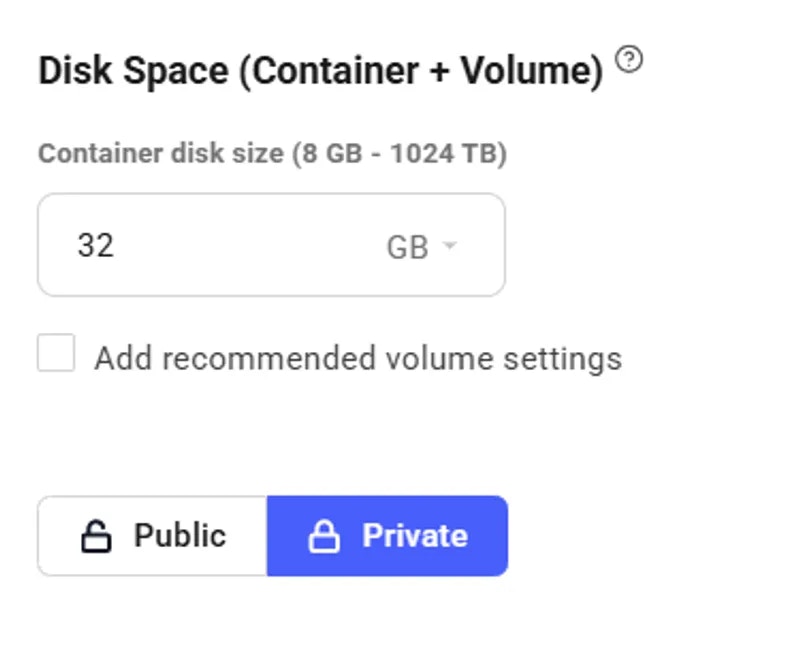 3. In this section, check the box **Add recommended volume settings**. Once selected, a new configuration area will appear where you can enter the **volume size **and specify the **installation path. **A default path is provided, but you can modify it if needed.
 4. After filling in the volume details, click **Save\&Use **or **Create\&Use Template **to apply your changes and navigate to the Search page. Offers that support volumes will now display a volume badge showing the available volume size. You can adjust the volume size using the slider in the Search page after your template is configured.
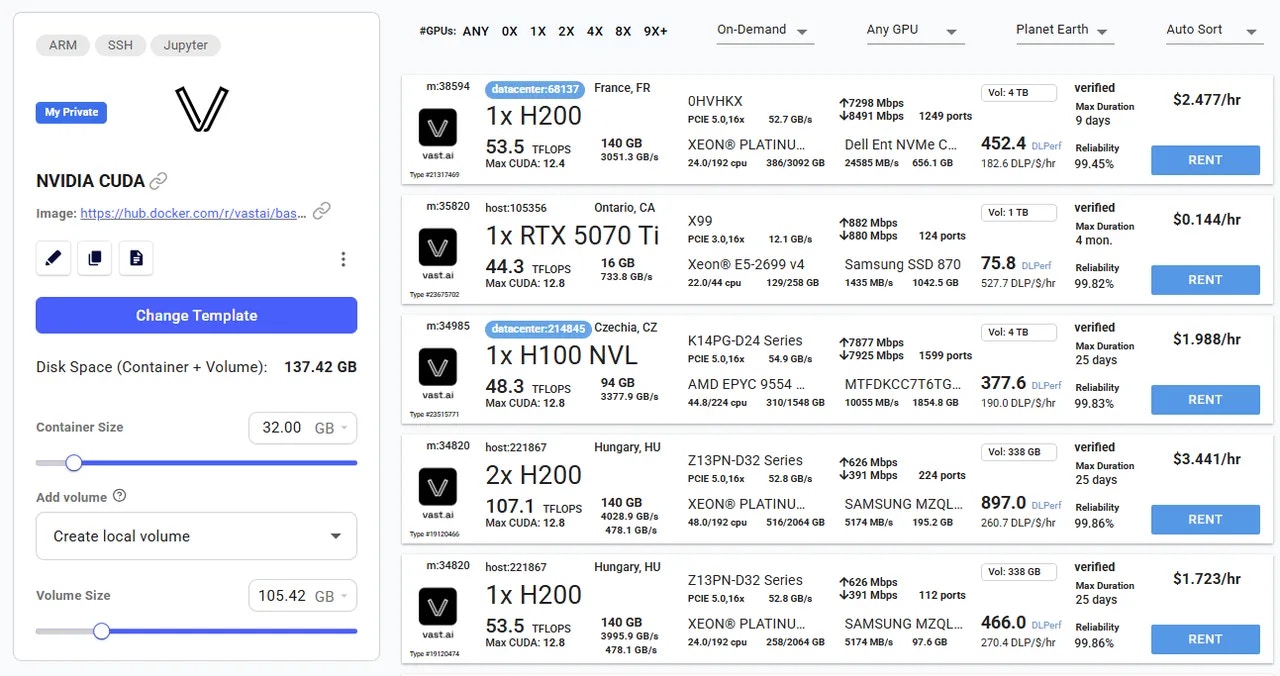 5. Select a GPU and click **Rent **button.
### **How to view volume pricing?**
To view pricing details, simply hover over the Rent button for any offer.
5. Select a GPU and click **Rent **button.
### **How to view volume pricing?**
To view pricing details, simply hover over the Rent button for any offer.
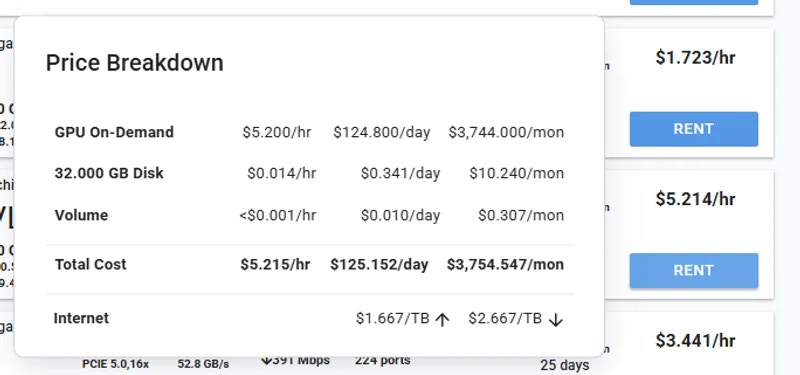 To delete a volume, the instance it is attached to must be **deleted first**. Deleting a volume that is currently **mounted to a running or stopped instance is not allowed**.
1. Make sure the volume is **not attached** to any instance.
If it is, **delete the instance** first from the Instances page.
2. Once the volume is detached, go to the **Storage** page.
3. Find the volume you want to delete, click on the **three-dot menu** (⋮) next to it, and select **"Delete volume"**.
To delete a volume, the instance it is attached to must be **deleted first**. Deleting a volume that is currently **mounted to a running or stopped instance is not allowed**.
1. Make sure the volume is **not attached** to any instance.
If it is, **delete the instance** first from the Instances page.
2. Once the volume is detached, go to the **Storage** page.
3. Find the volume you want to delete, click on the **three-dot menu** (⋮) next to it, and select **"Delete volume"**.
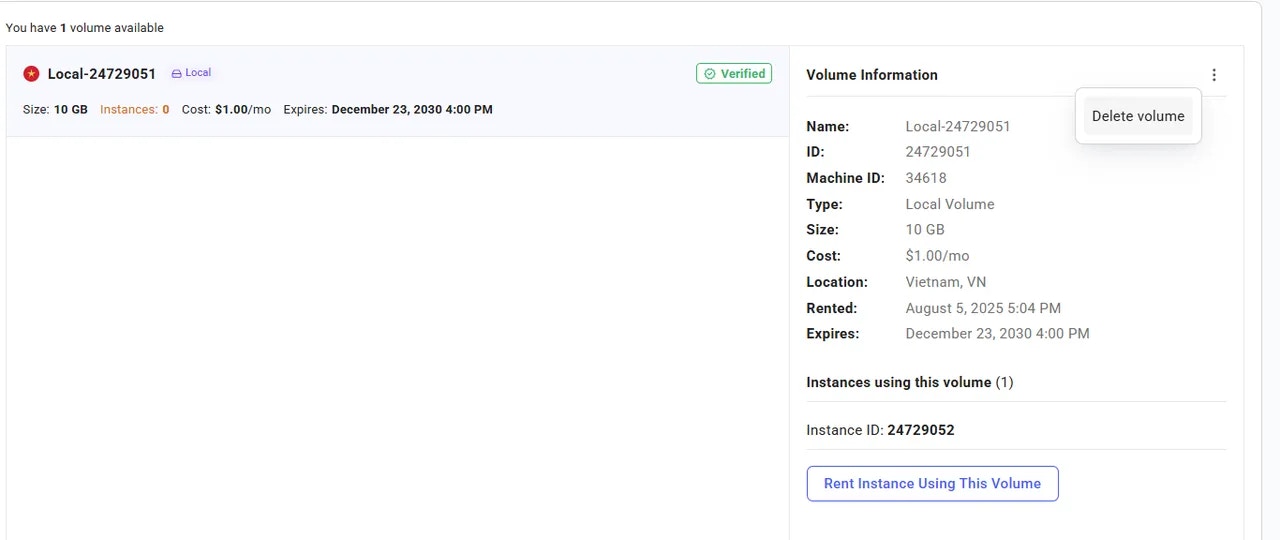 4. Confirm the deletion. This action is **permanent** and cannot be undone.
Important: Deleting a volume will permanently remove all data stored in it. Make sure to back up any important data before proceeding.
### How to create an instance with existing volume?
If you already have a volume and want to launch a new instance using it, follow these steps:
1. Go to the **Storage** page and select the volume you want to use.
2. In the **Volume Info** section, you will see a button labeled **Rent instance using this volume**.
4. Confirm the deletion. This action is **permanent** and cannot be undone.
Important: Deleting a volume will permanently remove all data stored in it. Make sure to back up any important data before proceeding.
### How to create an instance with existing volume?
If you already have a volume and want to launch a new instance using it, follow these steps:
1. Go to the **Storage** page and select the volume you want to use.
2. In the **Volume Info** section, you will see a button labeled **Rent instance using this volume**.
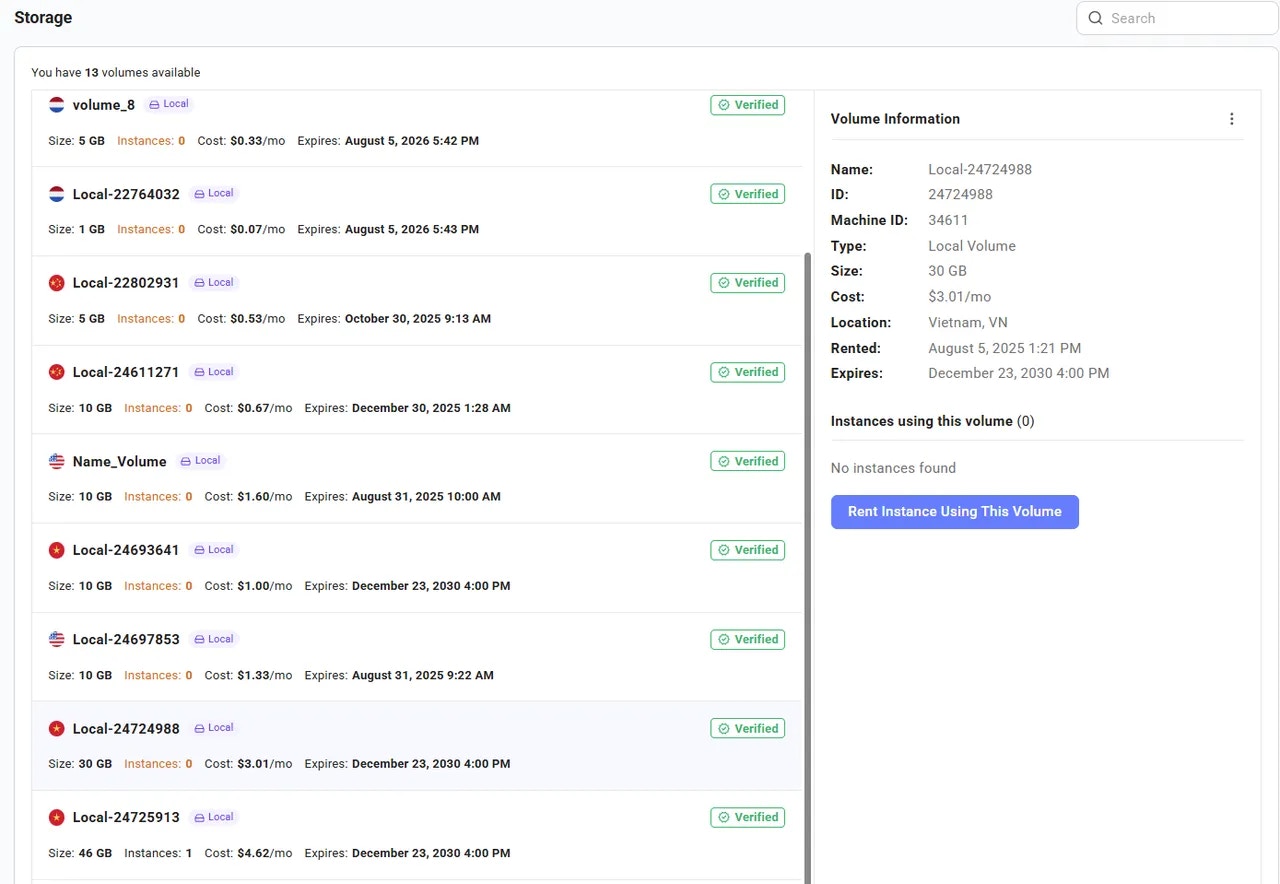 3. Click this button. You will be redirected to the **Search Page**, where available offers are automatically filtered to match the **same machine** where the volume is located.
4. Select your preferred offer and proceed to launch the instance.
The selected volume will be automatically attached to the instance upon creation.
## Creating a Volume in CLI
To create a volume, you can use the vast CLI. See our [CLI documentation](https://cloud.vast.ai/cli/) for set-up and usage of the CLI. You can search for volume offers using the command:
There is a modified list of search params available, for more information, you can add the -- help option to the search.
This will bring up a list of available volume offers. You will be able to see the maximum capacity for the volume (in Gigabytes). Just like creating an instance, you can copy the offer ID and create a volume with the command:
This will send a command to the host machine to allocate the given space to your volume. You can optionally specify a name with -n, it can be alphanumeric with underscores, with a max length of 64. If all goes well, you should be able to see your volume as created when you run the command
### How can I create an instance with a volume?
Now that your volume is created, you can use it by creating an instance on the machine with the volume, and passing the volume in the env argument. The format is -v \:\, for example:
That command mounts your volume at the directory /mnt. The directory does not need to exist in order to be mounted.
### Can I use my volume on a different machine?
You can't directly use the same volume on a different machine, but you can clone the volume to a machine that has an available volume contract.The clone command will create a new volume contract on the new machine, provision the volume, and copy all existing data from the existing volume to the new volume. To clone a volume, you can use the command:
where \ is a volume offer of at least the size of your existing volume.
The volumes are independent and do not sync data after the clone is completed. Any changes that occur (on either) volume AFTER the volume is successfully cloned will not be reflected on the other volume.
### How can I delete my volume?
When you're done using it, you can delete your volume using the command
This will only work if all instances using the volume have been destroyed.
### How can I see what instances are using my volume?
will display a list of volumes you own, as well as what instances exist that are using that volume.
## A machine with my volume went offline! Am I still being charged?
Just like with normal instances, you are never charged when a machine is offline. This is usually a temporary issue, and when the machine comes back online, volume charges will resume as normal. If you wish to delete the volume in the meantime, you can do so, and you will not be charged when the machine comes back online. If the machine is offline for an extended period of time, please reach out to vast support.
## Can I use my volume with a VM instance?
At this time, volumes are only supported for docker instances, and cannot be used with VM instances.
**Examples:**
Example 1 (unknown):
```unknown
There is a modified list of search params available, for more information, you can add the -- help option to the search.
This will bring up a list of available volume offers. You will be able to see the maximum capacity for the volume (in Gigabytes). Just like creating an instance, you can copy the offer ID and create a volume with the command:
```
Example 2 (unknown):
```unknown
This will send a command to the host machine to allocate the given space to your volume. You can optionally specify a name with -n, it can be alphanumeric with underscores, with a max length of 64. If all goes well, you should be able to see your volume as created when you run the command
```
Example 3 (unknown):
```unknown
### How can I create an instance with a volume?
Now that your volume is created, you can use it by creating an instance on the machine with the volume, and passing the volume in the env argument. The format is -v \:\, for example:
```
Example 4 (unknown):
```unknown
That command mounts your volume at the directory /mnt. The directory does not need to exist in order to be mounted.
### Can I use my volume on a different machine?
You can't directly use the same volume on a different machine, but you can clone the volume to a machine that has an available volume contract.The clone command will create a new volume contract on the new machine, provision the volume, and copy all existing data from the existing volume to the new volume. To clone a volume, you can use the command:
```
---
## Inside a Serverless GPU
**URL:** llms-txt#inside-a-serverless-gpu
**Contents:**
- Backend Configuration
- Adding Endpoints
- Authentication
- More Information
Source: https://docs.vast.ai/documentation/serverless/inside-a-serverless-gpu
Learn about the components of a Serverless GPU instance - the core ML model, model server code, and PyWorker server code.
All GPU instances on Vast Serverless contain three parts:
1. The core ML model.
2. The model server code that handles requests and inferences the ML model.
3. The [PyWorker](/documentation/serverless/overview) server code that wraps the ML model, which formats incoming HTTP requests into a compatible format for the model server.
3. Click this button. You will be redirected to the **Search Page**, where available offers are automatically filtered to match the **same machine** where the volume is located.
4. Select your preferred offer and proceed to launch the instance.
The selected volume will be automatically attached to the instance upon creation.
## Creating a Volume in CLI
To create a volume, you can use the vast CLI. See our [CLI documentation](https://cloud.vast.ai/cli/) for set-up and usage of the CLI. You can search for volume offers using the command:
There is a modified list of search params available, for more information, you can add the -- help option to the search.
This will bring up a list of available volume offers. You will be able to see the maximum capacity for the volume (in Gigabytes). Just like creating an instance, you can copy the offer ID and create a volume with the command:
This will send a command to the host machine to allocate the given space to your volume. You can optionally specify a name with -n, it can be alphanumeric with underscores, with a max length of 64. If all goes well, you should be able to see your volume as created when you run the command
### How can I create an instance with a volume?
Now that your volume is created, you can use it by creating an instance on the machine with the volume, and passing the volume in the env argument. The format is -v \:\, for example:
That command mounts your volume at the directory /mnt. The directory does not need to exist in order to be mounted.
### Can I use my volume on a different machine?
You can't directly use the same volume on a different machine, but you can clone the volume to a machine that has an available volume contract.The clone command will create a new volume contract on the new machine, provision the volume, and copy all existing data from the existing volume to the new volume. To clone a volume, you can use the command:
where \ is a volume offer of at least the size of your existing volume.
The volumes are independent and do not sync data after the clone is completed. Any changes that occur (on either) volume AFTER the volume is successfully cloned will not be reflected on the other volume.
### How can I delete my volume?
When you're done using it, you can delete your volume using the command
This will only work if all instances using the volume have been destroyed.
### How can I see what instances are using my volume?
will display a list of volumes you own, as well as what instances exist that are using that volume.
## A machine with my volume went offline! Am I still being charged?
Just like with normal instances, you are never charged when a machine is offline. This is usually a temporary issue, and when the machine comes back online, volume charges will resume as normal. If you wish to delete the volume in the meantime, you can do so, and you will not be charged when the machine comes back online. If the machine is offline for an extended period of time, please reach out to vast support.
## Can I use my volume with a VM instance?
At this time, volumes are only supported for docker instances, and cannot be used with VM instances.
**Examples:**
Example 1 (unknown):
```unknown
There is a modified list of search params available, for more information, you can add the -- help option to the search.
This will bring up a list of available volume offers. You will be able to see the maximum capacity for the volume (in Gigabytes). Just like creating an instance, you can copy the offer ID and create a volume with the command:
```
Example 2 (unknown):
```unknown
This will send a command to the host machine to allocate the given space to your volume. You can optionally specify a name with -n, it can be alphanumeric with underscores, with a max length of 64. If all goes well, you should be able to see your volume as created when you run the command
```
Example 3 (unknown):
```unknown
### How can I create an instance with a volume?
Now that your volume is created, you can use it by creating an instance on the machine with the volume, and passing the volume in the env argument. The format is -v \:\, for example:
```
Example 4 (unknown):
```unknown
That command mounts your volume at the directory /mnt. The directory does not need to exist in order to be mounted.
### Can I use my volume on a different machine?
You can't directly use the same volume on a different machine, but you can clone the volume to a machine that has an available volume contract.The clone command will create a new volume contract on the new machine, provision the volume, and copy all existing data from the existing volume to the new volume. To clone a volume, you can use the command:
```
---
## Inside a Serverless GPU
**URL:** llms-txt#inside-a-serverless-gpu
**Contents:**
- Backend Configuration
- Adding Endpoints
- Authentication
- More Information
Source: https://docs.vast.ai/documentation/serverless/inside-a-serverless-gpu
Learn about the components of a Serverless GPU instance - the core ML model, model server code, and PyWorker server code.
All GPU instances on Vast Serverless contain three parts:
1. The core ML model.
2. The model server code that handles requests and inferences the ML model.
3. The [PyWorker](/documentation/serverless/overview) server code that wraps the ML model, which formats incoming HTTP requests into a compatible format for the model server.
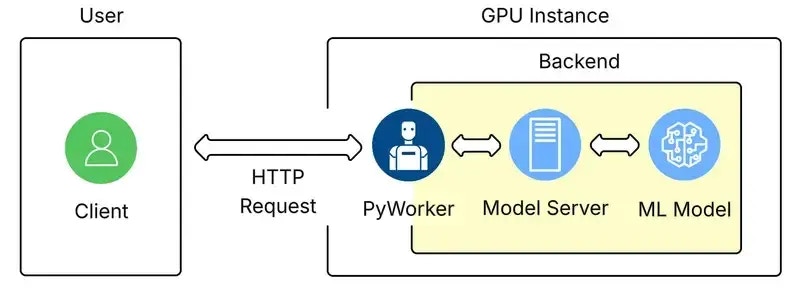 The term 'Backend' refers to the machine learning model itself, and the supplementary code used to make its inference work.
On Vast Serverless, the only way to access the ML model is through the PyWorker that wraps it. This allows the PyWorker to report accurate metrics to the serverless system so it can size the number of GPU instances appropriatley.
## Backend Configuration
Once a User has connected to a GPU Instance over Vast, the backend will start its own launch script. The launch script will:
* Setup a log file.
* Start a webserver to communicate with the ML model and PyWorker.
* Set environment variables.
* Launch the PyWorker and create a directory for it.
* Monitor the webserver and PyWorker processes.
After launch, the PyWorker acts as an inference API server façade, receiving HTTP requests, parsing them, and turning them into internal calls.
The 'Model Server' icon in the image above represents the inference runtime. This piece loads the model, exposes an interface, performs the model forward pass, and returns the resulting tensors to the PyWorker.
To add an endpoint to an existing backend, follow the instructions in the [PyWorker Extension Guide](/documentation/serverless/creating-new-pyworkers). This guide can also be used to write new backends.
The authentication information returned by [https://run.vast.ai/route/ ](/documentation/serverless/route)must be included in the request JSON to the PyWorker, but will be filtered out before forwarding to the model server. For example, a PyWorker expects to receive auth data in the request:
Once authenticated, the PyWorker will forward the following to the model server:
When the Serverless system returns an instance address from the `/route/` endpoint, it provides a unique signature with your request. The authentication server verifies this signature to ensure that only authorized clients can send requests to your server.
For more detailed information and advanced configuration, visit the [Vast PyWorker repository](https://github.com/vast-ai/pyworker/).
Vast also has pre-made backends in our supported templates, which can be found in the Serverless section [here](https://cloud.vast.ai/templates/).
**Examples:**
Example 1 (unknown):
```unknown
Once authenticated, the PyWorker will forward the following to the model server:
```
---
## execute
**URL:** llms-txt#execute
Source: https://docs.vast.ai/api-reference/instances/execute
api-reference/openapi.json put /api/v0/instances/command/{id}/
Executes a constrained remote command on a specified instance.
The command output can be retrieved from the returned result URL.
CLI Usage: `vastai execute `
---
## Serverless Overview
**URL:** llms-txt#serverless-overview
**Contents:**
- Key Features
Source: https://docs.vast.ai/documentation/serverless/index
Learn how to use Vast.ai's Serverless system to automate the provisioning of GPU workers to match the dynamic computational needs of your workloads.
Use Vast.ai’s Serverless system to automate the provisioning of GPU workers to match the dynamic computational needs of your workloads. This system ensures efficient and cost-effective scaling for AI inference and other GPU computing tasks.
* **Dynamic Scaling**: Automatically scale your AI inference up or down based on customizable performance metrics.
* **Global GPU Fleet**: Leverage Vast’s global fleet of powerful, affordable GPUs for your computational needs.
* **Fast Cold-Start Times**: Minimize cold-start times with a reserve pool of workers that can spin up in seconds.
* **Metrics and Debugging**: Access ample metrics and debugging tools for your serverless usage, including logs and Jupyter/SSH access.
* **Performance Exploration**: Perform in-depth performance exploration to optimize based on performance and price metrics.
* **Custom Worker Types**: Define custom worker types through CLI search filters and create commands, supporting multiple worker types per endpoint.
---
## Commands
**URL:** llms-txt#commands
Source: https://docs.vast.ai/cli/commands
<script
type="application/ld+json"
dangerouslySetInnerHTML={{
__html: JSON.stringify({
"@context": "https://schema.org",
"@type": "TechArticle",
"headline": "Vast.ai CLI Commands Reference",
"description": "Complete reference documentation for all Vast.ai CLI commands including client commands for managing instances, host commands for machine management, and detailed usage examples.",
"author": {
"@type": "Organization",
"name": "Vast.ai"
},
"datePublished": "2025-01-13",
"dateModified": "2025-07-12",
"articleSection": "CLI Reference",
"keywords": ["CLI", "command line", "API", "GPU", "vast.ai", "reference", "documentation", "Python", "instances", "hosting"],
"about": {
"@type": "SoftwareApplication",
"name": "Vast.ai CLI",
"applicationCategory": "DeveloperApplication",
"operatingSystem": ["Linux", "macOS", "Windows"],
"programmingLanguage": "Python"
}
})
}}
/>
---
## cancel maint
**URL:** llms-txt#cancel-maint
Source: https://docs.vast.ai/api-reference/machines/cancel-maint
api-reference/openapi.json put /api/v0/machines/{machine_id}/cancel_maint/
Cancel a scheduled maintenance window for a specified machine.
CLI Usage: `vastai cancel maint `
---
## Page Walkthrough
**URL:** llms-txt#page-walkthrough
**Contents:**
- Credit Balance
- Payment Sources
- Transfer Credits
- Invoice Info
- Common Questions
- If I rent a server and delete if after 10 minutes will I pay for 1 hour of usage or 10 minutes?
- Can I get a refund?
- Why has the prices changed?
- Why am I getting the error "No such payment method id None." when I try to add credit?
- Am I charged for "Loading" instances?
In this section we will walk through the Billing page you can find within the Console when logged into your Vast account.
Here you can see the current amount of Vast credits you have. This section also shows your current credit spend given your current instances. You can also view your transactions and generate invoices here.
In this section you can add payment methods and add credit to your account.
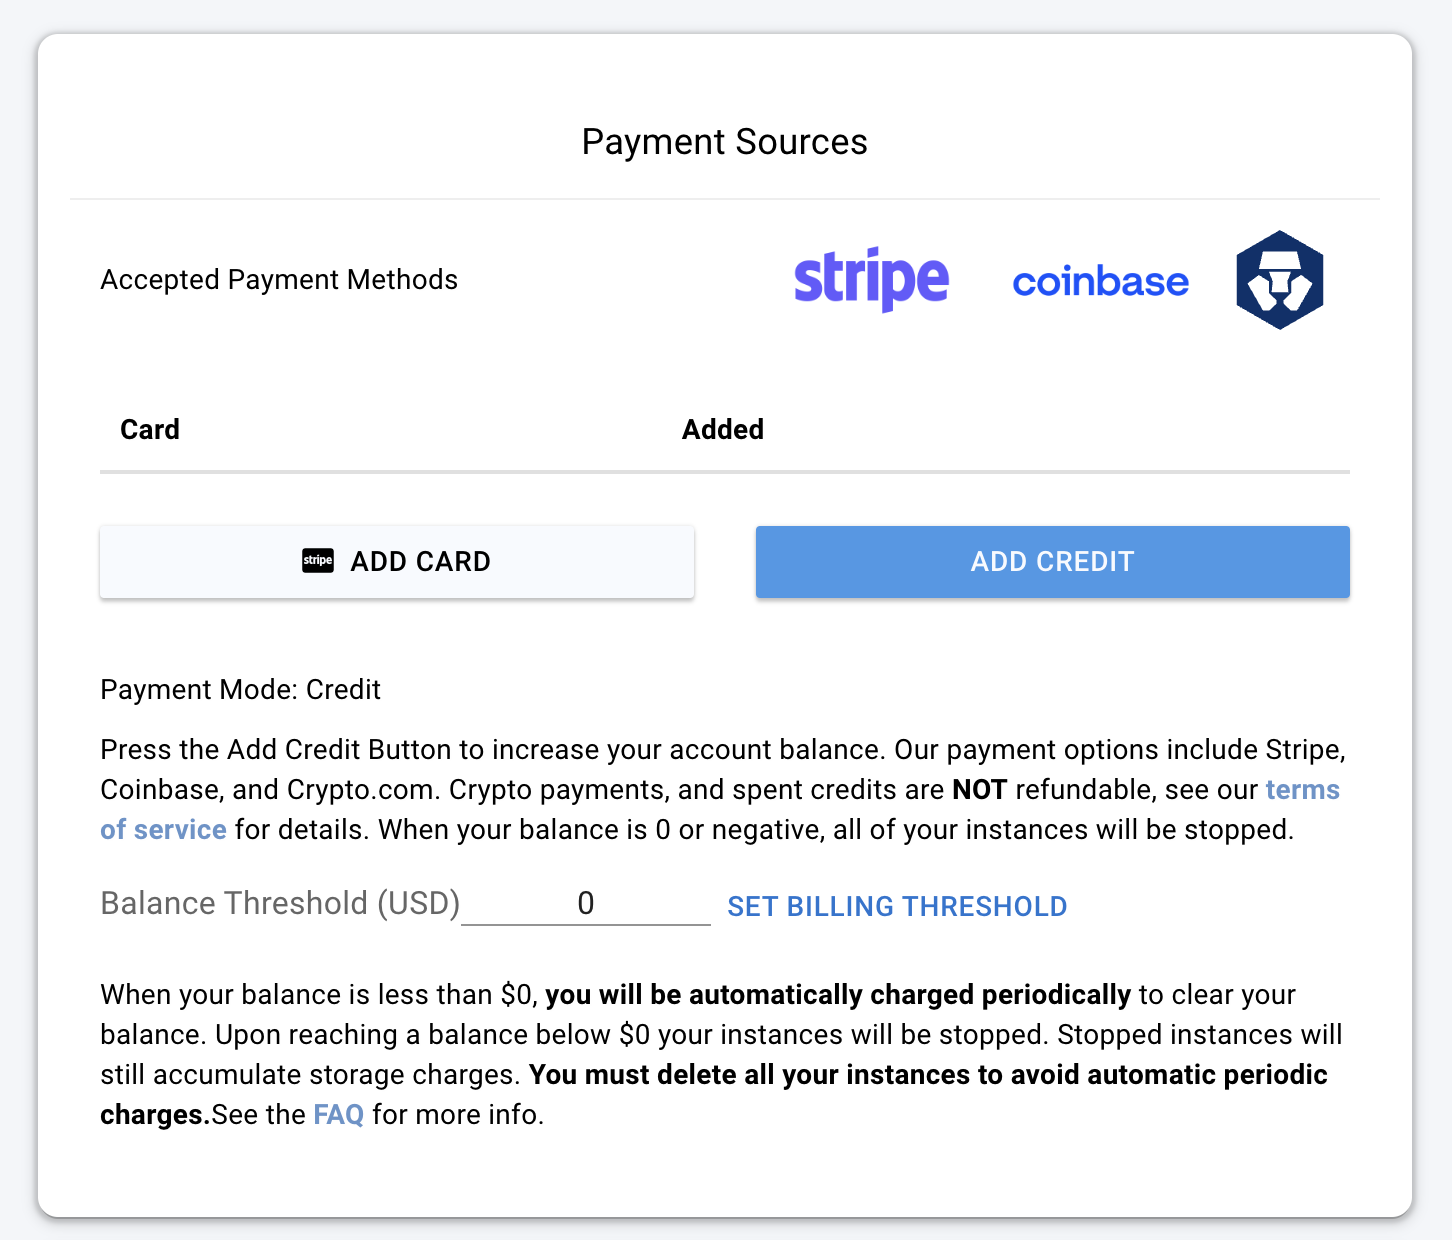
From this section, you can transfer your personal credits to a different account or team.
The term 'Backend' refers to the machine learning model itself, and the supplementary code used to make its inference work.
On Vast Serverless, the only way to access the ML model is through the PyWorker that wraps it. This allows the PyWorker to report accurate metrics to the serverless system so it can size the number of GPU instances appropriatley.
## Backend Configuration
Once a User has connected to a GPU Instance over Vast, the backend will start its own launch script. The launch script will:
* Setup a log file.
* Start a webserver to communicate with the ML model and PyWorker.
* Set environment variables.
* Launch the PyWorker and create a directory for it.
* Monitor the webserver and PyWorker processes.
After launch, the PyWorker acts as an inference API server façade, receiving HTTP requests, parsing them, and turning them into internal calls.
The 'Model Server' icon in the image above represents the inference runtime. This piece loads the model, exposes an interface, performs the model forward pass, and returns the resulting tensors to the PyWorker.
To add an endpoint to an existing backend, follow the instructions in the [PyWorker Extension Guide](/documentation/serverless/creating-new-pyworkers). This guide can also be used to write new backends.
The authentication information returned by [https://run.vast.ai/route/ ](/documentation/serverless/route)must be included in the request JSON to the PyWorker, but will be filtered out before forwarding to the model server. For example, a PyWorker expects to receive auth data in the request:
Once authenticated, the PyWorker will forward the following to the model server:
When the Serverless system returns an instance address from the `/route/` endpoint, it provides a unique signature with your request. The authentication server verifies this signature to ensure that only authorized clients can send requests to your server.
For more detailed information and advanced configuration, visit the [Vast PyWorker repository](https://github.com/vast-ai/pyworker/).
Vast also has pre-made backends in our supported templates, which can be found in the Serverless section [here](https://cloud.vast.ai/templates/).
**Examples:**
Example 1 (unknown):
```unknown
Once authenticated, the PyWorker will forward the following to the model server:
```
---
## execute
**URL:** llms-txt#execute
Source: https://docs.vast.ai/api-reference/instances/execute
api-reference/openapi.json put /api/v0/instances/command/{id}/
Executes a constrained remote command on a specified instance.
The command output can be retrieved from the returned result URL.
CLI Usage: `vastai execute `
---
## Serverless Overview
**URL:** llms-txt#serverless-overview
**Contents:**
- Key Features
Source: https://docs.vast.ai/documentation/serverless/index
Learn how to use Vast.ai's Serverless system to automate the provisioning of GPU workers to match the dynamic computational needs of your workloads.
Use Vast.ai’s Serverless system to automate the provisioning of GPU workers to match the dynamic computational needs of your workloads. This system ensures efficient and cost-effective scaling for AI inference and other GPU computing tasks.
* **Dynamic Scaling**: Automatically scale your AI inference up or down based on customizable performance metrics.
* **Global GPU Fleet**: Leverage Vast’s global fleet of powerful, affordable GPUs for your computational needs.
* **Fast Cold-Start Times**: Minimize cold-start times with a reserve pool of workers that can spin up in seconds.
* **Metrics and Debugging**: Access ample metrics and debugging tools for your serverless usage, including logs and Jupyter/SSH access.
* **Performance Exploration**: Perform in-depth performance exploration to optimize based on performance and price metrics.
* **Custom Worker Types**: Define custom worker types through CLI search filters and create commands, supporting multiple worker types per endpoint.
---
## Commands
**URL:** llms-txt#commands
Source: https://docs.vast.ai/cli/commands
<script
type="application/ld+json"
dangerouslySetInnerHTML={{
__html: JSON.stringify({
"@context": "https://schema.org",
"@type": "TechArticle",
"headline": "Vast.ai CLI Commands Reference",
"description": "Complete reference documentation for all Vast.ai CLI commands including client commands for managing instances, host commands for machine management, and detailed usage examples.",
"author": {
"@type": "Organization",
"name": "Vast.ai"
},
"datePublished": "2025-01-13",
"dateModified": "2025-07-12",
"articleSection": "CLI Reference",
"keywords": ["CLI", "command line", "API", "GPU", "vast.ai", "reference", "documentation", "Python", "instances", "hosting"],
"about": {
"@type": "SoftwareApplication",
"name": "Vast.ai CLI",
"applicationCategory": "DeveloperApplication",
"operatingSystem": ["Linux", "macOS", "Windows"],
"programmingLanguage": "Python"
}
})
}}
/>
---
## cancel maint
**URL:** llms-txt#cancel-maint
Source: https://docs.vast.ai/api-reference/machines/cancel-maint
api-reference/openapi.json put /api/v0/machines/{machine_id}/cancel_maint/
Cancel a scheduled maintenance window for a specified machine.
CLI Usage: `vastai cancel maint `
---
## Page Walkthrough
**URL:** llms-txt#page-walkthrough
**Contents:**
- Credit Balance
- Payment Sources
- Transfer Credits
- Invoice Info
- Common Questions
- If I rent a server and delete if after 10 minutes will I pay for 1 hour of usage or 10 minutes?
- Can I get a refund?
- Why has the prices changed?
- Why am I getting the error "No such payment method id None." when I try to add credit?
- Am I charged for "Loading" instances?
In this section we will walk through the Billing page you can find within the Console when logged into your Vast account.
Here you can see the current amount of Vast credits you have. This section also shows your current credit spend given your current instances. You can also view your transactions and generate invoices here.

In this section you can add payment methods and add credit to your account.

From this section, you can transfer your personal credits to a different account or team.
 Click the **Transfer Credits** button to open a pop-up. There, you can select the destination account or team to send the credit to.
* To transfer credit to another **user**, you will need their email address.
⚠️ This action is irreversible, so please double-check the email before proceeding.
Click the **Transfer Credits** button to open a pop-up. There, you can select the destination account or team to send the credit to.
* To transfer credit to another **user**, you will need their email address.
⚠️ This action is irreversible, so please double-check the email before proceeding.
 * to transfer credit to a **team**, you should be a part of the team.
 * To transfer credit from a team back to a personal account, you must be the team owner. You will need to switch to your team context and open Billing Page form there to see following pop-up.
 Here you can add the information to be shown on invoices you generate.
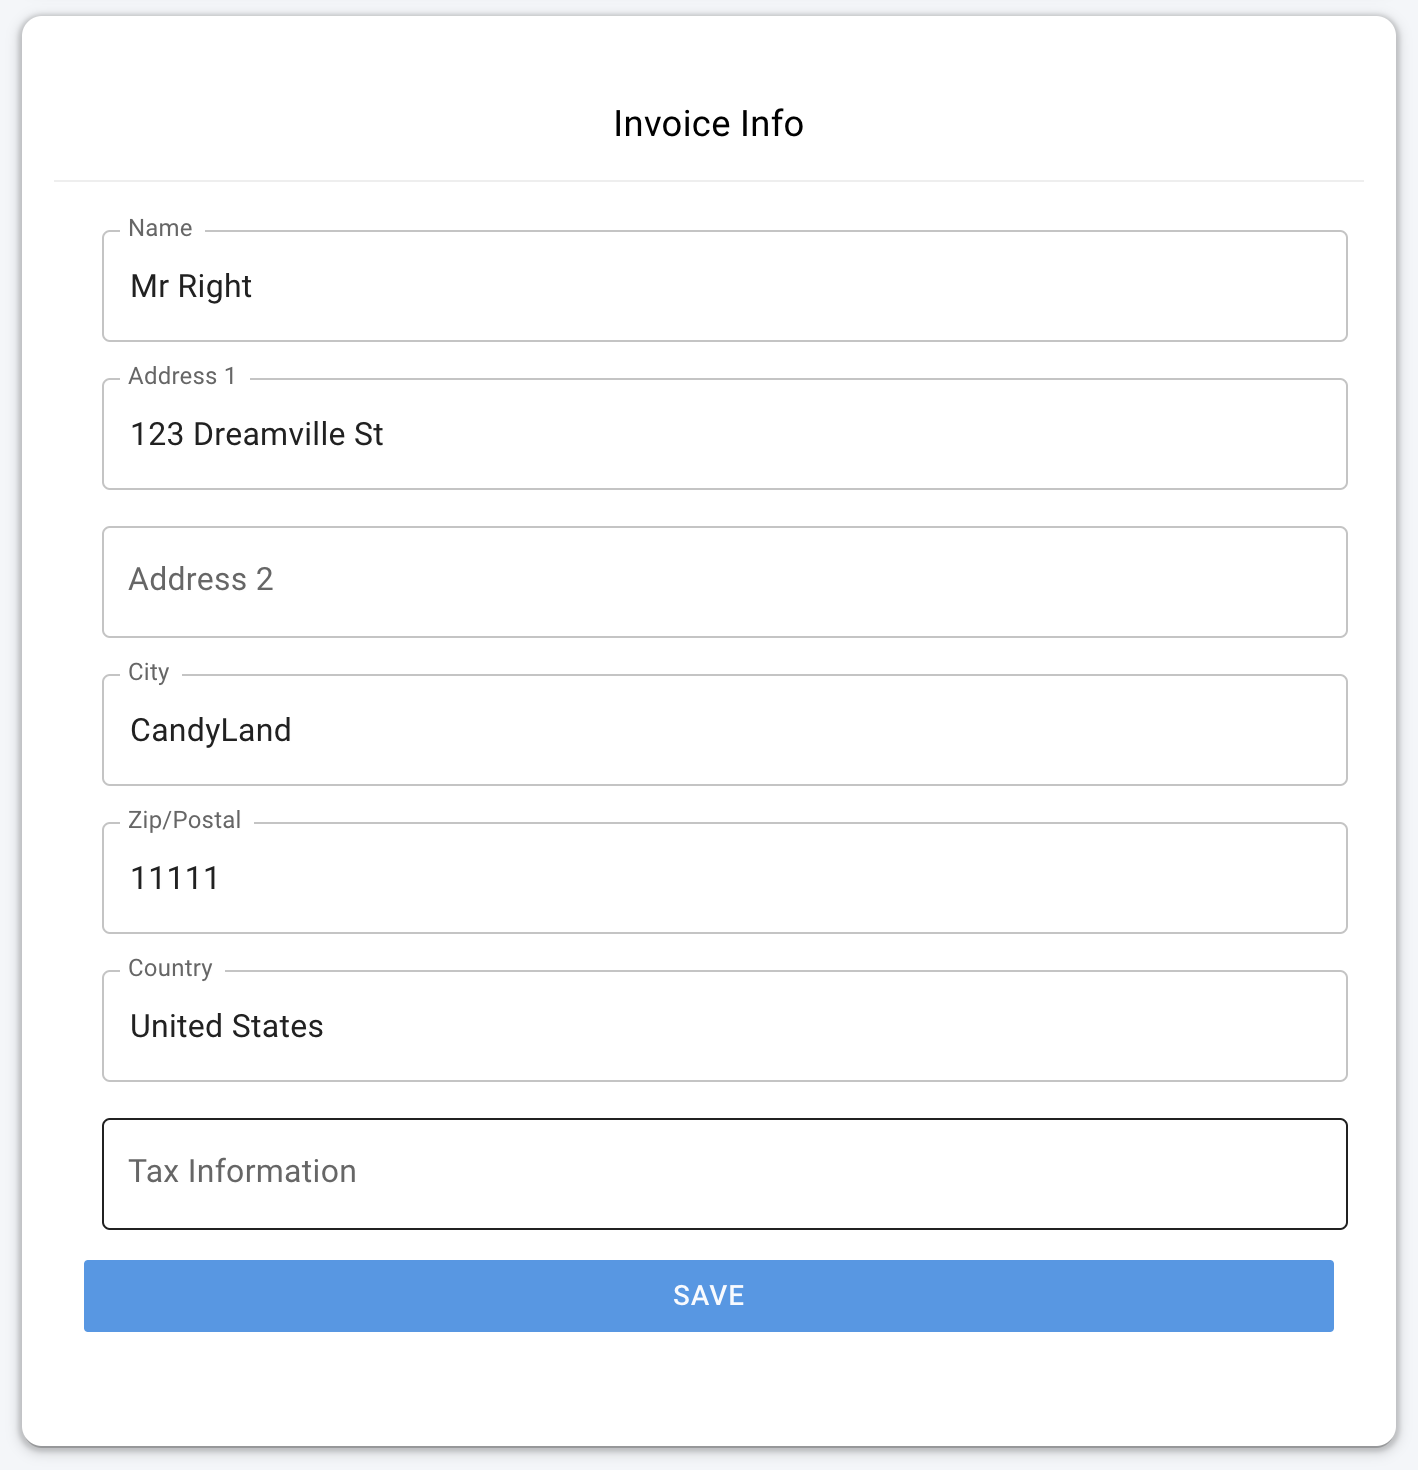
Here's an example that shows where and how the invoice info appears on generated invoices:
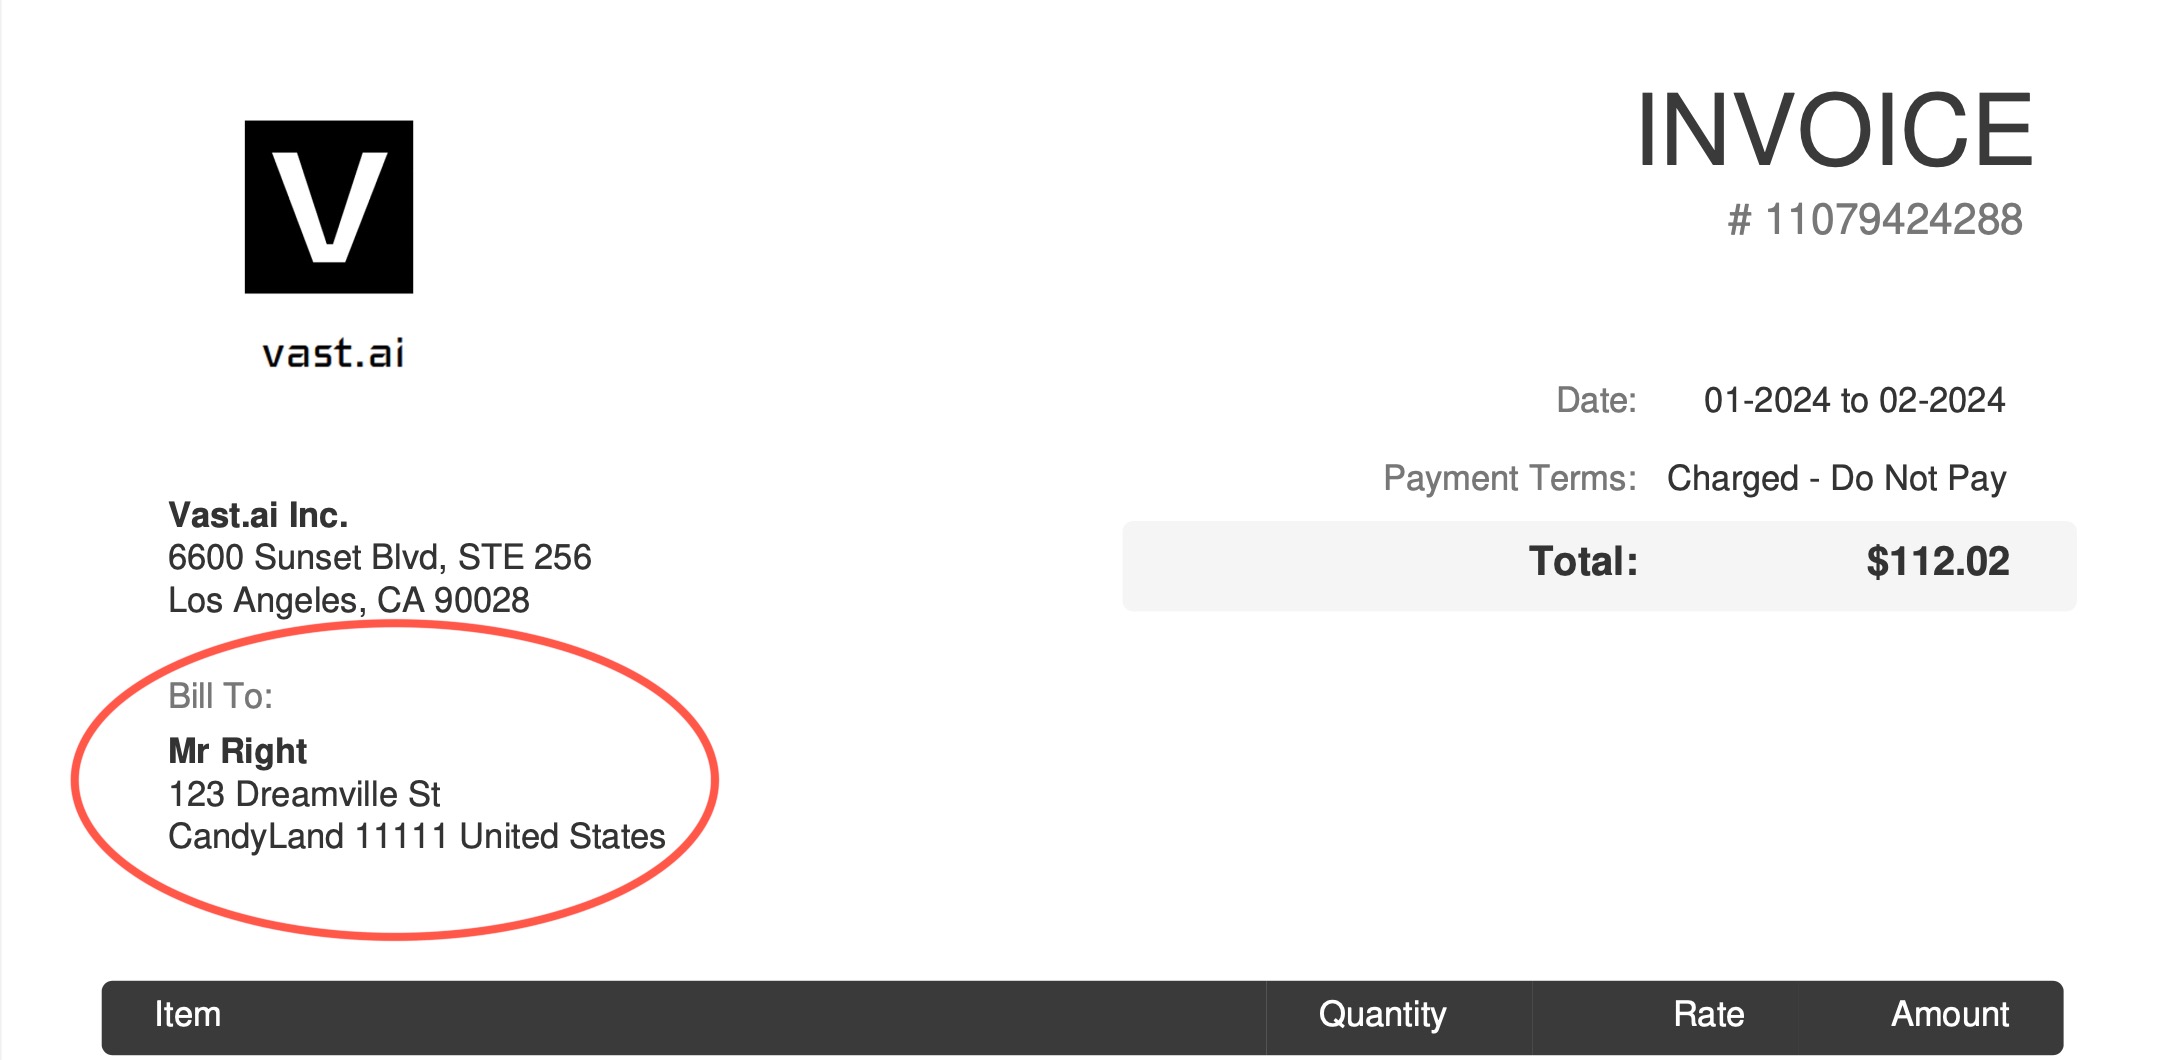
If you leave your Invoice Info blank it will default to your Vast account's email address for the "Bill To:" information.
### If I rent a server and delete if after 10 minutes will I pay for 1 hour of usage or 10 minutes?
You will only be charged for the 10 minutes of usage.
### Can I get a refund?
If you pay with credit card you can get a refund on unspent Vast credits. We do not refund Vast credits bought with crypto.
### Why has the prices changed?
Pricing is fixed by the host, and is specific to each machine and contract. You can refine your search and look for a machine that suits your needs [here](https://cloud.vast.ai/create/).
### Why am I getting the error "No such payment method id None." when I try to add credit?
Before buying credit with Stripe you must add a card!
### Am I charged for "Loading" instances?
No, you are not charged when it says "Loading".
### If my account is negative a few \$, what will happen? What happens if my Vast balance is negative?
It says in the Billing page: "You have a negative credit balance. Your instances are stopped and can resume once you pay the balance owed".
### Why am I getting charge more per hour than expected?
You may be see your Vast credit decline at a greater rate than expected due to upload and downloads costs, which is not shown in your $cost/hr or$cost/day pricing breakdowns as it is charged on a usage basis and not a constant rate. You can find these rates for bandwidth usage in the Internet: section of the pricing details, which you can see when you hover over the price in the bottom right-hand corner of instance cards within the Instance console page. You can also see pricing detail before instance creation from hovering over the prices on the Search page. You can also get a detailed document of your billing history by "Generate Billing History" within the Billing page of the console.
### Why are my GPUs not showing up in the list?
There are over 10,000+ listings on vast, and search only displays a small subset. You will usually not be able to find any one specific machine through most normal searches. To test that your machine is listed correctly, you can use the CLI:
vastai search offers 'machine\_id=12345 verified=any'
Replace 12345 with your actual machine ID
If your machine is verified, you should still be able to find it without the verified=any.
[Use the CLI (preferred)](/cli/get-started)
---
## This is the log line that is emitted once the server has started
**URL:** llms-txt#this-is-the-log-line-that-is-emitted-once-the-server-has-started
MODEL_SERVER_START_LOG_MSG = "infer server has started"
MODEL_SERVER_ERROR_LOG_MSGS = [
"Exception: corrupted model file" # message in the logs indicating the unrecoverable error
]
logging.basicConfig(
level=logging.DEBUG,
format="%(asctime)s[%(levelname)-5s] %(message)s",
datefmt="%Y-%m-%d %H:%M:%S",
)
log = logging.getLogger(__file__)
---
## Network
**URL:** llms-txt#network
---
## show user
**URL:** llms-txt#show-user
Source: https://docs.vast.ai/api-reference/accounts/show-user
api-reference/openapi.json get /api/v0/users/current/
Retrieve information about the current authenticated user, excluding the API key.
CLI Usage: `vastai show user`
---
## Host Commands
**URL:** llms-txt#host-commands
**Contents:**
- create cluster
- delete cluster
- join cluster
- list machine
- remove-machine-from-cluster
- remove defjob
- schedule maint
- set defjob
- set min-bid
- show clusters
Registers a new locally-networked cluster with the Vast.
Deregisters a cluster
Registers a machine or list of machines as a member of a cluster.
\[Host] list a machine for rent
## remove-machine-from-cluster
Deregisters a machine from a cluster, changing the manager node if the machine removed is the only manager.
\[Host] Delete default jobs
\[Host] Schedule upcoming maint window
\[Host] Create default jobs for a machine
\[Host] Set the minimum bid/rental price for a machine
Shows information about the host's clusters
\[Host] Show hosted machines
\[Host] Unlist a listed machine
**Examples:**
Example 1 (unknown):
```unknown
## delete cluster
Deregisters a cluster
```
Example 2 (unknown):
```unknown
## join cluster
Registers a machine or list of machines as a member of a cluster.
```
Example 3 (unknown):
```unknown
## list machine
\[Host] list a machine for rent
```
Example 4 (unknown):
```unknown
## remove-machine-from-cluster
Deregisters a machine from a cluster, changing the manager node if the machine removed is the only manager.
```
---
## show machines
**URL:** llms-txt#show-machines
Source: https://docs.vast.ai/api-reference/machines/show-machines
api-reference/openapi.json get /api/v0/machines/
Fetches data for multiple machines associated with the authenticated user.
CLI Usage: `vastai show machines [--user_id ]`
---
## show team roles
**URL:** llms-txt#show-team-roles
Source: https://docs.vast.ai/api-reference/team/show-team-roles
api-reference/openapi.json get /api/v0/team/roles-full/
Retrieve a list of all roles for a team, excluding the owner' role.
CLI Usage: `vastai show team-roles`
---
## Image Generation
**URL:** llms-txt#image-generation
Source: https://docs.vast.ai/image-generation
---
## create endpoint
**URL:** llms-txt#create-endpoint
Source: https://docs.vast.ai/api-reference/serverless/create-endpoint
api-reference/openapi.json post /api/v0/endptjobs/
This endpoint creates a new job processing endpoint with specified parameters.
CLI Usage: `vastai create endpoint [options]`
---
## Linux Virtual Desktop
**URL:** llms-txt#linux-virtual-desktop
Source: https://docs.vast.ai/linux-virtual-desktop
---
## Logs
**URL:** llms-txt#logs
Source: https://docs.vast.ai/documentation/serverless/logs
Learn how to fetch and analyze logs from Vast.ai Serverless endpoints and worker groups. Understand the log levels, how to use cURL to fetch logs, and how to interpret the logs for debugging and performance monitoring.
Both Endpoints and Worker Groups keep logs that can be fetched by using the `/get_endpoint_logs/` and `/get_autogroup_logs/` endpoints, respectively.
Endpoint logs relate to managing instances, and Worker Group logs relate to searching for offers to create instances from, as well as calls to create instances using the offers.
For both types of groups, there are four levels of logs with decreasing levels of detail: **debug**, **trace**, **info0**, and **info1**.
Each log level has a fixed size, and once it is full, the log is wiped and overwritten with new log messages. It is good practice to check these regularly while debugging.
---
## manage instance
**URL:** llms-txt#manage-instance
Source: https://docs.vast.ai/api-reference/instances/manage-instance
api-reference/openapi.json put /api/v0/instances/{id}/
Manage instance state and labels. The operation is determined by the request body parameters.
CLI Usage:
- To stop: `vastai stop instance `
- To start: `vastai start instance `
- To label: `vastai label instance `
---
## cancel sync
**URL:** llms-txt#cancel-sync
Source: https://docs.vast.ai/api-reference/instances/cancel-sync
api-reference/openapi.json delete /api/v0/commands/rclone/
Cancels an in-progress remote sync operation identified by the destination instance ID.
This operation cannot be resumed once canceled and must be restarted if needed.
CLI Usage: `vastai cancel sync --dst_id `
---
## POST [https://run.vast.ai/route/](https://run.vast.ai/route/)
**URL:** llms-txt#post-[https://run.vast.ai/route/](https://run.vast.ai/route/)
**Contents:**
- Inputs
- Outputs
- On Successful Worker Return
- On Failure to Find Ready Worker
- Example: Hitting route with cURL
* `endpoint`(string): Name of the Endpoint.
* `api_key`(string): The Vast API key associated with the account that controls the Endpoint. The key can also be placed in the header as an Authorization: Bearer.
* `cost`(float): The estimated compute resources for the request. The units of this cost are defined by the PyWorker. The serverless engine uses the cost as an estimate of the request's workload, and can scale GPU instances to ensure the Endpoint has the proper compute capacity.
### On Successful Worker Return
* `url`(string): The address of the worker instance to send the request to.
* `reqnum`(int): The request number corresponding to this worker instance. Note that workers expect to receive requests in approximately the same order as these reqnums, but some flexibility is allowed due to potential out-of-order requests caused by concurrency or small delays on the proxy server.
* `signature`(string): The signature is a cryptographic string that authenticates the url, cost, and reqnum fields in the response, proving they originated from the server. Clients can use this signature, along with the server's public key, to verify that these specific details have not been tampered with.
* `endpoint`(string): Same as the input parameter.
* `cost`(float): Same as the input parameter.
* `__request_id `(string): The \_\_request\_id is a unique string identifier generated by the server for each individual API request it receives. This ID is created at the start of processing the request and included in the response, allowing for distinct tracking and logging of every transaction.
### On Failure to Find Ready Worker
* `endpoint`: Same as the input parameter to `/route/`.
* `status`: The breakdown of workers in your endpoint group by status.
## Example: Hitting route with cURL
**Examples:**
Example 1 (unknown):
```unknown
## Outputs
### On Successful Worker Return
* `url`(string): The address of the worker instance to send the request to.
* `reqnum`(int): The request number corresponding to this worker instance. Note that workers expect to receive requests in approximately the same order as these reqnums, but some flexibility is allowed due to potential out-of-order requests caused by concurrency or small delays on the proxy server.
* `signature`(string): The signature is a cryptographic string that authenticates the url, cost, and reqnum fields in the response, proving they originated from the server. Clients can use this signature, along with the server's public key, to verify that these specific details have not been tampered with.
* `endpoint`(string): Same as the input parameter.
* `cost`(float): Same as the input parameter.
* `__request_id `(string): The \_\_request\_id is a unique string identifier generated by the server for each individual API request it receives. This ID is created at the start of processing the request and included in the response, allowing for distinct tracking and logging of every transaction.
```
Example 2 (unknown):
```unknown
### On Failure to Find Ready Worker
* `endpoint`: Same as the input parameter to `/route/`.
* `status`: The breakdown of workers in your endpoint group by status.
## Example: Hitting route with cURL
```
---
## Install zip
**URL:** llms-txt#install-zip
apt-get install -y zip
---
## Python packages
**URL:** llms-txt#python-packages
pip install package-name
---
## Choosing a Template
**URL:** llms-txt#choosing-a-template
**Contents:**
- What are Templates?
- Selecting a Template
- 1. Recommended Templates
- 2. Your Recent Templates
- 3. Custom Templates
- Quick Template Selection
- Launch Modes
- SSH
- Jupyter
- Entrypoint
Source: https://docs.vast.ai/documentation/instances/choosing/templates
Select the right template for your Vast.ai instance. Templates define your Docker image, launch mode, and initialization settings.
## What are Templates?
Templates are saved configurations that define how your instance will be set up. Every instance on Vast.ai requires a template that specifies:
* **Docker image** - The base container environment
* **Launch mode** - How you'll connect (SSH, Jupyter, or Entrypoint)
* **Initialization** - Startup scripts and environment variables
* **Ports and networking** - Required network configurations
For comprehensive template documentation including creating custom templates, see the main [Templates section](/documentation/templates/introduction).
## Selecting a Template
When renting an instance, you must select a template first. You have three options:
### 1. Recommended Templates
Pre-configured templates for common use cases:
* **PyTorch** - Ready for deep learning with Jupyter
* **TensorFlow** - ML development environment
* **Stable Diffusion** - Image generation UIs
* **LLM Inference** - Text generation setups
* **Base Ubuntu** - Clean development environment
### 2. Your Recent Templates
Templates you've previously used or customized are saved for quick access.
### 3. Custom Templates
Create your own or modify existing templates to match your exact needs.
## Quick Template Selection
1. On the [search page](https://cloud.vast.ai/create/), look for the template selector in the upper left
2. Click "Change Template" to see available options
3. Select a template that matches your needs
4. The search will update to show compatible machines
Start with a recommended template and modify it rather than creating from scratch. This ensures compatibility and faster startup times.
Templates support three connection methods:
* Terminal access via SSH
* Best for: Development, training scripts, command-line work
* Includes tmux session management
* Web-based notebook interface
* Best for: Data science, experimentation, visualization
* Includes terminal access
* Runs Docker's native entrypoint
* Best for: Automated workloads, API servers, production deployments
* No automatic SSH/Jupyter setup
## Important Template Settings
* Always specify a version tag (avoid "latest")
* Vast.ai base images (`vastai/pytorch`) start faster due to caching
* Custom images from Docker Hub supported
* Runs after the container starts
* Use for installing additional packages
* Executes as bash commands
* Set in the search interface (not the template)
* Cannot be changed after instance creation
* Default is 10GB - increase as needed
### Template Compatibility
Not all templates work on all machines. If an instance fails to start:
* Try a recommended template
* Check Docker image availability
* Verify port requirements match machine capabilities
### Invalid Docker Image Path
If you get an error like "Unable to find image 'ubuntu20.04\_latest/ssh'":
* You have an invalid Docker image path
* Use proper format: `nvidia/cuda:12.0.1-devel-ubuntu20.04`
* Always include repository and tag
* Test locally: `docker pull `
* Use recommended templates to ensure valid paths
### Image Loading Time
* First launch can take 5-60 minutes depending on image size
* Vast.ai base images load faster (pre-cached on many machines)
* You're not charged during loading
### Can't Change Template on Existing Instance
Templates are recipes for new instances. Once an instance is created:
* Template changes only affect new instances
* To use a different template, create a new instance
* Transfer data if needed using [data movement tools](/documentation/instances/storage/data-movement)
**Ready to customize?**
See the full [Templates documentation](/documentation/templates/introduction) for:
* [Creating custom templates](/documentation/templates/creating-templates)
* [Advanced configuration](/documentation/templates/advanced-setup)
* [Template settings reference](/documentation/templates/template-settings)
* Start with a recommended template
* Check the [Templates FAQ](/documentation/reference/faq/instances#templates)
* Review [troubleshooting guide](/documentation/reference/troubleshooting)
---
## Install CLI
**URL:** llms-txt#install-cli
---
## destroy instance
**URL:** llms-txt#destroy-instance
Source: https://docs.vast.ai/api-reference/instances/destroy-instance
api-reference/openapi.json delete /api/v0/instances/{id}/
Destroys/deletes an instance permanently. This is irreversible and will delete all data.
CLI Usage: `vastai destroy instance `
---
## Reconfigure the instance portal
**URL:** llms-txt#reconfigure-the-instance-portal
rm -f /etc/portal.yaml
export PORTAL_CONFIG="localhost:1111:11111:/:Instance Portal|localhost:1234:11234:/:My Application"
---
## update env var
**URL:** llms-txt#update-env-var
Source: https://docs.vast.ai/api-reference/accounts/update-env-var
api-reference/openapi.json put /api/v0/secrets/
Updates the value of an existing environment variable for the authenticated user.
CLI Usage: `vastai update env-var `
---
## Conda (if available)
**URL:** llms-txt#conda-(if-available)
**Contents:**
- How do I use specific CUDA versions?
- Debugging
- How do I view instance logs?
- My instance won't start - how do I debug?
- How do I monitor resource usage?
conda install package-name
bash theme={null}
nvcc --version
nvidia-smi
bash theme={null}
**Examples:**
Example 1 (unknown):
```unknown
Add to `/root/onstart.sh` for persistence across restarts.
### How do I use specific CUDA versions?
CUDA version depends on the Docker image. To check:
```
Example 2 (unknown):
```unknown
To use specific versions, choose appropriate templates or create custom images with your required CUDA version.
## Debugging
### How do I view instance logs?
* Through web console: Click "Logs" on instance card
* Via CLI: `vastai logs INSTANCE_ID`
* Inside instance: Check `/var/log/` directory
### My instance won't start - how do I debug?
1. Check instance logs for errors
2. Verify Docker image exists and is accessible
3. Check if ports are already in use
4. Ensure sufficient disk space requested
5. Try a different provider
6. Contact support with instance ID
### How do I monitor resource usage?
```
---
## POST [https://console.vast.ai/api/v0/workergroups/](https://console.vast.ai/api/v0/workergroups/)
**URL:** llms-txt#post-[https://console.vast.ai/api/v0/workergroups/](https://console.vast.ai/api/v0/workergroups/)
**Contents:**
- Inputs
- Outputs
- On Successful Worker Return
- On Failure to Find Ready Worker
- Example: Creating a Workergroup with cURL
- Example: Creating an Endpoint with the Vast CLI
* `api_key`(string): The Vast API key associated with the account that controls the Endpoint. The key can also be placed in the header as an Authorization: Bearer.
* `endpoint_name`(string): The name of the Endpoint that the Workergroup will be created under.
AND one of the following:
* `template_hash` (string): The hexadecimal string that identifies a particular template.
* `template_id` (integer): The unique id that identifes a template.
NOTE: If you use either the template hash or id, you can skip `search_params`, as they are automatically inferred from the template.
* `search_params` (string): A query string that specifies the hardware and performance criteria for filtering GPU offers in the vast.ai marketplace.
* `launch_args` (string): A command-line style string containing additional parameters for instance creation that will be parsed and applied when the autoscaler creates new workers. This allows you to customize instance configuration beyond what's specified in templates.
**Optional** (Default values will be assigned if not specified):
* `min_load`(integer): A minimum baseline load (measured in tokens/second for LLMs) that the serverless engine will assume your Endpoint needs to handle, regardless of actual measured traffic. Default value is 1.0.
* `target_util` (float): A ratio that determines how much spare capacity (headroom) the serverless engine maintains. Default value is 0.9.
* `cold_mult`(float): A multiplier applied to your target capacity for longer-term planning (1+ hours). This parameter controls how much extra capacity the serverless engine will plan for in the future compared to immediate needs. Default value is 3.0.
* `test_workers` (integer): The number of different physical machines that a Workergroup should test during its initial "exploration" phase to gather performance data before transitioning to normal demand-based scaling. Default value is 3.
* `gpu_ram` (integer): The amount of GPU memory (VRAM) in gigabytes that your model or workload requires to run. This parameter tells the serverless engine how much GPU memory your model needs. Default value is 24.
### On Successful Worker Return
* `success`(bool): True on successful creation of Workergroup, False if otherwise.
* `result`(int): The autogroup\_id of the newly created Workergroup.
### On Failure to Find Ready Worker
* `success`(bool): True on successful creation of Workergroup, False if otherwise.
* `error`(string): The type of error status.
* `msg` (string): The error message related to the error.
## Example: Creating a Workergroup with cURL
## Example: Creating an Endpoint with the Vast CLI
**Examples:**
Example 1 (unknown):
```unknown
## Outputs
### On Successful Worker Return
* `success`(bool): True on successful creation of Workergroup, False if otherwise.
* `result`(int): The autogroup\_id of the newly created Workergroup.
```
Example 2 (unknown):
```unknown
### On Failure to Find Ready Worker
* `success`(bool): True on successful creation of Workergroup, False if otherwise.
* `error`(string): The type of error status.
* `msg` (string): The error message related to the error.
```
Example 3 (unknown):
```unknown
## Example: Creating a Workergroup with cURL
```
Example 4 (unknown):
```unknown
## Example: Creating an Endpoint with the Vast CLI
```
---
## Account Settings
**URL:** llms-txt#account-settings
Source: https://docs.vast.ai/documentation/reference/account-settings
<script
type="application/ld+json"
dangerouslySetInnerHTML={{
__html: JSON.stringify({
"@context": "https://schema.org",
"@type": "HowTo",
"name": "How to Manage Your Vast.ai Account Settings",
"description": "A comprehensive guide to managing your Vast.ai account settings including dark mode, security, referral links, environment variables, notifications, cloud connections, and invoice information.",
"step": [
{
"@type": "HowToStep",
"name": "Enable Dark Mode",
"text": "Turn the switch on and off to enable and disable dark mode. You can also toggle this setting in the navigation bar with the moon and sun icons."
},
{
"@type": "HowToStep",
"name": "Set Up Account Security",
"text": "In the Account Security section, you can set up two-factor authentication, resend a verification email, change your email, or reset your password. Two-factor authentication can be used to help protect your account from unauthorized access."
},
{
"@type": "HowToStep",
"name": "Access Your Referral Link",
"text": "You can access your referral link in the Referral Link section of the Settings page. When users create an account through your referral link and use Vast services, you'll earn credits and receive payouts for your referrals."
},
{
"@type": "HowToStep",
"name": "Manage Environment Variables",
"text": "Add, edit, and delete environment variables stored on your account. Input the env key into the key field and value into the value field, then select the + button to save. To add multiple at once, select the Batch Paste option. Make sure you select the Save Edits button to save all of your changes."
},
{
"@type": "HowToStep",
"name": "Configure Cloud Connections",
"text": "Integrate and connect with cloud providers such as Amazon S3, Backblaze, and Dropbox. This integration allows you to sync data even while instances are inactive. You can access this feature via the Cloud Copy button on the Instances page."
},
{
"@type": "HowToStep",
"name": "Set Invoice Information",
"text": "In the Invoice Information section, you can set personal information for your invoices. Click into any input field to edit it, and select the Save button to save your changes."
}
]
})
}}
/>
On this page you can view and edit important information about your customer account.
---
## show deposit
**URL:** llms-txt#show-deposit
Source: https://docs.vast.ai/api-reference/billing/show-deposit
api-reference/openapi.json get /api/v0/instances/balance/{id}/
Retrieves the deposit details for a specified instance.
CLI Usage: `vastai show deposit `
---
## show logs
**URL:** llms-txt#show-logs
Source: https://docs.vast.ai/api-reference/instances/show-logs
api-reference/openapi.json put /api/v0/instances/request_logs/{id}
Request logs from a specific instance. The logs will be uploaded to S3 and can be retrieved from a generated URL. Supports both container logs and daemon system logs.
CLI Usage: `vastai show logs [--tail ] [--filter ] [--daemon-logs]`
---
## Navigate to models directory
**URL:** llms-txt#navigate-to-models-directory
cd /workspace/stable-diffusion-webui/models/Stable-diffusion
---
## Copy file TO instance
**URL:** llms-txt#copy-file-to-instance
scp -P my_file.txt root@:/workspace/
---
## Billing Help
**URL:** llms-txt#billing-help
**Contents:**
- How does billing work?
- Can you bill my card automatically so I don't have to add credit in advance?
- I didn't enable debit-mode - what are these automatic charges to my card?
- How does pricing work?
- What is the billing frequency?
- Why should I trust vast.ai with my credit card info?
- Do you support PayPal? What about cryptocurrency?
Source: https://docs.vast.ai/documentation/reference/billing-help
<script
type="application/ld+json"
dangerouslySetInnerHTML={{
__html: JSON.stringify({
"@context": "https://schema.org",
"@type": "FAQPage",
"mainEntity": [
{
"@type": "Question",
"name": "How does billing work?",
"acceptedAnswer": {
"@type": "Answer",
"text": "Once you enter a credit card and an email address and both are verified you can then increase your credit balance using one-time payments with the add credit button. Whenever your credit balance hits zero or below, your instances will be stopped automatically, but not destroyed. You are still charged storage costs for stopped instances, so it is important to destroy instances when you are done using them. Your credit card will be automatically charged periodically to pay off any outstanding negative balance."
}
},
{
"@type": "Question",
"name": "Can you bill my card automatically so I don't have to add credit in advance?",
"acceptedAnswer": {
"@type": "Answer",
"text": "You can set a balance threshold to configure auto billing, which will attempt to maintain your balance above the threshold. We recommend setting a threshold around your daily or weekly spend, and then setting an balance email notification threshold around 75% of that value, so that you get notified if the auto billing fails but long before your balance depletes to zero. There is also an optional debit-mode feature which can be enabled by request for older accounts. When debit-mode is enabled, your account balance is allowed to go negative (without immediately stopping your instances)."
}
},
{
"@type": "Question",
"name": "I didn't enable debit-mode - what are these automatic charges to my card?",
"acceptedAnswer": {
"@type": "Answer",
"text": "Your card is charged automatically regardless of whether or not you have debit-mode enabled. Instances are never free - even stopped instances have storage charges. Make sure you delete instances when you are done with them - otherwise, your card will continue to be periodically charged indefinitely."
}
},
{
"@type": "Question",
"name": "How does pricing work?",
"acceptedAnswer": {
"@type": "Answer",
"text": "There are separate prices and charges for: Active rental (GPU) costs, Storage costs, and Bandwidth costs. You are charged the base active rental cost for every second your instance is in the active/connected state. You are charged the storage cost (which depends on the size of your storage allocation) for every second your instance exists and is online, regardless of what state it is in: active, inactive, loading, etc. Stopping an instance does not avoid storage costs. You are charged bandwidth prices for every byte sent or received to or from the instance, regardless of what state it is in. The prices for base rental, storage, and bandwidth vary considerably from machine to machine, so make sure to check them. You are not charged active rental or storage costs for instances that are currently offline."
}
},
{
"@type": "Question",
"name": "What is the billing frequency?",
"acceptedAnswer": {
"@type": "Answer",
"text": "Balances are updated about once every few seconds."
}
},
{
"@type": "Question",
"name": "Why should I trust vast.ai with my credit card info?",
"acceptedAnswer": {
"@type": "Answer",
"text": "You don't need to: Vast.ai does not see, store or process your credit card numbers, they are passed directly to Stripe (which you can verify in the javascript)."
}
},
{
"@type": "Question",
"name": "Do you support PayPal? What about cryptocurrency?",
"acceptedAnswer": {
"@type": "Answer",
"text": "We currently support major credit cards through stripe and crypto payments through Coinbase and crypto.com."
}
}
]
})
}}
/>
### How does billing work?
Once you enter a credit card and an email address and both are verified you can then increase your credit balance using one-time payments with the add credit button.
Whenever your credit balance hits zero or below, your instances will be stopped automatically, but not destroyed.
You are still charged storage costs for stopped instances, so it is important to destroy instances when you are done using them.
Your credit card will be automatically charged periodically to pay off any outstanding negative balance.
### Can you bill my card automatically so I don't have to add credit in advance?
You can set a balance threshold to configure auto billing, which will attempt to maintain your balance above the threshold.
We recommend setting a threshold around your daily or weekly spend, and then setting an balance email notification threshold around 75% of that value, so that you get notified if the auto billing fails but long before your balance depletes to zero.
There is also an optional debit-mode feature which can be enabled by request for older accounts.
When debit-mode is enabled, your account balance is allowed to go negative (without immediately stopping your instances).
### I didn't enable debit-mode - what are these automatic charges to my card?
Your card is charged automatically regardless of whether or not you have debit-mode enabled.
Instances are never free - even stopped instances have storage charges.
Make sure you delete instances when you are done with them - otherwise, your card will continue to be periodically charged indefinitely.
### How does pricing work?
There are separate prices and charges for:
* Active rental (GPU) costs
* Storage costs
* Bandwidth costs
You are charged the base active rental cost for every second your instance is in the active/connected state.
You are charged the storage cost (which depends on the size of your storage allocation) for every second your instance exists and is online, regardless of what state it is in: active, inactive, loading, etc.
Stopping an instance does not avoid storage costs.
You are charged bandwidth prices for every byte sent or received to or from the instance, regardless of what state it is in.
The prices for base rental, storage, and bandwidth vary considerably from machine to machine, so make sure to check them.
You are not charged active rental or storage costs for instances that are currently offline.
### What is the billing frequency?
Balances are updated about once every few seconds.
### Why should I trust vast.ai with my credit card info?
You don't need to: Vast.ai does not see, store or process your credit card numbers, they are passed directly to Stripe (which you can verify in the javascript).
### Do you support PayPal? What about cryptocurrency?
We currently support major credit cards through stripe and crypto payments through Coinbase and crypto.com.
---
## Setting Up a vLLM + **Qwen3-8B** Serverless Engine
**URL:** llms-txt#setting-up-a-vllm-+-**qwen3-8b**--serverless-engine
Navigate to the user account settings page [here](https://cloud.vast.ai/account/) and drop down the "Environment Variables" tab. In the Key field, add "HF\_TOKEN", and in the Value field add the HuggingFace read-access token. Click the "+" button to the right of the fields, then click "Save Edits".
Here you can add the information to be shown on invoices you generate.

Here's an example that shows where and how the invoice info appears on generated invoices:

If you leave your Invoice Info blank it will default to your Vast account's email address for the "Bill To:" information.
### If I rent a server and delete if after 10 minutes will I pay for 1 hour of usage or 10 minutes?
You will only be charged for the 10 minutes of usage.
### Can I get a refund?
If you pay with credit card you can get a refund on unspent Vast credits. We do not refund Vast credits bought with crypto.
### Why has the prices changed?
Pricing is fixed by the host, and is specific to each machine and contract. You can refine your search and look for a machine that suits your needs [here](https://cloud.vast.ai/create/).
### Why am I getting the error "No such payment method id None." when I try to add credit?
Before buying credit with Stripe you must add a card!
### Am I charged for "Loading" instances?
No, you are not charged when it says "Loading".
### If my account is negative a few \$, what will happen? What happens if my Vast balance is negative?
It says in the Billing page: "You have a negative credit balance. Your instances are stopped and can resume once you pay the balance owed".
### Why am I getting charge more per hour than expected?
You may be see your Vast credit decline at a greater rate than expected due to upload and downloads costs, which is not shown in your $cost/hr or$cost/day pricing breakdowns as it is charged on a usage basis and not a constant rate. You can find these rates for bandwidth usage in the Internet: section of the pricing details, which you can see when you hover over the price in the bottom right-hand corner of instance cards within the Instance console page. You can also see pricing detail before instance creation from hovering over the prices on the Search page. You can also get a detailed document of your billing history by "Generate Billing History" within the Billing page of the console.
### Why are my GPUs not showing up in the list?
There are over 10,000+ listings on vast, and search only displays a small subset. You will usually not be able to find any one specific machine through most normal searches. To test that your machine is listed correctly, you can use the CLI:
vastai search offers 'machine\_id=12345 verified=any'
Replace 12345 with your actual machine ID
If your machine is verified, you should still be able to find it without the verified=any.
[Use the CLI (preferred)](/cli/get-started)
---
## This is the log line that is emitted once the server has started
**URL:** llms-txt#this-is-the-log-line-that-is-emitted-once-the-server-has-started
MODEL_SERVER_START_LOG_MSG = "infer server has started"
MODEL_SERVER_ERROR_LOG_MSGS = [
"Exception: corrupted model file" # message in the logs indicating the unrecoverable error
]
logging.basicConfig(
level=logging.DEBUG,
format="%(asctime)s[%(levelname)-5s] %(message)s",
datefmt="%Y-%m-%d %H:%M:%S",
)
log = logging.getLogger(__file__)
---
## Network
**URL:** llms-txt#network
---
## show user
**URL:** llms-txt#show-user
Source: https://docs.vast.ai/api-reference/accounts/show-user
api-reference/openapi.json get /api/v0/users/current/
Retrieve information about the current authenticated user, excluding the API key.
CLI Usage: `vastai show user`
---
## Host Commands
**URL:** llms-txt#host-commands
**Contents:**
- create cluster
- delete cluster
- join cluster
- list machine
- remove-machine-from-cluster
- remove defjob
- schedule maint
- set defjob
- set min-bid
- show clusters
Registers a new locally-networked cluster with the Vast.
Deregisters a cluster
Registers a machine or list of machines as a member of a cluster.
\[Host] list a machine for rent
## remove-machine-from-cluster
Deregisters a machine from a cluster, changing the manager node if the machine removed is the only manager.
\[Host] Delete default jobs
\[Host] Schedule upcoming maint window
\[Host] Create default jobs for a machine
\[Host] Set the minimum bid/rental price for a machine
Shows information about the host's clusters
\[Host] Show hosted machines
\[Host] Unlist a listed machine
**Examples:**
Example 1 (unknown):
```unknown
## delete cluster
Deregisters a cluster
```
Example 2 (unknown):
```unknown
## join cluster
Registers a machine or list of machines as a member of a cluster.
```
Example 3 (unknown):
```unknown
## list machine
\[Host] list a machine for rent
```
Example 4 (unknown):
```unknown
## remove-machine-from-cluster
Deregisters a machine from a cluster, changing the manager node if the machine removed is the only manager.
```
---
## show machines
**URL:** llms-txt#show-machines
Source: https://docs.vast.ai/api-reference/machines/show-machines
api-reference/openapi.json get /api/v0/machines/
Fetches data for multiple machines associated with the authenticated user.
CLI Usage: `vastai show machines [--user_id ]`
---
## show team roles
**URL:** llms-txt#show-team-roles
Source: https://docs.vast.ai/api-reference/team/show-team-roles
api-reference/openapi.json get /api/v0/team/roles-full/
Retrieve a list of all roles for a team, excluding the owner' role.
CLI Usage: `vastai show team-roles`
---
## Image Generation
**URL:** llms-txt#image-generation
Source: https://docs.vast.ai/image-generation
---
## create endpoint
**URL:** llms-txt#create-endpoint
Source: https://docs.vast.ai/api-reference/serverless/create-endpoint
api-reference/openapi.json post /api/v0/endptjobs/
This endpoint creates a new job processing endpoint with specified parameters.
CLI Usage: `vastai create endpoint [options]`
---
## Linux Virtual Desktop
**URL:** llms-txt#linux-virtual-desktop
Source: https://docs.vast.ai/linux-virtual-desktop
---
## Logs
**URL:** llms-txt#logs
Source: https://docs.vast.ai/documentation/serverless/logs
Learn how to fetch and analyze logs from Vast.ai Serverless endpoints and worker groups. Understand the log levels, how to use cURL to fetch logs, and how to interpret the logs for debugging and performance monitoring.
Both Endpoints and Worker Groups keep logs that can be fetched by using the `/get_endpoint_logs/` and `/get_autogroup_logs/` endpoints, respectively.
Endpoint logs relate to managing instances, and Worker Group logs relate to searching for offers to create instances from, as well as calls to create instances using the offers.
For both types of groups, there are four levels of logs with decreasing levels of detail: **debug**, **trace**, **info0**, and **info1**.
Each log level has a fixed size, and once it is full, the log is wiped and overwritten with new log messages. It is good practice to check these regularly while debugging.
---
## manage instance
**URL:** llms-txt#manage-instance
Source: https://docs.vast.ai/api-reference/instances/manage-instance
api-reference/openapi.json put /api/v0/instances/{id}/
Manage instance state and labels. The operation is determined by the request body parameters.
CLI Usage:
- To stop: `vastai stop instance `
- To start: `vastai start instance `
- To label: `vastai label instance `
---
## cancel sync
**URL:** llms-txt#cancel-sync
Source: https://docs.vast.ai/api-reference/instances/cancel-sync
api-reference/openapi.json delete /api/v0/commands/rclone/
Cancels an in-progress remote sync operation identified by the destination instance ID.
This operation cannot be resumed once canceled and must be restarted if needed.
CLI Usage: `vastai cancel sync --dst_id `
---
## POST [https://run.vast.ai/route/](https://run.vast.ai/route/)
**URL:** llms-txt#post-[https://run.vast.ai/route/](https://run.vast.ai/route/)
**Contents:**
- Inputs
- Outputs
- On Successful Worker Return
- On Failure to Find Ready Worker
- Example: Hitting route with cURL
* `endpoint`(string): Name of the Endpoint.
* `api_key`(string): The Vast API key associated with the account that controls the Endpoint. The key can also be placed in the header as an Authorization: Bearer.
* `cost`(float): The estimated compute resources for the request. The units of this cost are defined by the PyWorker. The serverless engine uses the cost as an estimate of the request's workload, and can scale GPU instances to ensure the Endpoint has the proper compute capacity.
### On Successful Worker Return
* `url`(string): The address of the worker instance to send the request to.
* `reqnum`(int): The request number corresponding to this worker instance. Note that workers expect to receive requests in approximately the same order as these reqnums, but some flexibility is allowed due to potential out-of-order requests caused by concurrency or small delays on the proxy server.
* `signature`(string): The signature is a cryptographic string that authenticates the url, cost, and reqnum fields in the response, proving they originated from the server. Clients can use this signature, along with the server's public key, to verify that these specific details have not been tampered with.
* `endpoint`(string): Same as the input parameter.
* `cost`(float): Same as the input parameter.
* `__request_id `(string): The \_\_request\_id is a unique string identifier generated by the server for each individual API request it receives. This ID is created at the start of processing the request and included in the response, allowing for distinct tracking and logging of every transaction.
### On Failure to Find Ready Worker
* `endpoint`: Same as the input parameter to `/route/`.
* `status`: The breakdown of workers in your endpoint group by status.
## Example: Hitting route with cURL
**Examples:**
Example 1 (unknown):
```unknown
## Outputs
### On Successful Worker Return
* `url`(string): The address of the worker instance to send the request to.
* `reqnum`(int): The request number corresponding to this worker instance. Note that workers expect to receive requests in approximately the same order as these reqnums, but some flexibility is allowed due to potential out-of-order requests caused by concurrency or small delays on the proxy server.
* `signature`(string): The signature is a cryptographic string that authenticates the url, cost, and reqnum fields in the response, proving they originated from the server. Clients can use this signature, along with the server's public key, to verify that these specific details have not been tampered with.
* `endpoint`(string): Same as the input parameter.
* `cost`(float): Same as the input parameter.
* `__request_id `(string): The \_\_request\_id is a unique string identifier generated by the server for each individual API request it receives. This ID is created at the start of processing the request and included in the response, allowing for distinct tracking and logging of every transaction.
```
Example 2 (unknown):
```unknown
### On Failure to Find Ready Worker
* `endpoint`: Same as the input parameter to `/route/`.
* `status`: The breakdown of workers in your endpoint group by status.
## Example: Hitting route with cURL
```
---
## Install zip
**URL:** llms-txt#install-zip
apt-get install -y zip
---
## Python packages
**URL:** llms-txt#python-packages
pip install package-name
---
## Choosing a Template
**URL:** llms-txt#choosing-a-template
**Contents:**
- What are Templates?
- Selecting a Template
- 1. Recommended Templates
- 2. Your Recent Templates
- 3. Custom Templates
- Quick Template Selection
- Launch Modes
- SSH
- Jupyter
- Entrypoint
Source: https://docs.vast.ai/documentation/instances/choosing/templates
Select the right template for your Vast.ai instance. Templates define your Docker image, launch mode, and initialization settings.
## What are Templates?
Templates are saved configurations that define how your instance will be set up. Every instance on Vast.ai requires a template that specifies:
* **Docker image** - The base container environment
* **Launch mode** - How you'll connect (SSH, Jupyter, or Entrypoint)
* **Initialization** - Startup scripts and environment variables
* **Ports and networking** - Required network configurations
For comprehensive template documentation including creating custom templates, see the main [Templates section](/documentation/templates/introduction).
## Selecting a Template
When renting an instance, you must select a template first. You have three options:
### 1. Recommended Templates
Pre-configured templates for common use cases:
* **PyTorch** - Ready for deep learning with Jupyter
* **TensorFlow** - ML development environment
* **Stable Diffusion** - Image generation UIs
* **LLM Inference** - Text generation setups
* **Base Ubuntu** - Clean development environment
### 2. Your Recent Templates
Templates you've previously used or customized are saved for quick access.
### 3. Custom Templates
Create your own or modify existing templates to match your exact needs.
## Quick Template Selection
1. On the [search page](https://cloud.vast.ai/create/), look for the template selector in the upper left
2. Click "Change Template" to see available options
3. Select a template that matches your needs
4. The search will update to show compatible machines
Start with a recommended template and modify it rather than creating from scratch. This ensures compatibility and faster startup times.
Templates support three connection methods:
* Terminal access via SSH
* Best for: Development, training scripts, command-line work
* Includes tmux session management
* Web-based notebook interface
* Best for: Data science, experimentation, visualization
* Includes terminal access
* Runs Docker's native entrypoint
* Best for: Automated workloads, API servers, production deployments
* No automatic SSH/Jupyter setup
## Important Template Settings
* Always specify a version tag (avoid "latest")
* Vast.ai base images (`vastai/pytorch`) start faster due to caching
* Custom images from Docker Hub supported
* Runs after the container starts
* Use for installing additional packages
* Executes as bash commands
* Set in the search interface (not the template)
* Cannot be changed after instance creation
* Default is 10GB - increase as needed
### Template Compatibility
Not all templates work on all machines. If an instance fails to start:
* Try a recommended template
* Check Docker image availability
* Verify port requirements match machine capabilities
### Invalid Docker Image Path
If you get an error like "Unable to find image 'ubuntu20.04\_latest/ssh'":
* You have an invalid Docker image path
* Use proper format: `nvidia/cuda:12.0.1-devel-ubuntu20.04`
* Always include repository and tag
* Test locally: `docker pull `
* Use recommended templates to ensure valid paths
### Image Loading Time
* First launch can take 5-60 minutes depending on image size
* Vast.ai base images load faster (pre-cached on many machines)
* You're not charged during loading
### Can't Change Template on Existing Instance
Templates are recipes for new instances. Once an instance is created:
* Template changes only affect new instances
* To use a different template, create a new instance
* Transfer data if needed using [data movement tools](/documentation/instances/storage/data-movement)
**Ready to customize?**
See the full [Templates documentation](/documentation/templates/introduction) for:
* [Creating custom templates](/documentation/templates/creating-templates)
* [Advanced configuration](/documentation/templates/advanced-setup)
* [Template settings reference](/documentation/templates/template-settings)
* Start with a recommended template
* Check the [Templates FAQ](/documentation/reference/faq/instances#templates)
* Review [troubleshooting guide](/documentation/reference/troubleshooting)
---
## Install CLI
**URL:** llms-txt#install-cli
---
## destroy instance
**URL:** llms-txt#destroy-instance
Source: https://docs.vast.ai/api-reference/instances/destroy-instance
api-reference/openapi.json delete /api/v0/instances/{id}/
Destroys/deletes an instance permanently. This is irreversible and will delete all data.
CLI Usage: `vastai destroy instance `
---
## Reconfigure the instance portal
**URL:** llms-txt#reconfigure-the-instance-portal
rm -f /etc/portal.yaml
export PORTAL_CONFIG="localhost:1111:11111:/:Instance Portal|localhost:1234:11234:/:My Application"
---
## update env var
**URL:** llms-txt#update-env-var
Source: https://docs.vast.ai/api-reference/accounts/update-env-var
api-reference/openapi.json put /api/v0/secrets/
Updates the value of an existing environment variable for the authenticated user.
CLI Usage: `vastai update env-var `
---
## Conda (if available)
**URL:** llms-txt#conda-(if-available)
**Contents:**
- How do I use specific CUDA versions?
- Debugging
- How do I view instance logs?
- My instance won't start - how do I debug?
- How do I monitor resource usage?
conda install package-name
bash theme={null}
nvcc --version
nvidia-smi
bash theme={null}
**Examples:**
Example 1 (unknown):
```unknown
Add to `/root/onstart.sh` for persistence across restarts.
### How do I use specific CUDA versions?
CUDA version depends on the Docker image. To check:
```
Example 2 (unknown):
```unknown
To use specific versions, choose appropriate templates or create custom images with your required CUDA version.
## Debugging
### How do I view instance logs?
* Through web console: Click "Logs" on instance card
* Via CLI: `vastai logs INSTANCE_ID`
* Inside instance: Check `/var/log/` directory
### My instance won't start - how do I debug?
1. Check instance logs for errors
2. Verify Docker image exists and is accessible
3. Check if ports are already in use
4. Ensure sufficient disk space requested
5. Try a different provider
6. Contact support with instance ID
### How do I monitor resource usage?
```
---
## POST [https://console.vast.ai/api/v0/workergroups/](https://console.vast.ai/api/v0/workergroups/)
**URL:** llms-txt#post-[https://console.vast.ai/api/v0/workergroups/](https://console.vast.ai/api/v0/workergroups/)
**Contents:**
- Inputs
- Outputs
- On Successful Worker Return
- On Failure to Find Ready Worker
- Example: Creating a Workergroup with cURL
- Example: Creating an Endpoint with the Vast CLI
* `api_key`(string): The Vast API key associated with the account that controls the Endpoint. The key can also be placed in the header as an Authorization: Bearer.
* `endpoint_name`(string): The name of the Endpoint that the Workergroup will be created under.
AND one of the following:
* `template_hash` (string): The hexadecimal string that identifies a particular template.
* `template_id` (integer): The unique id that identifes a template.
NOTE: If you use either the template hash or id, you can skip `search_params`, as they are automatically inferred from the template.
* `search_params` (string): A query string that specifies the hardware and performance criteria for filtering GPU offers in the vast.ai marketplace.
* `launch_args` (string): A command-line style string containing additional parameters for instance creation that will be parsed and applied when the autoscaler creates new workers. This allows you to customize instance configuration beyond what's specified in templates.
**Optional** (Default values will be assigned if not specified):
* `min_load`(integer): A minimum baseline load (measured in tokens/second for LLMs) that the serverless engine will assume your Endpoint needs to handle, regardless of actual measured traffic. Default value is 1.0.
* `target_util` (float): A ratio that determines how much spare capacity (headroom) the serverless engine maintains. Default value is 0.9.
* `cold_mult`(float): A multiplier applied to your target capacity for longer-term planning (1+ hours). This parameter controls how much extra capacity the serverless engine will plan for in the future compared to immediate needs. Default value is 3.0.
* `test_workers` (integer): The number of different physical machines that a Workergroup should test during its initial "exploration" phase to gather performance data before transitioning to normal demand-based scaling. Default value is 3.
* `gpu_ram` (integer): The amount of GPU memory (VRAM) in gigabytes that your model or workload requires to run. This parameter tells the serverless engine how much GPU memory your model needs. Default value is 24.
### On Successful Worker Return
* `success`(bool): True on successful creation of Workergroup, False if otherwise.
* `result`(int): The autogroup\_id of the newly created Workergroup.
### On Failure to Find Ready Worker
* `success`(bool): True on successful creation of Workergroup, False if otherwise.
* `error`(string): The type of error status.
* `msg` (string): The error message related to the error.
## Example: Creating a Workergroup with cURL
## Example: Creating an Endpoint with the Vast CLI
**Examples:**
Example 1 (unknown):
```unknown
## Outputs
### On Successful Worker Return
* `success`(bool): True on successful creation of Workergroup, False if otherwise.
* `result`(int): The autogroup\_id of the newly created Workergroup.
```
Example 2 (unknown):
```unknown
### On Failure to Find Ready Worker
* `success`(bool): True on successful creation of Workergroup, False if otherwise.
* `error`(string): The type of error status.
* `msg` (string): The error message related to the error.
```
Example 3 (unknown):
```unknown
## Example: Creating a Workergroup with cURL
```
Example 4 (unknown):
```unknown
## Example: Creating an Endpoint with the Vast CLI
```
---
## Account Settings
**URL:** llms-txt#account-settings
Source: https://docs.vast.ai/documentation/reference/account-settings
<script
type="application/ld+json"
dangerouslySetInnerHTML={{
__html: JSON.stringify({
"@context": "https://schema.org",
"@type": "HowTo",
"name": "How to Manage Your Vast.ai Account Settings",
"description": "A comprehensive guide to managing your Vast.ai account settings including dark mode, security, referral links, environment variables, notifications, cloud connections, and invoice information.",
"step": [
{
"@type": "HowToStep",
"name": "Enable Dark Mode",
"text": "Turn the switch on and off to enable and disable dark mode. You can also toggle this setting in the navigation bar with the moon and sun icons."
},
{
"@type": "HowToStep",
"name": "Set Up Account Security",
"text": "In the Account Security section, you can set up two-factor authentication, resend a verification email, change your email, or reset your password. Two-factor authentication can be used to help protect your account from unauthorized access."
},
{
"@type": "HowToStep",
"name": "Access Your Referral Link",
"text": "You can access your referral link in the Referral Link section of the Settings page. When users create an account through your referral link and use Vast services, you'll earn credits and receive payouts for your referrals."
},
{
"@type": "HowToStep",
"name": "Manage Environment Variables",
"text": "Add, edit, and delete environment variables stored on your account. Input the env key into the key field and value into the value field, then select the + button to save. To add multiple at once, select the Batch Paste option. Make sure you select the Save Edits button to save all of your changes."
},
{
"@type": "HowToStep",
"name": "Configure Cloud Connections",
"text": "Integrate and connect with cloud providers such as Amazon S3, Backblaze, and Dropbox. This integration allows you to sync data even while instances are inactive. You can access this feature via the Cloud Copy button on the Instances page."
},
{
"@type": "HowToStep",
"name": "Set Invoice Information",
"text": "In the Invoice Information section, you can set personal information for your invoices. Click into any input field to edit it, and select the Save button to save your changes."
}
]
})
}}
/>
On this page you can view and edit important information about your customer account.
---
## show deposit
**URL:** llms-txt#show-deposit
Source: https://docs.vast.ai/api-reference/billing/show-deposit
api-reference/openapi.json get /api/v0/instances/balance/{id}/
Retrieves the deposit details for a specified instance.
CLI Usage: `vastai show deposit `
---
## show logs
**URL:** llms-txt#show-logs
Source: https://docs.vast.ai/api-reference/instances/show-logs
api-reference/openapi.json put /api/v0/instances/request_logs/{id}
Request logs from a specific instance. The logs will be uploaded to S3 and can be retrieved from a generated URL. Supports both container logs and daemon system logs.
CLI Usage: `vastai show logs [--tail ] [--filter ] [--daemon-logs]`
---
## Navigate to models directory
**URL:** llms-txt#navigate-to-models-directory
cd /workspace/stable-diffusion-webui/models/Stable-diffusion
---
## Copy file TO instance
**URL:** llms-txt#copy-file-to-instance
scp -P my_file.txt root@:/workspace/
---
## Billing Help
**URL:** llms-txt#billing-help
**Contents:**
- How does billing work?
- Can you bill my card automatically so I don't have to add credit in advance?
- I didn't enable debit-mode - what are these automatic charges to my card?
- How does pricing work?
- What is the billing frequency?
- Why should I trust vast.ai with my credit card info?
- Do you support PayPal? What about cryptocurrency?
Source: https://docs.vast.ai/documentation/reference/billing-help
<script
type="application/ld+json"
dangerouslySetInnerHTML={{
__html: JSON.stringify({
"@context": "https://schema.org",
"@type": "FAQPage",
"mainEntity": [
{
"@type": "Question",
"name": "How does billing work?",
"acceptedAnswer": {
"@type": "Answer",
"text": "Once you enter a credit card and an email address and both are verified you can then increase your credit balance using one-time payments with the add credit button. Whenever your credit balance hits zero or below, your instances will be stopped automatically, but not destroyed. You are still charged storage costs for stopped instances, so it is important to destroy instances when you are done using them. Your credit card will be automatically charged periodically to pay off any outstanding negative balance."
}
},
{
"@type": "Question",
"name": "Can you bill my card automatically so I don't have to add credit in advance?",
"acceptedAnswer": {
"@type": "Answer",
"text": "You can set a balance threshold to configure auto billing, which will attempt to maintain your balance above the threshold. We recommend setting a threshold around your daily or weekly spend, and then setting an balance email notification threshold around 75% of that value, so that you get notified if the auto billing fails but long before your balance depletes to zero. There is also an optional debit-mode feature which can be enabled by request for older accounts. When debit-mode is enabled, your account balance is allowed to go negative (without immediately stopping your instances)."
}
},
{
"@type": "Question",
"name": "I didn't enable debit-mode - what are these automatic charges to my card?",
"acceptedAnswer": {
"@type": "Answer",
"text": "Your card is charged automatically regardless of whether or not you have debit-mode enabled. Instances are never free - even stopped instances have storage charges. Make sure you delete instances when you are done with them - otherwise, your card will continue to be periodically charged indefinitely."
}
},
{
"@type": "Question",
"name": "How does pricing work?",
"acceptedAnswer": {
"@type": "Answer",
"text": "There are separate prices and charges for: Active rental (GPU) costs, Storage costs, and Bandwidth costs. You are charged the base active rental cost for every second your instance is in the active/connected state. You are charged the storage cost (which depends on the size of your storage allocation) for every second your instance exists and is online, regardless of what state it is in: active, inactive, loading, etc. Stopping an instance does not avoid storage costs. You are charged bandwidth prices for every byte sent or received to or from the instance, regardless of what state it is in. The prices for base rental, storage, and bandwidth vary considerably from machine to machine, so make sure to check them. You are not charged active rental or storage costs for instances that are currently offline."
}
},
{
"@type": "Question",
"name": "What is the billing frequency?",
"acceptedAnswer": {
"@type": "Answer",
"text": "Balances are updated about once every few seconds."
}
},
{
"@type": "Question",
"name": "Why should I trust vast.ai with my credit card info?",
"acceptedAnswer": {
"@type": "Answer",
"text": "You don't need to: Vast.ai does not see, store or process your credit card numbers, they are passed directly to Stripe (which you can verify in the javascript)."
}
},
{
"@type": "Question",
"name": "Do you support PayPal? What about cryptocurrency?",
"acceptedAnswer": {
"@type": "Answer",
"text": "We currently support major credit cards through stripe and crypto payments through Coinbase and crypto.com."
}
}
]
})
}}
/>
### How does billing work?
Once you enter a credit card and an email address and both are verified you can then increase your credit balance using one-time payments with the add credit button.
Whenever your credit balance hits zero or below, your instances will be stopped automatically, but not destroyed.
You are still charged storage costs for stopped instances, so it is important to destroy instances when you are done using them.
Your credit card will be automatically charged periodically to pay off any outstanding negative balance.
### Can you bill my card automatically so I don't have to add credit in advance?
You can set a balance threshold to configure auto billing, which will attempt to maintain your balance above the threshold.
We recommend setting a threshold around your daily or weekly spend, and then setting an balance email notification threshold around 75% of that value, so that you get notified if the auto billing fails but long before your balance depletes to zero.
There is also an optional debit-mode feature which can be enabled by request for older accounts.
When debit-mode is enabled, your account balance is allowed to go negative (without immediately stopping your instances).
### I didn't enable debit-mode - what are these automatic charges to my card?
Your card is charged automatically regardless of whether or not you have debit-mode enabled.
Instances are never free - even stopped instances have storage charges.
Make sure you delete instances when you are done with them - otherwise, your card will continue to be periodically charged indefinitely.
### How does pricing work?
There are separate prices and charges for:
* Active rental (GPU) costs
* Storage costs
* Bandwidth costs
You are charged the base active rental cost for every second your instance is in the active/connected state.
You are charged the storage cost (which depends on the size of your storage allocation) for every second your instance exists and is online, regardless of what state it is in: active, inactive, loading, etc.
Stopping an instance does not avoid storage costs.
You are charged bandwidth prices for every byte sent or received to or from the instance, regardless of what state it is in.
The prices for base rental, storage, and bandwidth vary considerably from machine to machine, so make sure to check them.
You are not charged active rental or storage costs for instances that are currently offline.
### What is the billing frequency?
Balances are updated about once every few seconds.
### Why should I trust vast.ai with my credit card info?
You don't need to: Vast.ai does not see, store or process your credit card numbers, they are passed directly to Stripe (which you can verify in the javascript).
### Do you support PayPal? What about cryptocurrency?
We currently support major credit cards through stripe and crypto payments through Coinbase and crypto.com.
---
## Setting Up a vLLM + **Qwen3-8B** Serverless Engine
**URL:** llms-txt#setting-up-a-vllm-+-**qwen3-8b**--serverless-engine
Navigate to the user account settings page [here](https://cloud.vast.ai/account/) and drop down the "Environment Variables" tab. In the Key field, add "HF\_TOKEN", and in the Value field add the HuggingFace read-access token. Click the "+" button to the right of the fields, then click "Save Edits".
 Templates encapsulate all the information required to run an application on a GPU worker, including machine parameters, docker image, and environment variables.
Navigate to the [Templates Page](https://cloud.vast.ai/templates/), select the Serverless filter, and click the Edit button on the 'vLLM + Qwen/Qwen3-8B (Serverless)' template.
In the Environment Variables section, "Qwen/Qwen3-8B" is the default value for `MODEL_NAME`, but can be changed to any compatible vLLM model on HuggingFace. Set this template to Private and click Save & Use.
Templates encapsulate all the information required to run an application on a GPU worker, including machine parameters, docker image, and environment variables.
Navigate to the [Templates Page](https://cloud.vast.ai/templates/), select the Serverless filter, and click the Edit button on the 'vLLM + Qwen/Qwen3-8B (Serverless)' template.
In the Environment Variables section, "Qwen/Qwen3-8B" is the default value for `MODEL_NAME`, but can be changed to any compatible vLLM model on HuggingFace. Set this template to Private and click Save & Use.
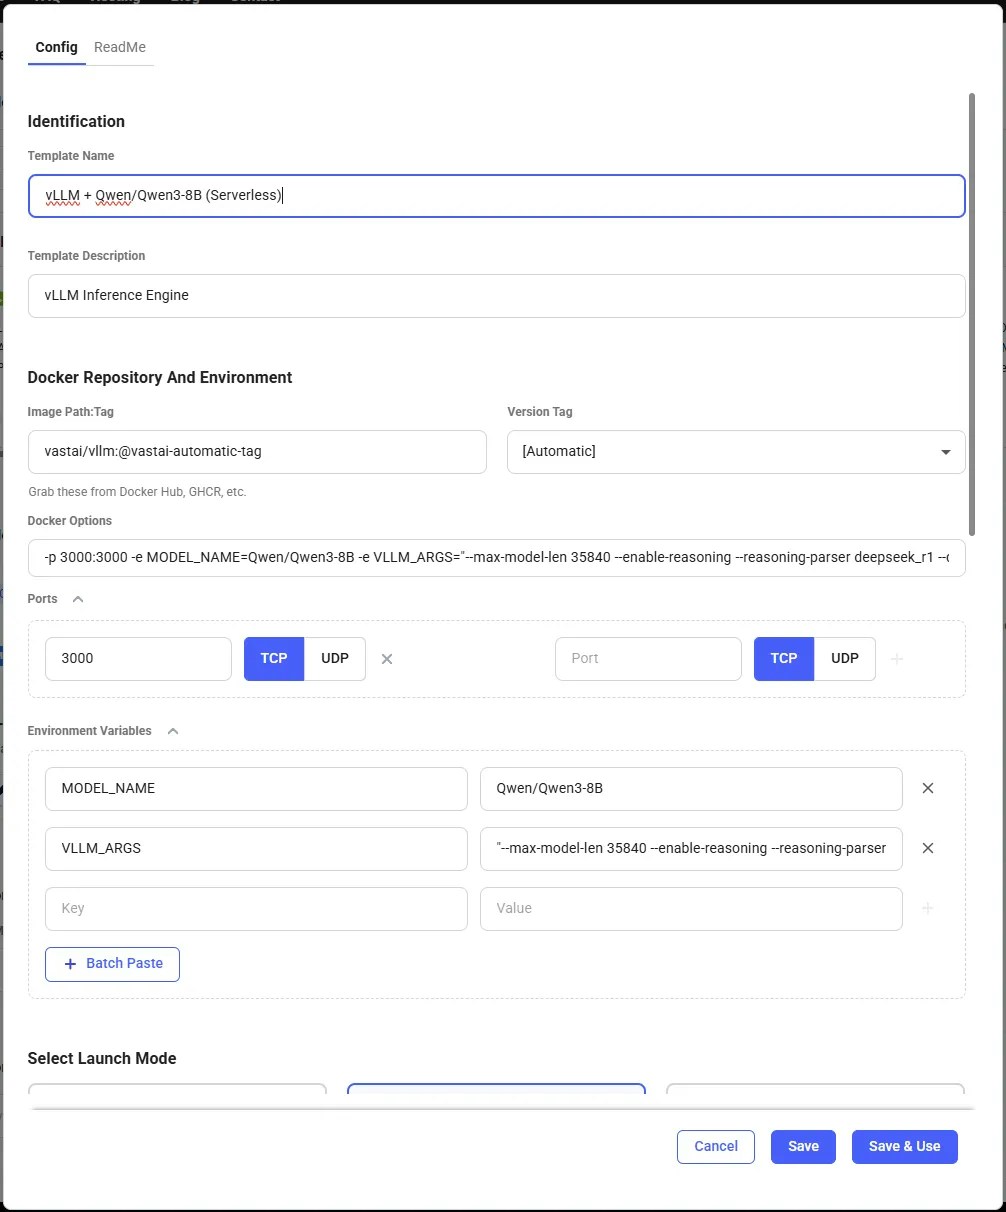 The template will now work without any further edits, but can be customized to suit specific needs. Vast recommends keeping the template private to avoid making any private information publically known.
We should now see the Vast.ai search page with the template selected. For those intending to use the Vast CLI, click More Options on the template and select 'Copy template hash'. We will use this in step 3.
The template will now work without any further edits, but can be customized to suit specific needs. Vast recommends keeping the template private to avoid making any private information publically known.
We should now see the Vast.ai search page with the template selected. For those intending to use the Vast CLI, click More Options on the template and select 'Copy template hash'. We will use this in step 3.
 Next we will create an Endpoint that any user can query for generation. This can be done through the Web UI or the Vast CLI. Here, we'll create an endpoint named 'vLLM-Qwen3-8B '.
Navigate to the [Serverless Page](https://cloud.vast.ai/serverless/) and click Create Endpoint. A screen to create a new Endpoint will pop up, with default values already assigned. Our Endpoint will work with these default values, but you can change them to suit your needs.
Next we will create an Endpoint that any user can query for generation. This can be done through the Web UI or the Vast CLI. Here, we'll create an endpoint named 'vLLM-Qwen3-8B '.
Navigate to the [Serverless Page](https://cloud.vast.ai/serverless/) and click Create Endpoint. A screen to create a new Endpoint will pop up, with default values already assigned. Our Endpoint will work with these default values, but you can change them to suit your needs.
 * `endpoint_name`: The name of the Endpoint.
* `cold_mult`: The multiple of the current load that is used to predict the future load. For example, if we currently have 10 users, but expect there to be 20 in the near future, we can set cold\_mult = 2.
* For LLMs, a good default is 2.
* `min_load`: The baseline amount of load (tokens / second for LLMs) we want the Endpoint to be able to handle.
* For LLMs, a good default is 100.0
* `target_util`: The percentage of the Endpoint compute resources that we want to be in-use at any given time. A lower value allows for more slack, which means the Endpoint will be less likely to be overwhelmed if there is a sudden spike in usage.
* For LLMs, a good default is 0.9
* `max_workers`: The maximum number of workers the Endpoint can have at any one time.
* `cold_workers`: The minimum number of workers kept "cold" (meaning stopped but fully loaded with the image) when the Endpoint has no load. Having cold workers available allows the Serverless system to seamlessly spin up more workers as when load increases.
Click Create, where you will be taken back to the Serverless page. After a few moments, the Endpoint will show up with the name 'vLLM-Qwen3-8B'.
If your machine is properly configured for the Vast CLI, you can run the following command:
* `endpoint_name`: The name you use to identify your Endpoint.
* `cold_mult`: The multiple of your current load that is used to predict your future load. For example if you currently have 10 users, but expect there to be 20 in the near future, you can set cold\_mult = 2.0.
* For LLMs, a good default is 2.0
* `min_load`: This is the baseline amount of load (tokens / second for LLMs) you want your Endpoint to be able to handle.
* For LLMs, a good default is 100.0
* `target_util`: The percentage of your Endpoint compute resources that you want to be in-use at any given time. A lower value allows for more slack, which means your Endpoint will be less likely to be overwhelmed if there is a sudden spike in usage.
* For LLMs, a good default is 0.9
* `max_workers`: The maximum number of workers your Endpoint can have at any one time.
* `cold_workers`: The minimum number of workers you want to keep "cold" (meaning stopped and fully loaded) when your Endpoint has no load.
A successful creation of the endpoint should return a `'success': True` as the output in the terminal.
Now that we have our Endpoint, we can create a Workergroup with the template we prepared in step 1.
From the Serverless page, click '+ Workergroup' under the Endpoint. Our custom vLLM (Serverless) template should already be selected. To confirm, click the Edit button and check that the `MODEL_NAME`environment variable is filled in.
For our simple setup, we can enter the following values:
* Cold Multiplier = 3
* Minimum Load = 1
* Target Utilization = 0.9
* Workergroup Name = 'Workergroup'
* Select Endpoint = 'vLLM-Qwen3-8B'
A complete page should look like the following:
* `endpoint_name`: The name of the Endpoint.
* `cold_mult`: The multiple of the current load that is used to predict the future load. For example, if we currently have 10 users, but expect there to be 20 in the near future, we can set cold\_mult = 2.
* For LLMs, a good default is 2.
* `min_load`: The baseline amount of load (tokens / second for LLMs) we want the Endpoint to be able to handle.
* For LLMs, a good default is 100.0
* `target_util`: The percentage of the Endpoint compute resources that we want to be in-use at any given time. A lower value allows for more slack, which means the Endpoint will be less likely to be overwhelmed if there is a sudden spike in usage.
* For LLMs, a good default is 0.9
* `max_workers`: The maximum number of workers the Endpoint can have at any one time.
* `cold_workers`: The minimum number of workers kept "cold" (meaning stopped but fully loaded with the image) when the Endpoint has no load. Having cold workers available allows the Serverless system to seamlessly spin up more workers as when load increases.
Click Create, where you will be taken back to the Serverless page. After a few moments, the Endpoint will show up with the name 'vLLM-Qwen3-8B'.
If your machine is properly configured for the Vast CLI, you can run the following command:
* `endpoint_name`: The name you use to identify your Endpoint.
* `cold_mult`: The multiple of your current load that is used to predict your future load. For example if you currently have 10 users, but expect there to be 20 in the near future, you can set cold\_mult = 2.0.
* For LLMs, a good default is 2.0
* `min_load`: This is the baseline amount of load (tokens / second for LLMs) you want your Endpoint to be able to handle.
* For LLMs, a good default is 100.0
* `target_util`: The percentage of your Endpoint compute resources that you want to be in-use at any given time. A lower value allows for more slack, which means your Endpoint will be less likely to be overwhelmed if there is a sudden spike in usage.
* For LLMs, a good default is 0.9
* `max_workers`: The maximum number of workers your Endpoint can have at any one time.
* `cold_workers`: The minimum number of workers you want to keep "cold" (meaning stopped and fully loaded) when your Endpoint has no load.
A successful creation of the endpoint should return a `'success': True` as the output in the terminal.
Now that we have our Endpoint, we can create a Workergroup with the template we prepared in step 1.
From the Serverless page, click '+ Workergroup' under the Endpoint. Our custom vLLM (Serverless) template should already be selected. To confirm, click the Edit button and check that the `MODEL_NAME`environment variable is filled in.
For our simple setup, we can enter the following values:
* Cold Multiplier = 3
* Minimum Load = 1
* Target Utilization = 0.9
* Workergroup Name = 'Workergroup'
* Select Endpoint = 'vLLM-Qwen3-8B'
A complete page should look like the following:
 After entering the values, click Create, where you will be taken back to the Serverless page. After a moment, the Workergroup will be created under the 'vLLM-Qwen3-8B' Endpoint.
Run the following command to create your Workergroup:
`endpoint_name`: The name of the Endpoint.
`template_hash`: The hash code of our custom vLLM (Serverless) template.
`test_workers`: The minimum number of workers to create while initializing the Workergroup. This allows the Workergroup to get performance estimates before serving the Endpoint, and also creates workers which are fully loaded and "stopped" (aka "cold").
You will need to replace "\$TEMPLATE\_HASH" with the template hash copied from step 1.
Once the Workergroup is created, the serverless engine will automatically find offers and create instances. This may take \~10-60 seconds to find appropritate GPU workers.
To see the instances the system creates, click the 'View detailed stats' button on the Workergroup. Five workers should startup, showing the 'Loading' status:
After entering the values, click Create, where you will be taken back to the Serverless page. After a moment, the Workergroup will be created under the 'vLLM-Qwen3-8B' Endpoint.
Run the following command to create your Workergroup:
`endpoint_name`: The name of the Endpoint.
`template_hash`: The hash code of our custom vLLM (Serverless) template.
`test_workers`: The minimum number of workers to create while initializing the Workergroup. This allows the Workergroup to get performance estimates before serving the Endpoint, and also creates workers which are fully loaded and "stopped" (aka "cold").
You will need to replace "\$TEMPLATE\_HASH" with the template hash copied from step 1.
Once the Workergroup is created, the serverless engine will automatically find offers and create instances. This may take \~10-60 seconds to find appropritate GPU workers.
To see the instances the system creates, click the 'View detailed stats' button on the Workergroup. Five workers should startup, showing the 'Loading' status:
 To see the instances the autoscaler creates, run the following command:
Now that we have created both the Endpoint and the Workergroup, all that is left to do is await for the first "Ready" worker. We can see the status of the workers in the Serverless section of the Vast.ai console. The workers will automatically download the Qwen3-8B model defined in the template, but it will take time to fully initialize. The worker is loaded and benchmarked when the `Curr. Performance` value is non-zero.
When a worker has finished benchmarking, the worker's status in the Workergroup will become Ready. We are now able to get a successful /route/ call to the Workergroup and send it requests!
To see the instances the autoscaler creates, run the following command:
Now that we have created both the Endpoint and the Workergroup, all that is left to do is await for the first "Ready" worker. We can see the status of the workers in the Serverless section of the Vast.ai console. The workers will automatically download the Qwen3-8B model defined in the template, but it will take time to fully initialize. The worker is loaded and benchmarked when the `Curr. Performance` value is non-zero.
When a worker has finished benchmarking, the worker's status in the Workergroup will become Ready. We are now able to get a successful /route/ call to the Workergroup and send it requests!
 We have now successfully created a vLLM + Qwen3-8B Serverless Engine! It is ready to receive user requests and will automatically scale up or down to meet the request demand. In this next section, we will setup a client to test the serverless engine, and learn how to use the core serverless endpoints along the way.
**Examples:**
Example 1 (unknown):
```unknown
* `endpoint_name`: The name you use to identify your Endpoint.
* `cold_mult`: The multiple of your current load that is used to predict your future load. For example if you currently have 10 users, but expect there to be 20 in the near future, you can set cold\_mult = 2.0.
* For LLMs, a good default is 2.0
* `min_load`: This is the baseline amount of load (tokens / second for LLMs) you want your Endpoint to be able to handle.
* For LLMs, a good default is 100.0
* `target_util`: The percentage of your Endpoint compute resources that you want to be in-use at any given time. A lower value allows for more slack, which means your Endpoint will be less likely to be overwhelmed if there is a sudden spike in usage.
* For LLMs, a good default is 0.9
* `max_workers`: The maximum number of workers your Endpoint can have at any one time.
* `cold_workers`: The minimum number of workers you want to keep "cold" (meaning stopped and fully loaded) when your Endpoint has no load.
A successful creation of the endpoint should return a `'success': True` as the output in the terminal.
Now that we have our Endpoint, we can create a Workergroup with the template we prepared in step 1.
From the Serverless page, click '+ Workergroup' under the Endpoint. Our custom vLLM (Serverless) template should already be selected. To confirm, click the Edit button and check that the `MODEL_NAME`environment variable is filled in.
For our simple setup, we can enter the following values:
* Cold Multiplier = 3
* Minimum Load = 1
* Target Utilization = 0.9
* Workergroup Name = 'Workergroup'
* Select Endpoint = 'vLLM-Qwen3-8B'
A complete page should look like the following:
After entering the values, click Create, where you will be taken back to the Serverless page. After a moment, the Workergroup will be created under the 'vLLM-Qwen3-8B' Endpoint.
Run the following command to create your Workergroup:
```
Example 2 (unknown):
```unknown
`endpoint_name`: The name of the Endpoint.
`template_hash`: The hash code of our custom vLLM (Serverless) template.
`test_workers`: The minimum number of workers to create while initializing the Workergroup. This allows the Workergroup to get performance estimates before serving the Endpoint, and also creates workers which are fully loaded and "stopped" (aka "cold").
You will need to replace "\$TEMPLATE\_HASH" with the template hash copied from step 1.
Once the Workergroup is created, the serverless engine will automatically find offers and create instances. This may take \~10-60 seconds to find appropritate GPU workers.
To see the instances the system creates, click the 'View detailed stats' button on the Workergroup. Five workers should startup, showing the 'Loading' status:
To see the instances the autoscaler creates, run the following command:
```
---
## transfer credit
**URL:** llms-txt#transfer-credit
Source: https://docs.vast.ai/api-reference/accounts/transfer-credit
api-reference/openapi.json put /api/v0/commands/transfer_credit/
Transfers specified amount of credits from the authenticated user's account to another user's account.
The recipient can be specified by either email address or user ID.
CLI Usage: `vastai transfer credit `
---
## change bid
**URL:** llms-txt#change-bid
Source: https://docs.vast.ai/api-reference/instances/change-bid
api-reference/openapi.json put /api/v0/instances/bid_price/{id}/
Change the current bid price of an instance to a specified price.
CLI Usage: `vastai change bid --price `
---
## search offers
**URL:** llms-txt#search-offers
Source: https://docs.vast.ai/api-reference/search/search-offers
api-reference/openapi.json post /api/v0/bundles/
Search for available GPU machine offers with advanced filtering and sorting.
Each filter parameter (such as `verified`, `gpu_name`, `num_gpus`, etc.) should be an object specifying the operator and value you want to match.
**Filter operators:**
| Operator | Meaning | Example |
|:---------|:-----------------------|:-------------------------------|
| `eq` | Equal to | `{ "eq": true }` |
| `neq` | Not equal to | `{ "neq": false }` |
| `gt` | Greater than | `{ "gt": 0.99 }` |
| `lt` | Less than | `{ "lt": 10000 }` |
| `gte` | Greater than or equal | `{ "gte": 4 }` |
| `lte` | Less than or equal | `{ "lte": 8 }` |
| `in` | Value is in a list | `{ "in": ["RTX_3090", "RTX_4090"] }` |
| `nin` | Value is not in a list | `{ "nin": ["TW", "SE"] }` |
Default filters: verified=true, rentable=true, rented=false (unless --no-default is used)
CLI Usage: `vastai search offers 'reliability > 0.99 num_gpus>=4' --order=dph_total`
---
## Activate virtual environment from base image
**URL:** llms-txt#activate-virtual-environment-from-base-image
RUN . /venv/main/bin/activate
RUN your-installation-commands
```
After building your image:
1. [Build](https://docs.docker.com/build/) and [push your image](https://docs.docker.com/reference/cli/docker/image/push/) to a container registry
2. Create a new template and enter your custom image path in the Image Path:Tag field (see [Template Settings](/documentation/templates/template-settings#docker-repository-and-environment))
---
## Using git lfs for larger files: https://git-lfs.com/
**URL:** llms-txt#using-git-lfs-for-larger-files:-https://git-lfs.com/
**Contents:**
- Training Best Practices
- Checkpoint Management
- Resource Monitoring
- Cost Optimization
- Instance Selection
- Resource Utilization
- Troubleshooting
- Common Issues and Solutions
- Best Practices
- Environment Management
sudo apt-get install git-lfs
git lfs install
git clone your_dataset_repo
python icon="python" Python theme={null}
checkpoint_dir = '/workspace/checkpoints'
os.makedirs(checkpoint_dir, exist_ok=True)
checkpoint = {
'epoch': epoch,
'model_state_dict': model.state_dict(),
'optimizer_state_dict': optimizer.state_dict(),
'loss': loss,
}
torch.save(checkpoint, f'{checkpoint_dir}/checkpoint_{epoch}.pt')
bash theme={null}
watch -n 1 nvidia-smi
python icon="python" Python theme={null}
def print_gpu_utilization():
print(torch.cuda.memory_allocated() / 1024**2, "MB Allocated")
print(torch.cuda.memory_reserved() / 1024**2, "MB Reserved")
python icon="python" Python theme={null}
from torch.cuda.amp import autocast, GradScaler
scaler = GradScaler()
with autocast():
outputs = model(inputs)
loss = criterion(outputs, labels)
scaler.scale(loss).backward()
python icon="python" Python theme={null}
model = torch.compile(model)
python icon="python" Python theme={null}
model = torch.nn.DataParallel(model)
python icon="python" Python theme={null}
from torch.cuda.amp import autocast
with autocast():
outputs = model(inputs)
dockerfile theme={null}
FROM pytorch/pytorch:2.1.0-cuda11.8-cudnn8-runtime
**Examples:**
Example 1 (unknown):
```unknown
## Training Best Practices
### Checkpoint Management
Always save checkpoints to prevent data loss:
```
Example 2 (unknown):
```unknown
### Resource Monitoring
Monitor GPU usage:
```
Example 3 (unknown):
```unknown
Or in Python:
```
Example 4 (unknown):
```unknown
## Cost Optimization
### Instance Selection
* Use [vast cli search offers command ](https://vast.ai/docs/cli/commands#search-offers)to search for machines that fit your budget
* Monitor your spending in Vast.ai's Billing tab
### Resource Utilization
* Use appropriate batch sizes to maximize GPU utilization
* Enable gradient checkpointing for large models
* Implement early stopping to avoid unnecessary compute time
## Troubleshooting
### Common Issues and Solutions
* Out of Memory (OOM) Errors
* Reduce batch size
* Enable gradient checkpointing
* Use mixed precision training
```
---
## Video Generation
**URL:** llms-txt#video-generation
Source: https://docs.vast.ai/video-generation
---
## Disco Diffusion
**URL:** llms-txt#disco-diffusion
**Contents:**
- DEPRECATED: Please see [Stable Diffusion guide](/stable-diffusion)
- Overview
- Pytorch image + Jupyter (recommended)
- 1) Select the docker image & config options
- 2) Allocate more disk space
- 3) Select an offer
- 5) Open the Jupyter instance
- 6) Run the modified DD notebook
- 7) Changing settings and downloading images
- Zipping up all your images
Source: https://docs.vast.ai/disco-diffusion
## DEPRECATED: Please see [Stable Diffusion guide](/stable-diffusion)
Disco diffusion is an incredibly powerful free and open source AI image generator, which is easy to use on vast.ai. With the right settings and powerful GPUs, it can generate artist quality high-res images for a wide variety of subjects. All of these images were generated purely through DD on vast.ai, without any other tools or clean up.
There are a few ways to run Disco Diffusion on Vast. The simple method is to use the pytorch docker image, plain vanilla jupyter and our slightly modified notebook which you download and then upload into your instance. The core of this guide will detail this method.
There is a custom docker image (fork) made specifically to run DD in docker- [jinaai/discoart](https://github.com/jina-ai/discoart). Discoart can spin up somewhat faster and has a number of advanced features beyond the original notebook. Directions for using Discoart on Vast are [here](/disco-diffusion)
We have created a video guide that shows all the steps for using Disco Diffusion on Vast:
We have now successfully created a vLLM + Qwen3-8B Serverless Engine! It is ready to receive user requests and will automatically scale up or down to meet the request demand. In this next section, we will setup a client to test the serverless engine, and learn how to use the core serverless endpoints along the way.
**Examples:**
Example 1 (unknown):
```unknown
* `endpoint_name`: The name you use to identify your Endpoint.
* `cold_mult`: The multiple of your current load that is used to predict your future load. For example if you currently have 10 users, but expect there to be 20 in the near future, you can set cold\_mult = 2.0.
* For LLMs, a good default is 2.0
* `min_load`: This is the baseline amount of load (tokens / second for LLMs) you want your Endpoint to be able to handle.
* For LLMs, a good default is 100.0
* `target_util`: The percentage of your Endpoint compute resources that you want to be in-use at any given time. A lower value allows for more slack, which means your Endpoint will be less likely to be overwhelmed if there is a sudden spike in usage.
* For LLMs, a good default is 0.9
* `max_workers`: The maximum number of workers your Endpoint can have at any one time.
* `cold_workers`: The minimum number of workers you want to keep "cold" (meaning stopped and fully loaded) when your Endpoint has no load.
A successful creation of the endpoint should return a `'success': True` as the output in the terminal.
Now that we have our Endpoint, we can create a Workergroup with the template we prepared in step 1.
From the Serverless page, click '+ Workergroup' under the Endpoint. Our custom vLLM (Serverless) template should already be selected. To confirm, click the Edit button and check that the `MODEL_NAME`environment variable is filled in.
For our simple setup, we can enter the following values:
* Cold Multiplier = 3
* Minimum Load = 1
* Target Utilization = 0.9
* Workergroup Name = 'Workergroup'
* Select Endpoint = 'vLLM-Qwen3-8B'
A complete page should look like the following:
After entering the values, click Create, where you will be taken back to the Serverless page. After a moment, the Workergroup will be created under the 'vLLM-Qwen3-8B' Endpoint.
Run the following command to create your Workergroup:
```
Example 2 (unknown):
```unknown
`endpoint_name`: The name of the Endpoint.
`template_hash`: The hash code of our custom vLLM (Serverless) template.
`test_workers`: The minimum number of workers to create while initializing the Workergroup. This allows the Workergroup to get performance estimates before serving the Endpoint, and also creates workers which are fully loaded and "stopped" (aka "cold").
You will need to replace "\$TEMPLATE\_HASH" with the template hash copied from step 1.
Once the Workergroup is created, the serverless engine will automatically find offers and create instances. This may take \~10-60 seconds to find appropritate GPU workers.
To see the instances the system creates, click the 'View detailed stats' button on the Workergroup. Five workers should startup, showing the 'Loading' status:
To see the instances the autoscaler creates, run the following command:
```
---
## transfer credit
**URL:** llms-txt#transfer-credit
Source: https://docs.vast.ai/api-reference/accounts/transfer-credit
api-reference/openapi.json put /api/v0/commands/transfer_credit/
Transfers specified amount of credits from the authenticated user's account to another user's account.
The recipient can be specified by either email address or user ID.
CLI Usage: `vastai transfer credit `
---
## change bid
**URL:** llms-txt#change-bid
Source: https://docs.vast.ai/api-reference/instances/change-bid
api-reference/openapi.json put /api/v0/instances/bid_price/{id}/
Change the current bid price of an instance to a specified price.
CLI Usage: `vastai change bid --price `
---
## search offers
**URL:** llms-txt#search-offers
Source: https://docs.vast.ai/api-reference/search/search-offers
api-reference/openapi.json post /api/v0/bundles/
Search for available GPU machine offers with advanced filtering and sorting.
Each filter parameter (such as `verified`, `gpu_name`, `num_gpus`, etc.) should be an object specifying the operator and value you want to match.
**Filter operators:**
| Operator | Meaning | Example |
|:---------|:-----------------------|:-------------------------------|
| `eq` | Equal to | `{ "eq": true }` |
| `neq` | Not equal to | `{ "neq": false }` |
| `gt` | Greater than | `{ "gt": 0.99 }` |
| `lt` | Less than | `{ "lt": 10000 }` |
| `gte` | Greater than or equal | `{ "gte": 4 }` |
| `lte` | Less than or equal | `{ "lte": 8 }` |
| `in` | Value is in a list | `{ "in": ["RTX_3090", "RTX_4090"] }` |
| `nin` | Value is not in a list | `{ "nin": ["TW", "SE"] }` |
Default filters: verified=true, rentable=true, rented=false (unless --no-default is used)
CLI Usage: `vastai search offers 'reliability > 0.99 num_gpus>=4' --order=dph_total`
---
## Activate virtual environment from base image
**URL:** llms-txt#activate-virtual-environment-from-base-image
RUN . /venv/main/bin/activate
RUN your-installation-commands
```
After building your image:
1. [Build](https://docs.docker.com/build/) and [push your image](https://docs.docker.com/reference/cli/docker/image/push/) to a container registry
2. Create a new template and enter your custom image path in the Image Path:Tag field (see [Template Settings](/documentation/templates/template-settings#docker-repository-and-environment))
---
## Using git lfs for larger files: https://git-lfs.com/
**URL:** llms-txt#using-git-lfs-for-larger-files:-https://git-lfs.com/
**Contents:**
- Training Best Practices
- Checkpoint Management
- Resource Monitoring
- Cost Optimization
- Instance Selection
- Resource Utilization
- Troubleshooting
- Common Issues and Solutions
- Best Practices
- Environment Management
sudo apt-get install git-lfs
git lfs install
git clone your_dataset_repo
python icon="python" Python theme={null}
checkpoint_dir = '/workspace/checkpoints'
os.makedirs(checkpoint_dir, exist_ok=True)
checkpoint = {
'epoch': epoch,
'model_state_dict': model.state_dict(),
'optimizer_state_dict': optimizer.state_dict(),
'loss': loss,
}
torch.save(checkpoint, f'{checkpoint_dir}/checkpoint_{epoch}.pt')
bash theme={null}
watch -n 1 nvidia-smi
python icon="python" Python theme={null}
def print_gpu_utilization():
print(torch.cuda.memory_allocated() / 1024**2, "MB Allocated")
print(torch.cuda.memory_reserved() / 1024**2, "MB Reserved")
python icon="python" Python theme={null}
from torch.cuda.amp import autocast, GradScaler
scaler = GradScaler()
with autocast():
outputs = model(inputs)
loss = criterion(outputs, labels)
scaler.scale(loss).backward()
python icon="python" Python theme={null}
model = torch.compile(model)
python icon="python" Python theme={null}
model = torch.nn.DataParallel(model)
python icon="python" Python theme={null}
from torch.cuda.amp import autocast
with autocast():
outputs = model(inputs)
dockerfile theme={null}
FROM pytorch/pytorch:2.1.0-cuda11.8-cudnn8-runtime
**Examples:**
Example 1 (unknown):
```unknown
## Training Best Practices
### Checkpoint Management
Always save checkpoints to prevent data loss:
```
Example 2 (unknown):
```unknown
### Resource Monitoring
Monitor GPU usage:
```
Example 3 (unknown):
```unknown
Or in Python:
```
Example 4 (unknown):
```unknown
## Cost Optimization
### Instance Selection
* Use [vast cli search offers command ](https://vast.ai/docs/cli/commands#search-offers)to search for machines that fit your budget
* Monitor your spending in Vast.ai's Billing tab
### Resource Utilization
* Use appropriate batch sizes to maximize GPU utilization
* Enable gradient checkpointing for large models
* Implement early stopping to avoid unnecessary compute time
## Troubleshooting
### Common Issues and Solutions
* Out of Memory (OOM) Errors
* Reduce batch size
* Enable gradient checkpointing
* Use mixed precision training
```
---
## Video Generation
**URL:** llms-txt#video-generation
Source: https://docs.vast.ai/video-generation
---
## Disco Diffusion
**URL:** llms-txt#disco-diffusion
**Contents:**
- DEPRECATED: Please see [Stable Diffusion guide](/stable-diffusion)
- Overview
- Pytorch image + Jupyter (recommended)
- 1) Select the docker image & config options
- 2) Allocate more disk space
- 3) Select an offer
- 5) Open the Jupyter instance
- 6) Run the modified DD notebook
- 7) Changing settings and downloading images
- Zipping up all your images
Source: https://docs.vast.ai/disco-diffusion
## DEPRECATED: Please see [Stable Diffusion guide](/stable-diffusion)
Disco diffusion is an incredibly powerful free and open source AI image generator, which is easy to use on vast.ai. With the right settings and powerful GPUs, it can generate artist quality high-res images for a wide variety of subjects. All of these images were generated purely through DD on vast.ai, without any other tools or clean up.
There are a few ways to run Disco Diffusion on Vast. The simple method is to use the pytorch docker image, plain vanilla jupyter and our slightly modified notebook which you download and then upload into your instance. The core of this guide will detail this method.
There is a custom docker image (fork) made specifically to run DD in docker- [jinaai/discoart](https://github.com/jina-ai/discoart). Discoart can spin up somewhat faster and has a number of advanced features beyond the original notebook. Directions for using Discoart on Vast are [here](/disco-diffusion)
We have created a video guide that shows all the steps for using Disco Diffusion on Vast: