146 KiB
Ollama - Llms-Txt
Pages: 58
FAQ
URL: llms-txt#faq
Contents:
- How can I upgrade Ollama?
- How can I view the logs?
- Is my GPU compatible with Ollama?
- How can I specify the context window size?
- How can I tell if my model was loaded onto the GPU?
- How do I configure Ollama server?
- Setting environment variables on Mac
- Setting environment variables on Linux
- Setting environment variables on Windows
- How do I use Ollama behind a proxy?
Source: https://docs.ollama.com/faq
How can I upgrade Ollama?
Ollama on macOS and Windows will automatically download updates. Click on the taskbar or menubar item and then click "Restart to update" to apply the update. Updates can also be installed by downloading the latest version manually.
On Linux, re-run the install script:
How can I view the logs?
Review the Troubleshooting docs for more about using logs.
Is my GPU compatible with Ollama?
Please refer to the GPU docs.
How can I specify the context window size?
By default, Ollama uses a context window size of 2048 tokens.
This can be overridden with the OLLAMA_CONTEXT_LENGTH environment variable. For example, to set the default context window to 8K, use:
To change this when using ollama run, use /set parameter:
When using the API, specify the num_ctx parameter:
How can I tell if my model was loaded onto the GPU?
Use the ollama ps command to see what models are currently loaded into memory.
The Processor column will show which memory the model was loaded in to:
100% GPUmeans the model was loaded entirely into the GPU100% CPUmeans the model was loaded entirely in system memory48%/52% CPU/GPUmeans the model was loaded partially onto both the GPU and into system memory
How do I configure Ollama server?
Ollama server can be configured with environment variables.
Setting environment variables on Mac
If Ollama is run as a macOS application, environment variables should be set using launchctl:
-
For each environment variable, call
launchctl setenv. -
Restart Ollama application.
Setting environment variables on Linux
If Ollama is run as a systemd service, environment variables should be set using systemctl:
-
Edit the systemd service by calling
systemctl edit ollama.service. This will open an editor. -
For each environment variable, add a line
Environmentunder section[Service]: -
Reload
systemdand restart Ollama:
Setting environment variables on Windows
On Windows, Ollama inherits your user and system environment variables.
-
First Quit Ollama by clicking on it in the task bar.
-
Start the Settings (Windows 11) or Control Panel (Windows 10) application and search for environment variables.
-
Click on Edit environment variables for your account.
-
Edit or create a new variable for your user account for
OLLAMA_HOST,OLLAMA_MODELS, etc. -
Click OK/Apply to save.
-
Start the Ollama application from the Windows Start menu.
How do I use Ollama behind a proxy?
Ollama pulls models from the Internet and may require a proxy server to access the models. Use HTTPS_PROXY to redirect outbound requests through the proxy. Ensure the proxy certificate is installed as a system certificate. Refer to the section above for how to use environment variables on your platform.
How do I use Ollama behind a proxy in Docker?
The Ollama Docker container image can be configured to use a proxy by passing -e HTTPS_PROXY=https://proxy.example.com when starting the container.
Alternatively, the Docker daemon can be configured to use a proxy. Instructions are available for Docker Desktop on macOS, Windows, and Linux, and Docker daemon with systemd.
Ensure the certificate is installed as a system certificate when using HTTPS. This may require a new Docker image when using a self-signed certificate.
Build and run this image:
Does Ollama send my prompts and answers back to ollama.com?
No. Ollama runs locally, and conversation data does not leave your machine.
How can I expose Ollama on my network?
Ollama binds 127.0.0.1 port 11434 by default. Change the bind address with the OLLAMA_HOST environment variable.
Refer to the section above for how to set environment variables on your platform.
How can I use Ollama with a proxy server?
Ollama runs an HTTP server and can be exposed using a proxy server such as Nginx. To do so, configure the proxy to forward requests and optionally set required headers (if not exposing Ollama on the network). For example, with Nginx:
How can I use Ollama with ngrok?
Ollama can be accessed using a range of tools for tunneling tools. For example with Ngrok:
How can I use Ollama with Cloudflare Tunnel?
To use Ollama with Cloudflare Tunnel, use the --url and --http-host-header flags:
How can I allow additional web origins to access Ollama?
Ollama allows cross-origin requests from 127.0.0.1 and 0.0.0.0 by default. Additional origins can be configured with OLLAMA_ORIGINS.
For browser extensions, you'll need to explicitly allow the extension's origin pattern. Set OLLAMA_ORIGINS to include chrome-extension://*, moz-extension://*, and safari-web-extension://* if you wish to allow all browser extensions access, or specific extensions as needed:
Examples:
Example 1 (unknown):
## How can I view the logs?

Review the [Troubleshooting](./troubleshooting.md) docs for more about using logs.

## Is my GPU compatible with Ollama?

Please refer to the [GPU docs](./gpu.md).

## How can I specify the context window size?

By default, Ollama uses a context window size of 2048 tokens.

This can be overridden with the `OLLAMA_CONTEXT_LENGTH` environment variable. For example, to set the default context window to 8K, use:
Example 2 (unknown):
To change this when using `ollama run`, use `/set parameter`:
Example 3 (unknown):
When using the API, specify the `num_ctx` parameter:
Example 4 (unknown):
## How can I tell if my model was loaded onto the GPU?

Use the `ollama ps` command to see what models are currently loaded into memory.
Quickstart
URL: llms-txt#quickstart
Contents:
- Run a model
Source: https://docs.ollama.com/quickstart
This quickstart will walk your through running your first model with Ollama. To get started, download Ollama on macOS, Windows or Linux.
Download Ollama Open a terminal and run the command:Lastly, chat with the model:
Start by downloading a model:Then install Ollama's Python library:
Lastly, chat with the model:
Start by downloading a model:Then install the Ollama JavaScript library:
Lastly, chat with the model:
See a full list of available models here.
Examples:
Example 1 (unknown):
ollama run gemma3
Example 2 (unknown):
ollama pull gemma3
Example 3 (unknown):
</Tab>

  <Tab title="Python">
    Start by downloading a model:
Example 4 (unknown):
Then install Ollama's Python library:
Generate a chat message
URL: llms-txt#generate-a-chat-message
Source: https://docs.ollama.com/api/chat
openapi.yaml post /api/chat Generate the next chat message in a conversation between a user and an assistant.
Get version
URL: llms-txt#get-version
Source: https://docs.ollama.com/api-reference/get-version
openapi.yaml get /api/version Retrieve the version of the Ollama
VS Code
URL: llms-txt#vs-code
Contents:
- Install
- Usage with Ollama
Source: https://docs.ollama.com/integrations/vscode
Install VSCode.
- Open Copilot side bar found in top right window
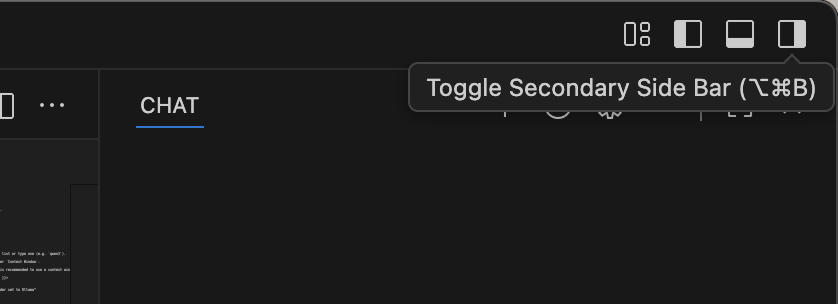
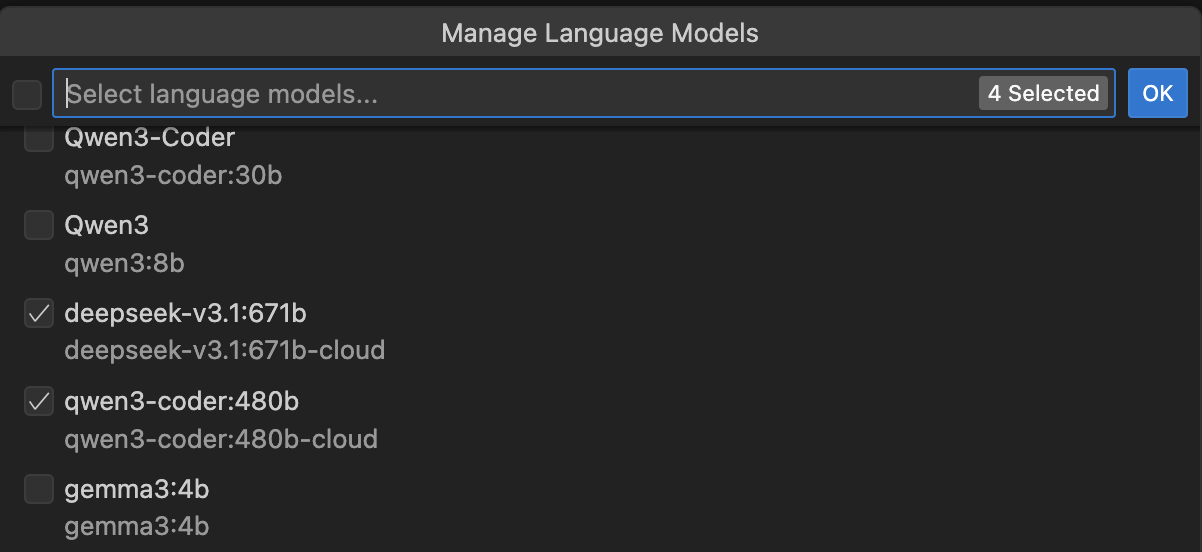
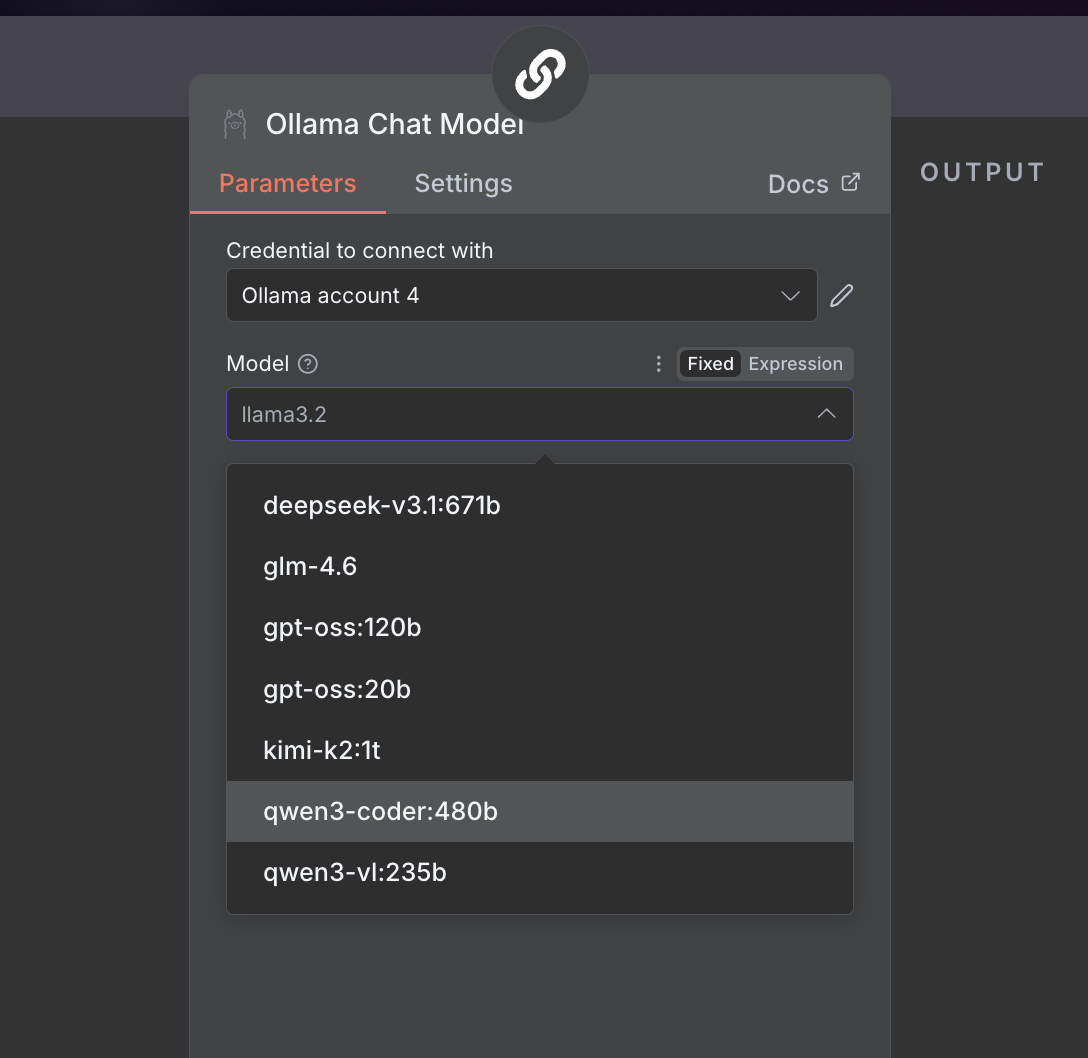
- Select the model drowpdown > Manage models
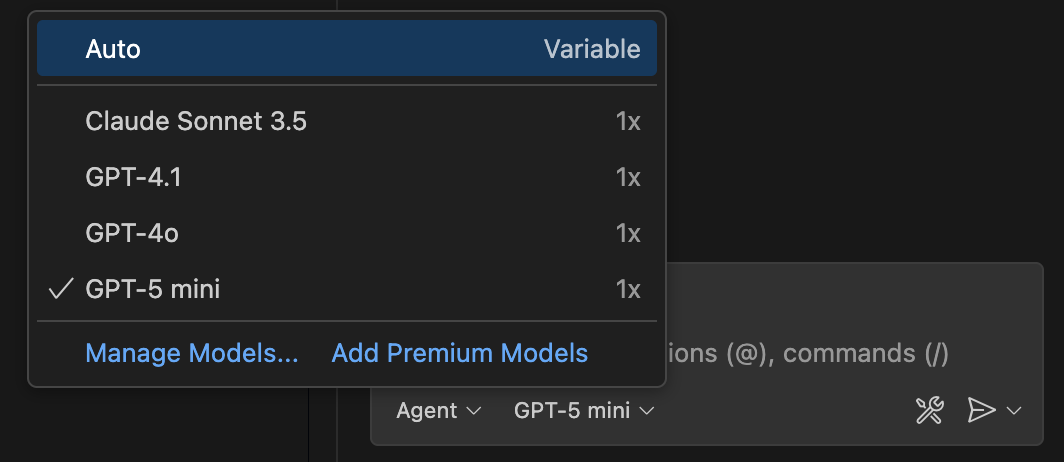
- Enter Ollama under Provider Dropdown and select desired models (e.g
qwen3, qwen3-coder:480b-cloud)
Cloud
URL: llms-txt#cloud
Contents:
- Cloud Models
- Running Cloud models
- Cloud API access
- Authentication
- Listing models
- Generating a response
Source: https://docs.ollama.com/cloud
Ollama's cloud is currently in preview.
Ollama's cloud models are a new kind of model in Ollama that can run without a powerful GPU. Instead, cloud models are automatically offloaded to Ollama's cloud service while offering the same capabilities as local models, making it possible to keep using your local tools while running larger models that wouldn't fit on a personal computer.
Ollama currently supports the following cloud models, with more coming soon:
deepseek-v3.1:671b-cloudgpt-oss:20b-cloudgpt-oss:120b-cloudkimi-k2:1t-cloudqwen3-coder:480b-cloudglm-4.6:cloudminimax-m2:cloud
Running Cloud models
Ollama's cloud models require an account on ollama.com. To sign in or create an account, run:
To run a cloud model, open the terminal and run: First, pull a cloud model so it can be accessed:Next, install Ollama's Python library:
Next, create and run a simple Python script:
First, pull a cloud model so it can be accessed:Next, install Ollama's JavaScript library:
Then use the library to run a cloud model:
First, pull a cloud model so it can be accessed:Run the following cURL command to run the command via Ollama's API:
Cloud models can also be accessed directly on ollama.com's API. In this mode, ollama.com acts as a remote Ollama host.
For direct access to ollama.com's API, first create an API key.
Then, set the OLLAMA_API_KEY environment variable to your API key.
For models available directly via Ollama's API, models can be listed via:
Generating a response
First, install [Ollama's Python library](https://github.com/ollama/ollama-python) First, install [Ollama's JavaScript library](https://github.com/ollama/ollama-js):Next, make a request to the model:
Generate a response via Ollama's chat API:Examples:
Example 1 (unknown):
ollama signin
Example 2 (unknown):
ollama run gpt-oss:120b-cloud
Example 3 (unknown):
ollama pull gpt-oss:120b-cloud
Example 4 (unknown):
pip install ollama
Pull a model
URL: llms-txt#pull-a-model
Source: https://docs.ollama.com/api/pull
openapi.yaml post /api/pull
Structured Outputs
URL: llms-txt#structured-outputs
Contents:
- Generating structured JSON
- Generating structured JSON with a schema
- Example: Extract structured data
- Example: Vision with structured outputs
- Tips for reliable structured outputs
Source: https://docs.ollama.com/capabilities/structured-outputs
Structured outputs let you enforce a JSON schema on model responses so you can reliably extract structured data, describe images, or keep every reply consistent.
Generating structured JSON
Generating structured JSON with a schema
Provide a JSON schema to the format field.
Example: Extract structured data
Define the objects you want returned and let the model populate the fields:
Example: Vision with structured outputs
Vision models accept the same format parameter, enabling deterministic descriptions of images:
Tips for reliable structured outputs
- Define schemas with Pydantic (Python) or Zod (JavaScript) so they can be reused for validation.
- Lower the temperature (e.g., set it to
0) for more deterministic completions. - Structured outputs work through the OpenAI-compatible API via
response_format
Examples:
Example 1 (unknown):
</Tab>

  <Tab title="Python">
Example 2 (unknown):
</Tab>

  <Tab title="JavaScript">
Example 3 (unknown):
</Tab>
</Tabs>

## Generating structured JSON with a schema

Provide a JSON schema to the `format` field.

<Note>
  It is ideal to also pass the JSON schema as a string in the prompt to ground the model's response.
</Note>

<Tabs>
  <Tab title="cURL">
Example 4 (unknown):
</Tab>

  <Tab title="Python">
    Use Pydantic models and pass `model_json_schema()` to `format`, then validate the response:
Context length
URL: llms-txt#context-length
Contents:
- Setting context length
- App
- CLI
- Check allocated context length and model offloading
Source: https://docs.ollama.com/context-length
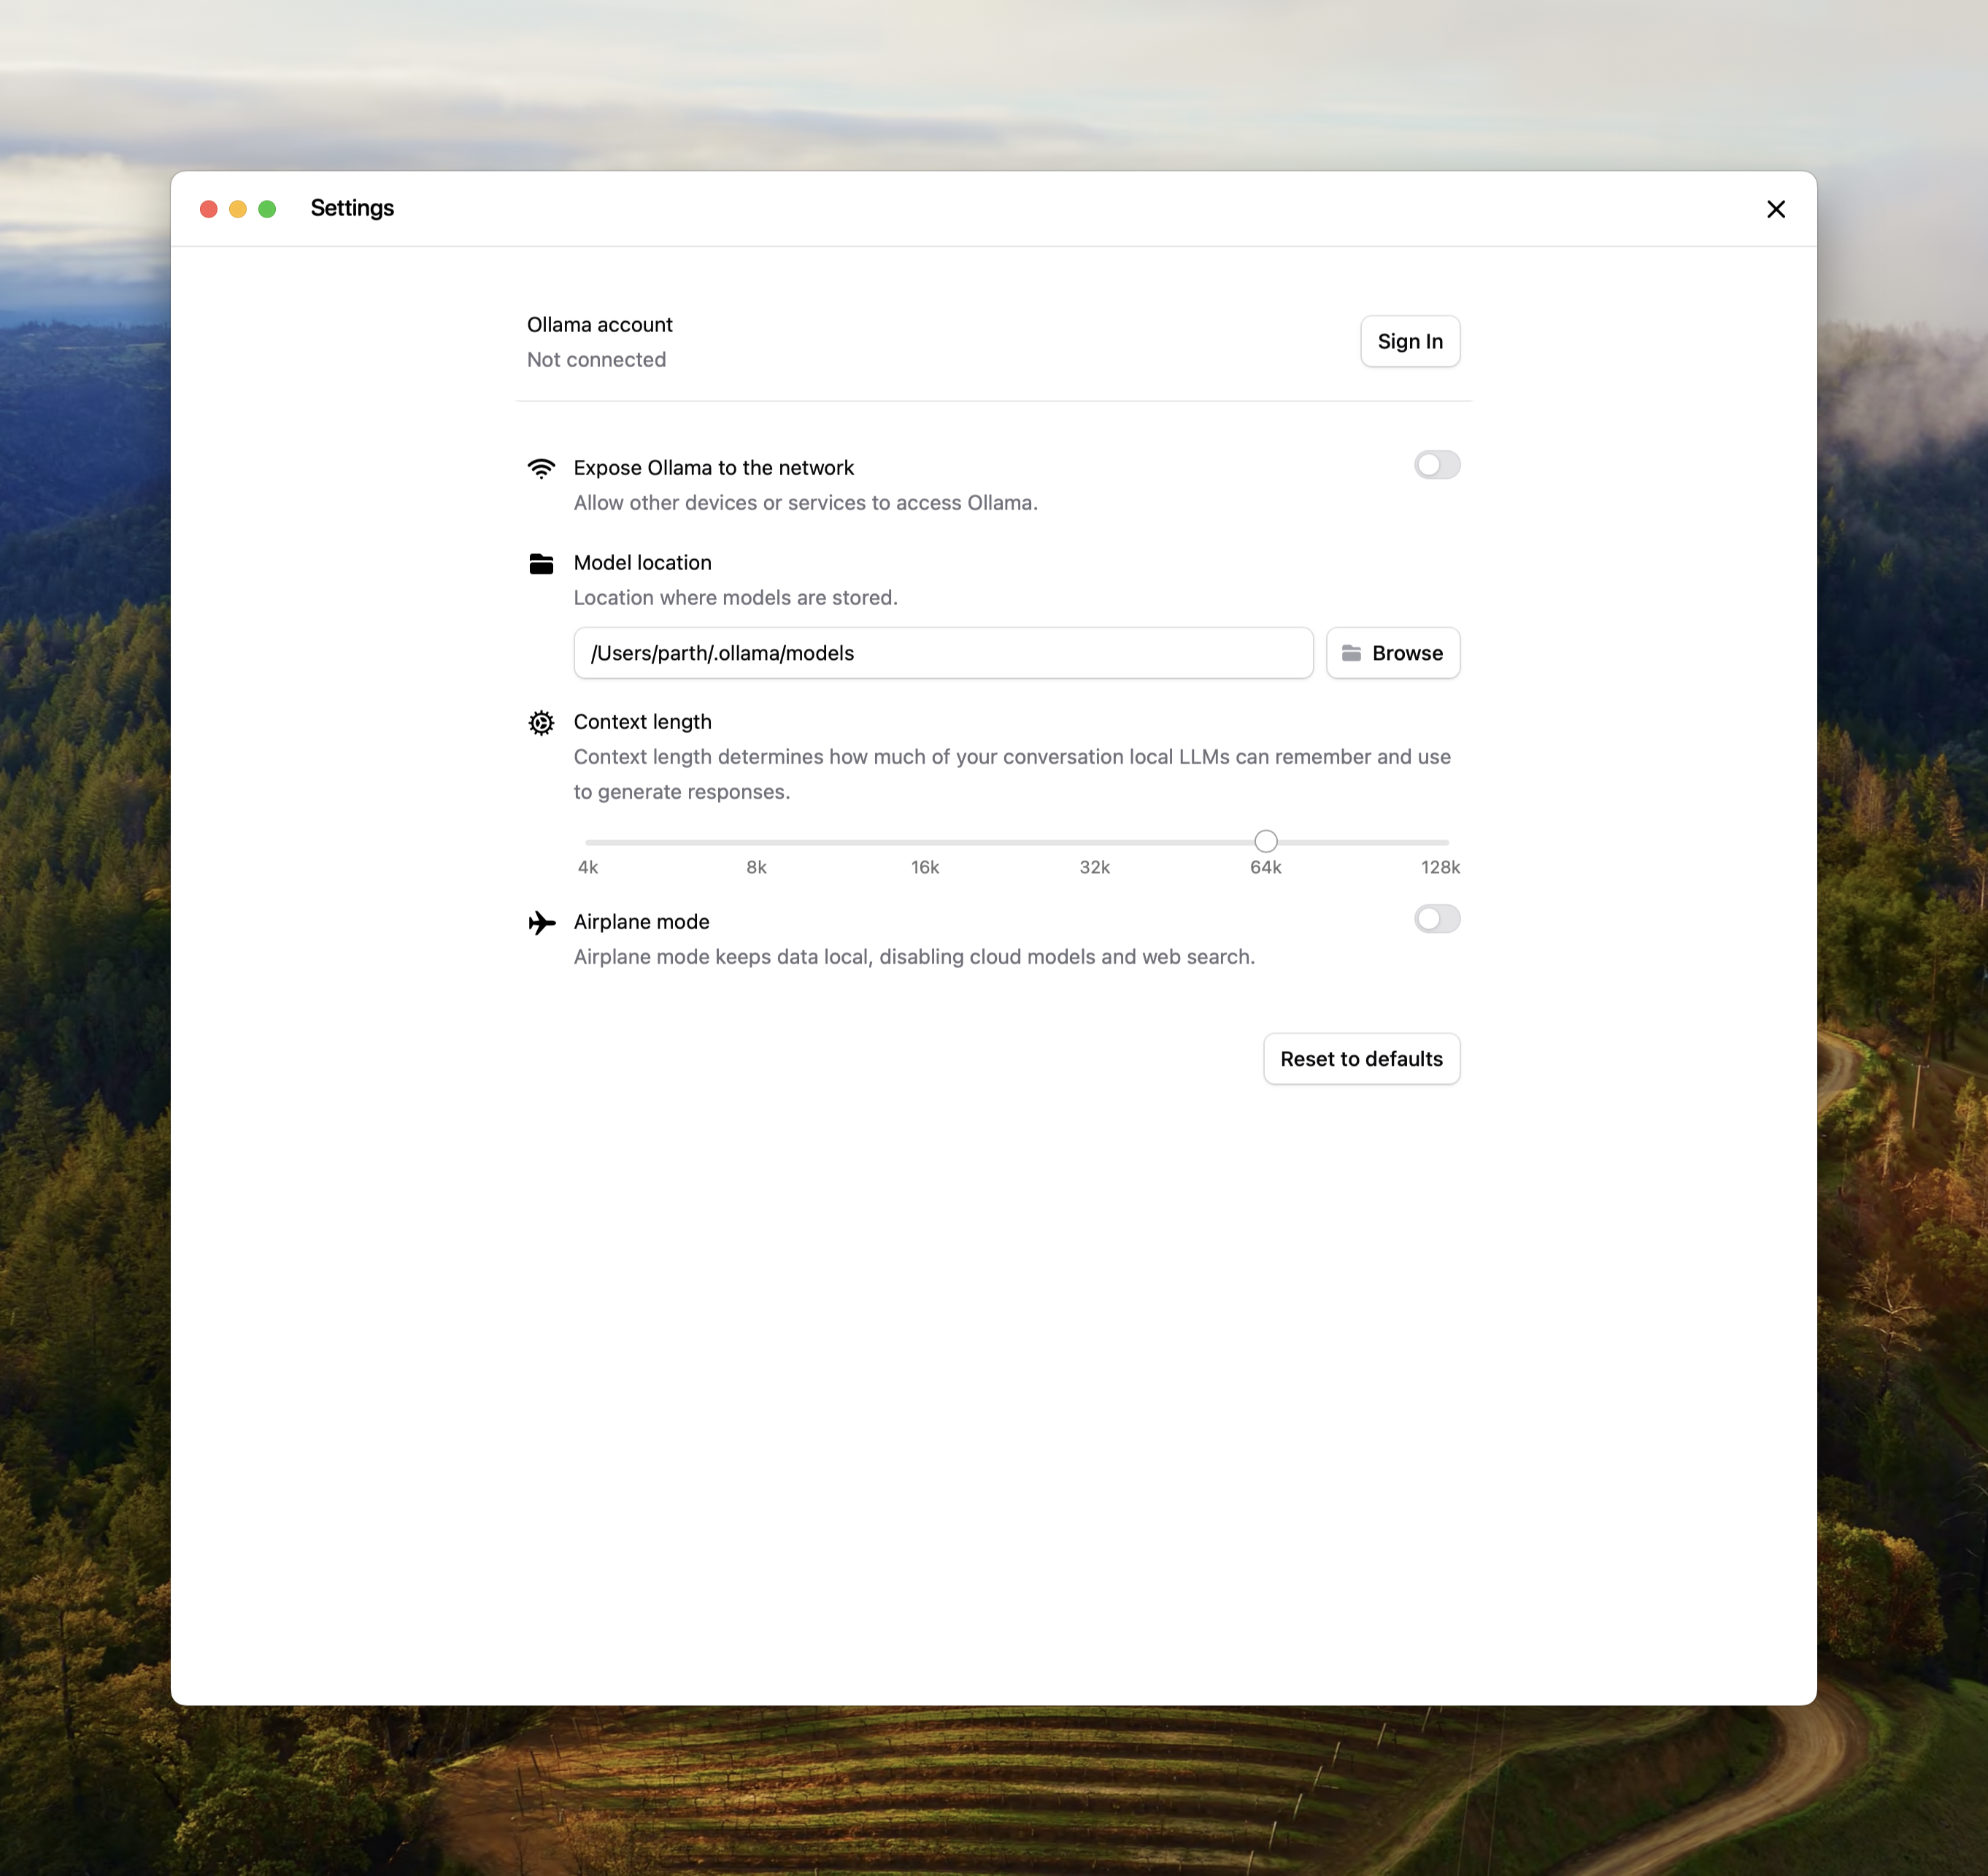
Context length is the maximum number of tokens that the model has access to in memory.
The default context length in Ollama is 4096 tokens.Tasks which require large context like web search, agents, and coding tools should be set to at least 32000 tokens.
Setting context length
Setting a larger context length will increase the amount of memory required to run a model. Ensure you have enough VRAM available to increase the context length.
Cloud models are set to their maximum context length by default.
Change the slider in the Ollama app under settings to your desired context length.
If editing the context length for Ollama is not possible, the context length can also be updated when serving Ollama.
Check allocated context length and model offloading
For best performance, use the maximum context length for a model, and avoid offloading the model to CPU. Verify the split under PROCESSOR using ollama ps.
Examples:
Example 1 (unknown):
OLLAMA_CONTEXT_LENGTH=32000 ollama serve
Example 2 (unknown):
ollama ps
Example 3 (unknown):
NAME             ID              SIZE      PROCESSOR    CONTEXT    UNTIL
gemma3:latest    a2af6cc3eb7f    6.6 GB    100% GPU     65536      2 minutes from now
comment
URL: llms-txt#comment
Contents:
- Examples
- Basic
Modelfile
- Basic
INSTRUCTION arguments
Examples:
Example 1 (unknown):
| Instruction                         | Description                                                    |
| ----------------------------------- | -------------------------------------------------------------- |
| [`FROM`](#from-required) (required) | Defines the base model to use.                                 |
| [`PARAMETER`](#parameter)           | Sets the parameters for how Ollama will run the model.         |
| [`TEMPLATE`](#template)             | The full prompt template to be sent to the model.              |
| [`SYSTEM`](#system)                 | Specifies the system message that will be set in the template. |
| [`ADAPTER`](#adapter)               | Defines the (Q)LoRA adapters to apply to the model.            |
| [`LICENSE`](#license)               | Specifies the legal license.                                   |
| [`MESSAGE`](#message)               | Specify message history.                                       |

## Examples

### Basic `Modelfile`

An example of a `Modelfile` creating a mario blueprint:
Allow all Chrome, Firefox, and Safari extensions
URL: llms-txt#allow-all-chrome,-firefox,-and-safari-extensions
Contents:
- Where are models stored?
- How do I set them to a different location?
- How can I use Ollama in Visual Studio Code?
- How do I use Ollama with GPU acceleration in Docker?
- Why is networking slow in WSL2 on Windows 10?
- How can I preload a model into Ollama to get faster response times?
- How do I keep a model loaded in memory or make it unload immediately?
- How do I manage the maximum number of requests the Ollama server can queue?
- How does Ollama handle concurrent requests?
- How does Ollama load models on multiple GPUs?
OLLAMA_ORIGINS=chrome-extension://,moz-extension://,safari-web-extension://* ollama serve shell theme={"system"} curl http://localhost:11434/api/generate -d '{"model": "mistral"}' shell theme={"system"} curl http://localhost:11434/api/chat -d '{"model": "mistral"}' shell theme={"system"} ollama run llama3.2 "" shell theme={"system"} ollama stop llama3.2 shell theme={"system"} curl http://localhost:11434/api/generate -d '{"model": "llama3.2", "keep_alive": -1}' shell theme={"system"} curl http://localhost:11434/api/generate -d '{"model": "llama3.2", "keep_alive": 0}' shell theme={"system"} ollama signin
* **Manually copy & paste** the key on the **Ollama Keys** page:
  [https://ollama.com/settings/keys](https://ollama.com/settings/keys)

### Where the Ollama Public Key lives

| OS      | Path to `id_ed25519.pub`                     |
| :------ | :------------------------------------------- |
| macOS   | `~/.ollama/id_ed25519.pub`                   |
| Linux   | `/usr/share/ollama/.ollama/id_ed25519.pub`   |
| Windows | `C:\Users\<username>\.ollama\id_ed25519.pub` |

<Note>
  Replace \<username> with your actual Windows user name.
</Note>

**Examples:**

Example 1 (unknown):
```unknown
Refer to the section [above](#how-do-i-configure-ollama-server) for how to set environment variables on your platform.

## Where are models stored?

* macOS: `~/.ollama/models`
* Linux: `/usr/share/ollama/.ollama/models`
* Windows: `C:\Users\%username%\.ollama\models`

### How do I set them to a different location?

If a different directory needs to be used, set the environment variable `OLLAMA_MODELS` to the chosen directory.

<Note>
  On Linux using the standard installer, the `ollama` user needs read and write access to the specified directory. To assign the directory to the `ollama` user run `sudo chown -R ollama:ollama <directory>`.
</Note>

Refer to the section [above](#how-do-i-configure-ollama-server) for how to set environment variables on your platform.

## How can I use Ollama in Visual Studio Code?

There is already a large collection of plugins available for VSCode as well as other editors that leverage Ollama. See the list of [extensions & plugins](https://github.com/ollama/ollama#extensions--plugins) at the bottom of the main repository readme.

## How do I use Ollama with GPU acceleration in Docker?

The Ollama Docker container can be configured with GPU acceleration in Linux or Windows (with WSL2). This requires the [nvidia-container-toolkit](https://github.com/NVIDIA/nvidia-container-toolkit). See [ollama/ollama](https://hub.docker.com/r/ollama/ollama) for more details.

GPU acceleration is not available for Docker Desktop in macOS due to the lack of GPU passthrough and emulation.

## Why is networking slow in WSL2 on Windows 10?

This can impact both installing Ollama, as well as downloading models.

Open `Control Panel > Networking and Internet > View network status and tasks` and click on `Change adapter settings` on the left panel. Find the `vEthernel (WSL)` adapter, right click and select `Properties`.
Click on `Configure` and open the `Advanced` tab. Search through each of the properties until you find `Large Send Offload Version 2 (IPv4)` and `Large Send Offload Version 2 (IPv6)`. *Disable* both of these
properties.

## How can I preload a model into Ollama to get faster response times?

If you are using the API you can preload a model by sending the Ollama server an empty request. This works with both the `/api/generate` and `/api/chat` API endpoints.

To preload the mistral model using the generate endpoint, use:
Example 2 (unknown):
To use the chat completions endpoint, use:
Example 3 (unknown):
To preload a model using the CLI, use the command:
Example 4 (unknown):
## How do I keep a model loaded in memory or make it unload immediately?

By default models are kept in memory for 5 minutes before being unloaded. This allows for quicker response times if you're making numerous requests to the LLM. If you want to immediately unload a model from memory, use the `ollama stop` command:
Push a model
URL: llms-txt#push-a-model
Source: https://docs.ollama.com/api/push
openapi.yaml post /api/push
List running models
URL: llms-txt#list-running-models
Source: https://docs.ollama.com/api/ps
openapi.yaml get /api/ps Retrieve a list of models that are currently running
Usage
URL: llms-txt#usage
Contents:
- Example response
Source: https://docs.ollama.com/api/usage
Ollama's API responses include metrics that can be used for measuring performance and model usage:
total_duration: How long the response took to generateload_duration: How long the model took to loadprompt_eval_count: How many input tokens were processedprompt_eval_duration: How long it took to evaluate the prompteval_count: How many output tokens were processeseval_duration: How long it took to generate the output tokens
All timing values are measured in nanoseconds.
For endpoints that return usage metrics, the response body will include the usage fields. For example, a non-streaming call to /api/generate may return the following response:
For endpoints that return streaming responses, usage fields are included as part of the final chunk, where done is true.
OpenAI compatibility
URL: llms-txt#openai-compatibility
Contents:
- Usage
- OpenAI Python library
Source: https://docs.ollama.com/api/openai-compatibility
Ollama provides compatibility with parts of the OpenAI API to help connect existing applications to Ollama.
OpenAI Python library
Structured outputs
from pydantic import BaseModel
from openai import OpenAI

client = OpenAI(base_url="http://localhost:11434/v1", api_key="ollama")

**Examples:**

Example 1 (unknown):
```unknown
#### Structured outputs
Streaming
URL: llms-txt#streaming
Contents:
- Key streaming concepts
- Handling streamed chunks
Source: https://docs.ollama.com/capabilities/streaming
Streaming allows you to render text as it is produced by the model.
Streaming is enabled by default through the REST API, but disabled by default in the SDKs.
To enable streaming in the SDKs, set the stream parameter to True.
Key streaming concepts
- Chatting: Stream partial assistant messages. Each chunk includes the
contentso you can render messages as they arrive. - Thinking: Thinking-capable models emit a
thinkingfield alongside regular content in each chunk. Detect this field in streaming chunks to show or hide reasoning traces before the final answer arrives. - Tool calling: Watch for streamed
tool_callsin each chunk, execute the requested tool, and append tool outputs back into the conversation.
Handling streamed chunks
It is necessary to accumulate the partial fields in order to maintain the history of the conversation. This is particularly important for tool calling where the thinking, tool call from the model, and the executed tool result must be passed back to the model in the next request.
Examples:
Example 1 (unknown):
</Tab>

  <Tab title="JavaScript">
Droid
URL: llms-txt#droid
Contents:
- Install
- Usage with Ollama
- Cloud Models
- Connecting to ollama.com
Source: https://docs.ollama.com/integrations/droid
Install the Droid CLI:
Droid requires a larger context window. It is recommended to use a context window of at least 32K tokens. See Context length for more information.
Add a local configuration block to ~/.factory/config.json:
qwen3-coder:480b-cloud is the recommended model for use with Droid.
Add the cloud configuration block to ~/.factory/config.json:
Connecting to ollama.com
- Create an API key from ollama.com and export it as
OLLAMA_API_KEY. - Add the cloud configuration block to
~/.factory/config.json:
Run droid in a new terminal to load the new settings.
Examples:
Example 1 (unknown):
<Note>Droid requires a larger context window. It is recommended to use a context window of at least 32K tokens. See [Context length](/context-length) for more information.</Note>

## Usage with Ollama

Add a local configuration block to `~/.factory/config.json`:
Example 2 (unknown):
## Cloud Models

`qwen3-coder:480b-cloud` is the recommended model for use with Droid.

Add the cloud configuration block to `~/.factory/config.json`:
Example 3 (unknown):
## Connecting to ollama.com

1. Create an [API key](https://ollama.com/settings/keys) from ollama.com and export it as `OLLAMA_API_KEY`.
2. Add the cloud configuration block to `~/.factory/config.json`:
Copy a model
URL: llms-txt#copy-a-model
Source: https://docs.ollama.com/api/copy
openapi.yaml post /api/copy
Authentication
URL: llms-txt#authentication
Contents:
- Signing in
- API keys
Source: https://docs.ollama.com/api/authentication
No authentication is required when accessing Ollama's API locally via http://localhost:11434.
Authentication is required for the following:
- Running cloud models via ollama.com
- Publishing models
- Downloading private models
Ollama supports two authentication methods:
- Signing in: sign in from your local installation, and Ollama will automatically take care of authenticating requests to ollama.com when running commands
- API keys: API keys for programmatic access to ollama.com's API
To sign in to ollama.com from your local installation of Ollama, run:
Once signed in, Ollama will automatically authenticate commands as required:
Similarly, when accessing a local API endpoint that requires cloud access, Ollama will automatically authenticate the request:
For direct access to ollama.com's API served at https://ollama.com/api, authentication via API keys is required.
First, create an API key, then set the OLLAMA_API_KEY environment variable:
Then use the API key in the Authorization header:
API keys don't currently expire, however you can revoke them at any time in your API keys settings.
Examples:
Example 1 (unknown):
ollama signin
Example 2 (unknown):
ollama run gpt-oss:120b-cloud
Example 3 (unknown):
## API keys

For direct access to ollama.com's API served at `https://ollama.com/api`, authentication via API keys is required.

First, create an [API key](https://ollama.com/settings/keys), then set the `OLLAMA_API_KEY` environment variable:
Example 4 (unknown):
Then use the API key in the Authorization header:
CLI Reference
URL: llms-txt#cli-reference
Contents:
- Run a model
- Download a model
- Remove a model
- List models
- Sign in to Ollama
- Sign out of Ollama
- Create a customized model
- List running models
- Stop a running model
- Start Ollama
Source: https://docs.ollama.com/cli
For multiline input, you can wrap text with """:
Multimodal models
Sign in to Ollama
Sign out of Ollama
Create a customized model
First, create a Modelfile
Then run ollama create:
List running models
Stop a running model
To view a list of environment variables that can be set run ollama serve --help
Examples:
Example 1 (unknown):
ollama run gemma3
Example 2 (unknown):
>>> """Hello,
... world!
... """
I'm a basic program that prints the famous "Hello, world!" message to the console.
Example 3 (unknown):
ollama run gemma3 "What's in this image? /Users/jmorgan/Desktop/smile.png"
Example 4 (unknown):
ollama pull gemma3
sets the temperature to 1 [higher is more creative, lower is more coherent]
URL: llms-txt#sets-the-temperature-to-1-[higher-is-more-creative,-lower-is-more-coherent]
PARAMETER temperature 1
Windows
URL: llms-txt#windows
Contents:
- System Requirements
- Filesystem Requirements
- Changing Install Location
- Changing Model Location
- API Access
- Troubleshooting
- Uninstall
- Standalone CLI
Source: https://docs.ollama.com/windows
Ollama runs as a native Windows application, including NVIDIA and AMD Radeon GPU support.
After installing Ollama for Windows, Ollama will run in the background and
the ollama command line is available in cmd, powershell or your favorite
terminal application. As usual the Ollama API will be served on
http://localhost:11434.
System Requirements
- Windows 10 22H2 or newer, Home or Pro
- NVIDIA 452.39 or newer Drivers if you have an NVIDIA card
- AMD Radeon Driver https://www.amd.com/en/support if you have a Radeon card
Ollama uses unicode characters for progress indication, which may render as unknown squares in some older terminal fonts in Windows 10. If you see this, try changing your terminal font settings.
Filesystem Requirements
The Ollama install does not require Administrator, and installs in your home directory by default. You'll need at least 4GB of space for the binary install. Once you've installed Ollama, you'll need additional space for storing the Large Language models, which can be tens to hundreds of GB in size. If your home directory doesn't have enough space, you can change where the binaries are installed, and where the models are stored.
Changing Install Location
To install the Ollama application in a location different than your home directory, start the installer with the following flag
Changing Model Location
To change where Ollama stores the downloaded models instead of using your home directory, set the environment variable OLLAMA_MODELS in your user account.
-
Start the Settings (Windows 11) or Control Panel (Windows 10) application and search for environment variables.
-
Click on Edit environment variables for your account.
-
Edit or create a new variable for your user account for
OLLAMA_MODELSwhere you want the models stored -
Click OK/Apply to save.
If Ollama is already running, Quit the tray application and relaunch it from the Start menu, or a new terminal started after you saved the environment variables.
Here's a quick example showing API access from powershell
Ollama on Windows stores files in a few different locations. You can view them in
the explorer window by hitting <Ctrl>+R and type in:
explorer %LOCALAPPDATA%\Ollamacontains logs, and downloaded updates- app.log contains most resent logs from the GUI application
- server.log contains the most recent server logs
- upgrade.log contains log output for upgrades
explorer %LOCALAPPDATA%\Programs\Ollamacontains the binaries (The installer adds this to your user PATH)explorer %HOMEPATH%\.ollamacontains models and configurationexplorer %TEMP%contains temporary executable files in one or moreollama*directories
The Ollama Windows installer registers an Uninstaller application. Under Add or remove programs in Windows Settings, you can uninstall Ollama.
The easiest way to install Ollama on Windows is to use the OllamaSetup.exe
installer. It installs in your account without requiring Administrator rights.
We update Ollama regularly to support the latest models, and this installer will
help you keep up to date.
If you'd like to install or integrate Ollama as a service, a standalone
ollama-windows-amd64.zip zip file is available containing only the Ollama CLI
and GPU library dependencies for Nvidia. If you have an AMD GPU, also download
and extract the additional ROCm package ollama-windows-amd64-rocm.zip into the
same directory. This allows for embedding Ollama in existing applications, or
running it as a system service via ollama serve with tools such as
NSSM.
Examples:
Example 1 (unknown):
### Changing Model Location

To change where Ollama stores the downloaded models instead of using your home directory, set the environment variable `OLLAMA_MODELS` in your user account.

1. Start the Settings (Windows 11) or Control Panel (Windows 10) application and search for *environment variables*.

2. Click on *Edit environment variables for your account*.

3. Edit or create a new variable for your user account for `OLLAMA_MODELS` where you want the models stored

4. Click OK/Apply to save.

If Ollama is already running, Quit the tray application and relaunch it from the Start menu, or a new terminal started after you saved the environment variables.

## API Access

Here's a quick example showing API access from `powershell`
Modelfile Reference
URL: llms-txt#modelfile-reference
Contents:
- Table of Contents
- Format
Source: https://docs.ollama.com/modelfile
A Modelfile is the blueprint to create and share customized models using Ollama.
The format of the Modelfile:
Embeddings
URL: llms-txt#embeddings
Contents:
- Recommended models
- Generate embeddings
- Generate a batch of embeddings
- Tips
Source: https://docs.ollama.com/capabilities/embeddings
Generate text embeddings for semantic search, retrieval, and RAG.
Embeddings turn text into numeric vectors you can store in a vector database, search with cosine similarity, or use in RAG pipelines. The vector length depends on the model (typically 384–1024 dimensions).
Recommended models
Generate embeddings
Use /api/embed with a single string.
Generate a batch of embeddings
Pass an array of strings to input.
- Use cosine similarity for most semantic search use cases.
- Use the same embedding model for both indexing and querying.
Examples:
Example 1 (unknown):
</Tab>

  <Tab title="Python">
Example 2 (unknown):
</Tab>

  <Tab title="JavaScript">
Example 3 (unknown):
</Tab>
</Tabs>

<Note>
  The `/api/embed` endpoint returns L2‑normalized (unit‑length) vectors.
</Note>

## Generate a batch of embeddings

Pass an array of strings to `input`.

<Tabs>
  <Tab title="cURL">
Example 4 (unknown):
</Tab>

  <Tab title="Python">
Thinking
URL: llms-txt#thinking
Contents:
- Supported models
- Enable thinking in API calls
- Stream the reasoning trace
- CLI quick reference
Source: https://docs.ollama.com/capabilities/thinking
Thinking-capable models emit a thinking field that separates their reasoning trace from the final answer.
Use this capability to audit model steps, animate the model thinking in a UI, or hide the trace entirely when you only need the final response.
- Qwen 3
- GPT-OSS (use
thinklevels:low,medium,high— the trace cannot be fully disabled) - DeepSeek-v3.1
- DeepSeek R1
- Browse the latest additions under thinking models
Enable thinking in API calls
Set the think field on chat or generate requests. Most models accept booleans (true/false).
GPT-OSS instead expects one of low, medium, or high to tune the trace length.
The message.thinking (chat endpoint) or thinking (generate endpoint) field contains the reasoning trace while message.content / response holds the final answer.
Stream the reasoning trace
Thinking streams interleave reasoning tokens before answer tokens. Detect the first thinking chunk to render a "thinking" section, then switch to the final reply once message.content arrives.
CLI quick reference
- Enable thinking for a single run:
ollama run deepseek-r1 --think "Where should I visit in Lisbon?" - Disable thinking:
ollama run deepseek-r1 --think=false "Summarize this article" - Hide the trace while still using a thinking model:
ollama run deepseek-r1 --hidethinking "Is 9.9 bigger or 9.11?" - Inside interactive sessions, toggle with
/set thinkor/set nothink. - GPT-OSS only accepts levels:
ollama run gpt-oss --think=low "Draft a headline"(replacelowwithmediumorhighas needed).
Thinking is enabled by default in the CLI and API for supported models.
Examples:
Example 1 (unknown):
</Tab>

  <Tab title="Python">
Example 2 (unknown):
</Tab>

  <Tab title="JavaScript">
Example 3 (unknown):
</Tab>
</Tabs>

<Note>
  GPT-OSS requires `think` to be set to `"low"`, `"medium"`, or `"high"`. Passing `true`/`false` is ignored for that model.
</Note>

## Stream the reasoning trace

Thinking streams interleave reasoning tokens before answer tokens. Detect the first `thinking` chunk to render a "thinking" section, then switch to the final reply once `message.content` arrives.

<Tabs>
  <Tab title="Python">
Example 4 (unknown):
</Tab>

  <Tab title="JavaScript">
Create a model
URL: llms-txt#create-a-model
Source: https://docs.ollama.com/api/create
openapi.yaml post /api/create
Define the schema for the response
URL: llms-txt#define-the-schema-for-the-response
Contents:
- OpenAI JavaScript library
curl- Endpoints
/v1/chat/completions/v1/completions/v1/models/v1/models/{model}/v1/embeddings
- Models
- Default model names
class FriendInfo(BaseModel): name: str age: int is_available: bool
class FriendList(BaseModel): friends: list[FriendInfo]
try: completion = client.beta.chat.completions.parse( temperature=0, model="llama3.1:8b", messages=[ {"role": "user", "content": "I have two friends. The first is Ollama 22 years old busy saving the world, and the second is Alonso 23 years old and wants to hang out. Return a list of friends in JSON format"} ], response_format=FriendList, )
friends_response = completion.choices[0].message if friends_response.parsed: print(friends_response.parsed) elif friends_response.refusal: print(friends_response.refusal) except Exception as e: print(f"Error: {e}") javascript theme={"system"} import OpenAI from "openai";
const openai = new OpenAI({ baseURL: "http://localhost:11434/v1/",
// required but ignored apiKey: "ollama", });
const chatCompletion = await openai.chat.completions.create({ messages: [{ role: "user", content: "Say this is a test" }], model: "llama3.2", });
const response = await openai.chat.completions.create({ model: "llava", messages: [ { role: "user", content: [ { type: "text", text: "What's in this image?" }, { type: "image_url", image_url: "data:image/png;base64,iVBORw0KGgoAAAANSUhEUgAAAG0AAABmCAYAAADBPx+VAAAACXBIWXMAAAsTAAALEwEAmpwYAAAAAXNSR0IArs4c6QAAAARnQU1BAACxjwv8YQUAAA3VSURBVHgB7Z27r0zdG8fX743i1bi1ikMoFMQloXRpKFFIqI7LH4BEQ+NWIkjQuSWCRIEoULk0gsK1kCBI0IhrQVT7tz/7zZo888yz1r7MnDl7z5xvsjkzs2fP3uu71nNfa7lkAsm7d++Sffv2JbNmzUqcc8m0adOSzZs3Z+/XES4ZckAWJEGWPiCxjsQNLWmQsWjRIpMseaxcuTKpG/7HP27I8P79e7dq1ars/yL4/v27S0ejqwv+cUOGEGGpKHR37tzJCEpHV9tnT58+dXXCJDdECBE2Ojrqjh071hpNECjx4cMHVycM1Uhbv359B2F79+51586daxN/+pyRkRFXKyRDAqxEp4yMlDDzXG1NPnnyJKkThoK0VFd1ELZu3TrzXKxKfW7dMBQ6bcuWLW2v0VlHjx41z717927ba22U9APcw7Nnz1oGEPeL3m3p2mTAYYnFmMOMXybPPXv2bNIPpFZr1NHn4HMw0KRBjg9NuRw95s8PEcz/6DZELQd/09C9QGq5RsmSRybqkwHGjh07OsJSsYYm3ijPpyHzoiacg35MLdDSIS/O1yM778jOTwYUkKNHWUzUWaOsylE00MyI0fcnOwIdjvtNdW/HZwNLGg+sR1kMepSNJXmIwxBZiG8tDTpEZzKg0GItNsosY8USkxDhD0Rinuiko2gfL/RbiD2LZAjU9zKQJj8RDR0vJBR1/Phx9+PHj9Z7REF4nTZkxzX4LCXHrV271qXkBAPGfP/atWvu/PnzHe4C97F48eIsRLZ9+3a3f/9+87dwP1JxaF7/3r17ba+5l4EcaVo0lj3SBq5kGTJSQmLWMjgYNei2GPT1MuMqGTDEFHzeQSP2wi/jGnkmPJ/nhccs44jvDAxpVcxnq0F6eT8h4ni/iIWpR5lPyA6ETkNXoSukvpJAD3AsXLiwpZs49+fPn5ke4j10TqYvegSfn0OnafC+Tv9ooA/JPkgQysqQNBzagXY55nO/oa1F7qvIPWkRL12WRpMWUvpVDYmxAPehxWSe8ZEXL20sadYIozfmNch4QJPAfeJgW3rNsnzphBKNJM2KKODo1rVOMRYik5ETy3ix4qWNI81qAAirizgMIc+yhTytx0JWZuNI03qsrgWlGtwjoS9XwgUhWGyhUaRZZQNNIEwCiXD16tXcAHUs79co0vSD8rrJCIW98pzvxpAWyyo3HYwqS0+H0BjStClcZJT5coMm6D2LOF8TolGJtK9fvyZpyiC5ePFi9nc/oJU4eiEP0jVoAnHa9wyJycITMP78+eMeP37sXrx44d6+fdt6f82aNdkx1pg9e3Zb5W+RSRE+n+VjksQWifvVaTKFhn5O8my63K8Qabdv33b379/PiAP//vuvW7BggZszZ072/+TJk91YgkafPn166zXB1rQHFvouAWHq9z3SEevSUerqCn2/dDCeta2jxYbr69evk4MHDyY7d+7MjhMnTiTPnz9Pfv/+nfQT2ggpO2dMF8cghuoM7Ygj5iWCqRlGFml0QC/ftGmTmzt3rmsaKDsgBSPh0/8yPeLLBihLkOKJc0jp8H8vUzcxIA1k6QJ/c78tWEyj5P3o4u9+jywNPdJi5rAH9x0KHcl4Hg570eQp3+vHXGyrmEeigzQsQsjavXt38ujRo44LQuDDhw+TW7duRS1HGgMxhNXHgflaNTOsHyKvHK5Ijo2jbFjJBQK9YwFd6RVMzfgRBmEfP37suBBm/p49e1qjEP2mwTViNRo0VJWH1deMXcNK08uUjVUu7s/zRaL+oLNxz1bpANco4npUgX4G2eFbpDFyQoQxojBCpEGSytmOH8qrH5Q9vuzD6ofQylkCUmh8DBAr+q8JCyVNtWQIidKQE9wNtLSQnS4jDSsxNHogzFuQBw4cyM61UKVsjfr3ooBkPSqqQHesUPWVtzi9/vQi1T+rJj7WiTz4Pt/l3LxUkr5P2VYZaZ4URpsE+st/dujQoaBBYokbrz/8TJNQYLSonrPS9kUaSkPeZyj1AWSj+d+VBoy1pIWVNed8P0Ll/ee5HdGRhrHhR5GGN0r4LGZBaj8oFDJitBTJzIZgFcmU0Y8ytWMZMzJOaXUSrUs5RxKnrxmbb5YXO9VGUhtpXldhEUogFr3IzIsvlpmdosVcGVGXFWp2oU9kLFL3dEkSz6NHEY1sjSRdIuDFWEhd8KxFqsRi1uM/nz9/zpxnwlESONdg6dKlbsaMGS4EHFHtjFIDHwKOo46l4TxSuxgDzi+rE2jg+BaFruOX4HXa0Nnf1lwAPufZeF8/r6zD97WK2qFnGjBxTw5qNGPxT+5T/r7/7RawFC3j4vTp09koCxkeHjqbHJqArmH5UrFKKksnxrK7FuRIs8STfBZv+luugXZ2pR/pP9Ois4z+TiMzUUkUjD0iEi1fzX8GmXyuxUBRcaUfykV0YZnlJGKQpOiGB76x5GeWkWWJc3mOrK6S7xdND+W5N6XyaRgtWJFe13GkaZnKOsYqGdOVVVbGupsyA/l7emTLHi7vwTdirNEt0qxnzAvBFcnQF16xh/TMpUuXHDowhlA9vQVraQhkudRdzOnK+04ZSP3DUhVSP61YsaLtd/ks7ZgtPcXqPqEafHkdqa84X6aCeL7YWlv6edGFHb+ZFICPlljHhg0bKuk0CSvVznWsotRu433alNdFrqG45ejoaPCaUkWERpLXjzFL2Rpllp7PJU2a/v7Ab8N05/9t27Z16KUqoFGsxnI9EosS2niSYg9SpU6B4JgTrvVW1flt1sT+0ADIJU2maXzcUTraGCRaL1Wp9rUMk16PMom8QhruxzvZIegJjFU7LLCePfS8uaQdPny4jTTL0dbee5mYokQsXTIWNY46kuMbnt8Kmec+LGWtOVIl9cT1rCB0V8WqkjAsRwta93TbwNYoGKsUSChN44lgBNCoHLHzquYKrU6qZ8lolCIN0Rh6cP0Q3U6I6IXILYOQI513hJaSKAorFpuHXJNfVlpRtmYBk1Su1obZr5dnKAO+L10Hrj3WZW+E3qh6IszE37F6EB+68mGpvKm4eb9bFrlzrok7fvr0Kfv727dvWRmdVTJHw0qiiCUSZ6wCK+7XL/AcsgNyL74DQQ730sv78Su7+t/A36MdY0sW5o40ahslXr58aZ5HtZB8GH64m9EmMZ7FpYw4T6QnrZfgenrhFxaSiSGXtPnz57e9TkNZLvTjeqhr734CNtrK41L40sUQckmj1lGKQ0rC37x544r8eNXRpnVE3ZZY7zXo8NomiO0ZUCj2uHz58rbXoZ6gc0uA+F6ZeKS/jhRDUq8MKrTho9fEkihMmhxtBI1DxKFY9XLpVcSkfoi8JGnToZO5sU5aiDQIW716ddt7ZLYtMQlhECdBGXZZMWldY5BHm5xgAroWj4C0hbYkSc/jBmggIrXJWlZM6pSETsEPGqZOndr2uuuR5rF169a2HoHPdurUKZM4CO1WTPqaDaAd+GFGKdIQkxAn9RuEWcTRyN2KSUgiSgF5aWzPTeA/lN5rZubMmR2bE4SIC4nJoltgAV/dVefZm72AtctUCJU2CMJ327hxY9t7EHbkyJFseq+EJSY16RPo3Dkq1kkr7+q0bNmyDuLQcZBEPYmHVdOBiJyIlrRDq41YPWfXOxUysi5fvtyaj+2BpcnsUV/oSoEMOk2CQGlr4ckhBwaetBhjCwH0ZHtJROPJkyc7UjcYLDjmrH7ADTEBXFfOYmB0k9oYBOjJ8b4aOYSe7QkKcYhFlq3QYLQhSidNmtS2RATwy8YOM3EQJsUjKiaWZ+vZToUQgzhkHXudb/PW5YMHD9yZM2faPsMwoc7RciYJXbGuBqJ1UIGKKLv915jsvgtJxCZDubdXr165mzdvtr1Hz5LONA8jrUwKPqsmVesKa49S3Q4WxmRPUEYdTjgiUcfUwLx589ySJUva3oMkP6IYddq6HMS4o55xBJBUeRjzfa4Zdeg56QZ43LhxoyPo7Lf1kNt7oO8wWAbNwaYjIv5lhyS7kRf96dvm5Jah8vfvX3flyhX35cuX6HfzFHOToS1H4BenCaHvO8pr8iDuwoUL7tevX+b5ZdbBair0xkFIlFDlW4ZknEClsp/TzXyAKVOmmHWFVSbDNw1l1+4f90U6IY/q4V27dpnE9bJ+v87QEydjqx/UamVVPRG+mwkNTYN+9tjkwzEx+atCm/X9WvWtDtAb68Wy9LXa1UmvCDDIpPkyOQ5ZwSzJ4jMrvFcr0rSjOUh+GcT4LSg5ugkW1Io0/SCDQBojh0hPlaJdah+tkVYrnTZowP8iq1F1TgMBBauufyB33x1v+NWFYmT5KmppgHC+NkAgbmRkpD3yn9QIseXymoTQFGQmIOKTxiZIWpvAatenVqRVXf2nTrAWMsPnKrMZHz6bJq5jvce6QK8J1cQNgKxlJapMPdZSR64/UivS9NztpkVEdKcrs5alhhWP9NeqlfWopzhZScI6QxseegZRGeg5a8C3Re1Mfl1ScP36ddcUaMuv24iOJtz7sbUjTS4qBvKmstYJoUauiuD3k5qhyr7QdUHMeCgLa1Ear9NquemdXgmum4fvJ6w1lqsuDhNrg1qSpleJK7K3TF0Q2jSd94uSZ60kK1e3qyVpQK6PVWXp2/FC3mp6jBhKKOiY2h3gtUV64TWM6wDETRPLDfSakXmH3w8g9Jlug8ZtTt4kVF0kLUYYmCCtD/DrQ5YhMGbA9L3ucdjh0y8kOHW5gU/VEEmJTcL4Pz/f7mgoAbYkAAAAAElFTkSuQmCC", }, ], }, ], });
const completion = await openai.completions.create({ model: "llama3.2", prompt: "Say this is a test.", });
const listCompletion = await openai.models.list();
const model = await openai.models.retrieve("llama3.2");
const embedding = await openai.embeddings.create({
model: "all-minilm",
input: ["why is the sky blue?", "why is the grass green?"],
});
shell theme={"system"}
curl http://localhost:11434/v1/chat/completions
-H "Content-Type: application/json"
-d '{
"model": "llama3.2",
"messages": [
{
"role": "system",
"content": "You are a helpful assistant."
},
{
"role": "user",
"content": "Hello!"
}
]
}'
curl http://localhost:11434/v1/chat/completions
-H "Content-Type: application/json"
-d '{
"model": "llava",
"messages": [
{
"role": "user",
"content": [
{
"type": "text",
"text": "What'''s in this image?"
},
{
"type": "image_url",
"image_url": {
"url": "data:image/png;base64,iVBORw0KGgoAAAANSUhEUgAAAG0AAABmCAYAAADBPx+VAAAACXBIWXMAAAsTAAALEwEAmpwYAAAAAXNSR0IArs4c6QAAAARnQU1BAACxjwv8YQUAAA3VSURBVHgB7Z27r0zdG8fX743i1bi1ikMoFMQloXRpKFFIqI7LH4BEQ+NWIkjQuSWCRIEoULk0gsK1kCBI0IhrQVT7tz/7zZo888yz1r7MnDl7z5xvsjkzs2fP3uu71nNfa7lkAsm7d++Sffv2JbNmzUqcc8m0adOSzZs3Z+/XES4ZckAWJEGWPiCxjsQNLWmQsWjRIpMseaxcuTKpG/7HP27I8P79e7dq1ars/yL4/v27S0ejqwv+cUOGEGGpKHR37tzJCEpHV9tnT58+dXXCJDdECBE2Ojrqjh071hpNECjx4cMHVycM1Uhbv359B2F79+51586daxN/+pyRkRFXKyRDAqxEp4yMlDDzXG1NPnnyJKkThoK0VFd1ELZu3TrzXKxKfW7dMBQ6bcuWLW2v0VlHjx41z717927ba22U9APcw7Nnz1oGEPeL3m3p2mTAYYnFmMOMXybPPXv2bNIPpFZr1NHn4HMw0KRBjg9NuRw95s8PEcz/6DZELQd/09C9QGq5RsmSRybqkwHGjh07OsJSsYYm3ijPpyHzoiacg35MLdDSIS/O1yM778jOTwYUkKNHWUzUWaOsylE00MyI0fcnOwIdjvtNdW/HZwNLGg+sR1kMepSNJXmIwxBZiG8tDTpEZzKg0GItNsosY8USkxDhD0Rinuiko2gfL/RbiD2LZAjU9zKQJj8RDR0vJBR1/Phx9+PHj9Z7REF4nTZkxzX4LCXHrV271qXkBAPGfP/atWvu/PnzHe4C97F48eIsRLZ9+3a3f/9+87dwP1JxaF7/3r17ba+5l4EcaVo0lj3SBq5kGTJSQmLWMjgYNei2GPT1MuMqGTDEFHzeQSP2wi/jGnkmPJ/nhccs44jvDAxpVcxnq0F6eT8h4ni/iIWpR5lPyA6ETkNXoSukvpJAD3AsXLiwpZs49+fPn5ke4j10TqYvegSfn0OnafC+Tv9ooA/JPkgQysqQNBzagXY55nO/oa1F7qvIPWkRL12WRpMWUvpVDYmxAPehxWSe8ZEXL20sadYIozfmNch4QJPAfeJgW3rNsnzphBKNJM2KKODo1rVOMRYik5ETy3ix4qWNI81qAAirizgMIc+yhTytx0JWZuNI03qsrgWlGtwjoS9XwgUhWGyhUaRZZQNNIEwCiXD16tXcAHUs79co0vSD8rrJCIW98pzvxpAWyyo3HYwqS0+H0BjStClcZJT5coMm6D2LOF8TolGJtK9fvyZpyiC5ePFi9nc/oJU4eiEP0jVoAnHa9wyJycITMP78+eMeP37sXrx44d6+fdt6f82aNdkx1pg9e3Zb5W+RSRE+n+VjksQWifvVaTKFhn5O8my63K8Qabdv33b379/PiAP//vuvW7BggZszZ072/+TJk91YgkafPn166zXB1rQHFvouAWHq9z3SEevSUerqCn2/dDCeta2jxYbr69evk4MHDyY7d+7MjhMnTiTPnz9Pfv/+nfQT2ggpO2dMF8cghuoM7Ygj5iWCqRlGFml0QC/ftGmTmzt3rmsaKDsgBSPh0/8yPeLLBihLkOKJc0jp8H8vUzcxIA1k6QJ/c78tWEyj5P3o4u9+jywNPdJi5rAH9x0KHcl4Hg570eQp3+vHXGyrmEeigzQsQsjavXt38ujRo44LQuDDhw+TW7duRS1HGgMxhNXHgflaNTOsHyKvHK5Ijo2jbFjJBQK9YwFd6RVMzfgRBmEfP37suBBm/p49e1qjEP2mwTViNRo0VJWH1deMXcNK08uUjVUu7s/zRaL+oLNxz1bpANco4npUgX4G2eFbpDFyQoQxojBCpEGSytmOH8qrH5Q9vuzD6ofQylkCUmh8DBAr+q8JCyVNtWQIidKQE9wNtLSQnS4jDSsxNHogzFuQBw4cyM61UKVsjfr3ooBkPSqqQHesUPWVtzi9/vQi1T+rJj7WiTz4Pt/l3LxUkr5P2VYZaZ4URpsE+st/dujQoaBBYokbrz/8TJNQYLSonrPS9kUaSkPeZyj1AWSj+d+VBoy1pIWVNed8P0Ll/ee5HdGRhrHhR5GGN0r4LGZBaj8oFDJitBTJzIZgFcmU0Y8ytWMZMzJOaXUSrUs5RxKnrxmbb5YXO9VGUhtpXldhEUogFr3IzIsvlpmdosVcGVGXFWp2oU9kLFL3dEkSz6NHEY1sjSRdIuDFWEhd8KxFqsRi1uM/nz9/zpxnwlESONdg6dKlbsaMGS4EHFHtjFIDHwKOo46l4TxSuxgDzi+rE2jg+BaFruOX4HXa0Nnf1lwAPufZeF8/r6zD97WK2qFnGjBxTw5qNGPxT+5T/r7/7RawFC3j4vTp09koCxkeHjqbHJqArmH5UrFKKksnxrK7FuRIs8STfBZv+luugXZ2pR/pP9Ois4z+TiMzUUkUjD0iEi1fzX8GmXyuxUBRcaUfykV0YZnlJGKQpOiGB76x5GeWkWWJc3mOrK6S7xdND+W5N6XyaRgtWJFe13GkaZnKOsYqGdOVVVbGupsyA/l7emTLHi7vwTdirNEt0qxnzAvBFcnQF16xh/TMpUuXHDowhlA9vQVraQhkudRdzOnK+04ZSP3DUhVSP61YsaLtd/ks7ZgtPcXqPqEafHkdqa84X6aCeL7YWlv6edGFHb+ZFICPlljHhg0bKuk0CSvVznWsotRu433alNdFrqG45ejoaPCaUkWERpLXjzFL2Rpllp7PJU2a/v7Ab8N05/9t27Z16KUqoFGsxnI9EosS2niSYg9SpU6B4JgTrvVW1flt1sT+0ADIJU2maXzcUTraGCRaL1Wp9rUMk16PMom8QhruxzvZIegJjFU7LLCePfS8uaQdPny4jTTL0dbee5mYokQsXTIWNY46kuMbnt8Kmec+LGWtOVIl9cT1rCB0V8WqkjAsRwta93TbwNYoGKsUSChN44lgBNCoHLHzquYKrU6qZ8lolCIN0Rh6cP0Q3U6I6IXILYOQI513hJaSKAorFpuHXJNfVlpRtmYBk1Su1obZr5dnKAO+L10Hrj3WZW+E3qh6IszE37F6EB+68mGpvKm4eb9bFrlzrok7fvr0Kfv727dvWRmdVTJHw0qiiCUSZ6wCK+7XL/AcsgNyL74DQQ730sv78Su7+t/A36MdY0sW5o40ahslXr58aZ5HtZB8GH64m9EmMZ7FpYw4T6QnrZfgenrhFxaSiSGXtPnz57e9TkNZLvTjeqhr734CNtrK41L40sUQckmj1lGKQ0rC37x544r8eNXRpnVE3ZZY7zXo8NomiO0ZUCj2uHz58rbXoZ6gc0uA+F6ZeKS/jhRDUq8MKrTho9fEkihMmhxtBI1DxKFY9XLpVcSkfoi8JGnToZO5sU5aiDQIW716ddt7ZLYtMQlhECdBGXZZMWldY5BHm5xgAroWj4C0hbYkSc/jBmggIrXJWlZM6pSETsEPGqZOndr2uuuR5rF169a2HoHPdurUKZM4CO1WTPqaDaAd+GFGKdIQkxAn9RuEWcTRyN2KSUgiSgF5aWzPTeA/lN5rZubMmR2bE4SIC4nJoltgAV/dVefZm72AtctUCJU2CMJ327hxY9t7EHbkyJFseq+EJSY16RPo3Dkq1kkr7+q0bNmyDuLQcZBEPYmHVdOBiJyIlrRDq41YPWfXOxUysi5fvtyaj+2BpcnsUV/oSoEMOk2CQGlr4ckhBwaetBhjCwH0ZHtJROPJkyc7UjcYLDjmrH7ADTEBXFfOYmB0k9oYBOjJ8b4aOYSe7QkKcYhFlq3QYLQhSidNmtS2RATwy8YOM3EQJsUjKiaWZ+vZToUQgzhkHXudb/PW5YMHD9yZM2faPsMwoc7RciYJXbGuBqJ1UIGKKLv915jsvgtJxCZDubdXr165mzdvtr1Hz5LONA8jrUwKPqsmVesKa49S3Q4WxmRPUEYdTjgiUcfUwLx589ySJUva3oMkP6IYddq6HMS4o55xBJBUeRjzfa4Zdeg56QZ43LhxoyPo7Lf1kNt7oO8wWAbNwaYjIv5lhyS7kRf96dvm5Jah8vfvX3flyhX35cuX6HfzFHOToS1H4BenCaHvO8pr8iDuwoUL7tevX+b5ZdbBair0xkFIlFDlW4ZknEClsp/TzXyAKVOmmHWFVSbDNw1l1+4f90U6IY/q4V27dpnE9bJ+v87QEydjqx/UamVVPRG+mwkNTYN+9tjkwzEx+atCm/X9WvWtDtAb68Wy9LXa1UmvCDDIpPkyOQ5ZwSzJ4jMrvFcr0rSjOUh+GcT4LSg5ugkW1Io0/SCDQBojh0hPlaJdah+tkVYrnTZowP8iq1F1TgMBBauufyB33x1v+NWFYmT5KmppgHC+NkAgbmRkpD3yn9QIseXymoTQFGQmIOKTxiZIWpvAatenVqRVXf2nTrAWMsPnKrMZHz6bJq5jvce6QK8J1cQNgKxlJapMPdZSR64/UivS9NztpkVEdKcrs5alhhWP9NeqlfWopzhZScI6QxseegZRGeg5a8C3Re1Mfl1ScP36ddcUaMuv24iOJtz7sbUjTS4qBvKmstYJoUauiuD3k5qhyr7QdUHMeCgLa1Ear9NquemdXgmum4fvJ6w1lqsuDhNrg1qSpleJK7K3TF0Q2jSd94uSZ60kK1e3qyVpQK6PVWXp2/FC3mp6jBhKKOiY2h3gtUV64TWM6wDETRPLDfSakXmH3w8g9Jlug8ZtTt4kVF0kLUYYmCCtD/DrQ5YhMGbA9L3ucdjh0y8kOHW5gU/VEEmJTcL4Pz/f7mgoAbYkAAAAAElFTkSuQmCC"
}
}
]
}
],
"max_tokens": 300
}'
curl http://localhost:11434/v1/completions
-H "Content-Type: application/json"
-d '{
"model": "llama3.2",
"prompt": "Say this is a test"
}'
curl http://localhost:11434/v1/models
curl http://localhost:11434/v1/models/llama3.2
curl http://localhost:11434/v1/embeddings
-H "Content-Type: application/json"
-d '{
"model": "all-minilm",
"input": ["why is the sky blue?", "why is the grass green?"]
}'
shell theme={"system"}
ollama pull llama3.2
shell theme={"system"}
ollama cp llama3.2 gpt-3.5-turbo
shell theme={"system"}
curl http://localhost:11434/v1/chat/completions
-H "Content-Type: application/json"
-d '{
"model": "gpt-3.5-turbo",
"messages": [
{
"role": "user",
"content": "Hello!"
}
]
}'
FROM
PARAMETER num_ctx
shell theme={"system"}
curl http://localhost:11434/v1/chat/completions
-H "Content-Type: application/json"
-d '{
"model": "mymodel",
"messages": [
{
"role": "user",
"content": "Hello!"
}
]
}'
**Examples:**

Example 1 (unknown):
```unknown
### OpenAI JavaScript library
Example 2 (unknown):
### `curl`
Example 3 (unknown):
## Endpoints

### `/v1/chat/completions`

#### Supported features

* [x] Chat completions
* [x] Streaming
* [x] JSON mode
* [x] Reproducible outputs
* [x] Vision
* [x] Tools
* [ ] Logprobs

#### Supported request fields

* [x] `model`
* [x] `messages`
  * [x] Text `content`
  * [x] Image `content`
    * [x] Base64 encoded image
    * [ ] Image URL
  * [x] Array of `content` parts
* [x] `frequency_penalty`
* [x] `presence_penalty`
* [x] `response_format`
* [x] `seed`
* [x] `stop`
* [x] `stream`
* [x] `stream_options`
  * [x] `include_usage`
* [x] `temperature`
* [x] `top_p`
* [x] `max_tokens`
* [x] `tools`
* [ ] `tool_choice`
* [ ] `logit_bias`
* [ ] `user`
* [ ] `n`

### `/v1/completions`

#### Supported features

* [x] Completions
* [x] Streaming
* [x] JSON mode
* [x] Reproducible outputs
* [ ] Logprobs

#### Supported request fields

* [x] `model`
* [x] `prompt`
* [x] `frequency_penalty`
* [x] `presence_penalty`
* [x] `seed`
* [x] `stop`
* [x] `stream`
* [x] `stream_options`
  * [x] `include_usage`
* [x] `temperature`
* [x] `top_p`
* [x] `max_tokens`
* [x] `suffix`
* [ ] `best_of`
* [ ] `echo`
* [ ] `logit_bias`
* [ ] `user`
* [ ] `n`

#### Notes

* `prompt` currently only accepts a string

### `/v1/models`

#### Notes

* `created` corresponds to when the model was last modified
* `owned_by` corresponds to the ollama username, defaulting to `"library"`

### `/v1/models/{model}`

#### Notes

* `created` corresponds to when the model was last modified
* `owned_by` corresponds to the ollama username, defaulting to `"library"`

### `/v1/embeddings`

#### Supported request fields

* [x] `model`
* [x] `input`
  * [x] string
  * [x] array of strings
  * [ ] array of tokens
  * [ ] array of token arrays
* [x] `encoding format`
* [x] `dimensions`
* [ ] `user`

## Models

Before using a model, pull it locally `ollama pull`:
Example 4 (unknown):
### Default model names

For tooling that relies on default OpenAI model names such as `gpt-3.5-turbo`, use `ollama cp` to copy an existing model name to a temporary name:
Goose
URL: llms-txt#goose
Contents:
- Goose Desktop
- Usage with Ollama
- Connecting to ollama.com
- Goose CLI
- Usage with Ollama
- Connecting to ollama.com
Source: https://docs.ollama.com/integrations/goose
Install Goose Desktop.
Usage with Ollama
- In Goose, open Settings → Configure Provider.
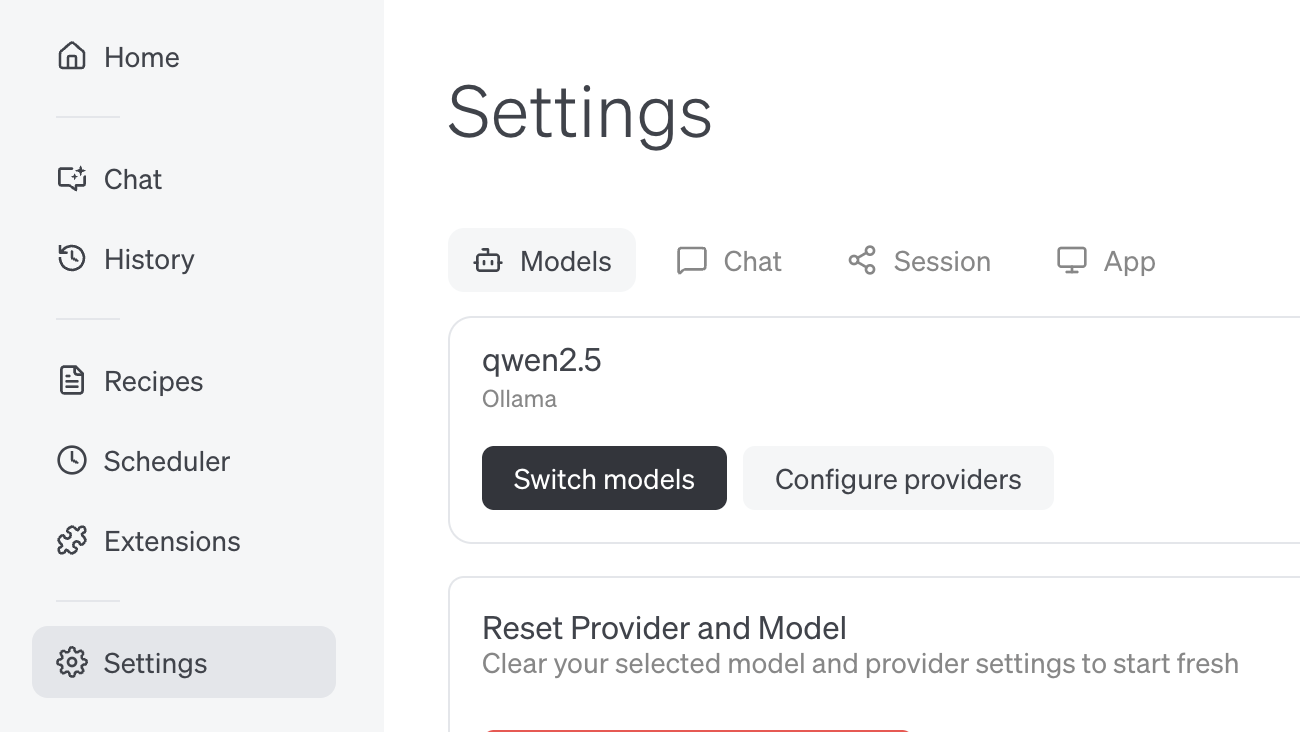
- Find Ollama, click Configure
- Confirm API Host is
http://localhost:11434and click Submit
Connecting to ollama.com
- Create an API key on ollama.com and save it in your
.env - In Goose, set API Host to
https://ollama.com
Install Goose CLI
Usage with Ollama
- Run
goose configure - Select Configure Providers and select Ollama
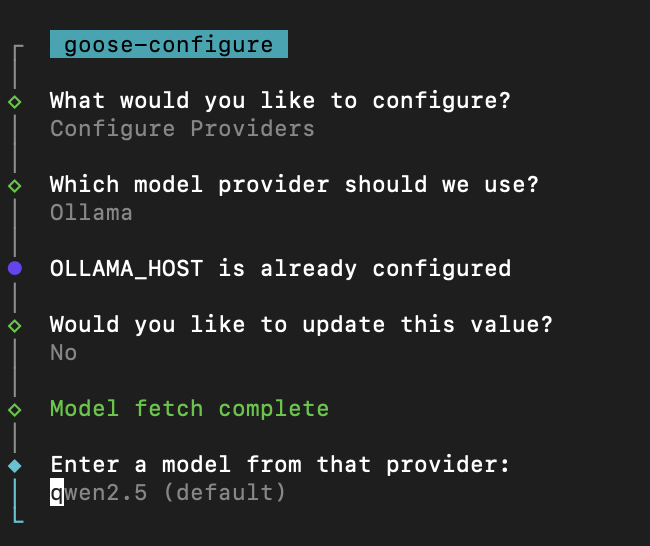
- Enter model name (e.g
qwen3)
Connecting to ollama.com
- Create an API key on ollama.com and save it in your
.env - Run
goose configure - Select Configure Providers and select Ollama
- Update OLLAMA_HOST to
https://ollama.com
Introduction
URL: llms-txt#introduction
Contents:
- Get started
- Base URL
- Example request
- Libraries
- Versioning
Source: https://docs.ollama.com/api/index
Ollama's API allows you to run and interact with models programatically.
If you're just getting started, follow the quickstart documentation to get up and running with Ollama's API.
After installation, Ollama's API is served by default at:
For running cloud models on ollama.com, the same API is available with the following base URL:
Once Ollama is running, its API is automatically available and can be accessed via curl:
Ollama has official libraries for Python and JavaScript:
Several community-maintained libraries are available for Ollama. For a full list, see the Ollama GitHub repository.
Ollama's API isn't strictly versioned, but the API is expected to be stable and backwards compatible. Deprecations are rare and will be announced in the release notes.
Examples:
Example 1 (unknown):
http://localhost:11434/api
Example 2 (unknown):
https://ollama.com/api
Hardware support
URL: llms-txt#hardware-support
Contents:
- Nvidia
- GPU Selection
- Linux Suspend Resume
- AMD Radeon
- Linux Support
- Windows Support
- Overrides on Linux
- GPU Selection
- Container Permission
- Metal (Apple GPUs)
Source: https://docs.ollama.com/gpu
Ollama supports Nvidia GPUs with compute capability 5.0+.
Check your compute compatibility to see if your card is supported: https://developer.nvidia.com/cuda-gpus
| Compute Capability | Family | Cards |
|---|---|---|
| 9.0 | NVIDIA | H200 H100 |
| 8.9 | GeForce RTX 40xx | RTX 4090 RTX 4080 SUPER RTX 4080 RTX 4070 Ti SUPER RTX 4070 Ti RTX 4070 SUPER RTX 4070 RTX 4060 Ti RTX 4060 |
| NVIDIA Professional | L4 L40 RTX 6000 |
|
| 8.6 | GeForce RTX 30xx | RTX 3090 Ti RTX 3090 RTX 3080 Ti RTX 3080 RTX 3070 Ti RTX 3070 RTX 3060 Ti RTX 3060 RTX 3050 Ti RTX 3050 |
| NVIDIA Professional | A40 RTX A6000 RTX A5000 RTX A4000 RTX A3000 RTX A2000 A10 A16 A2 |
|
| 8.0 | NVIDIA | A100 A30 |
| 7.5 | GeForce GTX/RTX | GTX 1650 Ti TITAN RTX RTX 2080 Ti RTX 2080 RTX 2070 RTX 2060 |
| NVIDIA Professional | T4 RTX 5000 RTX 4000 RTX 3000 T2000 T1200 T1000 T600 T500 |
|
| Quadro | RTX 8000 RTX 6000 RTX 5000 RTX 4000 |
|
| 7.0 | NVIDIA | TITAN V V100 Quadro GV100 |
| 6.1 | NVIDIA TITAN | TITAN Xp TITAN X |
| GeForce GTX | GTX 1080 Ti GTX 1080 GTX 1070 Ti GTX 1070 GTX 1060 GTX 1050 Ti GTX 1050 |
|
| Quadro | P6000 P5200 P4200 P3200 P5000 P4000 P3000 P2200 P2000 P1000 P620 P600 P500 P520 |
|
| Tesla | P40 P4 |
|
| 6.0 | NVIDIA | Tesla P100 Quadro GP100 |
| 5.2 | GeForce GTX | GTX TITAN X GTX 980 Ti GTX 980 GTX 970 GTX 960 GTX 950 |
| Quadro | M6000 24GB M6000 M5000 M5500M M4000 M2200 M2000 M620 |
|
| Tesla | M60 M40 |
|
| 5.0 | GeForce GTX | GTX 750 Ti GTX 750 NVS 810 |
| Quadro | K2200 K1200 K620 M1200 M520 M5000M M4000M M3000M M2000M M1000M K620M M600M M500M |
For building locally to support older GPUs, see developer.md
If you have multiple NVIDIA GPUs in your system and want to limit Ollama to use
a subset, you can set CUDA_VISIBLE_DEVICES to a comma separated list of GPUs.
Numeric IDs may be used, however ordering may vary, so UUIDs are more reliable.
You can discover the UUID of your GPUs by running nvidia-smi -L If you want to
ignore the GPUs and force CPU usage, use an invalid GPU ID (e.g., "-1")
Linux Suspend Resume
On linux, after a suspend/resume cycle, sometimes Ollama will fail to discover
your NVIDIA GPU, and fallback to running on the CPU. You can workaround this
driver bug by reloading the NVIDIA UVM driver with sudo rmmod nvidia_uvm && sudo modprobe nvidia_uvm
Ollama supports the following AMD GPUs:
| Family | Cards and accelerators |
|---|---|
| AMD Radeon RX | 7900 XTX 7900 XT 7900 GRE 7800 XT 7700 XT 7600 XT 7600 6950 XT 6900 XTX 6900XT 6800 XT 6800 Vega 64 Vega 56 |
| AMD Radeon PRO | W7900 W7800 W7700 W7600 W7500 W6900X W6800X Duo W6800X W6800 V620 V420 V340 V320 Vega II Duo Vega II VII SSG |
| AMD Instinct | MI300X MI300A MI300 MI250X MI250 MI210 MI200 MI100 MI60 MI50 |
With ROCm v6.1, the following GPUs are supported on Windows.
| Family | Cards and accelerators |
|---|---|
| AMD Radeon RX | 7900 XTX 7900 XT 7900 GRE 7800 XT 7700 XT 7600 XT 7600 6950 XT 6900 XTX 6900XT 6800 XT 6800 |
| AMD Radeon PRO | W7900 W7800 W7700 W7600 W7500 W6900X W6800X Duo W6800X W6800 V620 |
Overrides on Linux
Ollama leverages the AMD ROCm library, which does not support all AMD GPUs. In
some cases you can force the system to try to use a similar LLVM target that is
close. For example The Radeon RX 5400 is gfx1034 (also known as 10.3.4)
however, ROCm does not currently support this target. The closest support is
gfx1030. You can use the environment variable HSA_OVERRIDE_GFX_VERSION with
x.y.z syntax. So for example, to force the system to run on the RX 5400, you
would set HSA_OVERRIDE_GFX_VERSION="10.3.0" as an environment variable for the
server. If you have an unsupported AMD GPU you can experiment using the list of
supported types below.
If you have multiple GPUs with different GFX versions, append the numeric device
number to the environment variable to set them individually. For example,
HSA_OVERRIDE_GFX_VERSION_0=10.3.0 and HSA_OVERRIDE_GFX_VERSION_1=11.0.0
At this time, the known supported GPU types on linux are the following LLVM Targets. This table shows some example GPUs that map to these LLVM targets:
| LLVM Target | An Example GPU |
|---|---|
| gfx900 | Radeon RX Vega 56 |
| gfx906 | Radeon Instinct MI50 |
| gfx908 | Radeon Instinct MI100 |
| gfx90a | Radeon Instinct MI210 |
| gfx940 | Radeon Instinct MI300 |
| gfx941 | |
| gfx942 | |
| gfx1030 | Radeon PRO V620 |
| gfx1100 | Radeon PRO W7900 |
| gfx1101 | Radeon PRO W7700 |
| gfx1102 | Radeon RX 7600 |
AMD is working on enhancing ROCm v6 to broaden support for families of GPUs in a future release which should increase support for more GPUs.
Reach out on Discord or file an issue for additional help.
If you have multiple AMD GPUs in your system and want to limit Ollama to use a
subset, you can set ROCR_VISIBLE_DEVICES to a comma separated list of GPUs.
You can see the list of devices with rocminfo. If you want to ignore the GPUs
and force CPU usage, use an invalid GPU ID (e.g., "-1"). When available, use the
Uuid to uniquely identify the device instead of numeric value.
Container Permission
In some Linux distributions, SELinux can prevent containers from
accessing the AMD GPU devices. On the host system you can run
sudo setsebool container_use_devices=1 to allow containers to use devices.
Metal (Apple GPUs)
Ollama supports GPU acceleration on Apple devices via the Metal API.
Delete a model
URL: llms-txt#delete-a-model
Source: https://docs.ollama.com/api/delete
openapi.yaml delete /api/delete
Ollama's documentation
URL: llms-txt#ollama's-documentation
Contents:
- Libraries
- Community
Source: https://docs.ollama.com/index

Ollama is the easiest way to get up and running with large language models such as gpt-oss, Gemma 3, DeepSeek-R1, Qwen3 and more.
Get up and running with your first model Download Ollama on macOS, Windows or Linux Ollama's cloud models offer larger models with better performance. View Ollama's API reference The official library for using Ollama with Python The official library for using Ollama with JavaScript or TypeScript. View a list of 20+ community-supported libraries for Ollama Join our Discord community Join our Reddit communityGenerate a response
URL: llms-txt#generate-a-response
Source: https://docs.ollama.com/api/generate
openapi.yaml post /api/generate Generates a response for the provided prompt
n8n
URL: llms-txt#n8n
Contents:
- Install
- Using Ollama Locally
- Connecting to ollama.com
Source: https://docs.ollama.com/integrations/n8n
Install n8n.
Using Ollama Locally
- In the top right corner, click the dropdown and select Create Credential

- Under Add new credential select Ollama
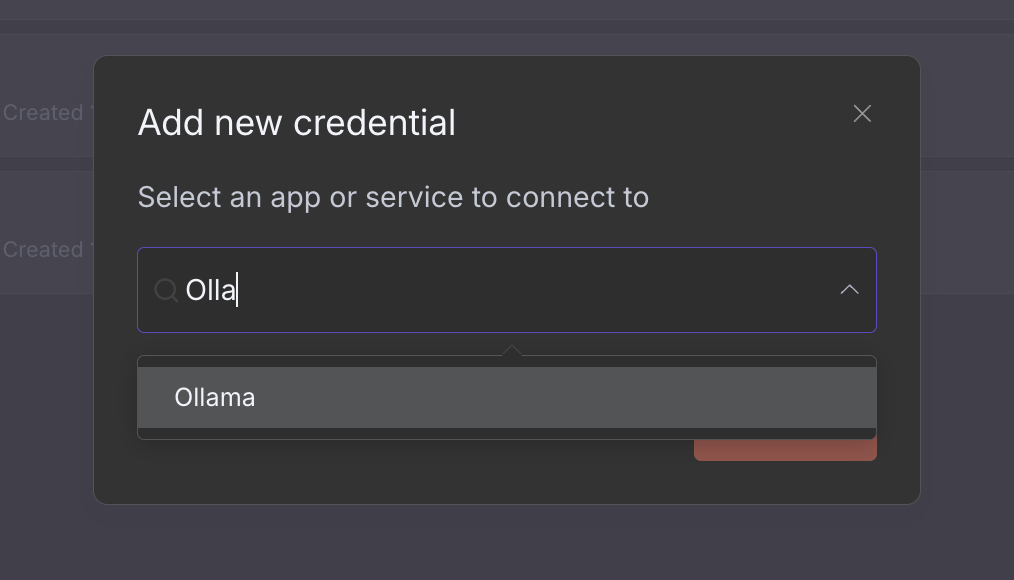
- Confirm Base URL is set to
http://localhost:11434and click Save If connecting tohttp://localhost:11434fails, usehttp://127.0.0.1:11434 - When creating a new workflow, select Add a first step and select an Ollama node
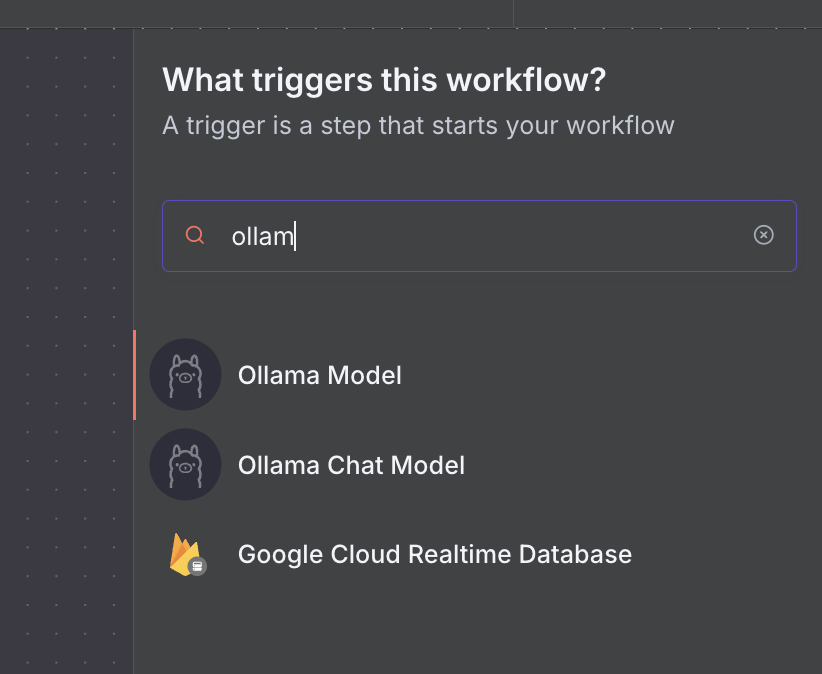
- Select your model of choice (e.g.
qwen3-coder)
Connecting to ollama.com
- Create an API key on ollama.com.
- In n8n, click Create Credential and select Ollama
- Set the API URL to
https://ollama.com - Enter your API Key and click Save
Show model details
URL: llms-txt#show-model-details
Source: https://docs.ollama.com/api-reference/show-model-details
openapi.yaml post /api/show
Web search
URL: llms-txt#web-search
Contents:
- Authentication
- Web search API
- Request
- Response
- Examples
- Web fetch API
- Request
- Response
- Examples
- Building a search agent
Source: https://docs.ollama.com/capabilities/web-search
Ollama's web search API can be used to augment models with the latest information to reduce hallucinations and improve accuracy.
Web search is provided as a REST API with deeper tool integrations in the Python and JavaScript libraries. This also enables models like OpenAI’s gpt-oss models to conduct long-running research tasks.
For access to Ollama's web search API, create an API key. A free Ollama account is required.
Performs a web search for a single query and returns relevant results.
POST https://ollama.com/api/web_search
query(string, required): the search query stringmax_results(integer, optional): maximum results to return (default 5, max 10)
Returns an object containing:
results(array): array of search result objects, each containing:title(string): the title of the web pageurl(string): the URL of the web pagecontent(string): relevant content snippet from the web page
More Ollama Python example
JavaScript Library
More Ollama JavaScript example
Fetches a single web page by URL and returns its content.
POST https://ollama.com/api/web_fetch
url(string, required): the URL to fetch
Returns an object containing:
title(string): the title of the web pagecontent(string): the main content of the web pagelinks(array): array of links found on the page
Building a search agent
Use Ollama’s web search API as a tool to build a mini search agent.
This example uses Alibaba’s Qwen 3 model with 4B parameters.
Context length and agents
Web search results can return thousands of tokens. It is recommended to increase the context length of the model to at least ~32000 tokens. Search agents work best with full context length. Ollama's cloud models run at the full context length.
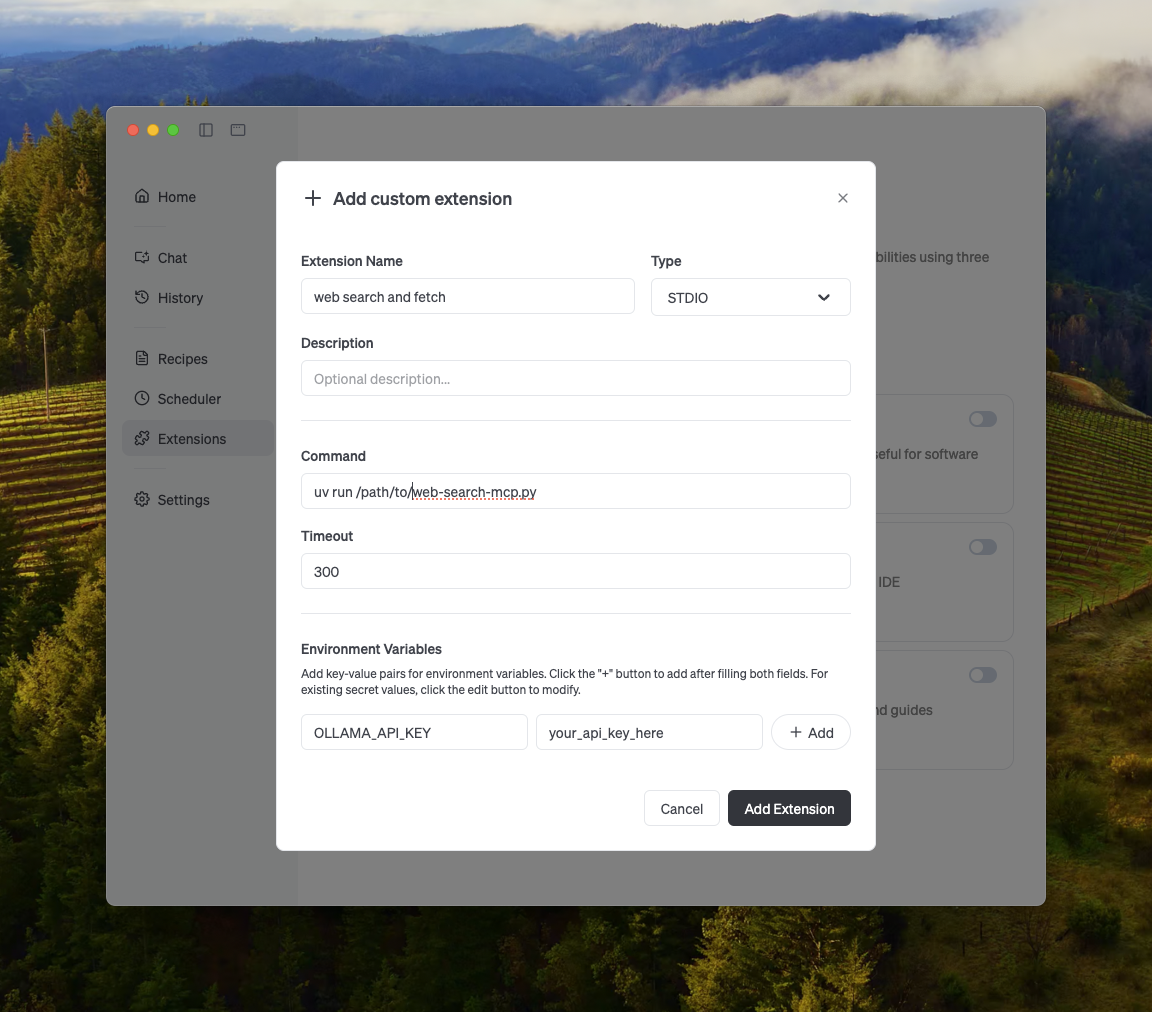
You can enable web search in any MCP client through the Python MCP server.
Ollama's web search can be integrated with Cline easily using the MCP server configuration.
Manage MCP Servers > Configure MCP Servers > Add the following configuration:

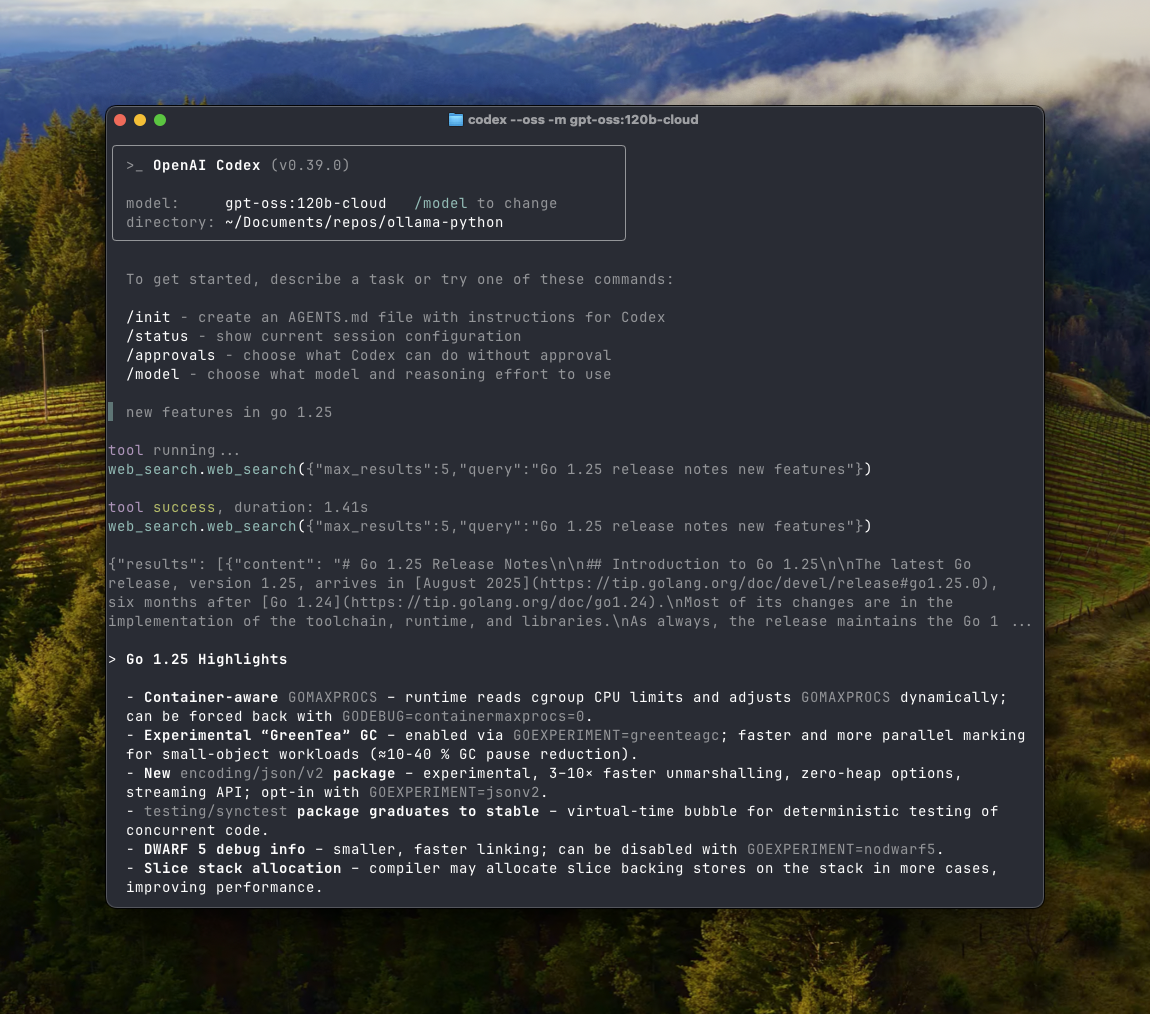
Ollama works well with OpenAI's Codex tool.
Add the following configuration to ~/.codex/config.toml
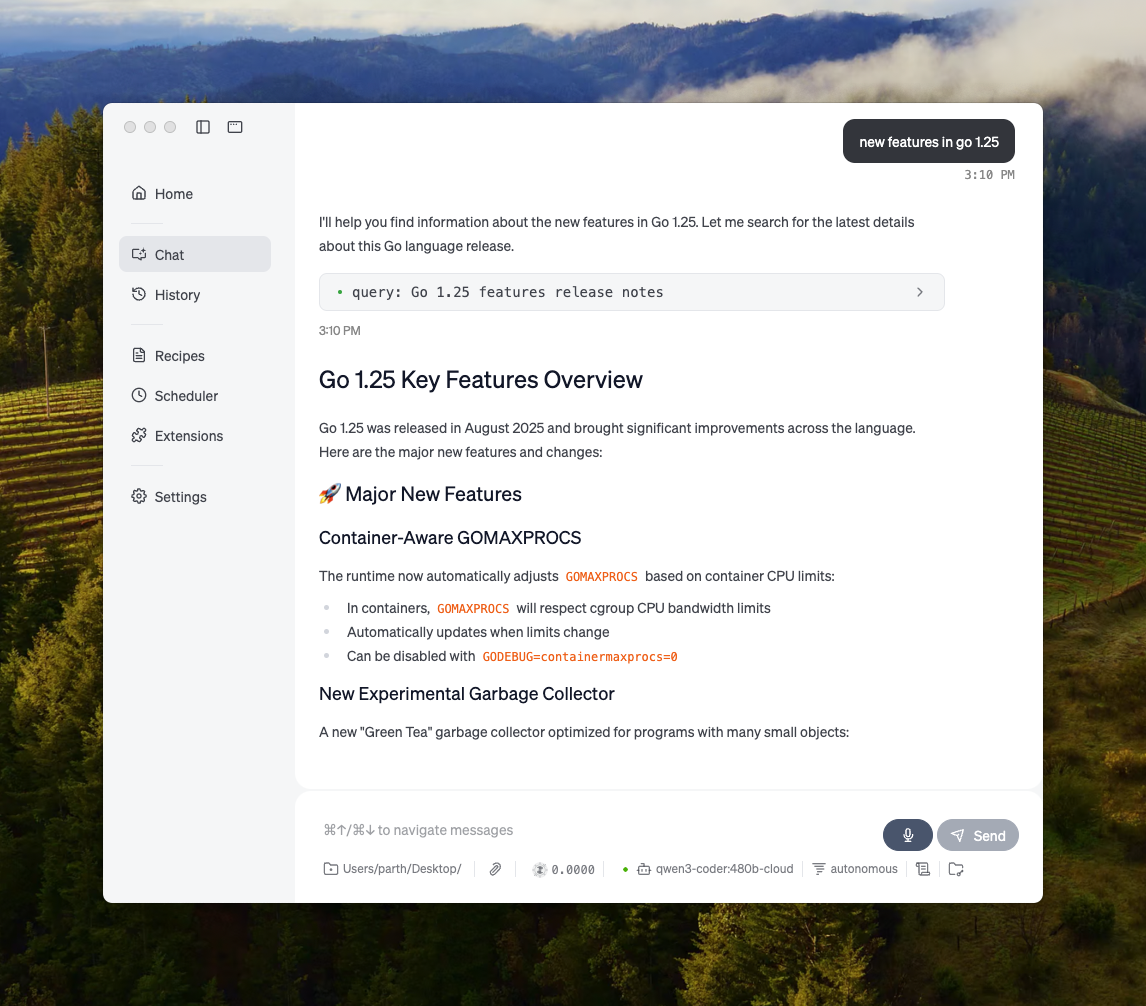
Ollama can integrate with Goose via its MCP feature.
Other integrations
Ollama can be integrated into most of the tools available either through direct integration of Ollama's API, Python / JavaScript libraries, OpenAI compatible API, and MCP server integration.
Examples:
Example 1 (unknown):
**Response**
Example 2 (unknown):
#### Python library
Example 3 (unknown):
**Example output**
Example 4 (unknown):
More Ollama [Python example](https://github.com/ollama/ollama-python/blob/main/examples/web-search.py)

#### JavaScript Library
Roo Code
URL: llms-txt#roo-code
Contents:
- Install
- Usage with Ollama
- Connecting to ollama.com
- Recommended Models
Source: https://docs.ollama.com/integrations/roo-code
Install Roo Code from the VS Code Marketplace.
- Open Roo Code in VS Code and click the gear icon on the top right corner of the Roo Code window to open Provider Settings
- Set
API ProvidertoOllama - (Optional) Update
Base URLif your Ollama instance is running remotely. The default ishttp://localhost:11434 - Enter a valid
Model ID(for exampleqwen3orqwen3-coder:480b-cloud) - Adjust the
Context Windowto at least 32K tokens for coding tasks
Coding tools require a larger context window. It is recommended to use a context window of at least 32K tokens. See Context length for more information.
Connecting to ollama.com
- Create an API key from ollama.com
- Enable
Use custom base URLand set it tohttps://ollama.com - Enter your Ollama API Key
- Select a model from the list
Recommended Models
qwen3-coder:480bdeepseek-v3.1:671b
Tool calling
URL: llms-txt#tool-calling
Contents:
- Calling a single tool
- Parallel tool calling
- Multi-turn tool calling (Agent loop)
- Tool calling with streaming
- Using functions as tools with Ollama Python SDK
Source: https://docs.ollama.com/capabilities/tool-calling
Ollama supports tool calling (also known as function calling) which allows a model to invoke tools and incorporate their results into its replies.
Calling a single tool
Invoke a single tool and include its response in a follow-up request.
Also known as "single-shot" tool calling.
Generate a response with a single tool result
Install the Ollama Python SDK: Install the Ollama JavaScript library:Parallel tool calling
Request multiple tool calls in parallel, then send all tool responses back to the model.Generate a response with multiple tool results
Multi-turn tool calling (Agent loop)
An agent loop allows the model to decide when to invoke tools and incorporate their results into its replies.
It also might help to tell the model that it is in a loop and can make multiple tool calls.
Tool calling with streaming
When streaming, gather every chunk of thinking, content, and tool_calls, then return those fields together with any tool results in the follow-up request.
This loop streams the assistant response, accumulates partial fields, passes them back together, and appends the tool results so the model can complete its answer.
Using functions as tools with Ollama Python SDK
The Python SDK automatically parses functions as a tool schema so we can pass them directly. Schemas can still be passed if needed.
from ollama import chat

def get_temperature(city: str) -> str:
  """Get the current temperature for a city

  Args:
    city: The name of the city

Returns:
    The current temperature for the city
  """
  temperatures = {
    'New York': '22°C',
    'London': '15°C',
  }
  return temperatures.get(city, 'Unknown')

available_functions = {
  'get_temperature': get_temperature,
}

**Examples:**

Example 1 (unknown):
```unknown
**Generate a response with a single tool result**
Example 2 (unknown):
</Tab>

  <Tab title="Python">
    Install the Ollama Python SDK:
Example 3 (unknown):
Example 4 (unknown):
</Tab>

  <Tab title="JavaScript">
    Install the Ollama JavaScript library:
directly pass the function as part of the tools list
URL: llms-txt#directly-pass-the-function-as-part-of-the-tools-list
response = chat(model='qwen3', messages=messages, tools=available_functions.values(), think=True)
---

## Generate embeddings

**URL:** llms-txt#generate-embeddings

Source: https://docs.ollama.com/api/embed

openapi.yaml post /api/embed
Creates vector embeddings representing the input text

---

## Troubleshooting

**URL:** llms-txt#troubleshooting

**Contents:**
- LLM libraries
- Installing older or pre-release versions on Linux
- Linux tmp noexec
- Linux docker
- NVIDIA GPU Discovery
  - Linux NVIDIA Troubleshooting
- AMD GPU Discovery
- Multiple AMD GPUs
- Windows Terminal Errors

Source: https://docs.ollama.com/troubleshooting

How to troubleshoot issues encountered with Ollama

Sometimes Ollama may not perform as expected. One of the best ways to figure out what happened is to take a look at the logs. Find the logs on **Mac** by running the command:

On **Linux** systems with systemd, the logs can be found with this command:

When you run Ollama in a **container**, the logs go to stdout/stderr in the container:

(Use `docker ps` to find the container name)

If manually running `ollama serve` in a terminal, the logs will be on that terminal.

When you run Ollama on **Windows**, there are a few different locations. You can view them in the explorer window by hitting `<cmd>+R` and type in:

* `explorer %LOCALAPPDATA%\Ollama` to view logs. The most recent server logs will be in `server.log` and older logs will be in `server-#.log`
* `explorer %LOCALAPPDATA%\Programs\Ollama` to browse the binaries (The installer adds this to your user PATH)
* `explorer %HOMEPATH%\.ollama` to browse where models and configuration is stored
* `explorer %TEMP%` where temporary executable files are stored in one or more `ollama*` directories

To enable additional debug logging to help troubleshoot problems, first **Quit the running app from the tray menu** then in a powershell terminal

Join the [Discord](https://discord.gg/ollama) for help interpreting the logs.

Ollama includes multiple LLM libraries compiled for different GPUs and CPU vector features. Ollama tries to pick the best one based on the capabilities of your system. If this autodetection has problems, or you run into other problems (e.g. crashes in your GPU) you can workaround this by forcing a specific LLM library. `cpu_avx2` will perform the best, followed by `cpu_avx` an the slowest but most compatible is `cpu`. Rosetta emulation under MacOS will work with the `cpu` library.

In the server log, you will see a message that looks something like this (varies from release to release):

**Experimental LLM Library Override**

You can set OLLAMA\_LLM\_LIBRARY to any of the available LLM libraries to bypass autodetection, so for example, if you have a CUDA card, but want to force the CPU LLM library with AVX2 vector support, use:

You can see what features your CPU has with the following.

## Installing older or pre-release versions on Linux

If you run into problems on Linux and want to install an older version, or you'd like to try out a pre-release before it's officially released, you can tell the install script which version to install.

If your system is configured with the "noexec" flag where Ollama stores its temporary executable files, you can specify an alternate location by setting OLLAMA\_TMPDIR to a location writable by the user ollama runs as. For example OLLAMA\_TMPDIR=/usr/share/ollama/

If Ollama initially works on the GPU in a docker container, but then switches to running on CPU after some period of time with errors in the server log reporting GPU discovery failures, this can be resolved by disabling systemd cgroup management in Docker. Edit `/etc/docker/daemon.json` on the host and add `"exec-opts": ["native.cgroupdriver=cgroupfs"]` to the docker configuration.

## NVIDIA GPU Discovery

When Ollama starts up, it takes inventory of the GPUs present in the system to determine compatibility and how much VRAM is available. Sometimes this discovery can fail to find your GPUs. In general, running the latest driver will yield the best results.

### Linux NVIDIA Troubleshooting

If you are using a container to run Ollama, make sure you've set up the container runtime first as described in [docker.md](./docker.md)

Sometimes the Ollama can have difficulties initializing the GPU. When you check the server logs, this can show up as various error codes, such as "3" (not initialized), "46" (device unavailable), "100" (no device), "999" (unknown), or others. The following troubleshooting techniques may help resolve the problem

* If you are using a container, is the container runtime working? Try `docker run --gpus all ubuntu nvidia-smi` - if this doesn't work, Ollama won't be able to see your NVIDIA GPU.
* Is the uvm driver loaded? `sudo nvidia-modprobe -u`
* Try reloading the nvidia\_uvm driver - `sudo rmmod nvidia_uvm` then `sudo modprobe nvidia_uvm`
* Try rebooting
* Make sure you're running the latest nvidia drivers

If none of those resolve the problem, gather additional information and file an issue:

* Set `CUDA_ERROR_LEVEL=50` and try again to get more diagnostic logs
* Check dmesg for any errors `sudo dmesg | grep -i nvrm` and `sudo dmesg | grep -i nvidia`

On linux, AMD GPU access typically requires `video` and/or `render` group membership to access the `/dev/kfd` device. If permissions are not set up correctly, Ollama will detect this and report an error in the server log.

When running in a container, in some Linux distributions and container runtimes, the ollama process may be unable to access the GPU. Use `ls -lnd /dev/kfd /dev/dri /dev/dri/*` on the host system to determine the **numeric** group IDs on your system, and pass additional `--group-add ...` arguments to the container so it can access the required devices. For example, in the following output `crw-rw---- 1 0  44 226,   0 Sep 16 16:55 /dev/dri/card0` the group ID column is `44`

If you are experiencing problems getting Ollama to correctly discover or use your GPU for inference, the following may help isolate the failure.

* `AMD_LOG_LEVEL=3` Enable info log levels in the AMD HIP/ROCm libraries. This can help show more detailed error codes that can help troubleshoot problems
* `OLLAMA_DEBUG=1` During GPU discovery additional information will be reported
* Check dmesg for any errors from amdgpu or kfd drivers `sudo dmesg | grep -i amdgpu` and `sudo dmesg | grep -i kfd`

If you experience gibberish responses when models load across multiple AMD GPUs on Linux, see the following guide.

* [https://rocm.docs.amd.com/projects/radeon/en/latest/docs/install/native\_linux/mgpu.html#mgpu-known-issues-and-limitations](https://rocm.docs.amd.com/projects/radeon/en/latest/docs/install/native_linux/mgpu.html#mgpu-known-issues-and-limitations)

## Windows Terminal Errors

Older versions of Windows 10 (e.g., 21H1) are known to have a bug where the standard terminal program does not display control characters correctly. This can result in a long string of strings like `←[?25h←[?25l` being displayed, sometimes erroring with `The parameter is incorrect` To resolve this problem, please update to Win 10 22H1 or newer.

**Examples:**

Example 1 (unknown):
```unknown
On **Linux** systems with systemd, the logs can be found with this command:
Example 2 (unknown):
When you run Ollama in a **container**, the logs go to stdout/stderr in the container:
Example 3 (unknown):
(Use `docker ps` to find the container name)

If manually running `ollama serve` in a terminal, the logs will be on that terminal.

When you run Ollama on **Windows**, there are a few different locations. You can view them in the explorer window by hitting `<cmd>+R` and type in:

* `explorer %LOCALAPPDATA%\Ollama` to view logs. The most recent server logs will be in `server.log` and older logs will be in `server-#.log`
* `explorer %LOCALAPPDATA%\Programs\Ollama` to browse the binaries (The installer adds this to your user PATH)
* `explorer %HOMEPATH%\.ollama` to browse where models and configuration is stored
* `explorer %TEMP%` where temporary executable files are stored in one or more `ollama*` directories

To enable additional debug logging to help troubleshoot problems, first **Quit the running app from the tray menu** then in a powershell terminal
Example 4 (unknown):
Join the [Discord](https://discord.gg/ollama) for help interpreting the logs.

## LLM libraries

Ollama includes multiple LLM libraries compiled for different GPUs and CPU vector features. Ollama tries to pick the best one based on the capabilities of your system. If this autodetection has problems, or you run into other problems (e.g. crashes in your GPU) you can workaround this by forcing a specific LLM library. `cpu_avx2` will perform the best, followed by `cpu_avx` an the slowest but most compatible is `cpu`. Rosetta emulation under MacOS will work with the `cpu` library.

In the server log, you will see a message that looks something like this (varies from release to release):
Errors
URL: llms-txt#errors
Contents:
- Status codes
- Error messages
- Errors that occur while streaming
Source: https://docs.ollama.com/api/errors
Endpoints return appropriate HTTP status codes based on the success or failure of the request in the HTTP status line (e.g. HTTP/1.1 200 OK or HTTP/1.1 400 Bad Request). Common status codes are:
200: Success400: Bad Request (missing parameters, invalid JSON, etc.)404: Not Found (model doesn't exist, etc.)429: Too Many Requests (e.g. when a rate limit is exceeded)500: Internal Server Error502: Bad Gateway (e.g. when a cloud model cannot be reached)
Errors are returned in the application/json format with the following structure, with the error message in the error property:
Errors that occur while streaming
If an error occurs mid-stream, the error will be returned as an object in the application/x-ndjson format with an error property. Since the response has already started, the status code of the response will not be changed.
Examples:
Example 1 (unknown):
## Errors that occur while streaming

If an error occurs mid-stream, the error will be returned as an object in the `application/x-ndjson` format with an `error` property. Since the response has already started, the status code of the response will not be changed.
Cline
URL: llms-txt#cline
Contents:
- Install
- Usage with Ollama
- Connecting to ollama.com
- Recommended Models
Source: https://docs.ollama.com/integrations/cline
Install Cline in your IDE.
- Open Cline settings >
API Configurationand setAPI ProvidertoOllama - Select a model under
Modelor type one (e.g.qwen3) - Update the context window to at least 32K tokens under
Context Window
Coding tools require a larger context window. It is recommended to use a context window of at least 32K tokens. See Context length for more information.
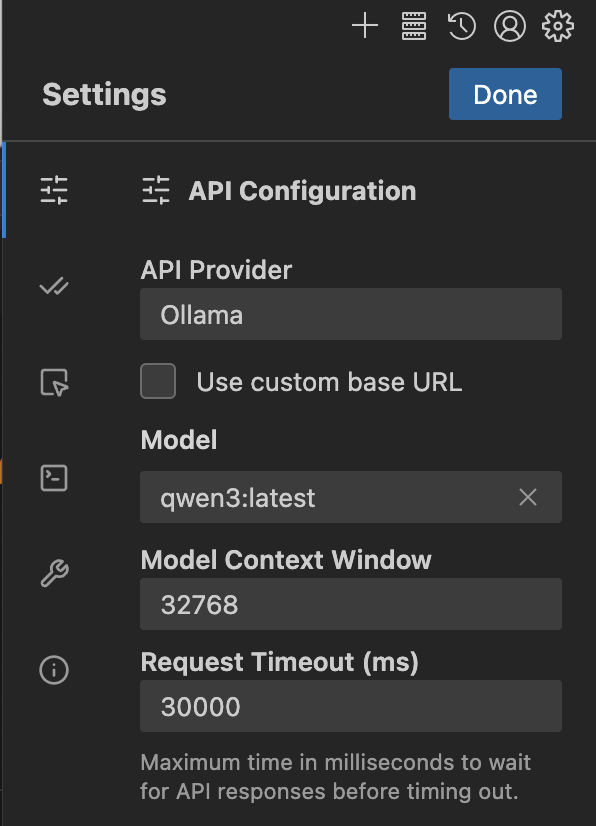
Connecting to ollama.com
- Create an API key from ollama.com
- Click on
Use custom base URLand set it tohttps://ollama.com - Enter your Ollama API Key
- Select a model from the list
Recommended Models
qwen3-coder:480bdeepseek-v3.1:671b
To build a new Modelfile based on this one, replace the FROM line with:
URL: llms-txt#to-build-a-new-modelfile-based-on-this-one,-replace-the-from-line-with:
Linux
URL: llms-txt#linux
Contents:
- Install
- Manual install
- AMD GPU install
- ARM64 install
- Adding Ollama as a startup service (recommended)
- Install CUDA drivers (optional)
- Install AMD ROCm drivers (optional)
- Start Ollama
- Customizing
- Updating
Source: https://docs.ollama.com/linux
To install Ollama, run the following command:
If you are upgrading from a prior version, you should remove the old libraries with `sudo rm -rf /usr/lib/ollama` first.Download and extract the package:
In another terminal, verify that Ollama is running:
If you have an AMD GPU, also download and extract the additional ROCm package:
Download and extract the ARM64-specific package:
Adding Ollama as a startup service (recommended)
Create a user and group for Ollama:
Create a service file in /etc/systemd/system/ollama.service:
Then start the service:
Install CUDA drivers (optional)
Download and install CUDA.
Verify that the drivers are installed by running the following command, which should print details about your GPU:
Install AMD ROCm drivers (optional)
Download and Install ROCm v6.
Start Ollama and verify it is running:
While AMD has contributed the `amdgpu` driver upstream to the official linux kernel source, the version is older and may not support all ROCm features. We recommend you install the latest driver from [https://www.amd.com/en/support/linux-drivers](https://www.amd.com/en/support/linux-drivers) for best support of your Radeon GPU.To customize the installation of Ollama, you can edit the systemd service file or the environment variables by running:
Alternatively, create an override file manually in /etc/systemd/system/ollama.service.d/override.conf:
Update Ollama by running the install script again:
Or by re-downloading Ollama:
Installing specific versions
Use OLLAMA_VERSION environment variable with the install script to install a specific version of Ollama, including pre-releases. You can find the version numbers in the releases page.
To view logs of Ollama running as a startup service, run:
Remove the ollama service:
Remove ollama libraries from your lib directory (either /usr/local/lib, /usr/lib, or /lib):
Remove the ollama binary from your bin directory (either /usr/local/bin, /usr/bin, or /bin):
Remove the downloaded models and Ollama service user and group:
Examples:
Example 1 (unknown):
## Manual install

<Note>
  If you are upgrading from a prior version, you should remove the old libraries
  with `sudo rm -rf /usr/lib/ollama` first.
</Note>

Download and extract the package:
Example 2 (unknown):
Start Ollama:
Example 3 (unknown):
In another terminal, verify that Ollama is running:
Example 4 (unknown):
### AMD GPU install

If you have an AMD GPU, also download and extract the additional ROCm package:
Codex
URL: llms-txt#codex
Contents:
- Install
- Usage with Ollama
- Changing Models
- Cloud Models
- Connecting to ollama.com
Source: https://docs.ollama.com/integrations/codex
Install the Codex CLI:
Codex requires a larger context window. It is recommended to use a context window of at least 32K tokens.
To use codex with Ollama, use the --oss flag:
By default, codex will use the local gpt-oss:20b model. However, you can specify a different model with the -m flag:
Connecting to ollama.com
Create an API key from ollama.com and export it as OLLAMA_API_KEY.
To use ollama.com directly, edit your ~/.codex/config.toml file to point to ollama.com.
Run codex in a new terminal to load the new settings.
Examples:
Example 1 (unknown):
npm install -g @openai/codex
Example 2 (unknown):
codex --oss
Example 3 (unknown):
codex --oss -m gpt-oss:120b
Example 4 (unknown):
codex --oss -m gpt-oss:120b-cloud
List models
URL: llms-txt#list-models
Source: https://docs.ollama.com/api/tags
openapi.yaml get /api/tags Fetch a list of models and their details
Vision
URL: llms-txt#vision
Contents:
- Quick start
- Usage with Ollama's API
Source: https://docs.ollama.com/capabilities/vision
Vision models accept images alongside text so the model can describe, classify, and answer questions about what it sees.
Usage with Ollama's API
Provide an images array. SDKs accept file paths, URLs or raw bytes while the REST API expects base64-encoded image data.
Examples:
Example 1 (unknown):
## Usage with Ollama's API

Provide an `images` array. SDKs accept file paths, URLs or raw bytes while the REST API expects base64-encoded image data.

<Tabs>
  <Tab title="cURL">
Example 2 (unknown):
</Tab>

  <Tab title="Python">
Example 3 (unknown):
</Tab>

  <Tab title="JavaScript">
FROM llama3.2:latest
URL: llms-txt#from-llama3.2:latest
Contents:
- Instructions
- FROM (Required)
- PARAMETER
- TEMPLATE
- SYSTEM
- ADAPTER
- LICENSE
- MESSAGE
- Notes
FROM /Users/pdevine/.ollama/models/blobs/sha256-00e1317cbf74d901080d7100f57580ba8dd8de57203072dc6f668324ba545f29 TEMPLATE """{{ if .System }}<|start_header_id|>system<|end_header_id|>
{{ .System }}<|eot_id|>{{ end }}{{ if .Prompt }}<|start_header_id|>user<|end_header_id|>
{{ .Prompt }}<|eot_id|>{{ end }}<|start_header_id|>assistant<|end_header_id|>
{{ .Response }}<|eot_id|>""" PARAMETER stop "<|start_header_id|>" PARAMETER stop "<|end_header_id|>" PARAMETER stop "<|eot_id|>" PARAMETER stop "<|reserved_special_token"
FROM :
FROM
FROM ./ollama-model.gguf
PARAMETER
TEMPLATE """{{ if .System }}<|im_start|>system {{ .System }}<|im_end|> {{ end }}{{ if .Prompt }}<|im_start|>user {{ .Prompt }}<|im_end|> {{ end }}<|im_start|>assistant """
SYSTEM """"""
ADAPTER
ADAPTER ./ollama-lora.gguf
LICENSE """ """
MESSAGE
MESSAGE user Is Toronto in Canada? MESSAGE assistant yes MESSAGE user Is Sacramento in Canada? MESSAGE assistant no MESSAGE user Is Ontario in Canada? MESSAGE assistant yes
* the **`Modelfile` is not case sensitive**. In the examples, uppercase instructions are used to make it easier to distinguish it from arguments.
* Instructions can be in any order. In the examples, the `FROM` instruction is first to keep it easily readable.

[1]: https://ollama.com/library

**Examples:**

Example 1 (unknown):
```unknown
## Instructions

### FROM (Required)

The `FROM` instruction defines the base model to use when creating a model.
Example 2 (unknown):
#### Build from existing model
Example 3 (unknown):
<Card title="Base Models" href="https://github.com/ollama/ollama#model-library">
  A list of available base models
</Card>

<Card title="Base Models" href="https://ollama.com/library">
  Additional models can be found at
</Card>

#### Build from a Safetensors model
Example 4 (unknown):
The model directory should contain the Safetensors weights for a supported architecture.

Currently supported model architectures:

* Llama (including Llama 2, Llama 3, Llama 3.1, and Llama 3.2)
* Mistral (including Mistral 1, Mistral 2, and Mixtral)
* Gemma (including Gemma 1 and Gemma 2)
* Phi3

#### Build from a GGUF file
sets a custom system message to specify the behavior of the chat assistant
URL: llms-txt#sets-a-custom-system-message-to-specify-the-behavior-of-the-chat-assistant
SYSTEM You are Mario from super mario bros, acting as an assistant. shell theme={"system"} ollama show --modelfile llama3.2
Examples:
Example 1 (unknown):
To use this:

1. Save it as a file (e.g. `Modelfile`)
2. `ollama create choose-a-model-name -f <location of the file e.g. ./Modelfile>`
3. `ollama run choose-a-model-name`
4. Start using the model!

To view the Modelfile of a given model, use the `ollama show --modelfile` command.
Example 2 (unknown):
Xcode
URL: llms-txt#xcode
Contents:
- Install
- Usage with Ollama
- Connecting to ollama.com directly
Source: https://docs.ollama.com/integrations/xcode
Install XCode
Ensure Apple Intelligence is setup and the latest XCode version is v26.0
- Click XCode in top left corner > Settings
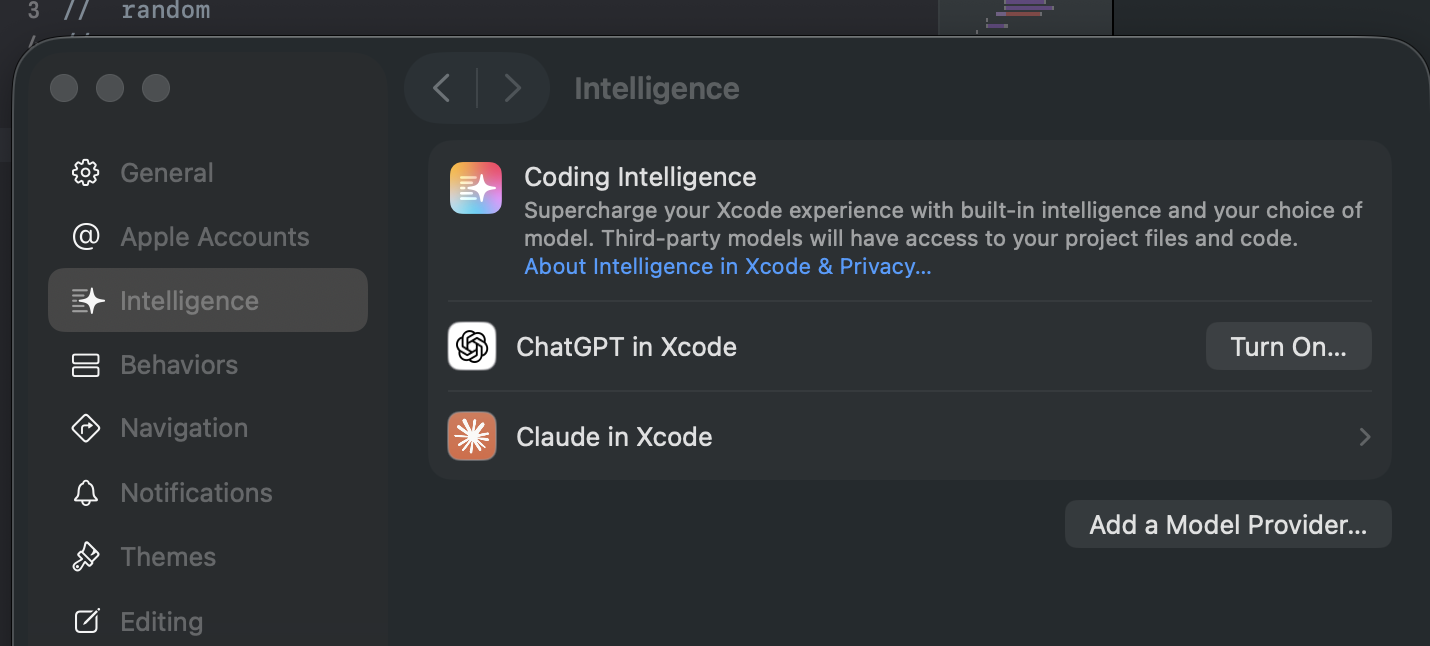
- Select Locally Hosted, enter port 11434 and click Add
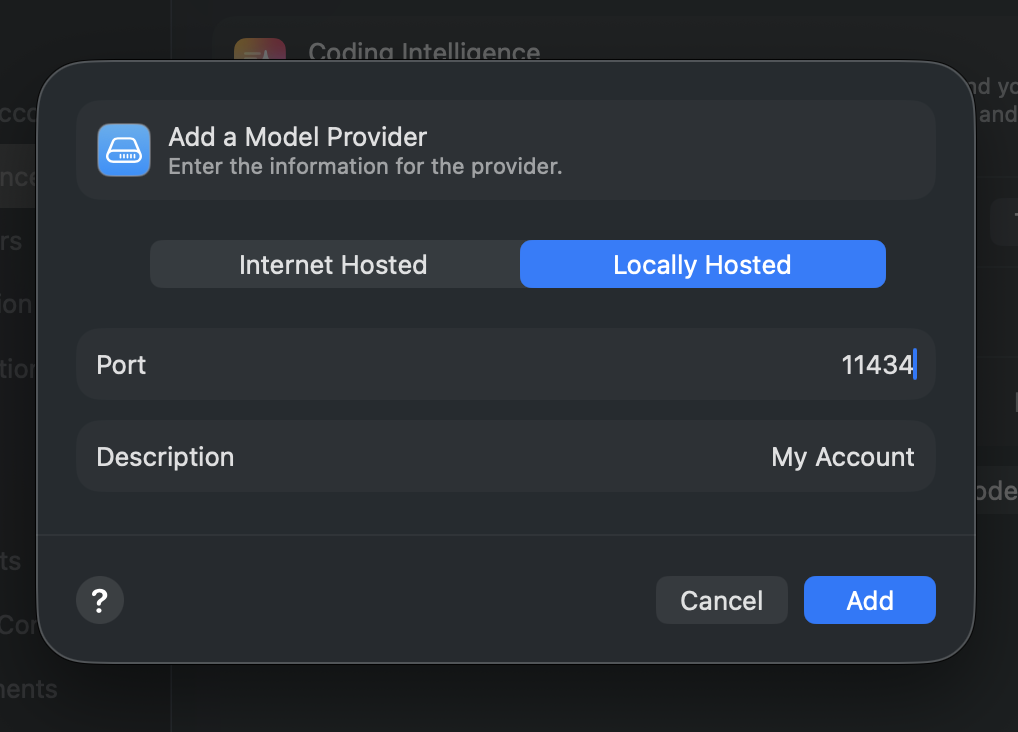
- Select the star icon on the top left corner and click the dropdown
- Click My Account and select your desired model
Connecting to ollama.com directly
- Create an API key from ollama.com
- Select Internet Hosted and enter URL as
https://ollama.com - Enter your Ollama API Key and click Add
Modelfile generated by "ollama show"
URL: llms-txt#modelfile-generated-by-"ollama-show"
Importing a Model
URL: llms-txt#importing-a-model
Contents:
- Table of Contents
- Importing a fine tuned adapter from Safetensors weights
- Importing a model from Safetensors weights
- Importing a GGUF based model or adapter
- Quantizing a Model
- Supported Quantizations
- Sharing your model on ollama.com
Source: https://docs.ollama.com/import
- Importing a Safetensors adapter
- Importing a Safetensors model
- Importing a GGUF file
- Sharing models on ollama.com
Importing a fine tuned adapter from Safetensors weights
First, create a Modelfile with a FROM command pointing at the base model you used for fine tuning, and an ADAPTER command which points to the directory with your Safetensors adapter:
Make sure that you use the same base model in the FROM command as you used to create the adapter otherwise you will get erratic results. Most frameworks use different quantization methods, so it's best to use non-quantized (i.e. non-QLoRA) adapters. If your adapter is in the same directory as your Modelfile, use ADAPTER . to specify the adapter path.
Now run ollama create from the directory where the Modelfile was created:
Lastly, test the model:
Ollama supports importing adapters based on several different model architectures including:
- Llama (including Llama 2, Llama 3, Llama 3.1, and Llama 3.2);
- Mistral (including Mistral 1, Mistral 2, and Mixtral); and
- Gemma (including Gemma 1 and Gemma 2)
You can create the adapter using a fine tuning framework or tool which can output adapters in the Safetensors format, such as:
- Hugging Face fine tuning framework
- Unsloth
- MLX
Importing a model from Safetensors weights
First, create a Modelfile with a FROM command which points to the directory containing your Safetensors weights:
If you create the Modelfile in the same directory as the weights, you can use the command FROM ..
Now run the ollama create command from the directory where you created the Modelfile:
Lastly, test the model:
Ollama supports importing models for several different architectures including:
- Llama (including Llama 2, Llama 3, Llama 3.1, and Llama 3.2);
- Mistral (including Mistral 1, Mistral 2, and Mixtral);
- Gemma (including Gemma 1 and Gemma 2); and
- Phi3
This includes importing foundation models as well as any fine tuned models which have been fused with a foundation model.
Importing a GGUF based model or adapter
If you have a GGUF based model or adapter it is possible to import it into Ollama. You can obtain a GGUF model or adapter by:
- converting a Safetensors model with the
convert_hf_to_gguf.pyfrom Llama.cpp; - converting a Safetensors adapter with the
convert_lora_to_gguf.pyfrom Llama.cpp; or - downloading a model or adapter from a place such as HuggingFace
To import a GGUF model, create a Modelfile containing:
For a GGUF adapter, create the Modelfile with:
When importing a GGUF adapter, it's important to use the same base model as the base model that the adapter was created with. You can use:
- a model from Ollama
- a GGUF file
- a Safetensors based model
Once you have created your Modelfile, use the ollama create command to build the model.
Quantizing a Model
Quantizing a model allows you to run models faster and with less memory consumption but at reduced accuracy. This allows you to run a model on more modest hardware.
Ollama can quantize FP16 and FP32 based models into different quantization levels using the -q/--quantize flag with the ollama create command.
First, create a Modelfile with the FP16 or FP32 based model you wish to quantize.
Use ollama create to then create the quantized model.
Supported Quantizations
q4_0q4_1q5_0q5_1q8_0
K-means Quantizations
q3_K_Sq3_K_Mq3_K_Lq4_K_Sq4_K_Mq5_K_Sq5_K_Mq6_K
Sharing your model on ollama.com
You can share any model you have created by pushing it to ollama.com so that other users can try it out.
First, use your browser to go to the Ollama Sign-Up page. If you already have an account, you can skip this step.
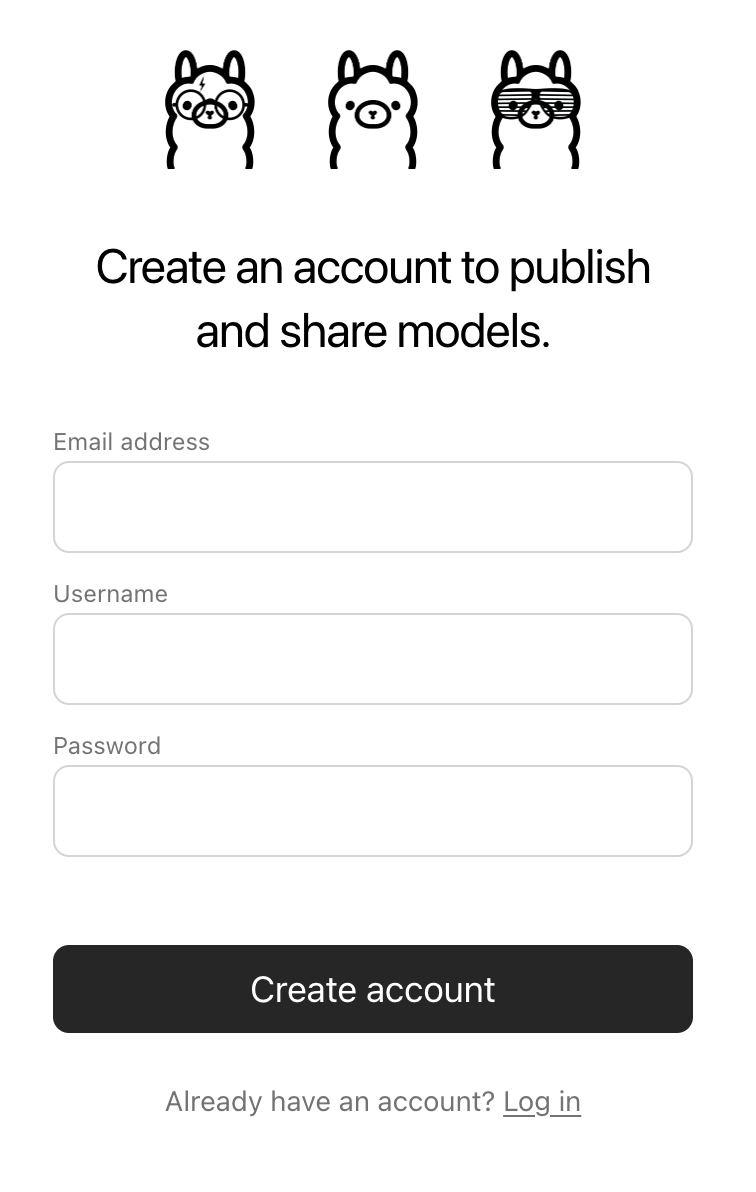
The Username field will be used as part of your model's name (e.g. jmorganca/mymodel), so make sure you are comfortable with the username that you have selected.
Now that you have created an account and are signed-in, go to the Ollama Keys Settings page.
Follow the directions on the page to determine where your Ollama Public Key is located.
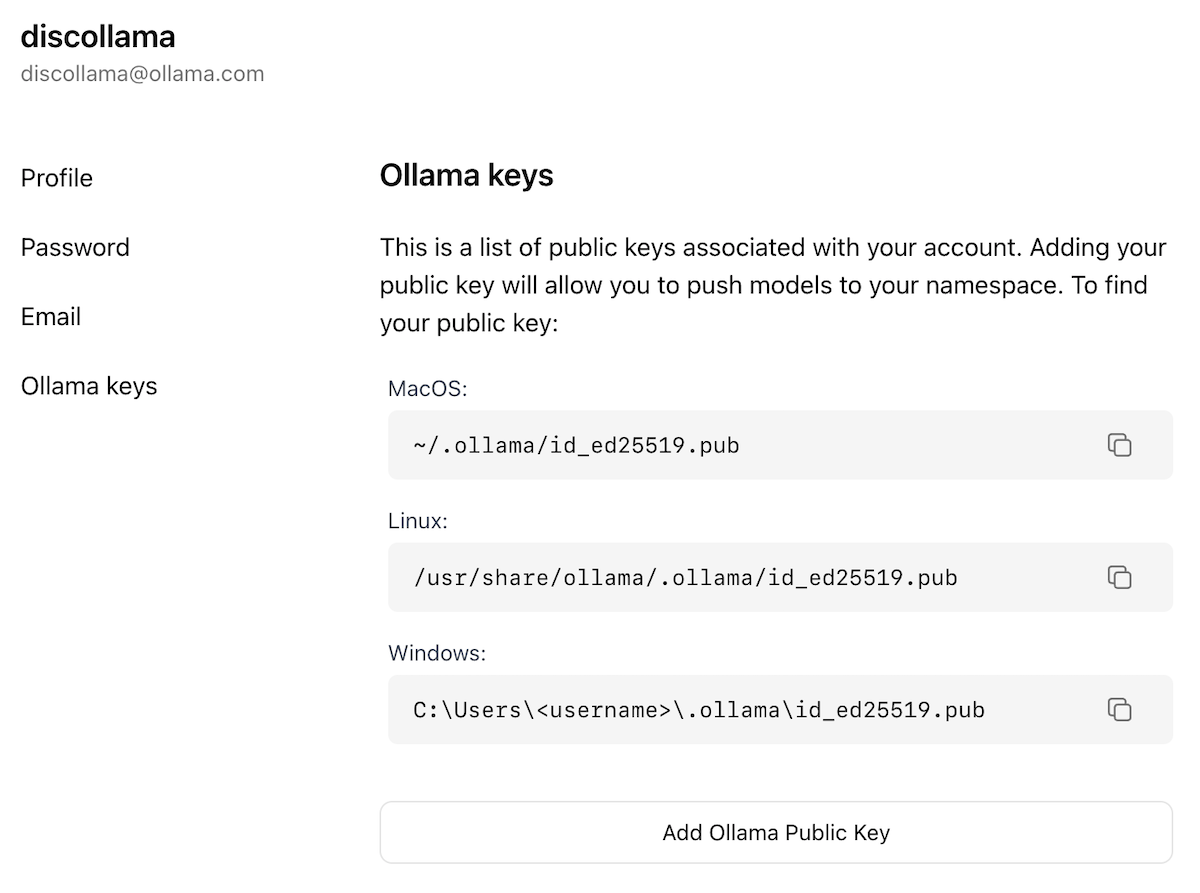
Click on the Add Ollama Public Key button, and copy and paste the contents of your Ollama Public Key into the text field.
To push a model to ollama.com, first make sure that it is named correctly with your username. You may have to use the ollama cp command to copy
your model to give it the correct name. Once you're happy with your model's name, use the ollama push command to push it to ollama.com.
Once your model has been pushed, other users can pull and run it by using the command:
Examples:
Example 1 (unknown):
Make sure that you use the same base model in the `FROM` command as you used to create the adapter otherwise you will get erratic results. Most frameworks use different quantization methods, so it's best to use non-quantized (i.e. non-QLoRA) adapters. If your adapter is in the same directory as your `Modelfile`, use `ADAPTER .` to specify the adapter path.

Now run `ollama create` from the directory where the `Modelfile` was created:
Example 2 (unknown):
Lastly, test the model:
Example 3 (unknown):
Ollama supports importing adapters based on several different model architectures including:

* Llama (including Llama 2, Llama 3, Llama 3.1, and Llama 3.2);
* Mistral (including Mistral 1, Mistral 2, and Mixtral); and
* Gemma (including Gemma 1 and Gemma 2)

You can create the adapter using a fine tuning framework or tool which can output adapters in the Safetensors format, such as:

* Hugging Face [fine tuning framework](https://huggingface.co/docs/transformers/en/training)
* [Unsloth](https://github.com/unslothai/unsloth)
* [MLX](https://github.com/ml-explore/mlx)

## Importing a model from Safetensors weights

First, create a `Modelfile` with a `FROM` command which points to the directory containing your Safetensors weights:
Example 4 (unknown):
If you create the Modelfile in the same directory as the weights, you can use the command `FROM .`.

Now run the `ollama create` command from the directory where you created the `Modelfile`:
JetBrains
URL: llms-txt#jetbrains
Contents:
- Install
- Usage with Ollama
Source: https://docs.ollama.com/integrations/jetbrains
This example uses IntelliJ; same steps apply to other JetBrains IDEs (e.g., PyCharm).
Install IntelliJ.
To use **Ollama**, you will need a [JetBrains AI Subscription](https://www.jetbrains.com/ai-ides/buy/?section=personal\&billing=yearly).- In Intellij, click the chat icon located in the right sidebar
- Select the current model in the sidebar, then click Set up Local Models
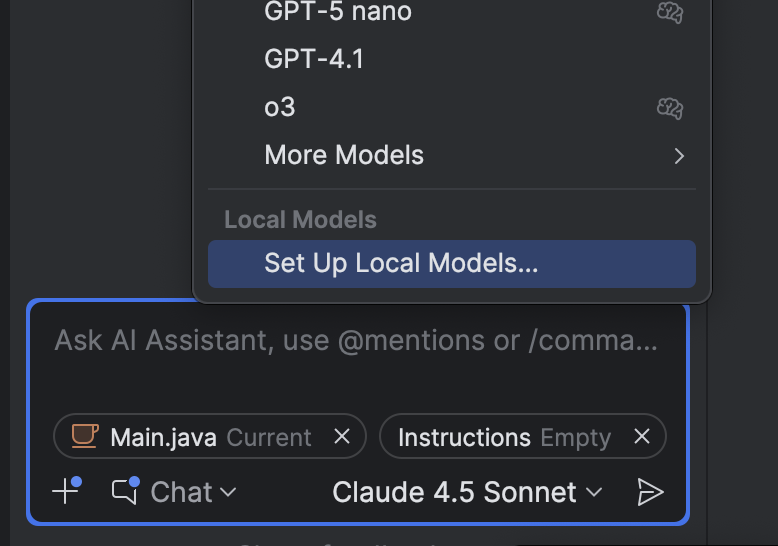
- Under Third Party AI Providers, choose Ollama
- Confirm the Host URL is
http://localhost:11434, then click Ok - Once connected, select a model under Local models by Ollama
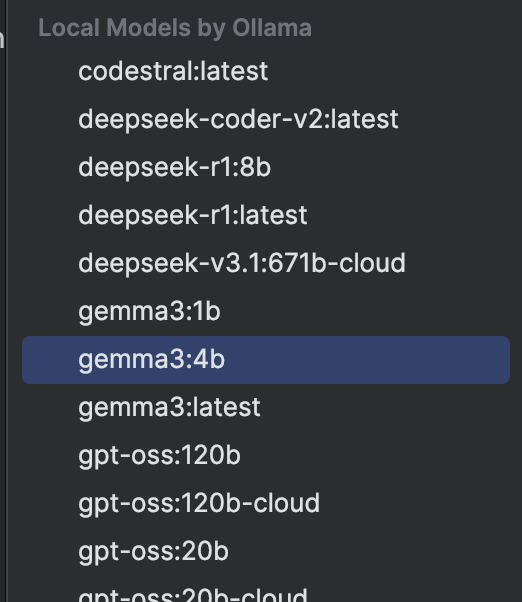
null
URL: llms-txt#null
Contents:
- CPU only
- Nvidia GPU
- Install with Apt
- Install with Yum or Dnf
- Configure Docker to use Nvidia driver
- Start the container
- AMD GPU
- Run model locally
- Try different models
Source: https://docs.ollama.com/docker
Install the NVIDIA Container Toolkit.
-
Configure the repository
-
Install the NVIDIA Container Toolkit packages
Install with Yum or Dnf
-
Configure the repository
-
Install the NVIDIA Container Toolkit packages
Configure Docker to use Nvidia driver
Start the container
If you're running on an NVIDIA JetPack system, Ollama can't automatically discover the correct JetPack version. Pass the environment variable `JETSON_JETPACK=5` or `JETSON_JETPACK=6` to the container to select version 5 or 6.To run Ollama using Docker with AMD GPUs, use the rocm tag and the following command:
Now you can run a model:
Try different models
More models can be found on the Ollama library.
Examples:
Example 1 (unknown):
## Nvidia GPU

Install the [NVIDIA Container Toolkit](https://docs.nvidia.com/datacenter/cloud-native/container-toolkit/latest/install-guide.html#installation).

### Install with Apt

1. Configure the repository
Example 2 (unknown):
2. Install the NVIDIA Container Toolkit packages
Example 3 (unknown):
### Install with Yum or Dnf

1. Configure the repository
Example 4 (unknown):
2. Install the NVIDIA Container Toolkit packages
macOS
URL: llms-txt#macos
Contents:
- System Requirements
- Filesystem Requirements
- Changing Install Location
- Troubleshooting
- Uninstall
Source: https://docs.ollama.com/macos
System Requirements
- MacOS Sonoma (v14) or newer
- Apple M series (CPU and GPU support) or x86 (CPU only)
Filesystem Requirements
The preferred method of installation is to mount the ollama.dmg and drag-and-drop the Ollama application to the system-wide Applications folder. Upon startup, the Ollama app will verify the ollama CLI is present in your PATH, and if not detected, will prompt for permission to create a link in /usr/local/bin
Once you've installed Ollama, you'll need additional space for storing the Large Language models, which can be tens to hundreds of GB in size. If your home directory doesn't have enough space, you can change where the binaries are installed, and where the models are stored.
Changing Install Location
To install the Ollama application somewhere other than Applications, place the Ollama application in the desired location, and ensure the CLI Ollama.app/Contents/Resources/ollama or a sym-link to the CLI can be found in your path. Upon first start decline the "Move to Applications?" request.
Ollama on MacOS stores files in a few different locations.
~/.ollamacontains models and configuration~/.ollama/logscontains logs- app.log contains most recent logs from the GUI application
- server.log contains the most recent server logs
<install location>/Ollama.app/Contents/Resources/ollamathe CLI binary
To fully remove Ollama from your system, remove the following files and folders:
Examples:
Example 1 (unknown):
sudo rm -rf /Applications/Ollama.app
sudo rm /usr/local/bin/ollama
rm -rf "~/Library/Application Support/Ollama"
rm -rf "~/Library/Saved Application State/com.electron.ollama.savedState"
rm -rf ~/Library/Caches/com.electron.ollama/
rm -rf ~/Library/Caches/ollama
rm -rf ~/Library/WebKit/com.electron.ollama
rm -rf ~/.ollama
Zed
URL: llms-txt#zed
Contents:
- Install
- Usage with Ollama
- Connecting to ollama.com
Source: https://docs.ollama.com/integrations/zed
Install Zed.
- In Zed, click the star icon in the bottom-right corner, then select Configure.
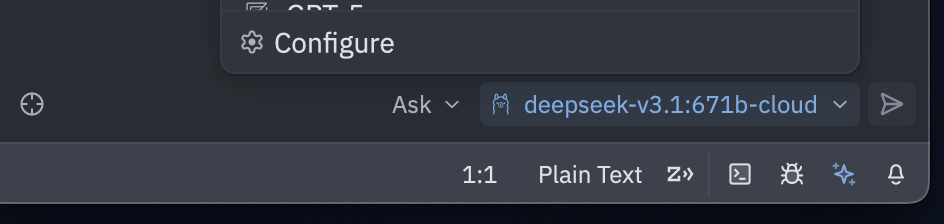
- Under LLM Providers, choose Ollama
- Confirm the Host URL is
http://localhost:11434, then click Connect - Once connected, select a model under Ollama
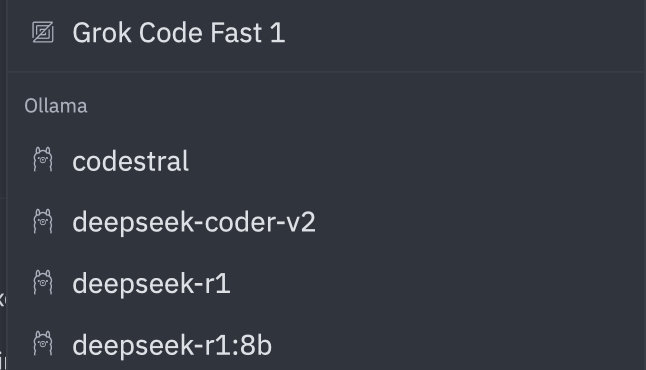
Connecting to ollama.com
- Create an API key on ollama.com
- In Zed, open the star icon → Configure
- Under LLM Providers, select Ollama
- Set the API URL to
https://ollama.com
sets the context window size to 4096, this controls how many tokens the LLM can use as context to generate the next token
URL: llms-txt#sets-the-context-window-size-to-4096,-this-controls-how-many-tokens-the-llm-can-use-as-context-to-generate-the-next-token
PARAMETER num_ctx 4096