68 lines
7.4 KiB
Markdown
68 lines
7.4 KiB
Markdown
---
|
|
|
|
slug: /dashboard-user
|
|
---
|
|
|
|
# User management
|
|
|
|
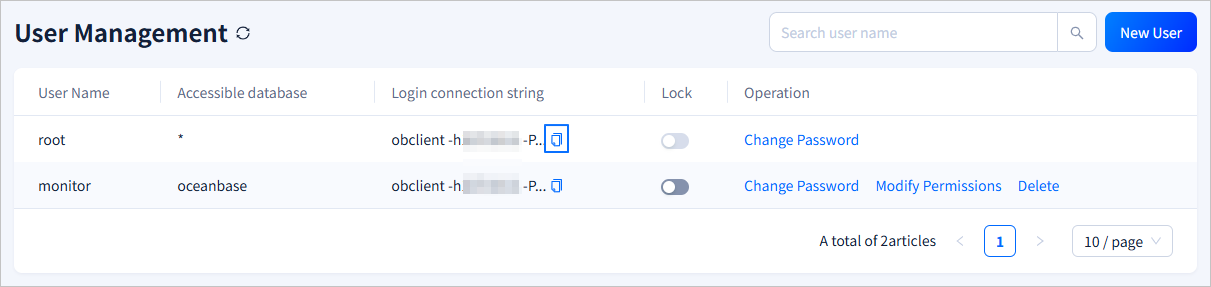
Log in to the obshell Dashboard console and click **User Management** in the left-side navigation pane to go to the **User Management** page.
|
|
|
|
On the **User Management** page, you can view all users in the instance. You can click the <span style={{ verticalAlign: 'middle' }}><img src="https://obbusiness-private.oss-cn-shanghai.aliyuncs.com/doc/img/observer-enterprise/V4.3.5/700.reference/1500.Components-and-Tools/100.obshell/500.icon/100.ob-dashboard-tenant-01.png" alt="Copy" style={{ height: '20px' }}/></span> icon in the **Login connection string** column to copy the connection string for a user. If the instance contains a large number of users, you can use the search bar in the upper-right corner to search for and view the information about a specified user.
|
|
|
|
|
|
|
|
## Create a user
|
|
|
|
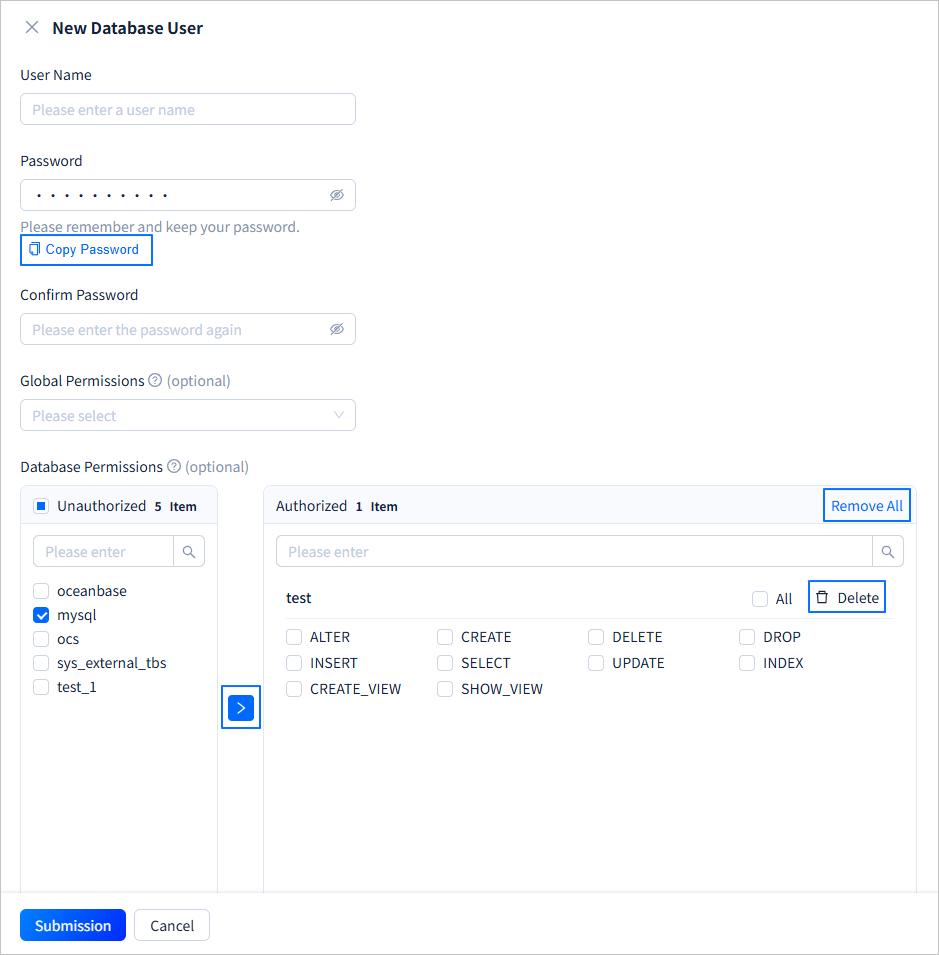
On the **User Management** page, click **New User** in the upper-right corner. On the **New Database User** page, set the **User Name**, **Password**, **Global Permissions**, and **Database Permissions**. After the settings are completed, click **Submission**.
|
|
|
|
|
|
|
|
| Parameter | Description |
|
|
|-------|------|
|
|
| User Name | Set the name of the new user. The username must meet the following requirements:<ul><li>Length: 2 to 64 characters.</li><li>Contains lowercase letters, digits, and underscores, and must start with a letter.</li></ul> |
|
|
| Password | The password must meet the following requirements:<ul><li>Length: 8 to 32 characters</li><li>Contains at least 2 of each of the following four types of characters: digits (0 to 9), uppercase letters (A to Z), lowercase letters (a to z), and special characters (<code>~!@#%^&*_-+=\|(){}[]:;,.?/</code>). </li></ul> After the password is configured, click **Copy Password** to copy the password for later use. |
|
|
| Confirm Password | Re-enter the password to confirm the configuration. If the two passwords are inconsistent, a prompt is displayed: `The new password entered twice is inconsistent, please re-enter.`. |
|
|
| Global Permissions (Optional) | You can select the privileges that the user can have from the drop-down list. The privileges apply to all databases. For more information about the privileges, see [Privilege types in MySQL mode](https://en.oceanbase.com/docs/common-oceanbase-database-10000000001974758). If no privileges are selected, the user has no privileges. |
|
|
| Database Permissions | Set the privileges of the new user for each database. The privileges apply to all targets in the specified database. To set the privileges, perform the following steps:<ol><li>Select one or more databases from the left list. The left list displays all databases in the current instance. You can also search for a specified database in the search box of the left list.</li><li>Click **>** in the middle. The selected databases are moved to the right list.</li><li>Select the privileges that the user can have in the specified database from the right list. Click **All** in the upper-right corner of the specified database to grant all privileges to the user.</li><li>Repeat steps 1, 2, and 3 to set the privileges for other databases. You can also search for a specified database in the search box of the right list.</li><li>To cancel the privileges of the user for a specified database, click **Delete** in the upper-right corner of the database in the right list to move the database back to the left list. You can also click **Remove All** in the upper-right corner of the right list, and then click **Determine** in the dialog box that appears to move all databases in the right list back to the left list. </li></ol> |
|
|
|
|
## Lock a user
|
|
|
|
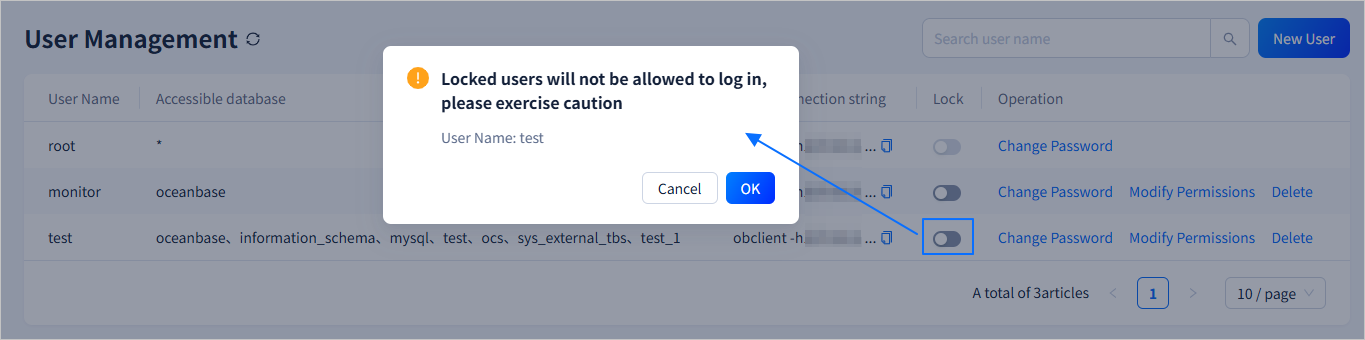
You can click the switch icon in the **Lock** column to lock or unlock a user. If the user is not locked, click <span style={{ verticalAlign: 'middle' }}><img src="https://obbusiness-private.oss-cn-shanghai.aliyuncs.com/doc/img/observer-enterprise/V4.3.5/700.reference/1500.Components-and-Tools/100.obshell/500.icon/400.ob-dashboard-tenant-user-01.png" alt="switch" style={{ height: '20px' }}/></span> in the **Lock** column. In the dialog box that appears, click **OK** to lock the user. A locked user cannot log in. Proceed with caution. If the user is locked, click <span style={{ verticalAlign: 'middle' }}><img src="https://obbusiness-private.oss-cn-shanghai.aliyuncs.com/doc/img/observer-enterprise/V4.3.5/700.reference/1500.Components-and-Tools/100.obshell/500.icon/400.ob-dashboard-tenant-user-02.png" alt="switch" style={{ height: '20px' }}/></span> in the **Lock** column. In the dialog box that appears, click **OK** to unlock the user. An unlocked user can log in.
|
|
|
|
|
|
|
|
## Change a password
|
|
|
|
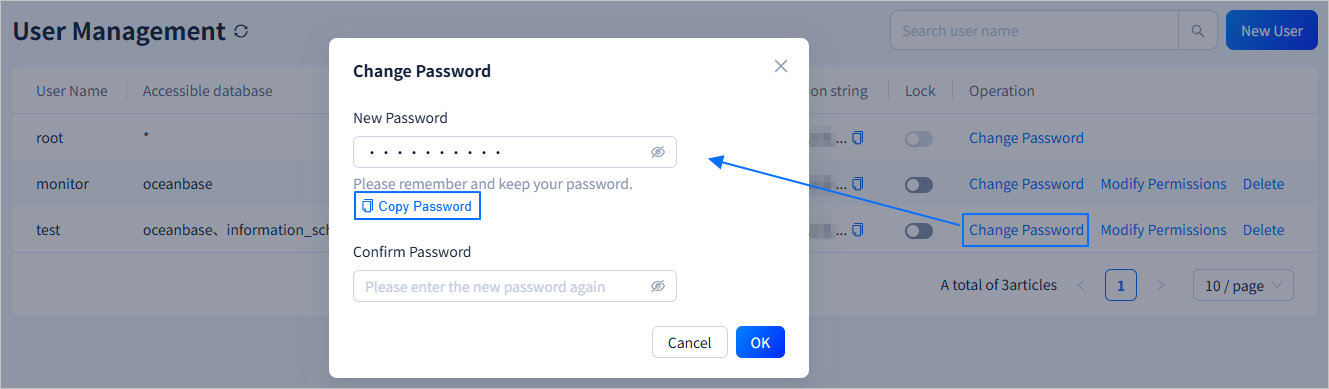
Click the **Change Password** field in the **Operation** column. In the dialog box that appears, enter the **New Password** and **Confirm Password**. After you complete the entries, click **OK** to change the password. The password must meet the following requirements:
|
|
|
|
* The password must be 8 to 32 characters long.
|
|
|
|
* The password must contain at least two characters of each of the following types: digits (0 to 9), uppercase letters (A to Z), lowercase letters (a to z), and special characters (<code>~!@#%^&*_-+=\|(){}[]:;,.?/</code>).
|
|
|
|
After you configure the password, click **Copy Password** to copy the password for later use.
|
|
|
|
|
|
|
|
## Modify permissions
|
|
|
|
Click the **Modify Permissions** field in the **Operation** column to modify the global and database permissions of the corresponding user. You can directly select a global permission from the drop-down list. To modify the database permissions of the user, perform the following steps:
|
|
|
|
1. In the left list, select one or more databases. The left list displays all databases in the current instance. You can also search for a specific database in the left search field.
|
|
|
|
2. Click **>** in the middle. The selected databases are moved to the right list.
|
|
|
|
3. In the right list, select the permissions that the user can have in the specified database. To grant all permissions to the user in the specified database, click **All** in the upper-right corner of the database.
|
|
|
|
4. Repeat steps 1, 2, and 3 to set the user permissions for different databases. You can also search for a specific database in the right search field.
|
|
|
|
5. To revoke the user permissions of a specified database, click **Delete** in the upper-right corner of the database in the right list. This moves the database back to the left list. You can also click **Remove All** in the upper-right corner of the right list. In the dialog box that appears, click **Determine** to move all databases in the right list back to the left list.
|
|
|
|
6. After you complete the settings, click **Submission**.
|
|
|
|

|
|
|
|
## Delete a user
|
|
|
|
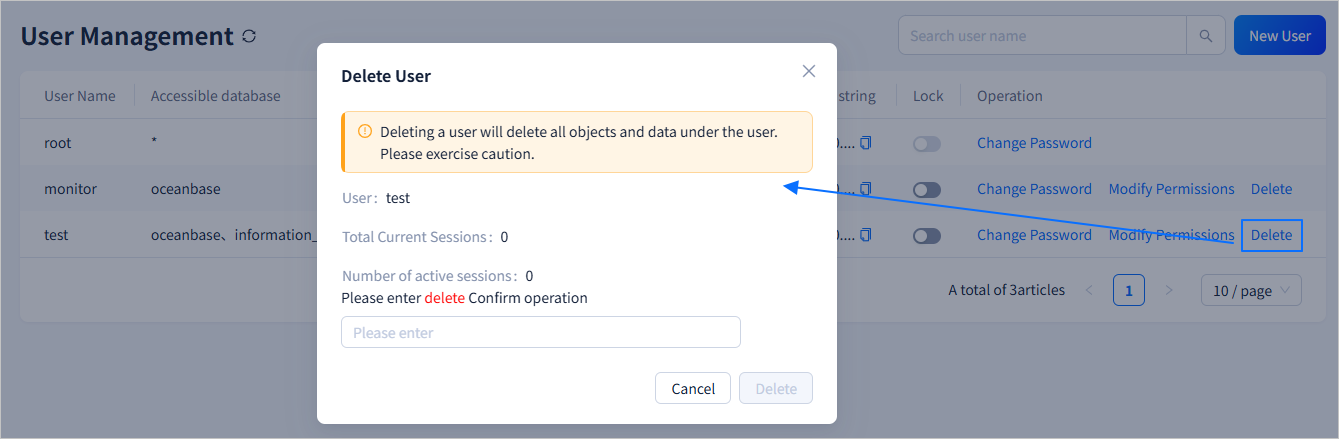
Click the **Delete** field in the **Operation** column. In the dialog box that appears, enter `delete` in the input field and click **Delete**. This deletes the specified user. The objects and data under the user will also be deleted. Proceed with caution.
|
|
|
|
 |